World's only RS5 transmission cooler and high flow crash bar for the A4/A5 line
 10-12-2019, 06:04 PM
#1
So I've been working on this little project for about half a year with the idea of getting more consistent performance, safely, out of the RS5 even in extreme temperatures like we experience here in Texas. We all know heat soak is a problem with these cars and they tend to fall off rapidly in the hp department once warm. The long-term viability of the mechatronic, it's PCB electronic panel and the solenoids was also a concern (I'll address that later). This is going to be a really long post so I apologize but it took an incredible amount of time, effort, testing and research.
While studying the RS5's various systems, especially on the cooling end, the one glaring issue I see is the OEM transmission fluid cooler. It's housed in the radiator and is a liquid to liquid heat exchanger. This design is shared amongst several models including the A5 and the S5 (the entire A4 and A6 line as well, pretty much anything running the S-Tronic 7-speed DL-501). It actually does double duty; first it heats up the fluid and then "cools" it when the fluid gets above the radiator coolant temperature. Problem is, that's pretty darn hot and the temps tend to get higher like a runaway freight train. They seem to max out, generally, around 120C to 150C but can get hotter and the transmission will go into limp mode. I've experienced this myself after a few back to back launches. Even one run at the drag strip has the temps "up there" and when you return to the pits, it takes forever for them to come back down.
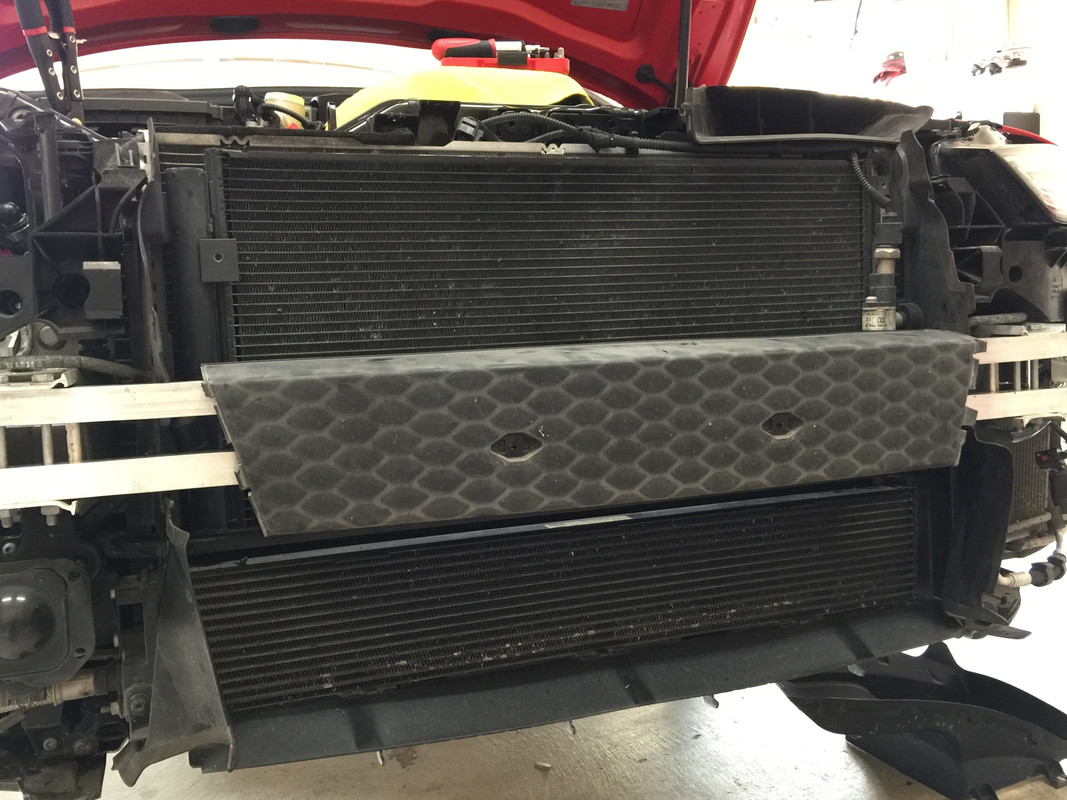
I was also amazed (ok maybe incredulous) at the actual grille opening. We all have these huge grilles but very little of it is actually "open" to airflow. Part of the problem is the huge crash bar along with a cover on the RS5 which blocks even more airflow. Measuring the OEM bar, there was only about 2.5" of space behind it for a larger heat exchanger. The Homelink transmitter takes up an inordinate amount of room too so there's really no way to put another core of sufficient size to make a difference. So I redesigned the crash bar.
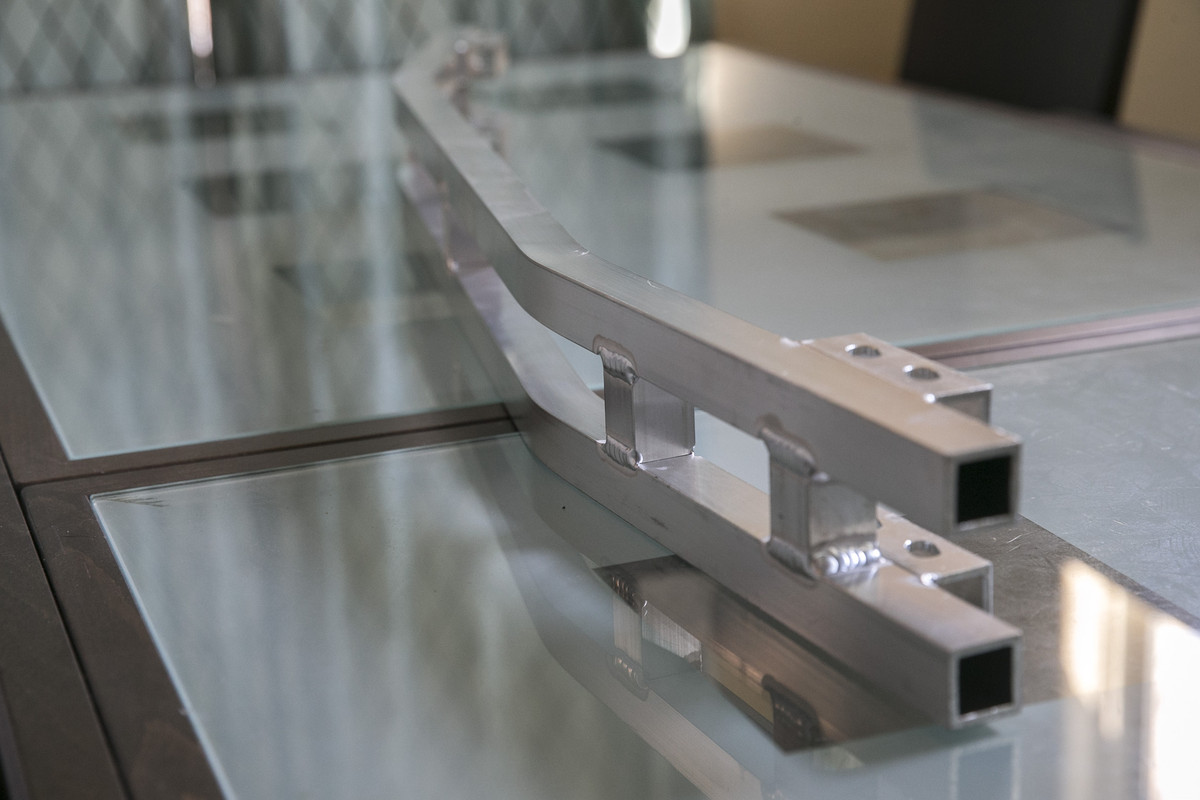
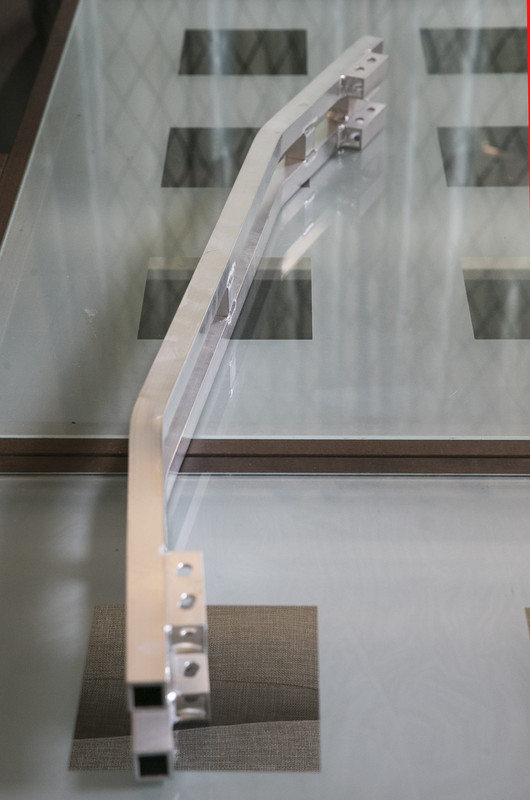
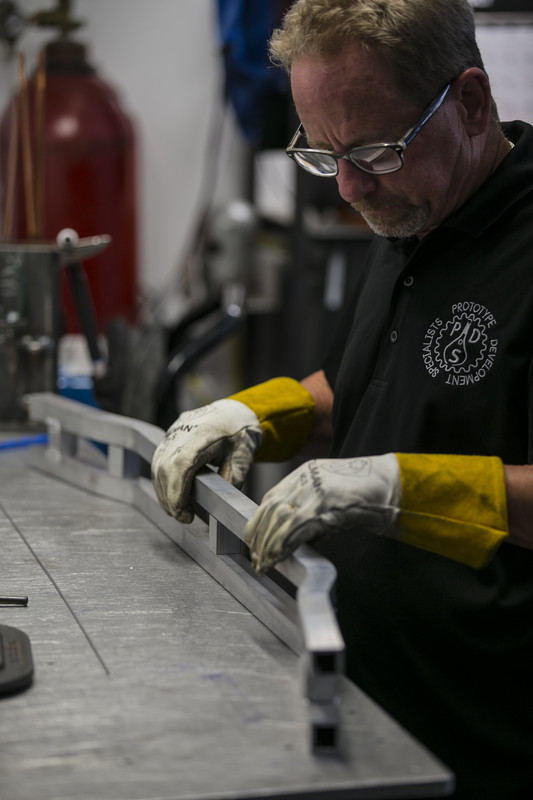
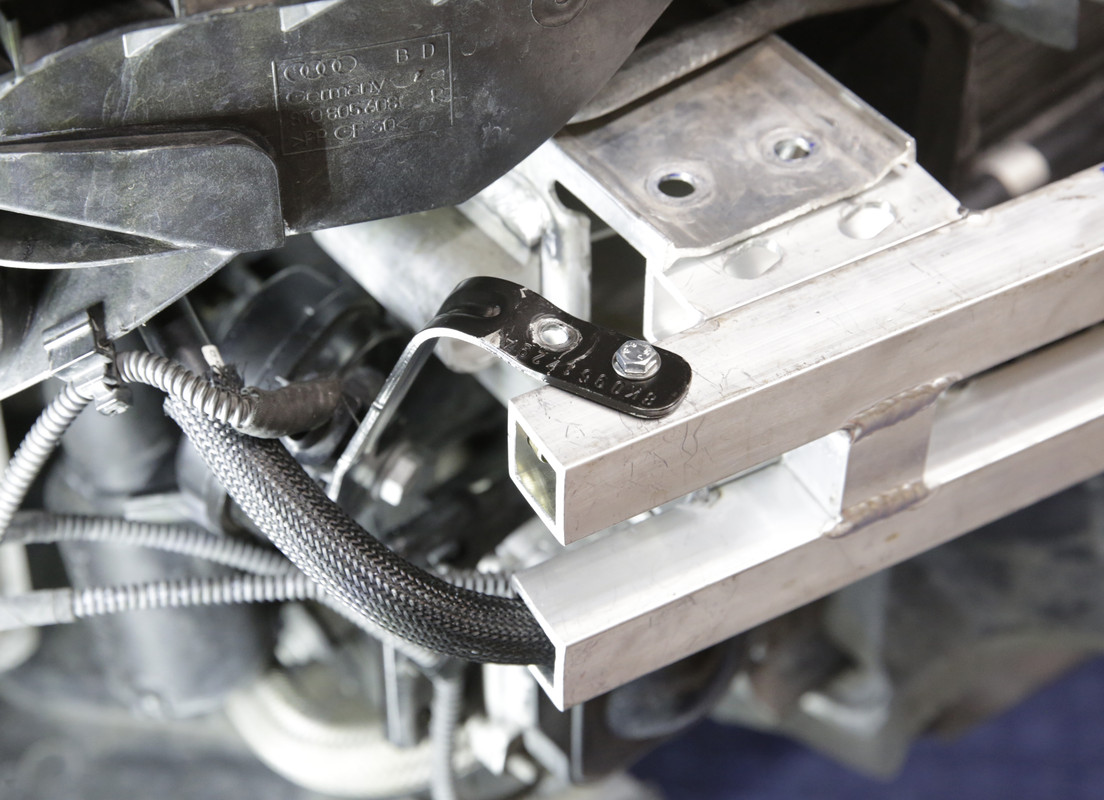
The bar is about 1/4 of the surface area, made of extruded 6061 aluminum tubing, and precision welded by a gentleman at a prototype shop who used to work at Bell Intercoolers. In terms of handling, the crash bar is not load bearing and isn't mounted in a way that would affect front end stiffness when taking corners. It's mounted in another aluminum "clamp" of sorts with two shear bolts which connects to the main shock absorbing beams. While the new bar is definitely stout and quite strong, it's designed for off-road use as they say and is not DOT approved and I have not crash tested it, LOL. All told it took three prototypes to get it just right. It wasn't cheap, but it is effective.
In addition to more airflow, the bar is moved forward for substantially more clearance behind it. With the additional space, I was able to get a nice, large core of my choice behind it. I consulted with Setrab, who makes our OEM oil cooler (they're HUGE!) and I didn't have to compromise, choosing a 19 row with the least amount of pressure drop in their range. I also had enough room to add a fan pack which kicks on when temps reach 80C and there's not enough airflow to cool the fluid properly. Ideal for the drag strip, autocross and gridlock for that matter!
The cooler is spaced back from the crash bar so the entire core has access to airflow. There's obviously still a gap at the back between the fans and the a/c condenser.
For those who decide to go with a supercharger or even turbo on their RS5, this bar would provide lots of space for a large heat exchanger. But enough chatter, a few photos.
So this is the finished product, which now resides on my vehicle.
Installed with the bumper cover removed.

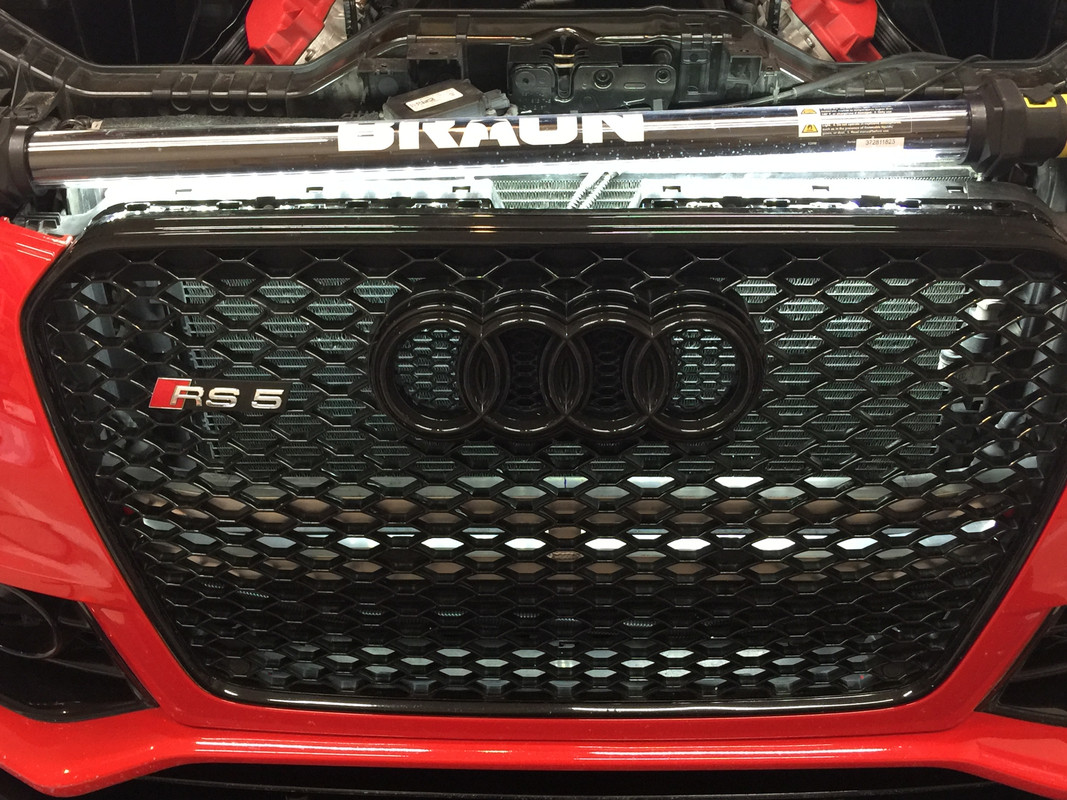
With the bumper cover installed with an uncoated bar. I used an LED work light to give you a rough idea on how much room this bar opens up to mound heat exchangers.
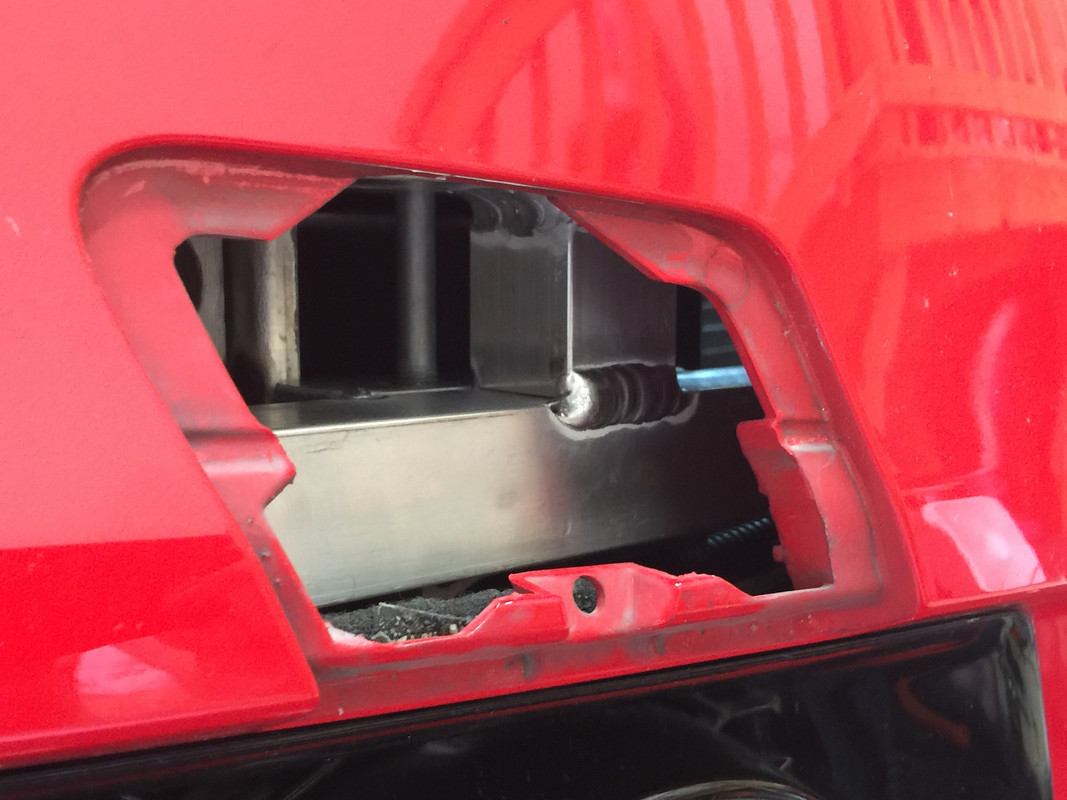
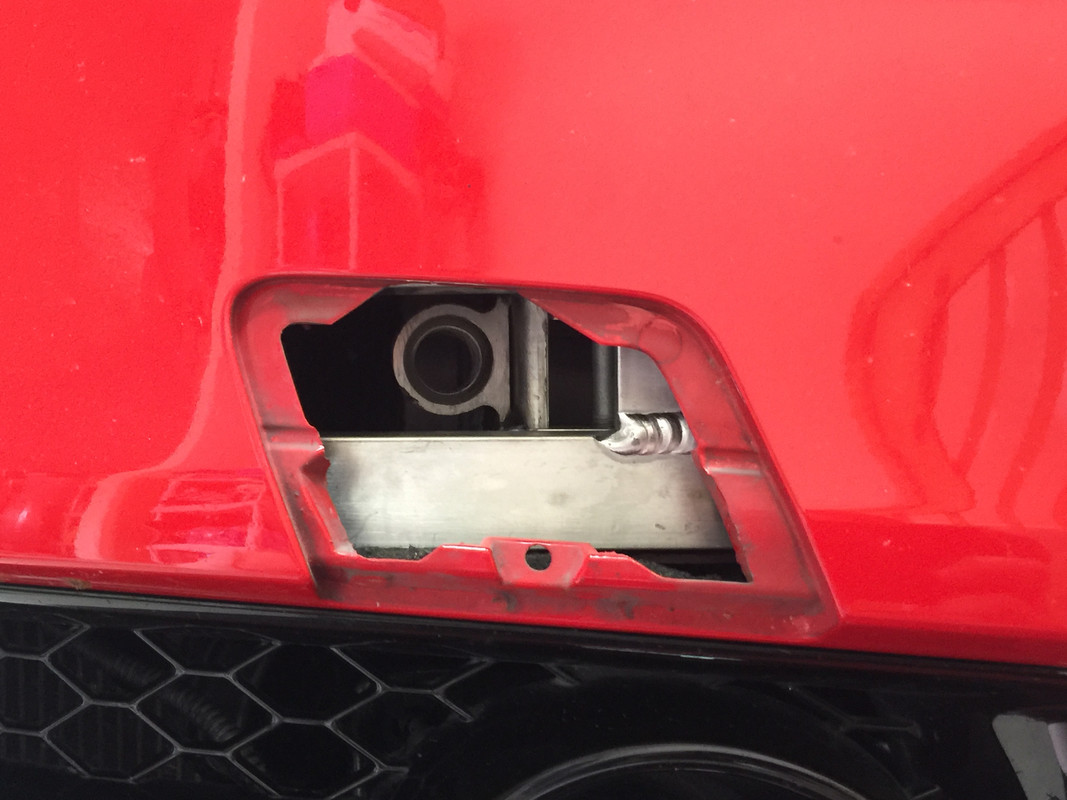
Peering behind the tow hook cover...still fully accessible.
I took black gaffer's tape and covered the bar for now although I'll have it coated in an industrial coating similar to truck bed liner. That'll prevent chips long term and keep it invisible. You can barely see it behind the grille.

Let's compare the two bars. Both are aluminum and exceptionally light. No added weight here...

Throwing the OEM plastic crash bar cover over the new crash bar the size difference is quite shocking.

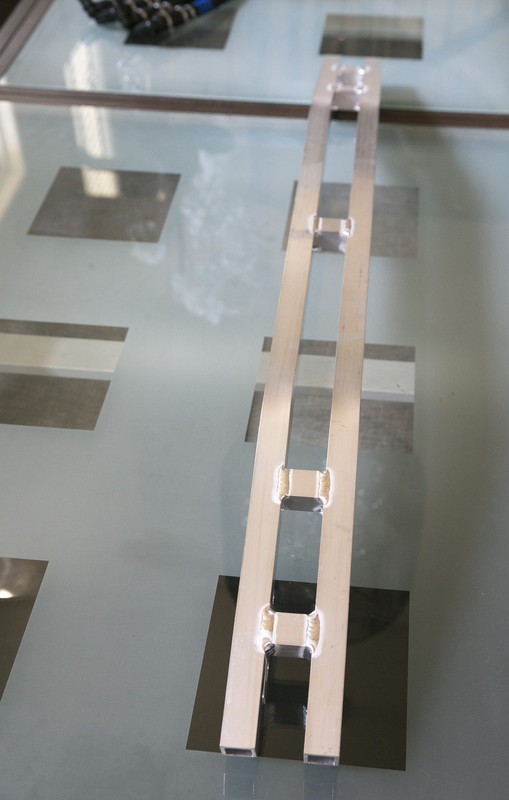
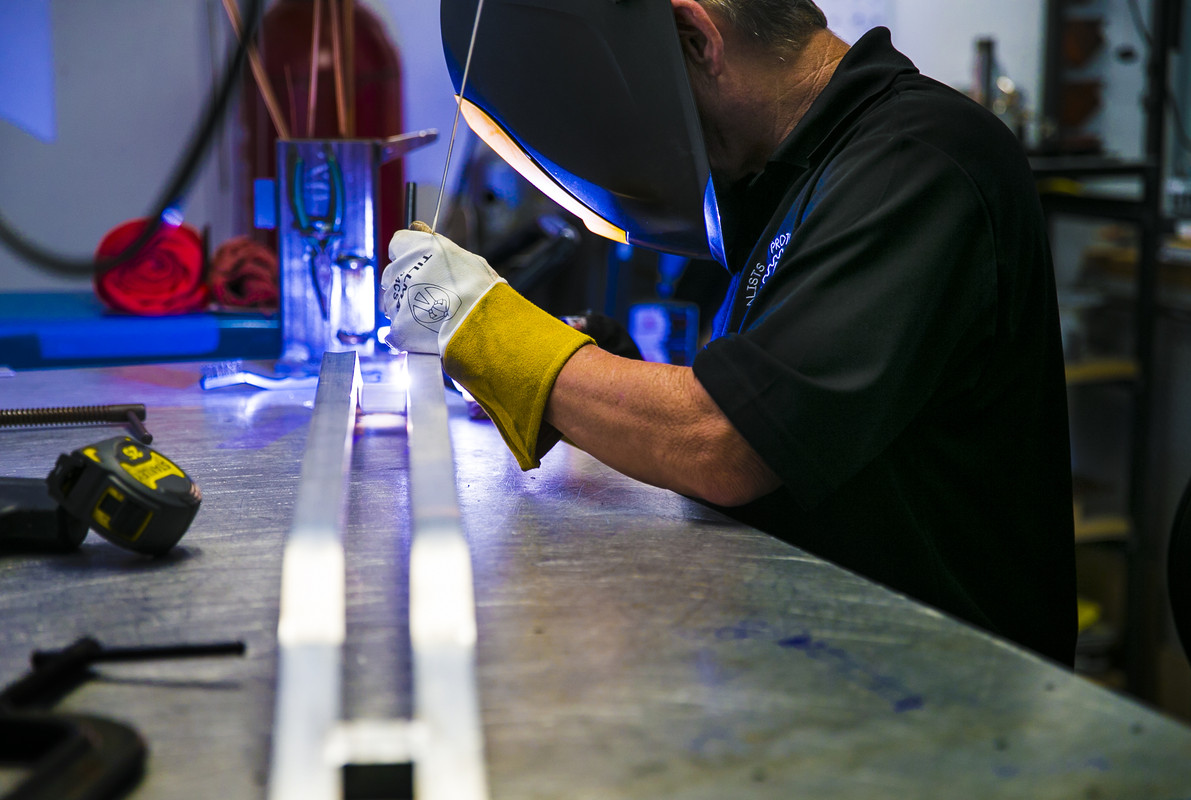
The bar being welded up.

While I was working on the bar I was also working with Setrab on the heat exchanger core. Originally I had a shorter, 25 row but moved to a longer 19 row as it gave me more installation options, more heat dissipation capability and had a lower pressure drop to boot. This thing is capable of handling over 650hp so there's "room" to grow.

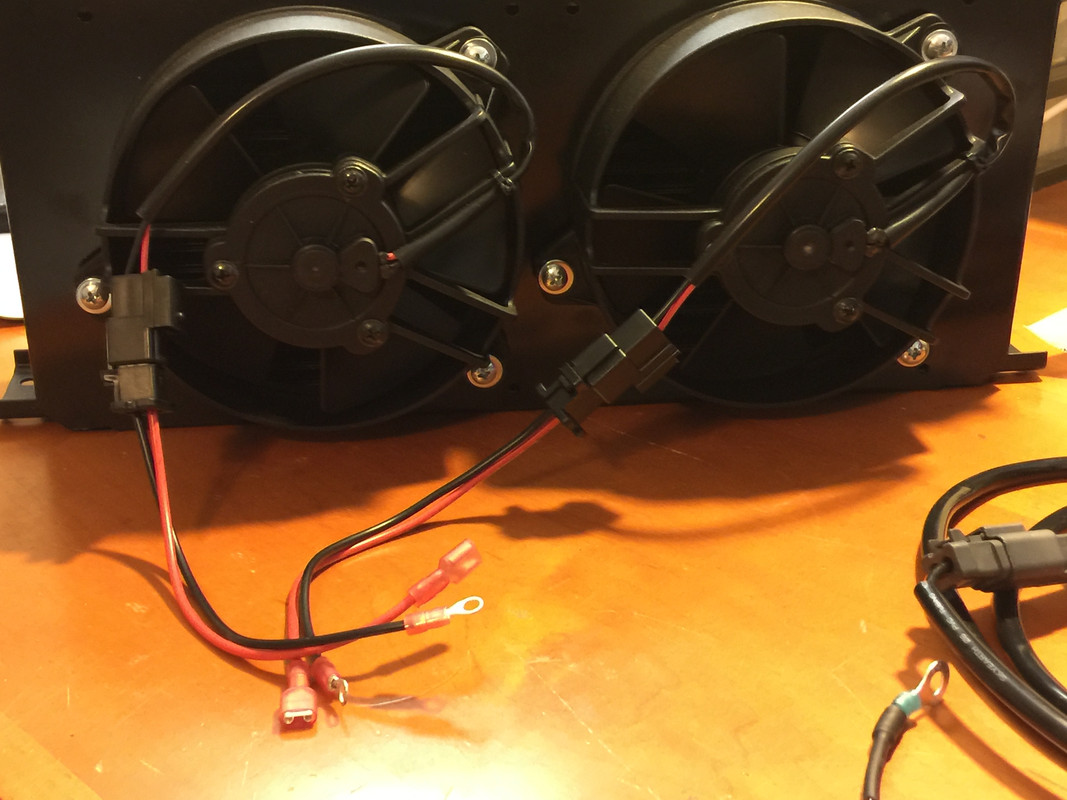
Fan pack on the back side. This'll flow enough air at a standstill to equate to 50mph while moving. It's activated at 80 degrees Celsius via a thermal switch.

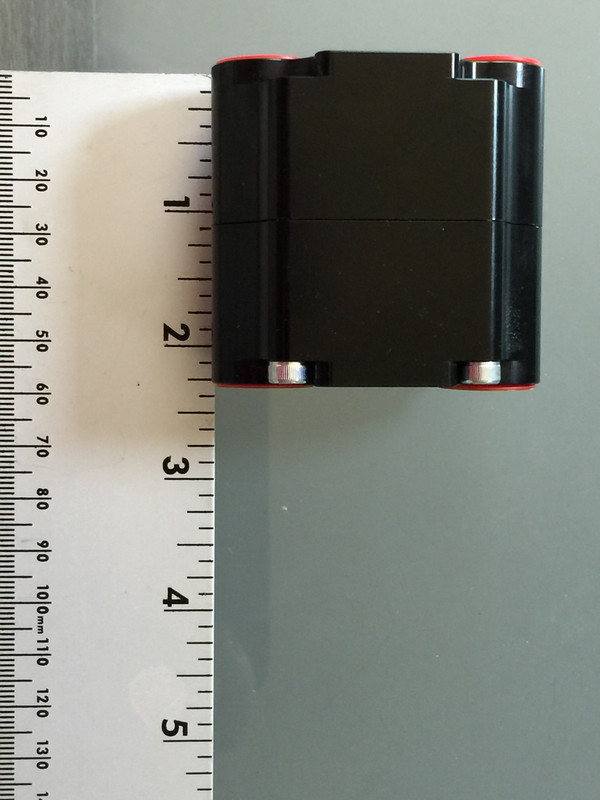
I did incorporate a thermostat into the system to aid in heating up the fluid temps more quickly. Strangely, it takes about the same time as OEM to warm up. The housing separates so you can change out the actual thermostatic unit. My target temps were about 70C and with this thermostat, it pretty much nails it in day in, day out driving. Never really gets any hotter which is perfect and it's a bullseye in terms of ideal fluid temps. I'm using the most compact unit on the market and as I said, it's fully rebuildable.
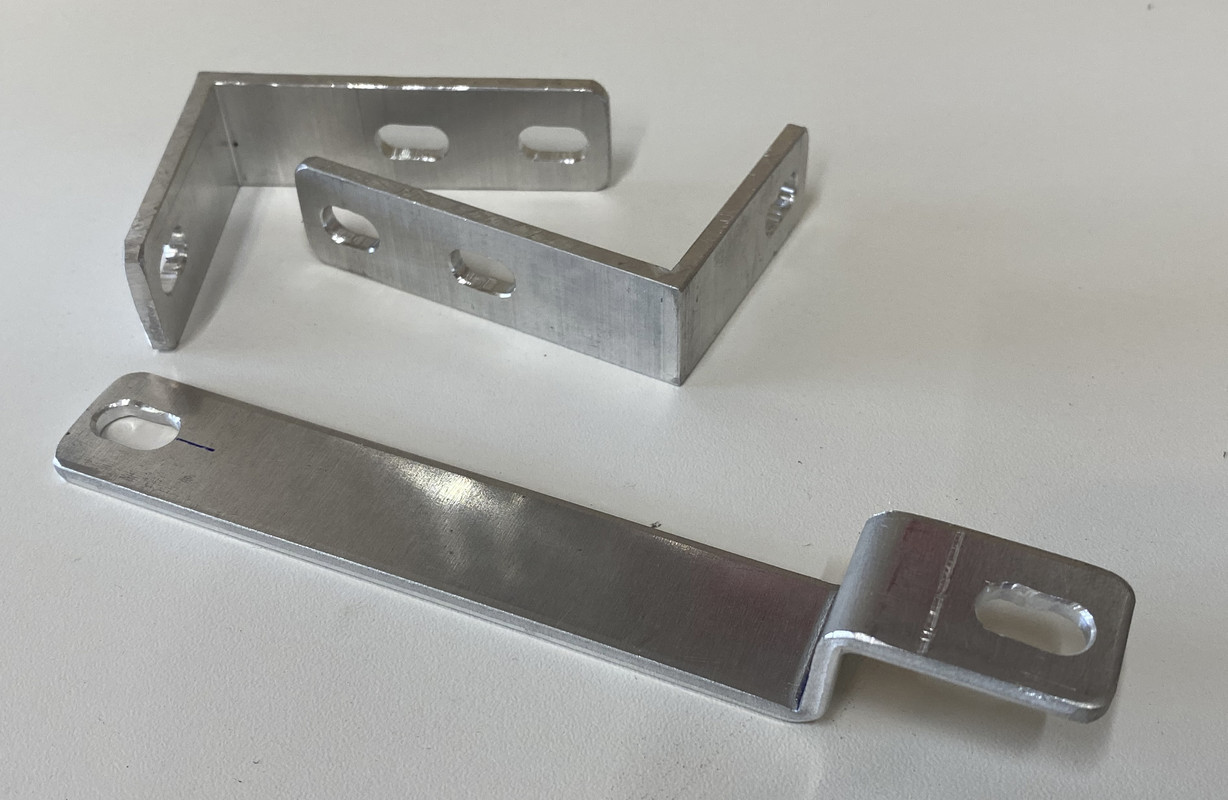
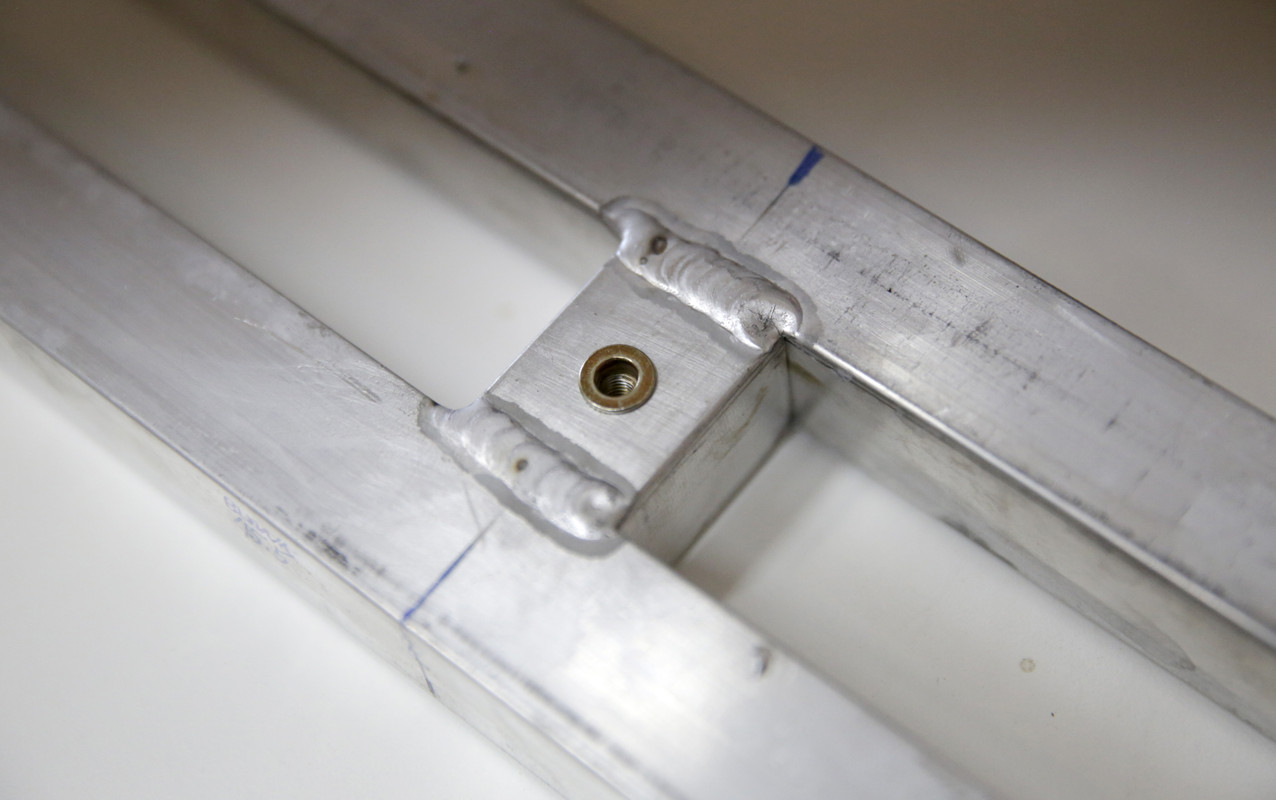
I then designed brackets and had those machined from 6061 and 3003 stock. Like the crash bar, the mounting holes are all slotted to ensure perfect alignment and compensate for any build tolerances. I'll coat these black as well so they're invisible. All the mounting points are by rivet nut on the back side of the crash bar for a cleaner installation.
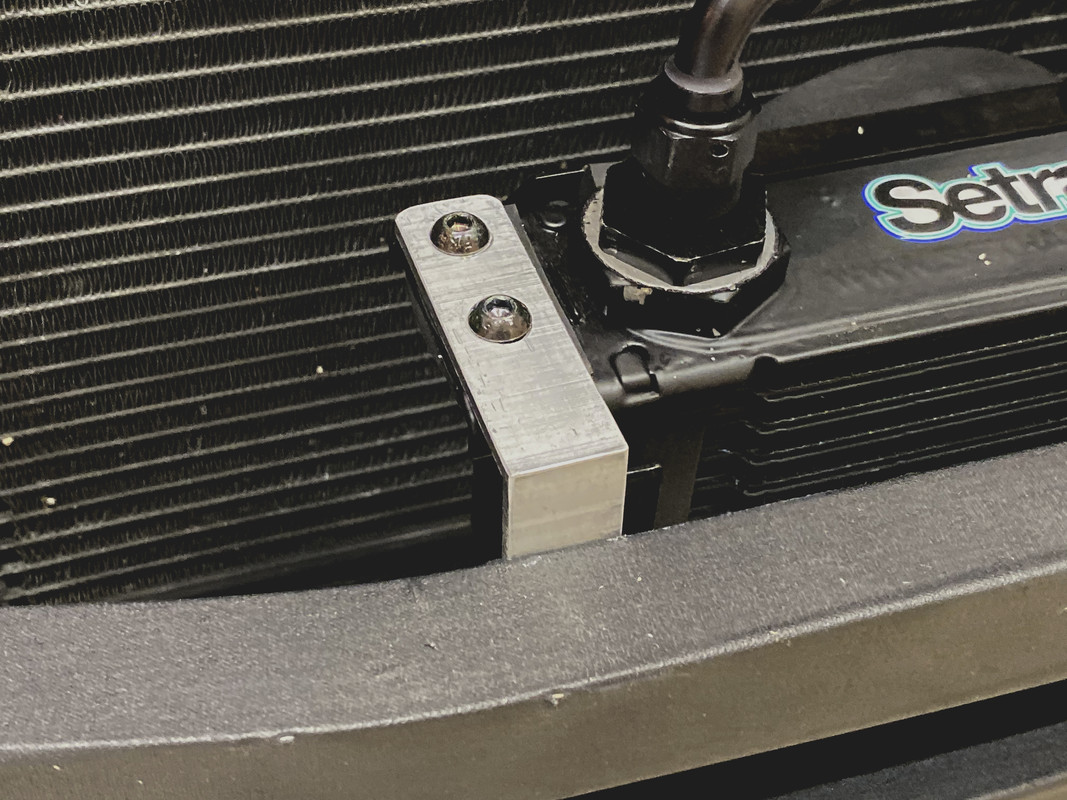
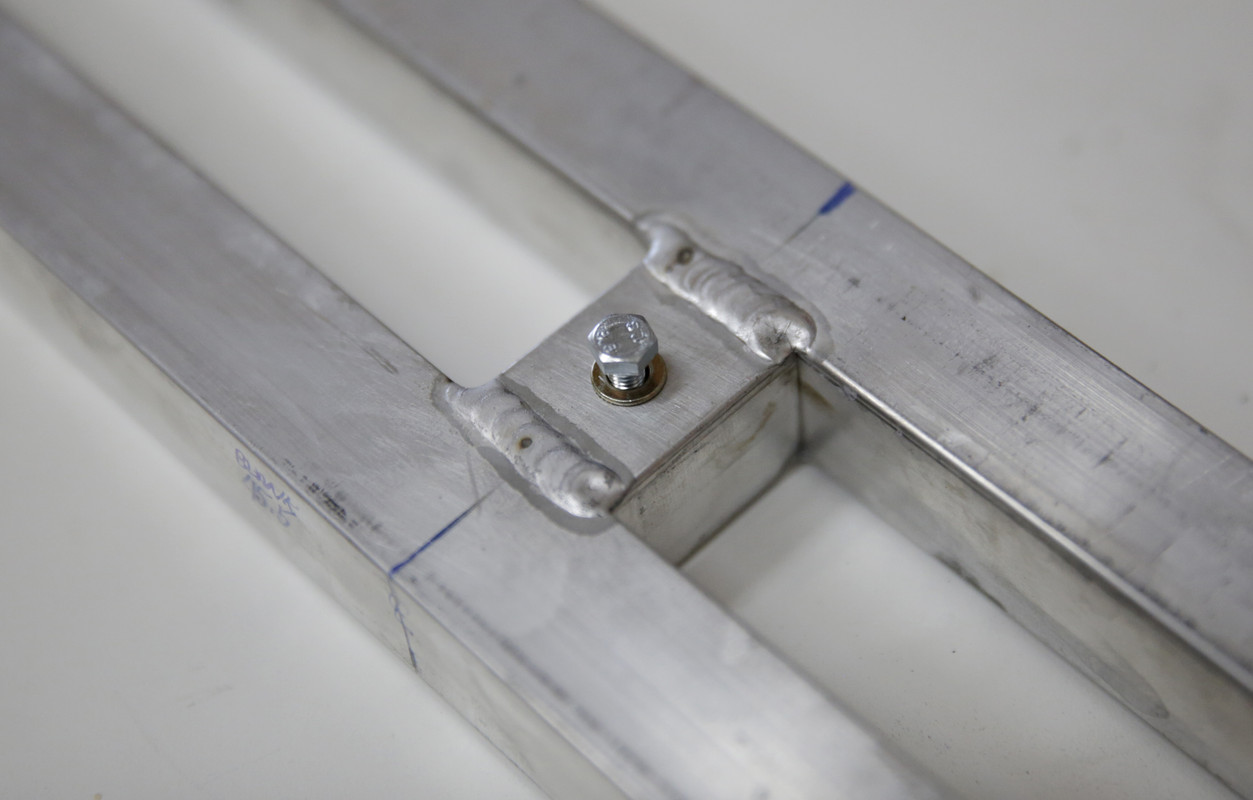
Here's a rivet nut mounted. This eliminates the need for a separate nut, less to drop!
I mounted the OEM ambient air sensor in the same way as original.

The lower bar is completely hollow and the OEM washer fluid hose for the headlight washers slides right through just like stock.
The horns are riveted to the OEM bar. They're aluminum rivets and it took all of five seconds to drill them out. I ended up mounting the horn brackets with the same rivet nuts. Took a bit of fiddling to get them positioned right but they sit perfectly in a gap with no physical interference.
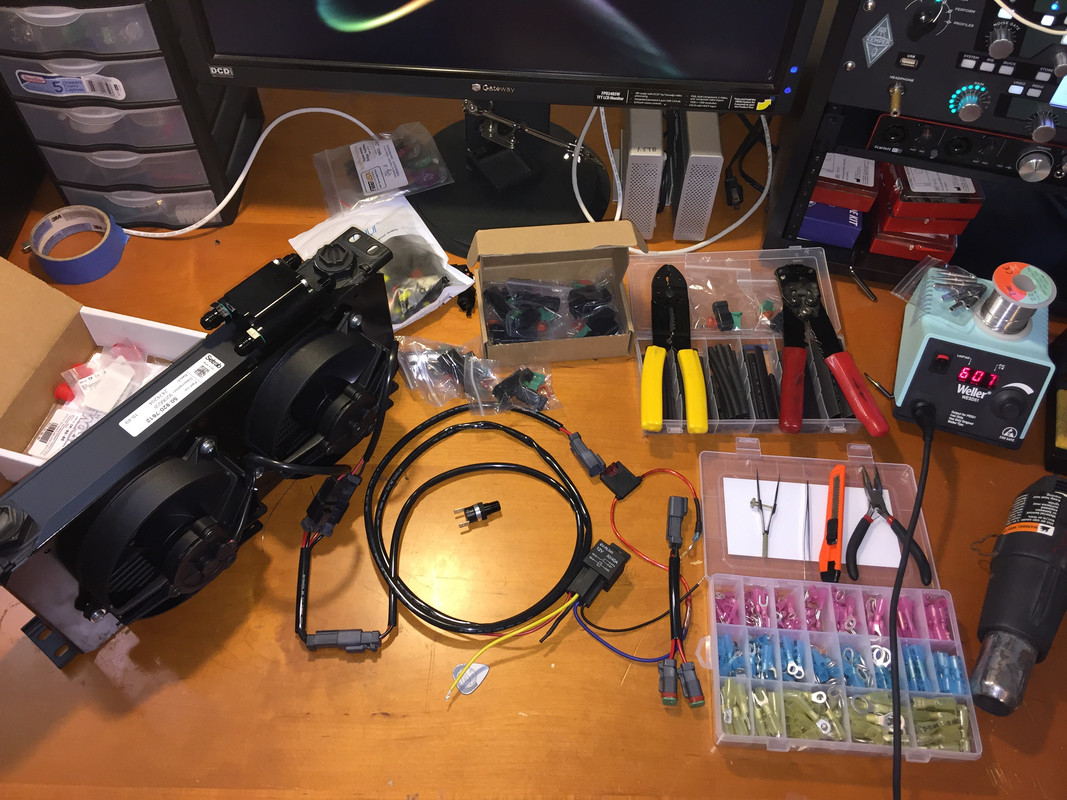
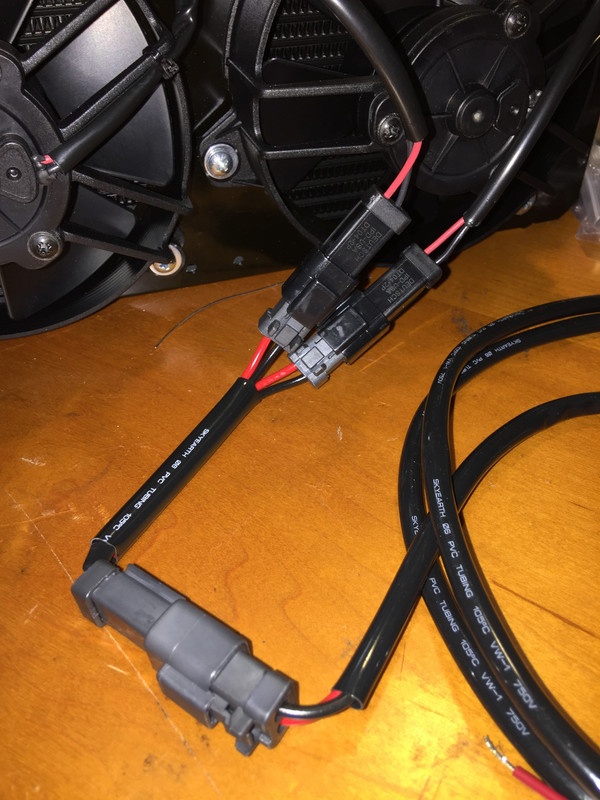
With the bar and mounting designed, I worked on the wiring harness and built it up from scratch. I have extensive experience soldering complex wiring harnesses for guitars (I make those on the side) so I felt pretty confident I could build a full harness. I re-engineered the Setrab OEM plugs on the fan pack to terminate in a single plug and designed an intercept harness for the thermo-switch. I used waterproof connectors and everything is plug and play so there's no splicing anywhere into the OEM harness. I run a fused relay with both ends connected to a live source. Nothing is connected to switched. This'll allow the fans to run temporarily when the car is off. Sounds dangerous but typically it'll only run for a minute or so at most. I've been daily driving it like this for some time with no issues. I didn't want to splice into a wire anywhere on the harness.
Setrab's wiring...
My wiring...
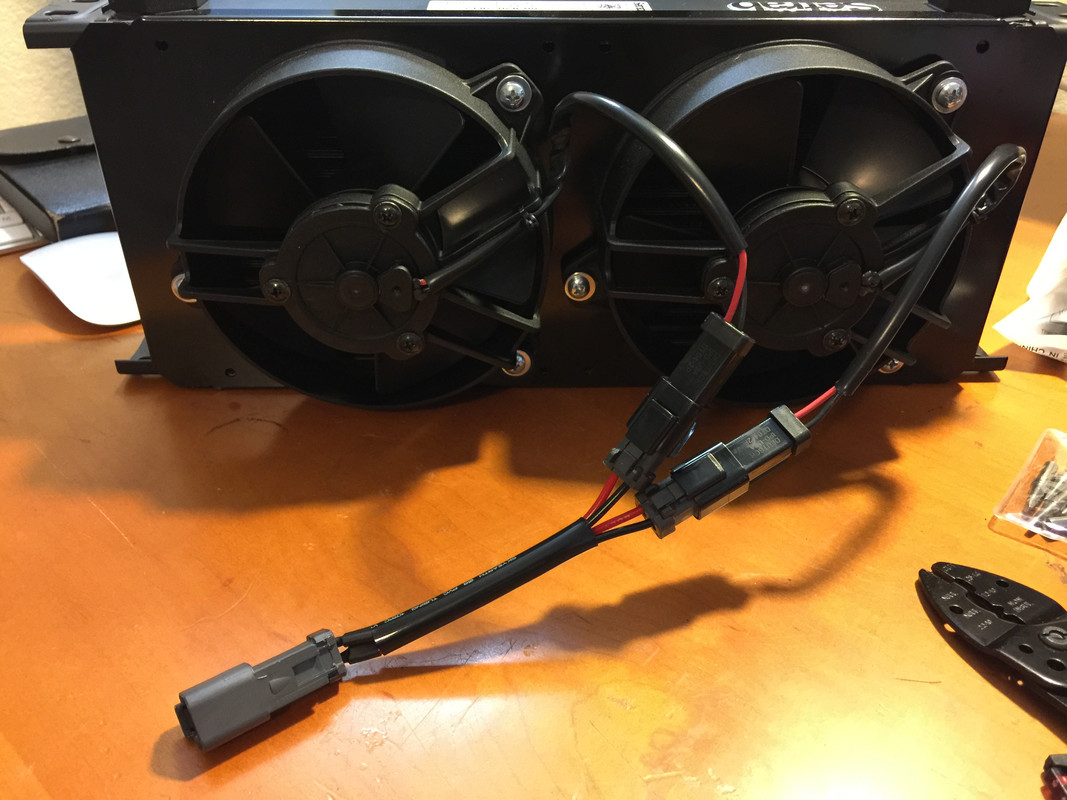
Plugged into the main harness.
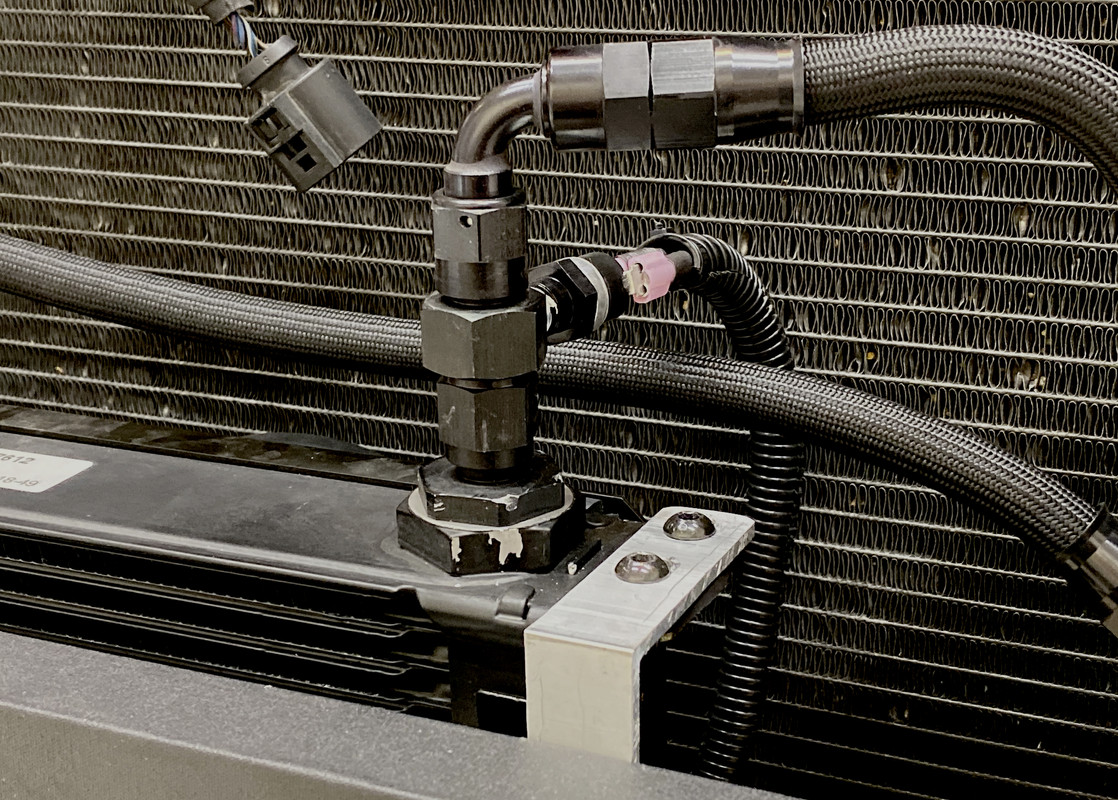
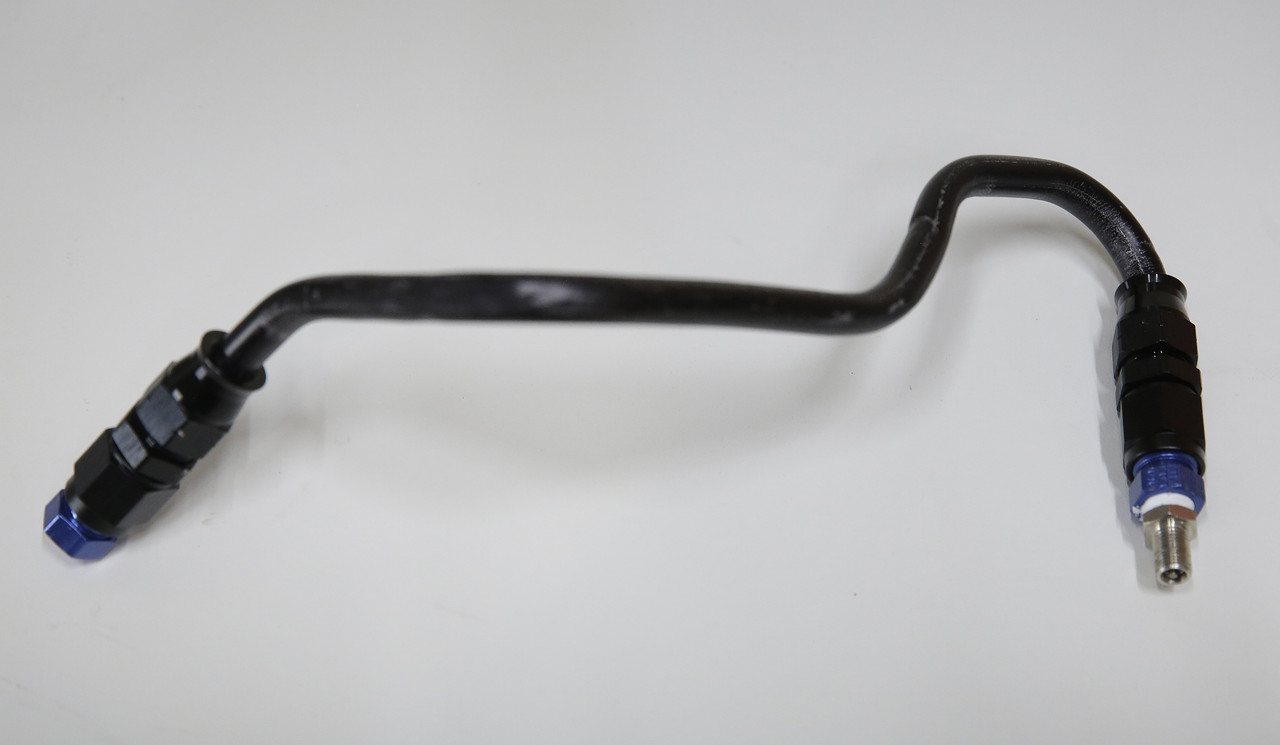
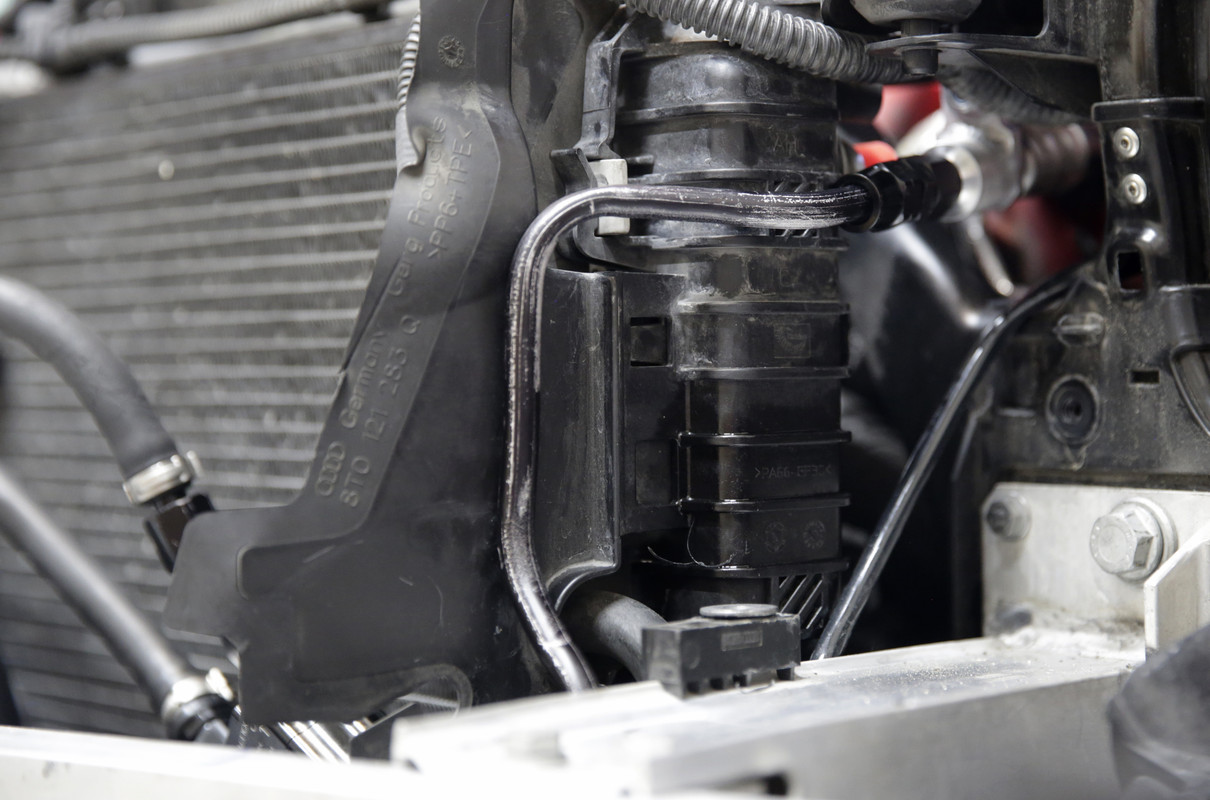
Next up are the feed lines. Originally I wanted hard lines as they're small in diameter, high in flow, and I could bend them to fit whatever space I needed to. There isn't much space! So I ordered a bunch of black aluminum lines and began bending. Took quite a bit of time and fab work but I did a full set. Here's a photo of one uninstalled and installed.
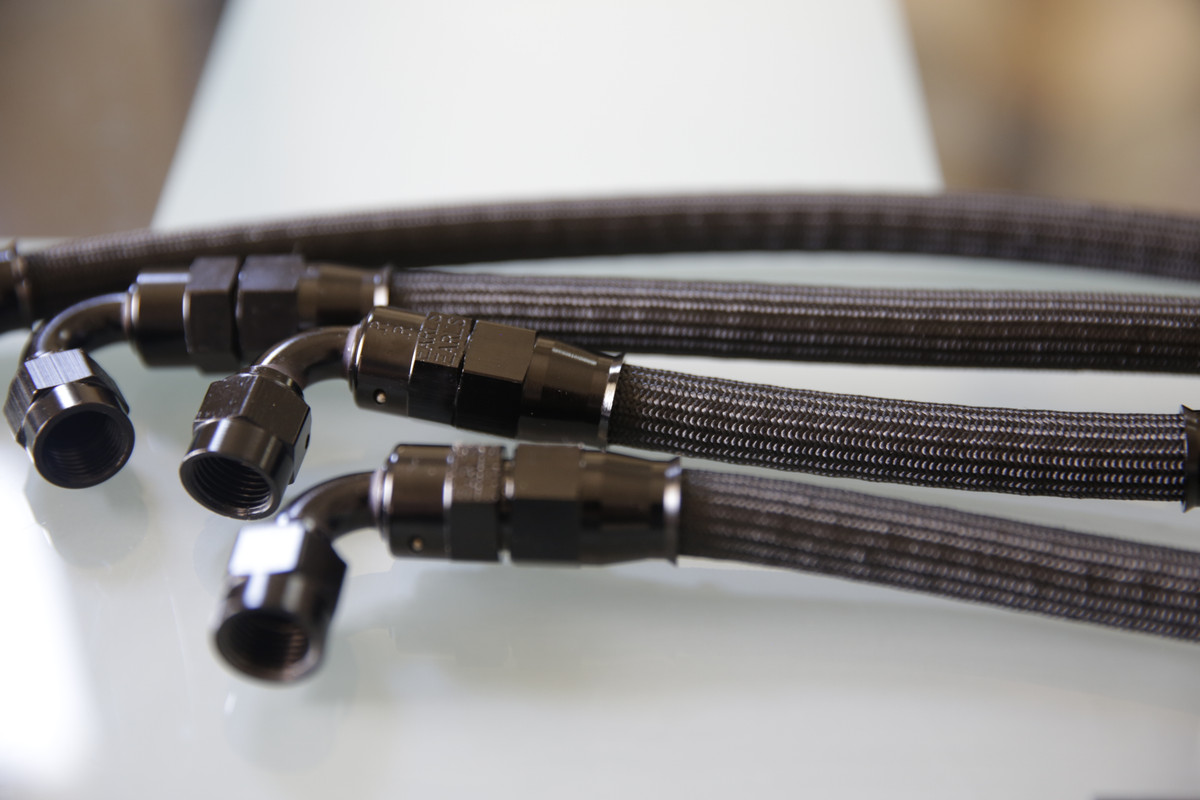
I realized the error in my ways. Even though there's a flex connection in the OEM lines (it's a mixture of hard and flex line), the thermostat is hard mounted to a different location from the crash bar. This necessitates a flex line. No if's and's or but's. So back to the drawing board. Again, after a ton of research, I settled on a flexible line with a 1" bend radius that's serviceable by the average individual. I wanted to be able to fix or repair a line if there's some mishap. This meant crimp-on connectors were a no-go. I really like some of the higher end XRP stuff but you just can't service the lines or build them yourself without purchasing a $3K crimper. No thanks. I ended up using a PTFE hose with an abrasion resistant outer braid that handles 250psi and can be assembled at home. Not cheap by any means but highly effective and high performance. It'll also make installation super easy. I built all the lines necessary and also purchased a pressure test kit and was able to test all the lines up to 125psi which is about 8x more than necessary.

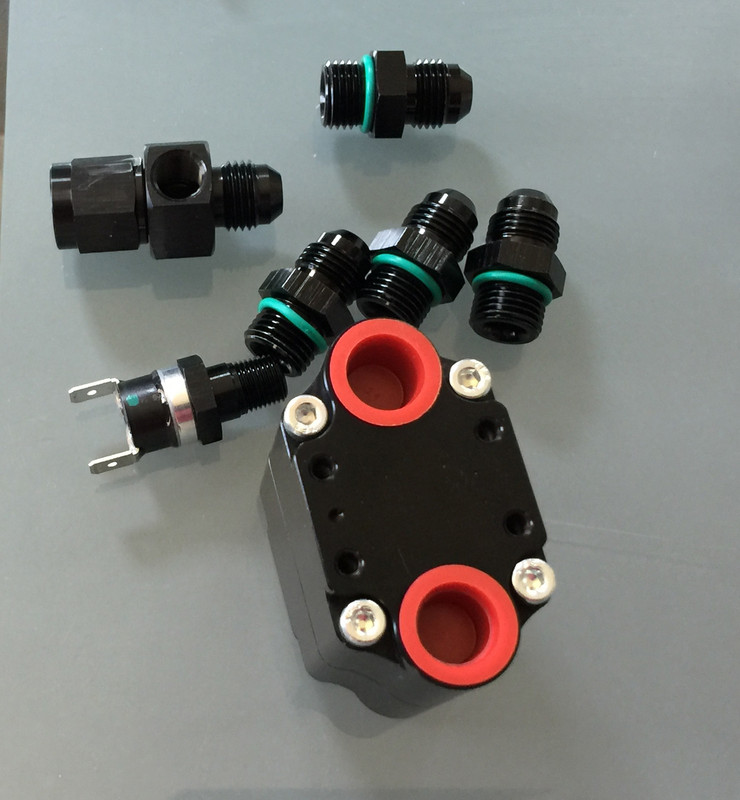
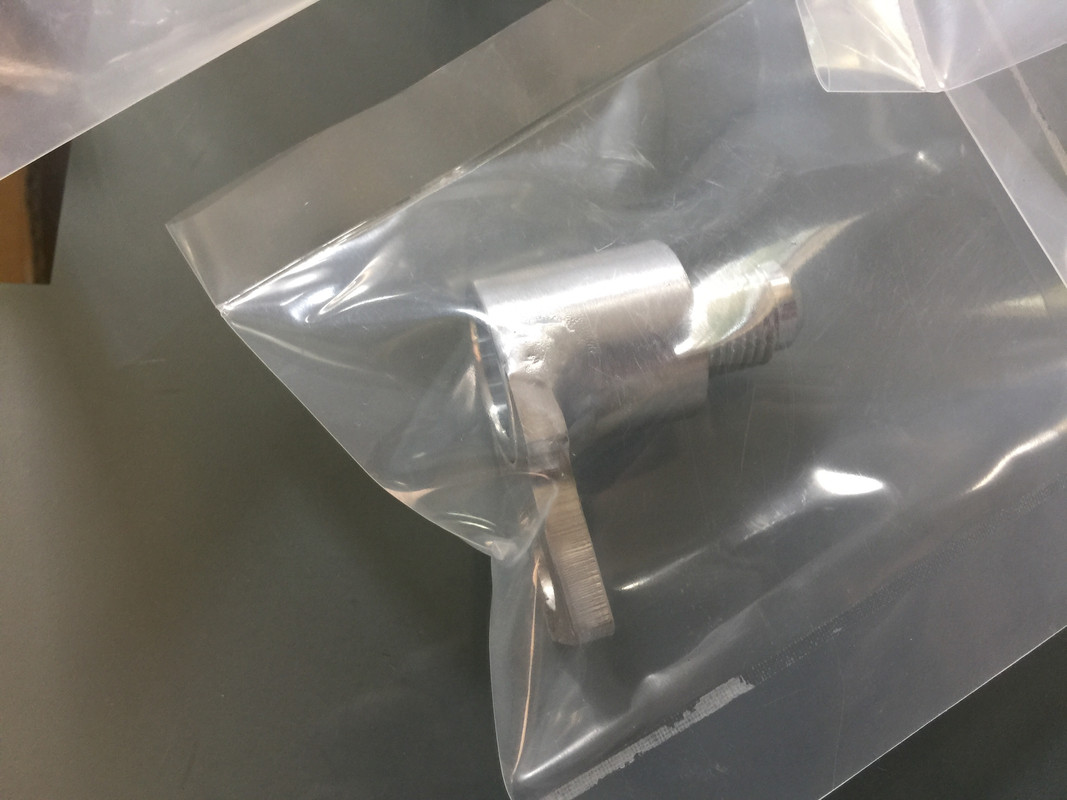
The last and most challenging piece of the puzzle was how to interface with the OEM ATF coolant circuit. Adapters for this sort of thing don't exist anywhere. So...I started talking to various engineers, machine and prototype shops and designed one from scratch. It's super easy to install and interfaces with standard AN fittings. I also sourced the o-rings. Here's a little movie showing how they work (no o-ring installed).
https://youtu.be/ql8e2a7BGZA
Because of the substantial cost in producing just one set, I had 10 sets made in total. I also took additional steps to apply for a patent as I did on the crash bar as well.
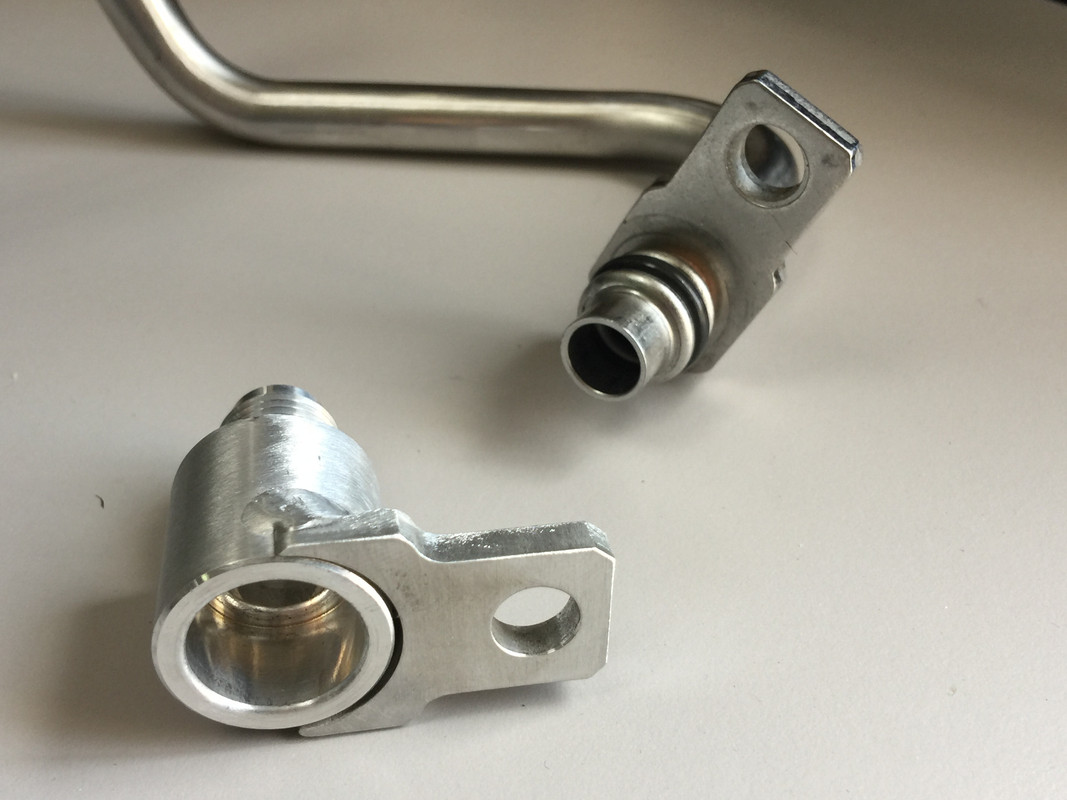


Here it is attached to one of the OEM transmission cooler lines. The design is used on multiple fittings across VW's various lines and is adaptable.
While studying the RS5's various systems, especially on the cooling end, the one glaring issue I see is the OEM transmission fluid cooler. It's housed in the radiator and is a liquid to liquid heat exchanger. This design is shared amongst several models including the A5 and the S5 (the entire A4 and A6 line as well, pretty much anything running the S-Tronic 7-speed DL-501). It actually does double duty; first it heats up the fluid and then "cools" it when the fluid gets above the radiator coolant temperature. Problem is, that's pretty darn hot and the temps tend to get higher like a runaway freight train. They seem to max out, generally, around 120C to 150C but can get hotter and the transmission will go into limp mode. I've experienced this myself after a few back to back launches. Even one run at the drag strip has the temps "up there" and when you return to the pits, it takes forever for them to come back down.
I was also amazed (ok maybe incredulous) at the actual grille opening. We all have these huge grilles but very little of it is actually "open" to airflow. Part of the problem is the huge crash bar along with a cover on the RS5 which blocks even more airflow. Measuring the OEM bar, there was only about 2.5" of space behind it for a larger heat exchanger. The Homelink transmitter takes up an inordinate amount of room too so there's really no way to put another core of sufficient size to make a difference. So I redesigned the crash bar.
The bar is about 1/4 of the surface area, made of extruded 6061 aluminum tubing, and precision welded by a gentleman at a prototype shop who used to work at Bell Intercoolers. In terms of handling, the crash bar is not load bearing and isn't mounted in a way that would affect front end stiffness when taking corners. It's mounted in another aluminum "clamp" of sorts with two shear bolts which connects to the main shock absorbing beams. While the new bar is definitely stout and quite strong, it's designed for off-road use as they say and is not DOT approved and I have not crash tested it, LOL. All told it took three prototypes to get it just right. It wasn't cheap, but it is effective.
In addition to more airflow, the bar is moved forward for substantially more clearance behind it. With the additional space, I was able to get a nice, large core of my choice behind it. I consulted with Setrab, who makes our OEM oil cooler (they're HUGE!) and I didn't have to compromise, choosing a 19 row with the least amount of pressure drop in their range. I also had enough room to add a fan pack which kicks on when temps reach 80C and there's not enough airflow to cool the fluid properly. Ideal for the drag strip, autocross and gridlock for that matter!
The cooler is spaced back from the crash bar so the entire core has access to airflow. There's obviously still a gap at the back between the fans and the a/c condenser.
For those who decide to go with a supercharger or even turbo on their RS5, this bar would provide lots of space for a large heat exchanger. But enough chatter, a few photos.
So this is the finished product, which now resides on my vehicle.
Installed with the bumper cover removed.
With the bumper cover installed with an uncoated bar. I used an LED work light to give you a rough idea on how much room this bar opens up to mound heat exchangers.
Peering behind the tow hook cover...still fully accessible.
I took black gaffer's tape and covered the bar for now although I'll have it coated in an industrial coating similar to truck bed liner. That'll prevent chips long term and keep it invisible. You can barely see it behind the grille.
Let's compare the two bars. Both are aluminum and exceptionally light. No added weight here...
Throwing the OEM plastic crash bar cover over the new crash bar the size difference is quite shocking.
The bar being welded up.
While I was working on the bar I was also working with Setrab on the heat exchanger core. Originally I had a shorter, 25 row but moved to a longer 19 row as it gave me more installation options, more heat dissipation capability and had a lower pressure drop to boot. This thing is capable of handling over 650hp so there's "room" to grow.
Fan pack on the back side. This'll flow enough air at a standstill to equate to 50mph while moving. It's activated at 80 degrees Celsius via a thermal switch.
I did incorporate a thermostat into the system to aid in heating up the fluid temps more quickly. Strangely, it takes about the same time as OEM to warm up. The housing separates so you can change out the actual thermostatic unit. My target temps were about 70C and with this thermostat, it pretty much nails it in day in, day out driving. Never really gets any hotter which is perfect and it's a bullseye in terms of ideal fluid temps. I'm using the most compact unit on the market and as I said, it's fully rebuildable.
I then designed brackets and had those machined from 6061 and 3003 stock. Like the crash bar, the mounting holes are all slotted to ensure perfect alignment and compensate for any build tolerances. I'll coat these black as well so they're invisible. All the mounting points are by rivet nut on the back side of the crash bar for a cleaner installation.
Here's a rivet nut mounted. This eliminates the need for a separate nut, less to drop!
I mounted the OEM ambient air sensor in the same way as original.
The lower bar is completely hollow and the OEM washer fluid hose for the headlight washers slides right through just like stock.
The horns are riveted to the OEM bar. They're aluminum rivets and it took all of five seconds to drill them out. I ended up mounting the horn brackets with the same rivet nuts. Took a bit of fiddling to get them positioned right but they sit perfectly in a gap with no physical interference.
With the bar and mounting designed, I worked on the wiring harness and built it up from scratch. I have extensive experience soldering complex wiring harnesses for guitars (I make those on the side) so I felt pretty confident I could build a full harness. I re-engineered the Setrab OEM plugs on the fan pack to terminate in a single plug and designed an intercept harness for the thermo-switch. I used waterproof connectors and everything is plug and play so there's no splicing anywhere into the OEM harness. I run a fused relay with both ends connected to a live source. Nothing is connected to switched. This'll allow the fans to run temporarily when the car is off. Sounds dangerous but typically it'll only run for a minute or so at most. I've been daily driving it like this for some time with no issues. I didn't want to splice into a wire anywhere on the harness.
Setrab's wiring...
My wiring...
Plugged into the main harness.
Next up are the feed lines. Originally I wanted hard lines as they're small in diameter, high in flow, and I could bend them to fit whatever space I needed to. There isn't much space! So I ordered a bunch of black aluminum lines and began bending. Took quite a bit of time and fab work but I did a full set. Here's a photo of one uninstalled and installed.
I realized the error in my ways. Even though there's a flex connection in the OEM lines (it's a mixture of hard and flex line), the thermostat is hard mounted to a different location from the crash bar. This necessitates a flex line. No if's and's or but's. So back to the drawing board. Again, after a ton of research, I settled on a flexible line with a 1" bend radius that's serviceable by the average individual. I wanted to be able to fix or repair a line if there's some mishap. This meant crimp-on connectors were a no-go. I really like some of the higher end XRP stuff but you just can't service the lines or build them yourself without purchasing a $3K crimper. No thanks. I ended up using a PTFE hose with an abrasion resistant outer braid that handles 250psi and can be assembled at home. Not cheap by any means but highly effective and high performance. It'll also make installation super easy. I built all the lines necessary and also purchased a pressure test kit and was able to test all the lines up to 125psi which is about 8x more than necessary.
The last and most challenging piece of the puzzle was how to interface with the OEM ATF coolant circuit. Adapters for this sort of thing don't exist anywhere. So...I started talking to various engineers, machine and prototype shops and designed one from scratch. It's super easy to install and interfaces with standard AN fittings. I also sourced the o-rings. Here's a little movie showing how they work (no o-ring installed).
https://youtu.be/ql8e2a7BGZA
Because of the substantial cost in producing just one set, I had 10 sets made in total. I also took additional steps to apply for a patent as I did on the crash bar as well.
Here it is attached to one of the OEM transmission cooler lines. The design is used on multiple fittings across VW's various lines and is adaptable.
 10-12-2019, 06:06 PM
#2
There are a few other details that I had to work out including ease of installation. The fitting adapters make it exceptionally easy. Without these, I just don't think it'd be possible to design something with OEM reliability and ease of installation.
I haven't gotten the bars or brackets coated just yet but that's the next step. The best part is the installation is fully reversible and it's actually easy to go back to the OEM heat exchanger and leave everything else in place.

I've done tons of testing, much in anger in the hill country (Mexico!) to really push this system in the stupid hot temperatures we typically see in the summertime. On average, I'm seeing a 20C drop in normal conditions, daily driving, and even more when driven in anger. More importantly the car just feels more consistent overall.
Now I mentioned long-term health of the mechatronic and associated electronics. The consistent overall temperatures lessen fluid breakdown long term, helps the fluids maintain a better, more optimal operating temperature (better for lubrication) and allow the solenoids to produce more consistent pressure and prevent wear. As the solenoids wear, they slowly loose the ability to maintain operating pressure. The hotter the fluid, the less viscous it is. This in turn lesses it's ability to lubricate and protect moving parts. As the solenoids wear, they cannot maintain proper pressure. As the fluid heats up, it compounds the pressure issue as the fluid is thinner. Keeping the fluid at a lower temperature and thus a higher viscosity, it helps negate those issues.
The larger core also allows the system to hold more fluid. Less dilution, more mass, and more ability to absorb and dissipate heat. Keeping the fluid out of the danger zone also allows the car and it's various systems to perform at an optimal level.
In addition, this is a full-divorced system meaning it no longer interfaces with the radiator and coolant. This not only lessens the burden on the radiator to remove heat but also eliminates a potential issue where the internal heat exchanger inside the radiator leaks and contaminates the transmission fluid with coolant. Bad things happen when that occurs.
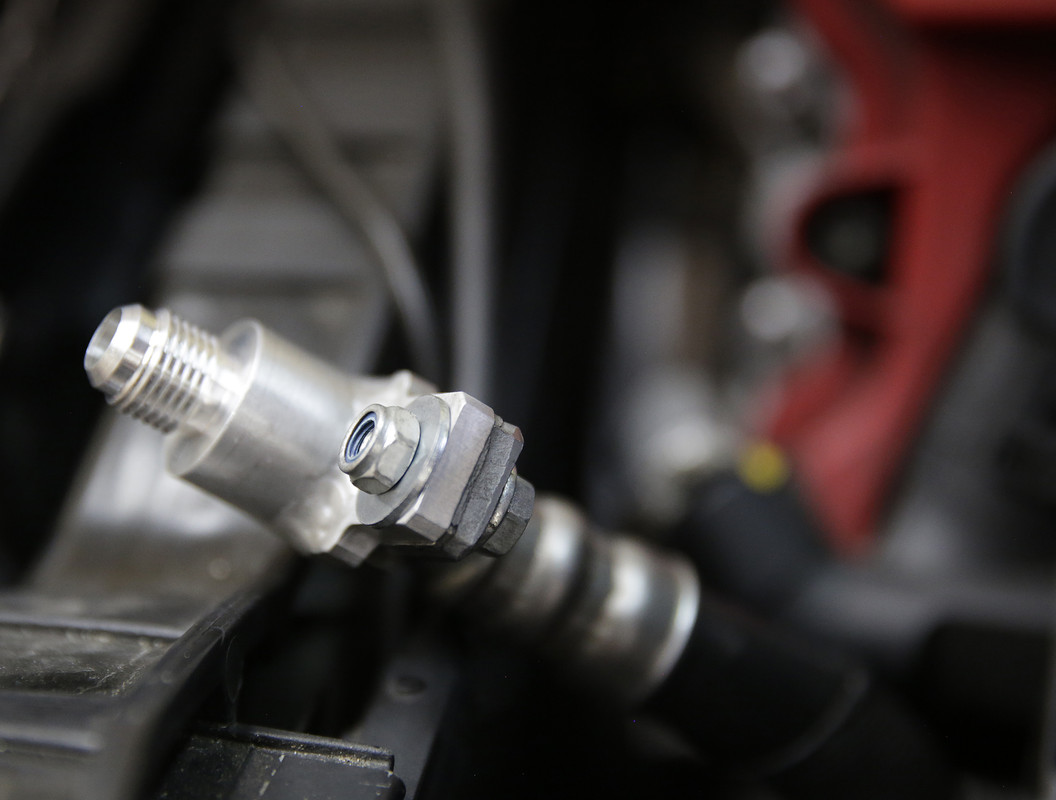
A few more photos. The new lines which connect the OEM trans cooler lines to the thermostat


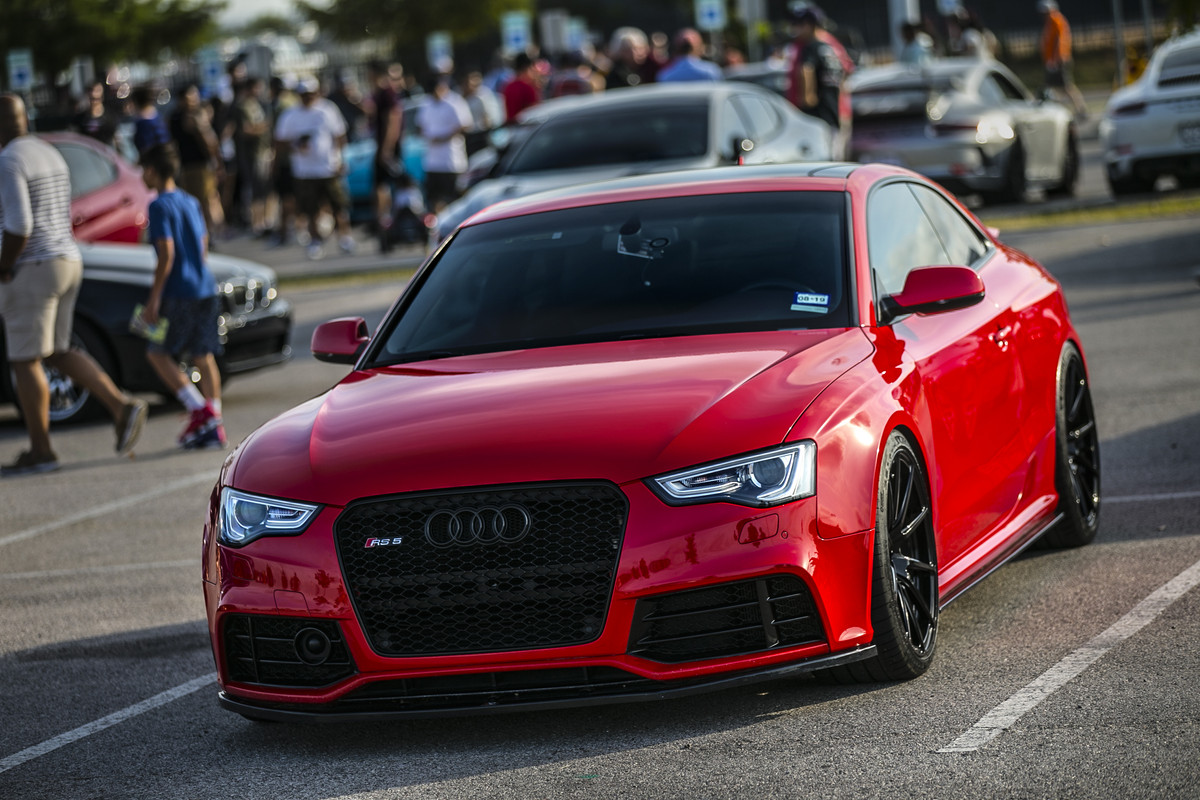
One last shot of the car with everything installed. Less visible than the OEM cover.
Lastly, I have logs if anyone is interested. Here's a quick graph showing the delta change between the OEM cooler and the new setup over the same stretch of road. It's really an effective mod for a completely stock car or one that's been modded. I have the JHM stage 2 currently so I'm producing more hp and torque than OEM. The performance is very consistent and the car feels incredibly strong even when it's 100 degrees out.

I haven't gotten the bars or brackets coated just yet but that's the next step. The best part is the installation is fully reversible and it's actually easy to go back to the OEM heat exchanger and leave everything else in place.
I've done tons of testing, much in anger in the hill country (Mexico!) to really push this system in the stupid hot temperatures we typically see in the summertime. On average, I'm seeing a 20C drop in normal conditions, daily driving, and even more when driven in anger. More importantly the car just feels more consistent overall.
Now I mentioned long-term health of the mechatronic and associated electronics. The consistent overall temperatures lessen fluid breakdown long term, helps the fluids maintain a better, more optimal operating temperature (better for lubrication) and allow the solenoids to produce more consistent pressure and prevent wear. As the solenoids wear, they slowly loose the ability to maintain operating pressure. The hotter the fluid, the less viscous it is. This in turn lesses it's ability to lubricate and protect moving parts. As the solenoids wear, they cannot maintain proper pressure. As the fluid heats up, it compounds the pressure issue as the fluid is thinner. Keeping the fluid at a lower temperature and thus a higher viscosity, it helps negate those issues.
The larger core also allows the system to hold more fluid. Less dilution, more mass, and more ability to absorb and dissipate heat. Keeping the fluid out of the danger zone also allows the car and it's various systems to perform at an optimal level.
In addition, this is a full-divorced system meaning it no longer interfaces with the radiator and coolant. This not only lessens the burden on the radiator to remove heat but also eliminates a potential issue where the internal heat exchanger inside the radiator leaks and contaminates the transmission fluid with coolant. Bad things happen when that occurs.
A few more photos. The new lines which connect the OEM trans cooler lines to the thermostat
One last shot of the car with everything installed. Less visible than the OEM cover.
Lastly, I have logs if anyone is interested. Here's a quick graph showing the delta change between the OEM cooler and the new setup over the same stretch of road. It's really an effective mod for a completely stock car or one that's been modded. I have the JHM stage 2 currently so I'm producing more hp and torque than OEM. The performance is very consistent and the car feels incredibly strong even when it's 100 degrees out.
11-29-2019, 06:19 AM
#4
AudiWorld Member
11-29-2019, 10:55 AM
#7
When you're interested, let me know. You could drive up and I could install it for a small fee, bout 2.5 hours work. Also, I'm able to flash JHM's stage 2. I've flashed two Houston cars so far. The necessary cable is becoming available as we speak though so you'll be able to do it yourself.
The following users liked this post:
millersntx (11-29-2019)
Trending Topics
11-29-2019, 12:42 PM
#8
AudiWorld Member
When you're interested, let me know. You could drive up and I could install it for a small fee, bout 2.5 hours work. Also, I'm able to flash JHM's stage 2. I've flashed two Houston cars so far. The necessary cable is becoming available as we speak though so you'll be able to do it yourself.
11-29-2019, 07:20 PM
#9
Yes, daily driver. I've been sporting stage 2 for some time and I highly, highly recommend it. Completely transforms the RS5, even in daily driven situations in D mode. There have been a few who went straight from the OEM tune to stage 2 and they can't believe it's the same car.
There's a guy in Houston, Chris, who has a Suzuka with gold BBS wheels, I flashed him a month ago. Flashed another Ibis white from Houston last week. Zero worries about long-term reliability.
I just pulled my plugs after running the tune for some time and they were fine. No misfires, no pulled timing (except when it's 107 degrees out), all the safety features are left in place. The engine pulls harder everywhere in the rev range and the transmission is much smoother, buttery even. D mode is now usable and S mode is full-on beast mode. With the OEM tune, I was typically trapping 108 to 110mph. I'm now trapping 116 and several people have now gone 11.99 or faster.
11-30-2019, 08:44 AM
#10
AudiWorld Member
Yes, daily driver. I've been sporting stage 2 for some time and I highly, highly recommend it. Completely transforms the RS5, even in daily driven situations in D mode. There have been a few who went straight from the OEM tune to stage 2 and they can't believe it's the same car.
There's a guy in Houston, Chris, who has a Suzuka with gold BBS wheels, I flashed him a month ago. Flashed another Ibis white from Houston last week. Zero worries about long-term reliability.
I just pulled my plugs after running the tune for some time and they were fine. No misfires, no pulled timing (except when it's 107 degrees out), all the safety features are left in place. The engine pulls harder everywhere in the rev range and the transmission is much smoother, buttery even. D mode is now usable and S mode is full-on beast mode. With the OEM tune, I was typically trapping 108 to 110mph. I'm now trapping 116 and several people have now gone 11.99 or faster.
There's a guy in Houston, Chris, who has a Suzuka with gold BBS wheels, I flashed him a month ago. Flashed another Ibis white from Houston last week. Zero worries about long-term reliability.
I just pulled my plugs after running the tune for some time and they were fine. No misfires, no pulled timing (except when it's 107 degrees out), all the safety features are left in place. The engine pulls harder everywhere in the rev range and the transmission is much smoother, buttery even. D mode is now usable and S mode is full-on beast mode. With the OEM tune, I was typically trapping 108 to 110mph. I'm now trapping 116 and several people have now gone 11.99 or faster.