When you click on links to various merchants on this site and make a purchase, this can result in this site earning a commission. Affiliate programs and affiliations include, but are not limited to, the eBay Partner Network.
Dash speaker upgrade kits for B8/8.5 A4/S4, A5/S5/RS5 and Q5/SQ5
These kits fit all variants of the B8 and B8.5 A4, A5, and Q5 models UPDATE: PLUG AND PLAY DIY KITS FOR BOTH B&O AND NON-B&O DASH SPEAKERS ARE NOW AVAILABLE. KITS WILL BE AVAILABLE AS LONG AS DAYTON AUDIO IS STILL MAKING THE RS75-4 AND RS75-8 SPEAKERS. PLENTY OF KITS IN STOCK AND READY TO SHIP AS OF 12/06/2023.
Please note that I am currently offering just the DIY kits rather than the complete assembled kits. The cost differential is minimal as I basically charge what the speakers cost me from Parts-Express, but it's been difficult to keep them in stock without having to purchase a huge amount of speakers. The DIY kits include everything you need for the upgrade except the speakers. I will provide you with the product links for the speakers required for your particular kit so you can order them directly from Parts-Express. If you are outside of the U.S. I will provide you with links to the suppliers in your region. I will still offer complete kits upon request, but I will no longer be stocking the speakers in advance so expect a delay if you want a complete pre-assembled kit.
I am offering upgrade kits for the B8/8.5 A4/S4, A5/S5/RS5, and Q5/SQ5. Here are links to threads the discuss the speakers included in the kits:
These kits are used to replace the front dash speakers for both B&O and non-B&O systems as well as the rear deck speakers in the B&O system.
Here are links that show the vehicle compatibility. You can also remove one of the outer dash speakers and the center speaker and check the part number to make sure these will fit.
The non-B&O outer speaker part number is 8T0035399A
The non-B&O center speaker PN is 8T0035397
The B&O center speaker part number is 8T0035397A
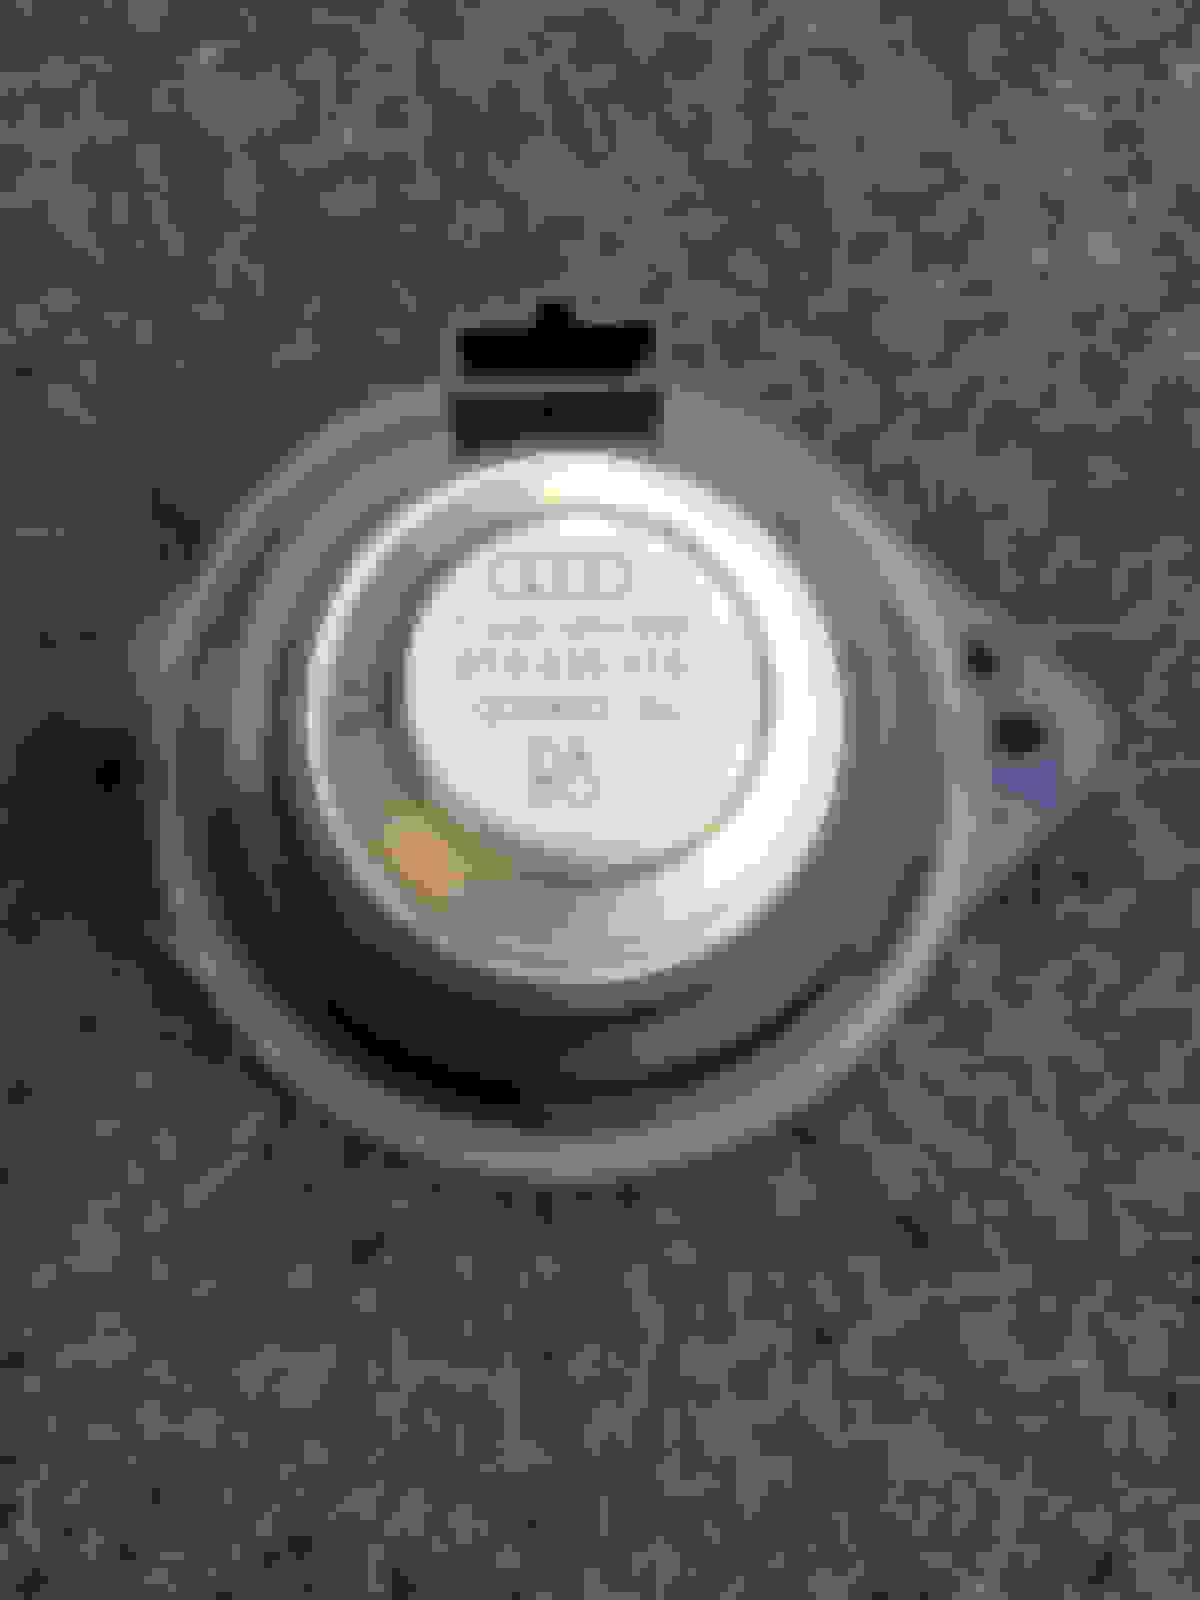
The B&O outer speaker part number is 8T0035416 The part numbers for the Q5/SQ5 speakers are identical except they begin with 8R0 instead of 8T0. The fitment is identical for all three types of vehicles.
If the part numbers for the speakers in your car are not an exact match to the ones listed above, please be aware that some part numbers may vary slightly between models and years, but the fitment for all B8/B8.5 models is the same so my kits will work in your vehicle. I have sold over 100 of these kits to customers all over the world and so far nobody has said they did not work in their Audi.
The kits are being offered in various configurations.
In stock and ready to ship:
NOTE - All DIY kits include the brackets, all mounting hardware, and wiring harnesses. You supply just the speakers. Everything else you need is included in the DIY kit and is easy to assemble.
1. Center speaker DIY kit (B&O and non-B&O)
2. Front outer speakers DIY kit (B&O and non-B&O)
3. Full front speakers DIY kit (B&O and non-B&O)
4. Rear deck speakers DIY kit (B&O only; same as front outer speaker DIY kit)
5. Full front and rear speakers DIY kit (B&O only)
6. Outer speakers bracket kit with all hardware (rear speaker brackets are the same as the front)
7. Center speaker bracket kit with all hardware
8. Complete front speakers bracket kit with all hardware
9. Complete front and rear speakers bracket kit with all hardware (B&O only)
10. Wiring harness with OEM connector on one end (with or without female spade lugs on the other end that mate with the speaker terminals; both B&O and non-B&O speakers; a 10 uf capacitor is installed for the two outer speakers on the non-B&O system only)
11. Full set of speaker bracket mounting hardware (for anyone that wants to 3D print their own brackets)
Special order kits (speakers have to be ordered so expect a delay):
1. Outer dash speaker kit - fully plug and play (both B&O and non-B&O systems)
2. Center dash speaker kit - fully plug and play (both B&O and non-B&O systems)
3. Complete dash speaker kit - fully plug and play (both B&O and non-B&O systems)
4. Rear deck speaker kit (B&O only)
5. Complete front and rear speaker kit (B&O only)
Pricing and further details are included in the documents at the end of this post. Prices are current as of 5-22-2022 per the Parts Express website.
Please note: I do not offer upgrades to the door speakers nor do I offer recommendations for speakers to use in the doors or the subwoofer. There are a multitude of options available for those locations as well as commercially available adapters for 6-1/2" speakers for the door woofers. I get asked these same questions all the time so I am posting this so I do not have to keep answering the same questions over and over again. If I had upgrades to these other speakers I would say so in this post or the price list.
I have recently discovered a source for the connectors used on the door midrange/woofers as well as the subwoofers. I have received a set of these to ensure proper fit and they mate with the 4E0 971 942 connectors used in the Audi factory wiring harness for the door woofers and subwoofer. They are available through AliExpress at the following link:
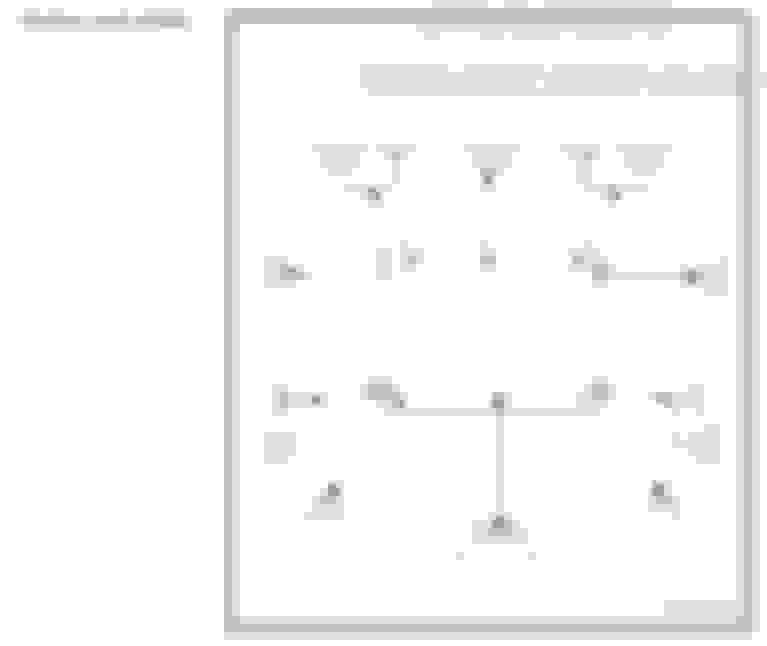
B&O systems - The three speakers across the dash as well as the rear deck are all mid-range speakers. Each of these speakers has a dedicated channel from the amplifier and the bandpass filters for each speaker is configured in the DSP so they do not require any external components to set these frequencies. The two outer speakers in the dash and the two speakers in the rear deck act as surround speakers for the 3D effect in the B&O system and are all identical. All of these speakers are 4 ohm speakers. Here's how the speakers are connected to the B&O amplifier:
Non-B&O systems - The non-B&O systems have either two tweeters mounted on the left and right side of the dash along with a center midrange speaker or they just have the two tweeters at the left and right with no center speaker. The tweeters in the dash share the same amplifier output as the mid-bass speakers in the doors so they have a capacitor connected to act as a high pass filter that only provides frequencies above 2 kHz to the tweeters. The center mid-range speaker is powered by a dedicated amplifier channel and a bandpass filter is configured in the Digital Signal Processor for this speaker. The two tweeters are 8-ohm speakers whereas the center speaker is 4 ohms. The amplifier configuration is essentially the same as shown above except channels 1, 5, 7, and 9 are not part of the basic Audi sound system. Those channels and extra speakers are used for surround effects in the B&O system only.
Feel free to send me a PM with any questions, but if you think it may be of interest to others please post your questions here.Here�s a link to a YouTube video showing how to install the speakers in the dash:
Here is a pic of the non-B&O system OEM dash speakers:
Here is a pic of the B&O outer dash OEM speaker:
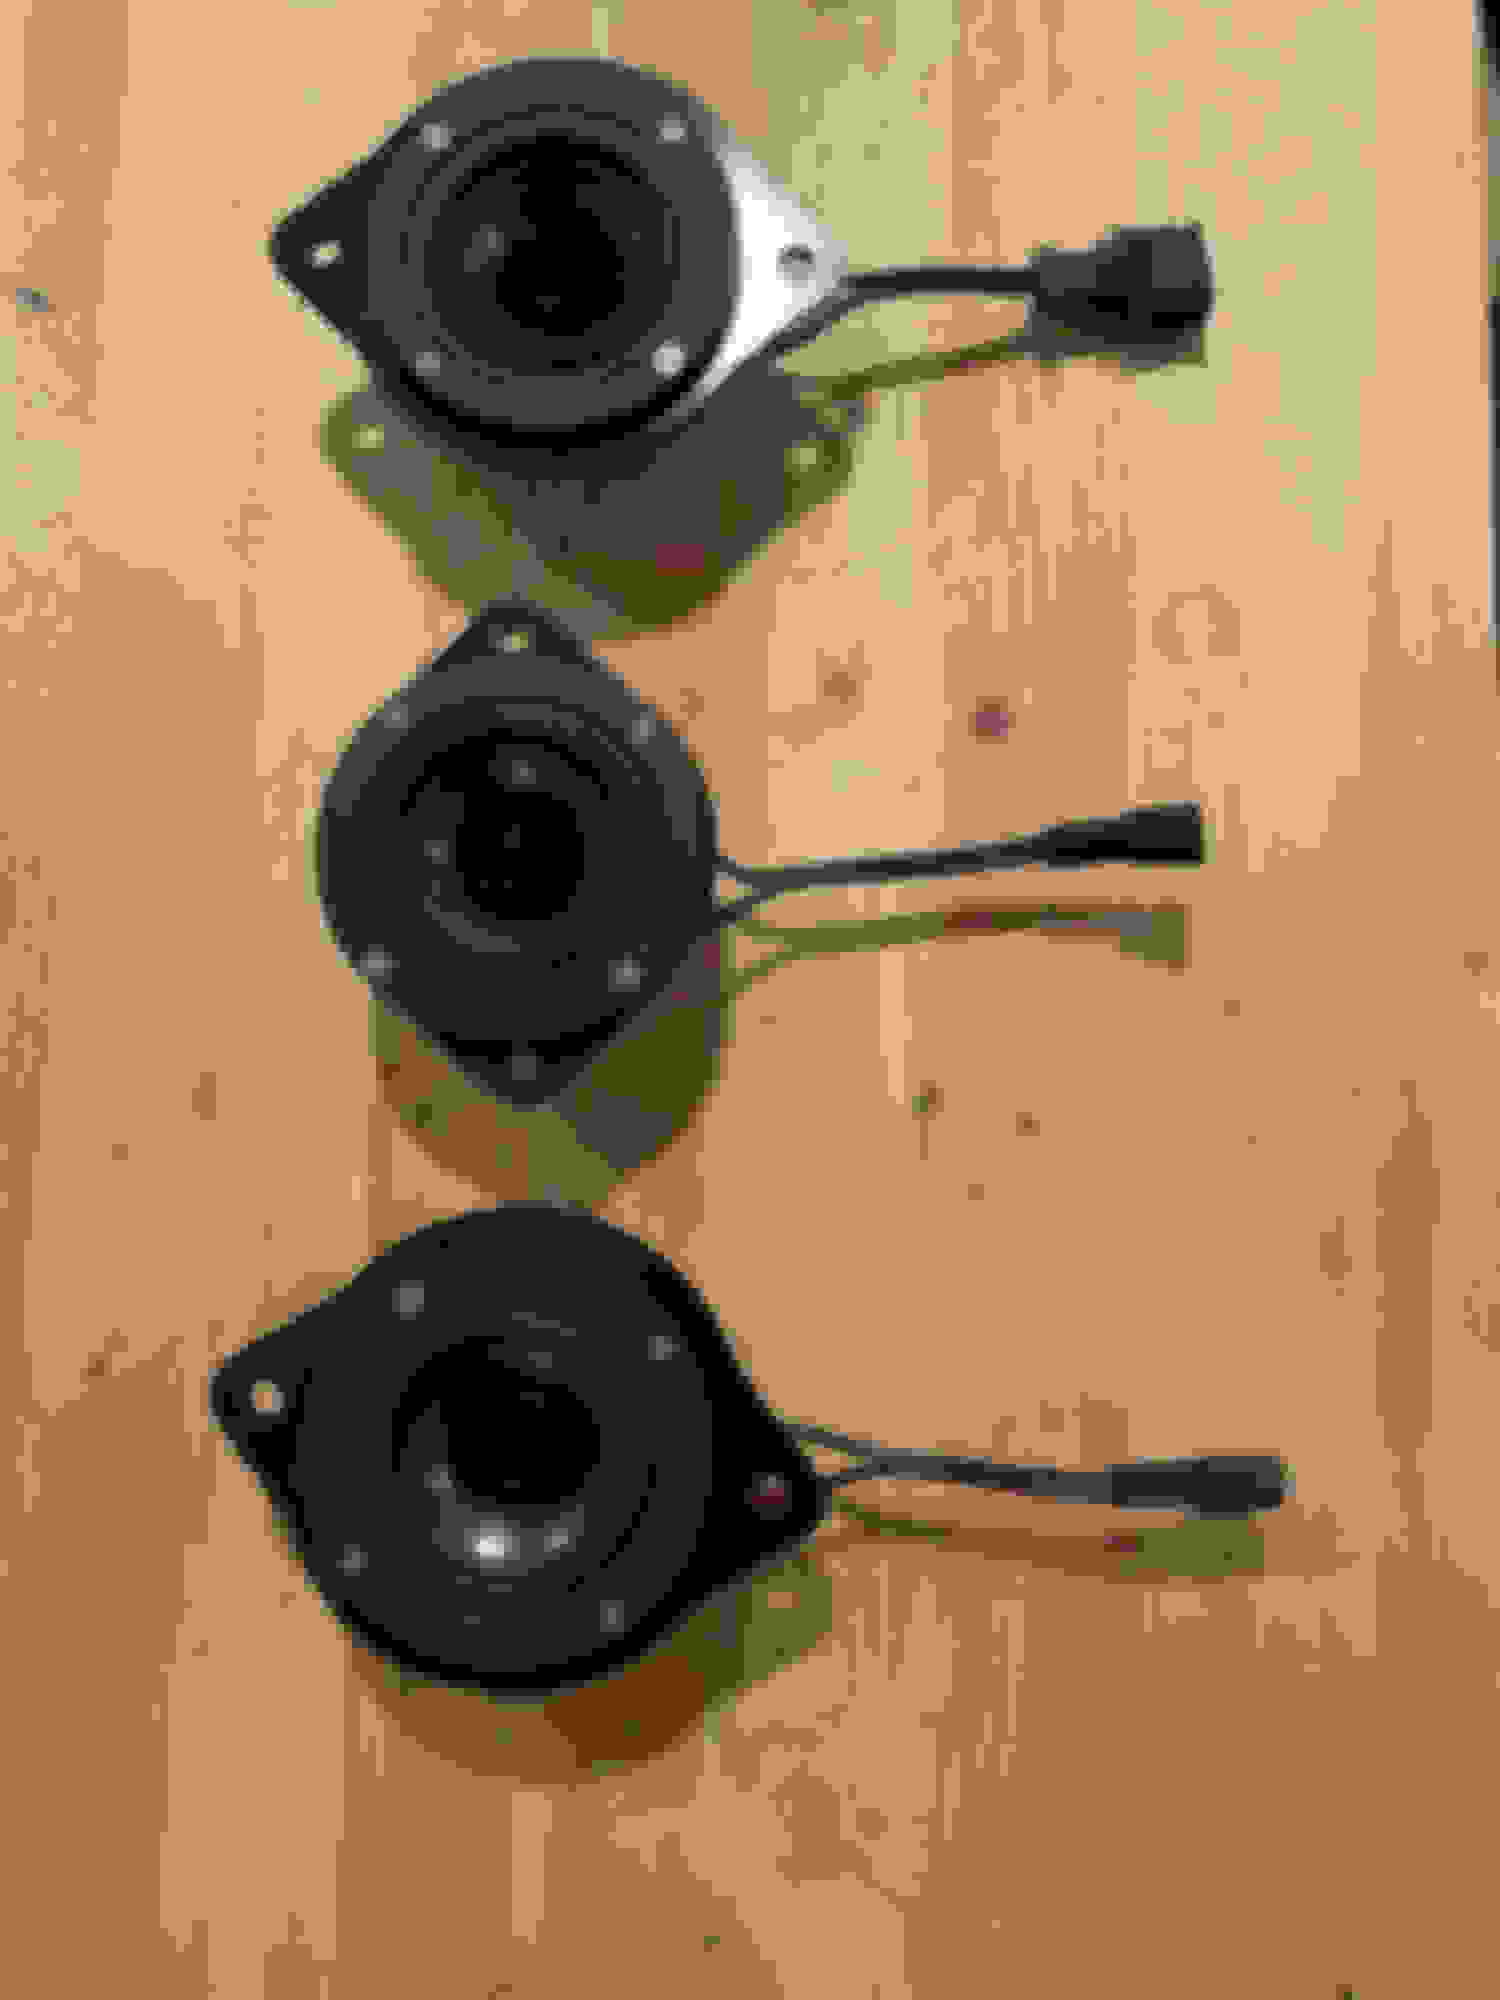
Here are the different configurations of the speakers used in the B8 and B8.5 Audis and are presented just to illustrate what they final product will look like once you've assembled the speakers with the DIY kits I provide. The speaker on the top is the replacement for the front dash outer speakers and the rear deck speakers for the B&O system. The speaker in the middle is the center channel dashboard speaker for both B&O and non-B&O systems. The speaker at the bottom of the photo is for the outer dash speakers for the non-B&O systems. Please note that the photos show the older wire harnesses. The updated wire harnesses are shown in a separate photo later in this thread.
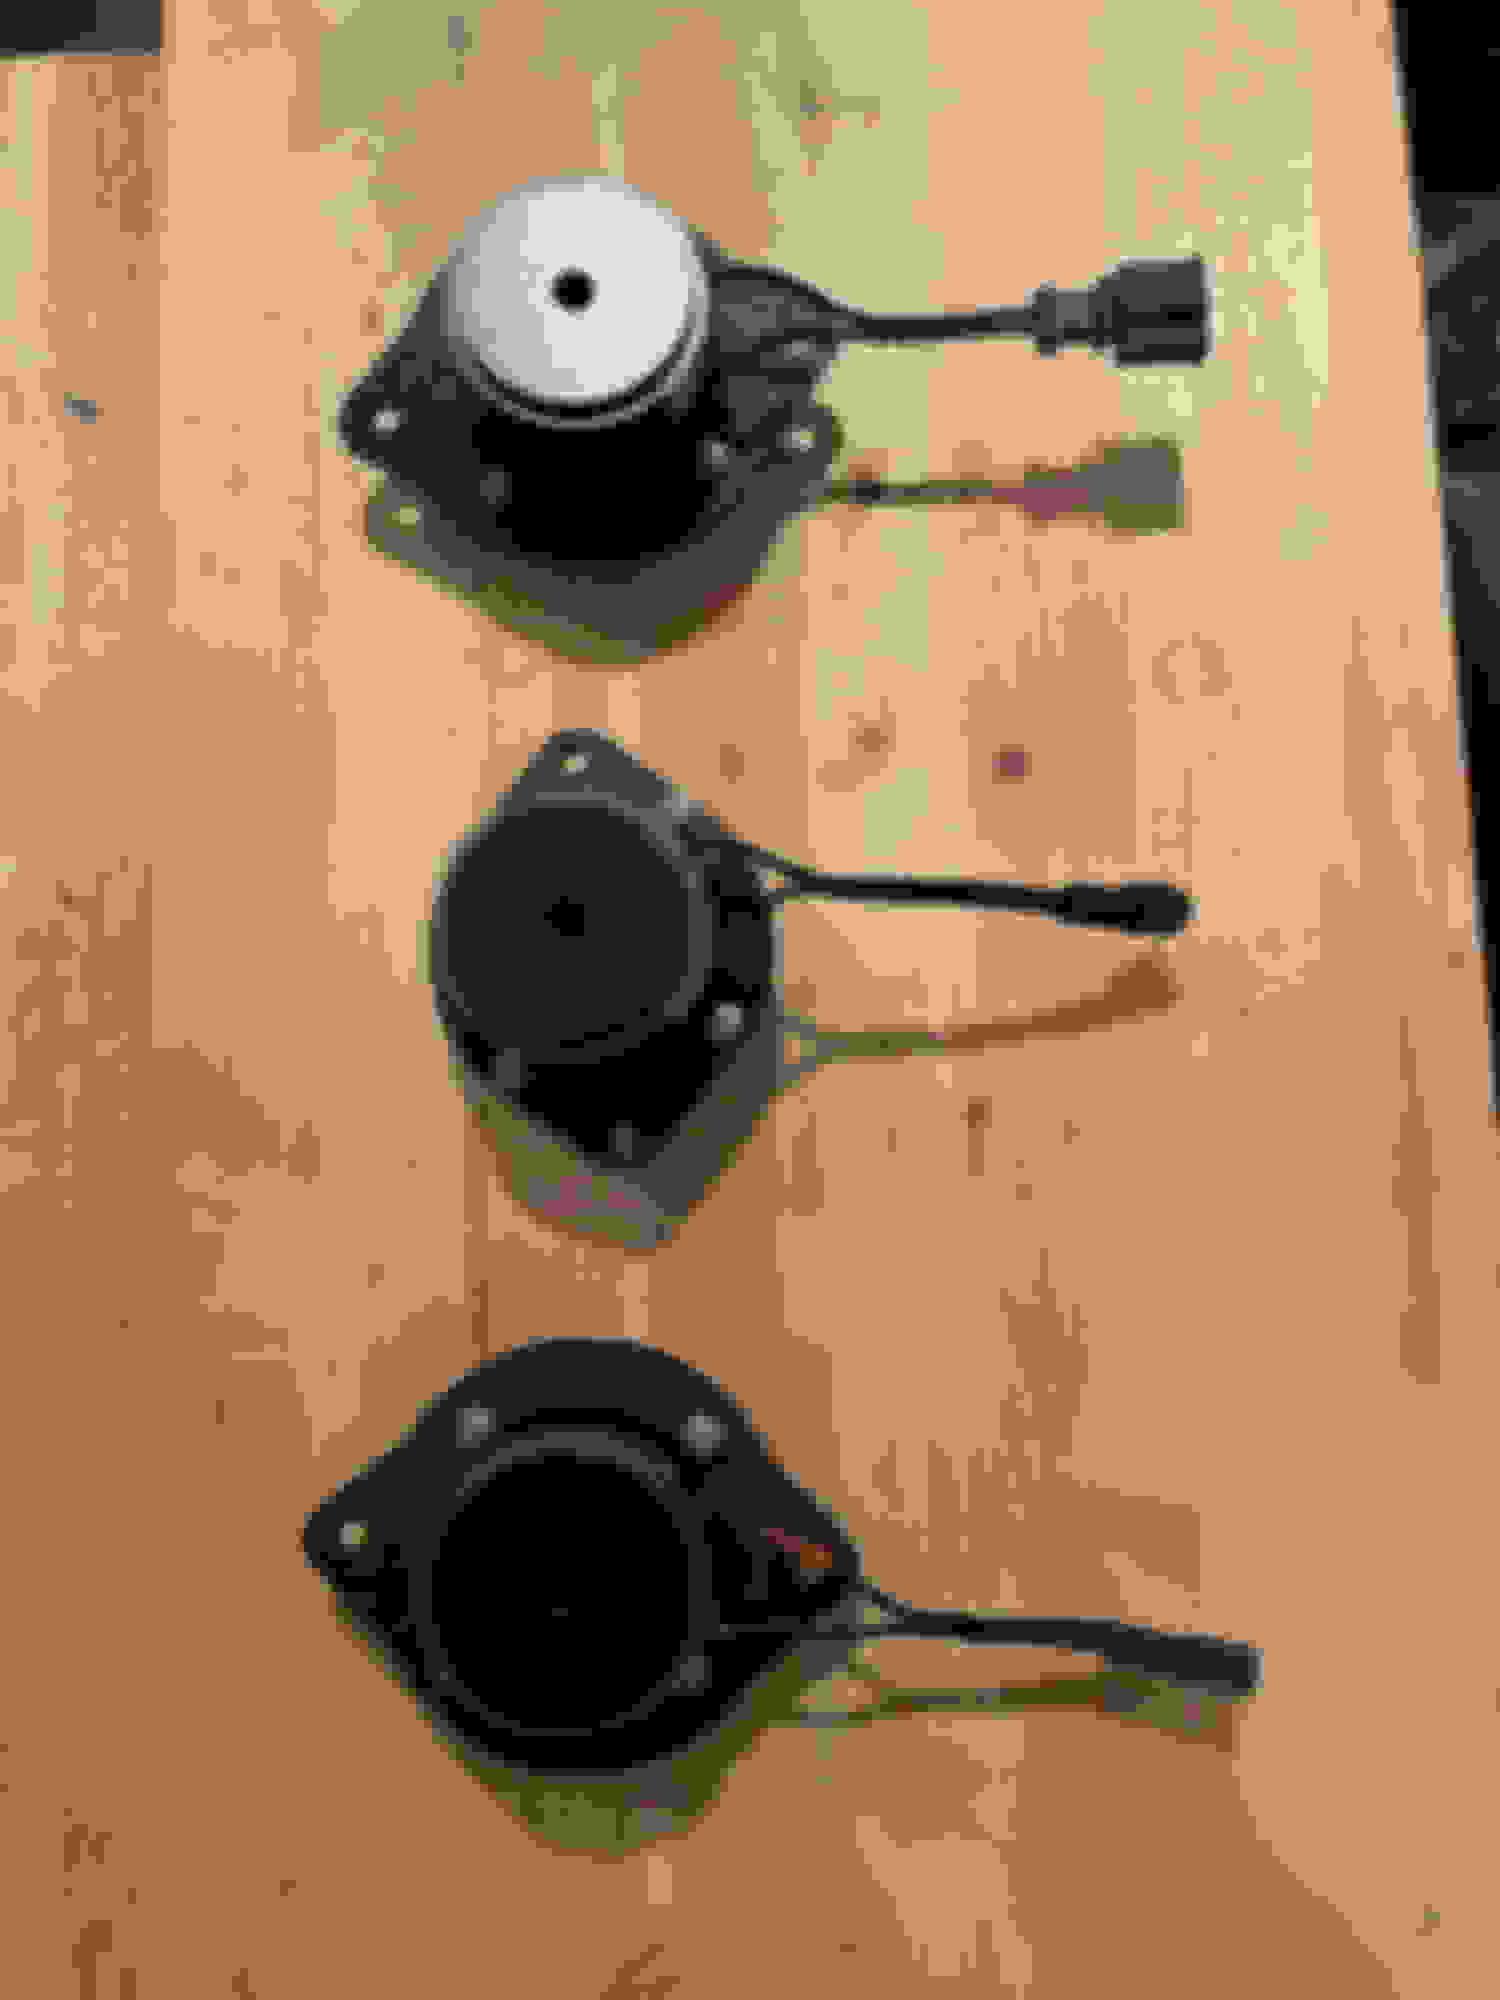
This is the bottom view of the same speakers shown above. Note that the capacitor on the speaker shown in the bottom of the photo for the outer dash non-B&O speaker upgrade is no longer preassembled to the wiring harness but is supplied with spade terminals so you can see if you prefer the sound with or without the capacitor.
Here are the front bracket kits with all hardware shown. The rear deck bracket kits for the B&O speakers are the same as just the two front outer brackets. The center speaker uses two brackets as the cup where the speaker sits in the dash is too shallow to allow the speaker to sit flush against the dash due to the size of the magnet. The double brackets provide more rigidity so the bracket does not flex too much when tightening the mounting screws to the dash. The brackets are actually raised about the opening to allow proper clearance for the magnet. The longer screws used for the center speaker brackets act as standoffs to raise it above the opening, but not high enough to where it prevents the grill cover from sitting flush when reinstalled. Please note that the hardware included with the kits may differ slightly as I have been using a different vendor and some of the hardware may be stainless steel instead of the zinc-plated steel shown in the photos.
Please note that all brackets come pre-drilled for the mounting hardware so all you need to do is position the speakers on the brackets and install the screws, washers, lock washers, and nuts.
Here are the two types of updated wiring harnesses currently being offered. They both come with expandable sleeving so the two wires stay bundled together and the ends of the sleeves are terminated with heat shrink tubing to prevent them from unraveling. All wiring harnesses in the DIY kits have female spade lugs connected so they can be plugged directly onto the speaker terminals. Note that the spade lugs are different sizes so they can only attach in one configuration to ensure the correct polarity. The current wire harnesses I offer have insulated sleeves for the spade lugs instead of the red heat shrink tubing on the terminal but are otherwise identical to the harnesses shown. Wire colors may vary but the connectors are oriented to make sure they can only be connected one way to ensure the correct polarity. The wire harness on the left fits all dash speakers in the non-B&O configuration as well as the center dash in the B&O setup. These will also work for the door tweeters in both the B&O (front A-pillar and rear door) and non-B&O (rear door). The wire harness shown on the right fits the B&O front dash outer and rear deck speakers. Also shown are four different bags of hardware that are included with each kit. The top left bag is a set of one each of the various types of hardware included as spares. The bottom left bag with the two black screws is for the center dash speaker. The top right bag contains two 10 uF capacitors that can be installed with the two outer dash speakers in the non-B&O system. The lower right bag contains hardware for the front outer dash or rear deck speakers (B&O only).
Please contact me at captain.video99@gmail.com for pricing information. Indicate whether you are in the continental United States or some other country. If outside the U.S. you will need to provide your complete mailing address and a daytime phone number to be included on the shipping bill. Note that some countries require customs duties to be prepaid so I will include that in the quote where applicable.
INTERNATIONAL SHIPPING: I do ship anywhere in the world as long as I can create a shipping label using either Stamps.com or the USPS website. I may contact you for clarification about your address as the form I need to fill out is standardized but worldwide address formats differ all over the world.
***Fees include what is charged by PayPal for the transaction. PayPal charges fees for the total transaction cost, including shipping and sales tax. I will include all fees when calculating shipping costs.
Payment Method and International Shipping Info
My PayPal account is mr.unnatural@verizon.net Please include your name, shipping address, email address, the items you are ordering, and your forum user name and the forum where you saw the listing, as applicable, when you process the payment. Otherwise, just send me an email notifying me of what you are ordering. The forum user name allows me to correlate any emails with private messages sent via the forum. Please use captain.video99@gmail.com for all correspondence if you have any questions.
If you are requesting a quote for international shipping, please provide your complete name and address as well as a daytime phone number. This is a requirement for the shipping label in order to process the quote.
NOTE: ASSEMBLY INSTRUCTIONS FOR MOUNTING THE SPEAKERS TO THE BRACKETS AND ATTACHING THE WIRE HARNESSES TO THE SPEAKERS ARE PROVIDED IN POST #50 OF THIS THREAD.
Each complete kit, once assembled using the supplied brackets and wire harnesses, is literally plug and play. Remove the grill covers from the dash at each location. Remove two Torx screws securing each speaker flange. A right-angle screwdriver like the one in the link below make the job a lot easier since there is little room to work with right below the windshield.
Lift the speaker out of the opening and disconnect the wiring harness from the speaker connector. Attach the new speaker to the factory harness and position it in the dash opening. Secure the center speaker using the provided screws. Secure the outer speakers using the OEM screws. Snap the grill covers back in place and you're good to go.
Installation tip for outer dash speakers
The opening doesn�t allow you to simply drop the speaker into position. The overhang in the dash gets in the way and the speaker magnet prevents the speaker from just dropping into the opening. Connect the speaker wire harness to the factory wire harness connector. Position the speaker vertically over the opening with the speaker cone facing towards you and rotate it towards the windshield so that the speaker slips under the dash overhang and sits in the opening.
I am trying to keep several DIY kits in stock ready to ship. I will configure them with the appropriate wiring harnesses when I receive an order and get them shipped out within 24 hours after receipt of payment. Most of the time I can get them shipped the same day. Just order the DIY kits from me you can order the speakers from Parts Express or one of their worldwide distributors and assemble everything yourself. I will provide you with the product links on their website for ordering. If outside of the U.S. I will provide a link to their worldwide distributors.
PLEASE NOTE THAT I AM NOT THE AUTHOR OF ANY VIDEOS LINKED TO YOUTUBE ON THIS PAGE!
Here�s a link to a YouTube video showing how to install the speakers in the dash:
Someone asked me in another thread about how difficult it was to remove and install the speakers so I took some pics and put together some instructions for completing the task.
The two outer grill covers can be lifted up using a pick tool like the one shown in the first photo. You can also use a thin blade screwdriver or anything with a small tip that can get under the edge of the grill cover. Slide the pick too along the edge to release the clips. Unclip the edge facing you as well as the two sides, lift the front of the cover so the clips on each side are clear of the dash opening and the pull the cover towards you to release the rear clips.
The center grill cover can be lifted up with the pick tool to release the clips. I started at the left edge and then worked my way along to release all of the clips. The grill covers are fairly thin so be careful when removing them. All three speakers are held in place by two Torx screws securing the tabs at each end of the speaker. The outer speakers can be a little tricky, but you can lift up the rear edge of the speaker and rotate it upwards towards you to get it clear of the dash overhang as shown in the photo. Thee wires don't provide much slack so it can be a little tricky releasing the tab on the speaker connector. I used a pair of forceps to clamp the wire so that it doesn't fall back into the dash. The center speaker has much more slack than the outer speakers and it's also less likely to fall through the opening in the speaker enclosure/cup. I used a small
with individual bits from Amazon to remove and install the screws. It has the right size Torx bit for the factory screws as well as a Philips bit for installing the new screws for the center speaker supplied in the kit.
Sorry for the photo layout. Everything got rotated 90 degrees counterclockwise for some reason. The speakers in the photos are the new Dayton Audio speakers.
Installation is basically the reverse of removal. Position the outer grill covers and push them gently towards the windshield to engage the rear clips and then just press it down gently to engage the clips along the side and the front. Position the center grill cover over the dash opening and gently press it back into place.
Last edited by captain_video; 08-09-2020 at 10:34 AM.
The 10 uf capacitor works as a high pass filter at around 2kHz so it blends more seamlessly with the door speakers. If you look at the stock speakers they have 10 uf capacitors connected to the positive speaker terminal.
Last edited by captain_video; 01-22-2023 at 08:41 AM.
You might also want to also reconsider the 10uf capacitor. That 10uf capacitor was fine for the OEM tweeter,. You are replacing it with a full range, but are still using it as a tweeter. Instead you could lower the crossover point and use it as a mid-tweeter. Doing that will allow you to raise the sound stage and bring the mids up to the dashboard where they belong. Try it, you will be amazed at the difference it makes. Your customers will be happier with the results too.
You might also want to check if the B&O system uses those end dash positions for something else instead of the normal highs. Because the B&O often uses the same speaker positions but for purposes like 3D and surround sound and if you enhance those using the superb Dayton Audio drivers that you are using, it might drive people nuts.
I didn't come up with the 10 uf value on my own. This was determined by others over at the Audizine forums that have tested these speakers in their Audi systems and it seems to blend in well using this value capacitor. Some have tried using the center speaker without the capacitor and the results were not as good. It sounded much better after installing the capacitor. I have a set in my car that replaced all three dash speakers and it sounds much better than the stock speakers. You are correct in that I am basically running these as tweeters in all three locations but I haven't noticed any loss of midrange as a result. I can only assume that the stock center speaker just didn't do much for adding any midrange balance and the door speakers did most of the heavy lifting in that frequency range. Maybe when I have some time to play around with it I'll experiment with other values to lower the crossover frequency and see how that works.
Many people with B&O systems have replaced their dash speakers with the Daytons and are quite pleased with the results. I do not have a B&O system in my Audi so I can't test your theory, but so far I haven't gotten any complaints about the way the Daytons sound with this setup. What's really got me baffled is that the majority of people that have purchased these kits from me all have B&O systems. I would have expected more people with the basic Audi Concert system would be more likely to want this upgrade.
Thanks for the feedback. I always appreciate any comments and suggestions.
I misspoke about using the speakers as tweeters in each location. The outer speakers in the dash for the OEM system are midrange speakers and have the 10 uf capacitor included. I assume the speakers must naturally roll off at a specific frequency to blend with the tweeter in the center of the dash which does not use a capacitor. The Daytons are used to cover all frequencies above 4 kHZ so they are both midrange/tweeters and do a much better job handling these frequencies than the stock speakers.
Last edited by captain_video; 08-21-2020 at 06:20 PM.
I have been able to source the connectors for the outer dash B&O speakers so that I can provide plug and play kits for both B&O and non-B&O systems. I have tested them for fitment with the B&O speakers I am now able to provide complete kits that require absolutely no modification to the factory wiring.
Last edited by captain_video; 09-18-2020 at 04:57 PM.
I have a 2010 b8 a5 non-b&O. If i order the complete set is that all I need? Just plug and play? Does it add more to the bass, mids, or lows? Do i have to take off the battery before I mess with it?
I have a 2010 b8 a5 non-b&O. If i order the complete set is that all I need? Just plug and play? Does it add more to the bass, mids, or lows? Do i have to take off the battery before I mess with it?
The set is completely plug and play. Remove the grilles, remove the mounting screws, disconnect the speakers and swap them out. These speakers replace the two midrange drivers at the left and right of the dash and the tweeter in the center. The 10 uf capacitor acts as a high pass filter so they reproduce all frequencies above 4 kHz. You don't have to touch the battery to replace the speakers.

 08-09-2020, 04:30 AM