Undertail is installed!! Pics!!
 08-10-2008, 09:39 PM
#1
AudiWorld Super User
Thread Starter

Join Date: Jan 2006
Posts: 6,072
Likes: 0
Received 0 Likes
on
0 Posts
so I took my time and did everything needed to get this undertail to work.
it comes with instructions and pictures. I used them and went my own route from there.
the wiring can mess you up. the ground wire is for the brake/parking light only. I tested out the brake light wires to make sure i had it right. You owuld think the black wire is ground on the rc51 but it isnt. just check out the pics.
You only use one wire for the left and right signal and it may cause you to think you use a return wire but you dont.
so heres some pics!!
first i took the rear tail off
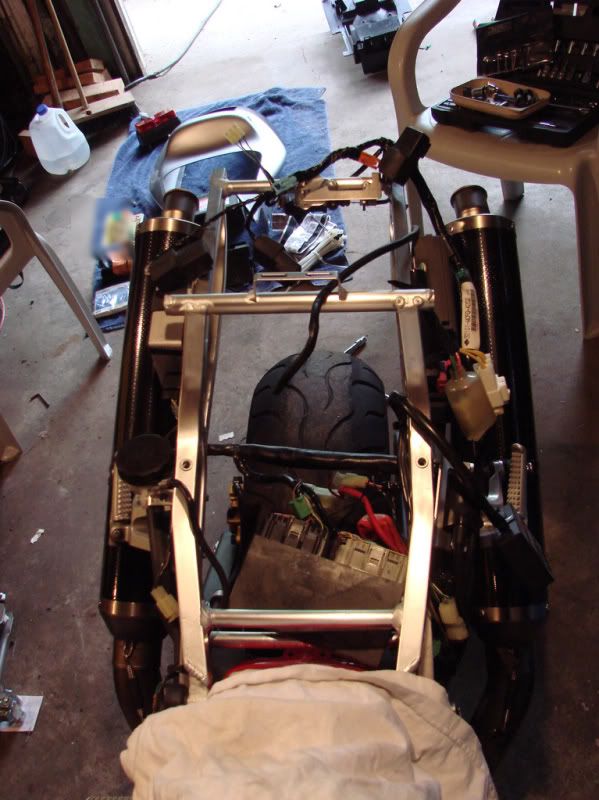
then i took the undertailout and took off al the wires that held ontot he undertail. battery was taken out.
all the rubber electrical components sat on the subframe waiting for the modified one
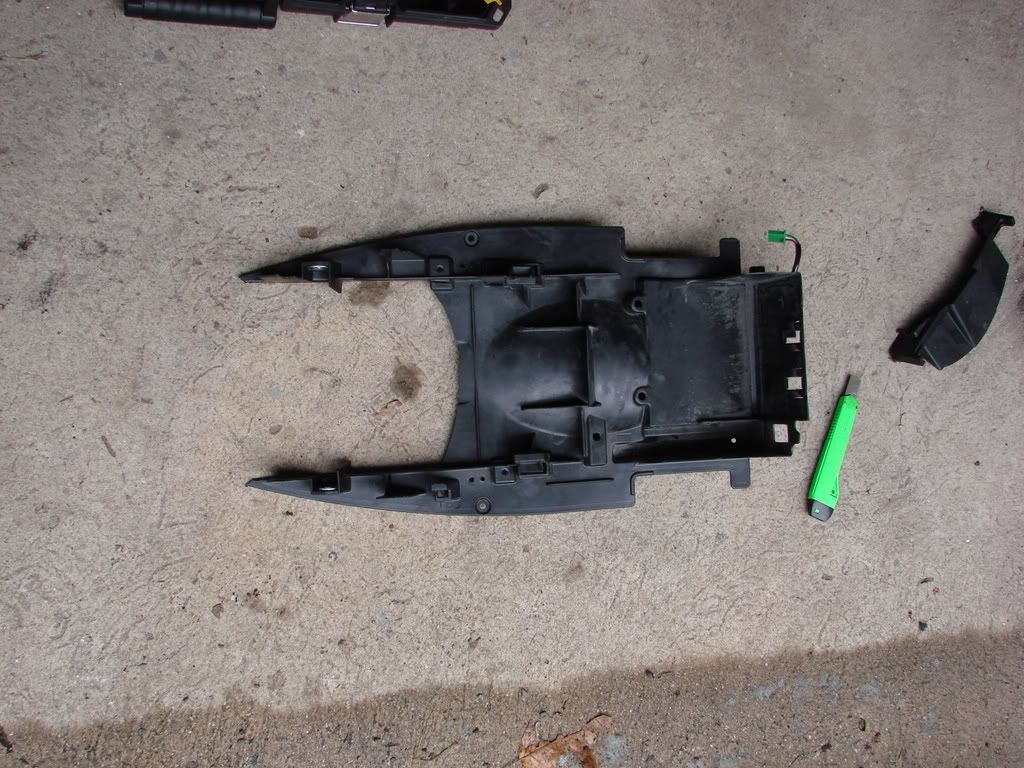
here is the modified undertail, I used a pair of sheetmetal shears to start off some cuts, as well as a 1/4" drill bit so I could fit the shears in to cut away.
I actually used a cordless saw zaw to cut the thick piece of plastic out fromt he underside of the OEM undertail(see pic below)
once there was enough room i used a razor blade and cut it like butter!
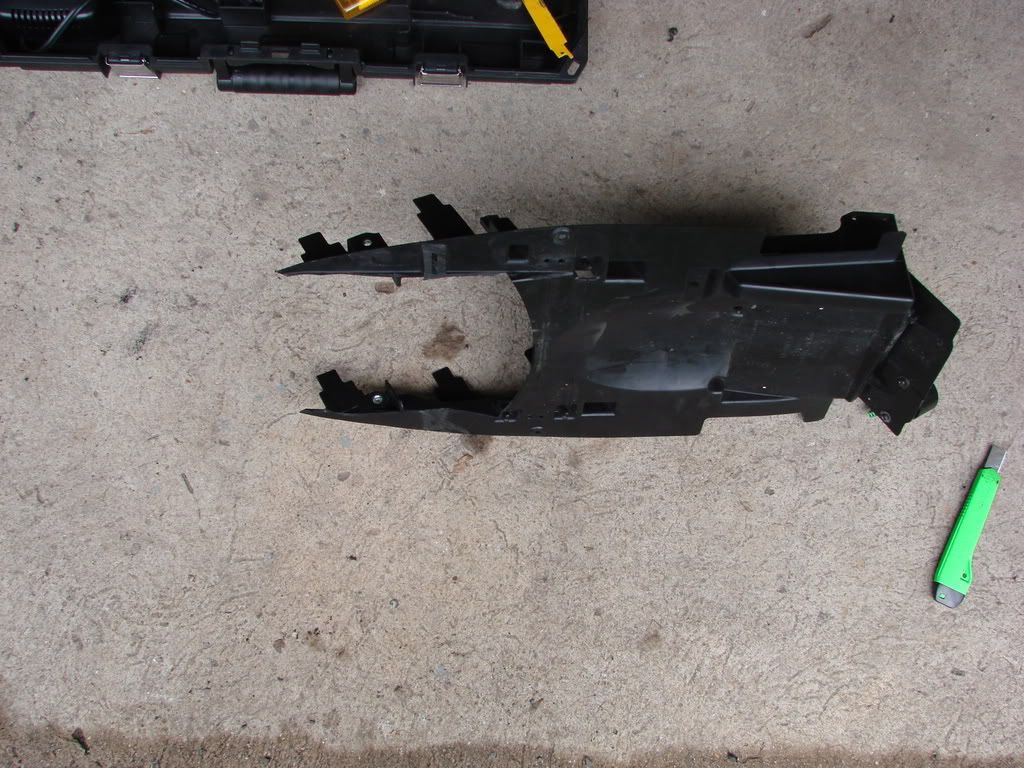
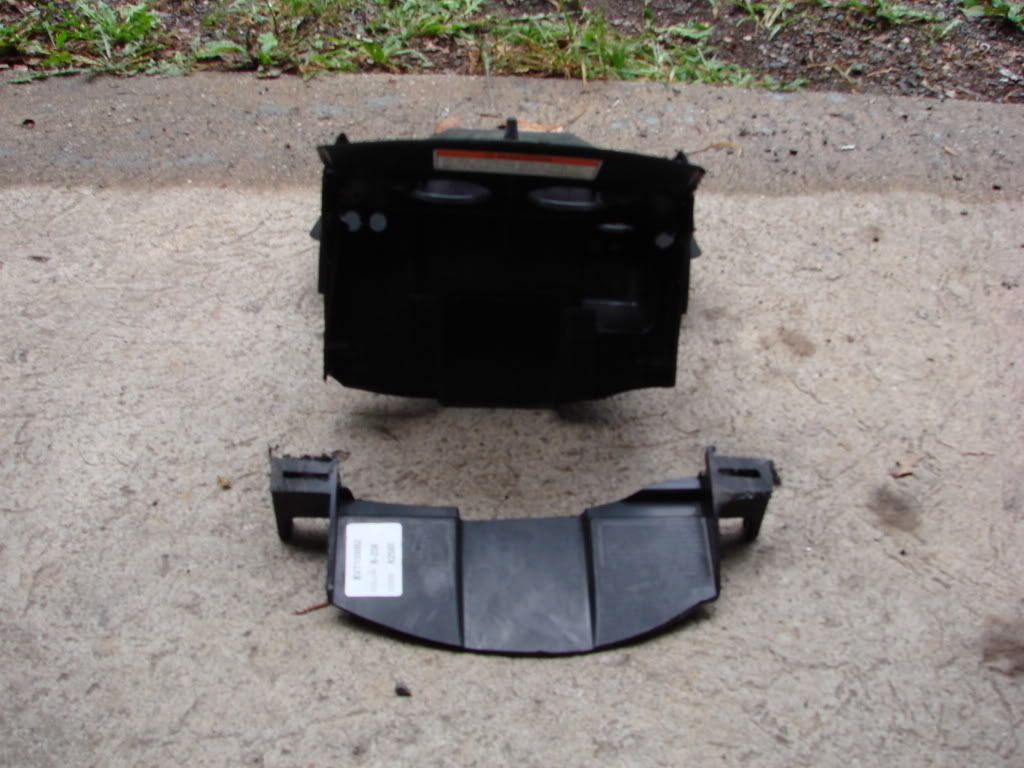
here is what remained
Here is the modifed oem plastic bolted up to the NEW undertail. I ha tons of OEM mtoorcycle bolts so I bolted together the oem piece with the aftermarket undertail. to make it sturdy. However I had to remove the locknuts and bolts form the middle portion of the undertail. since the tail section has a bolt up area there.
here is the undertail installed and the correct wiring I used the stock connectors for the signals and electrical taped it all up nice and neat.
all taped up
ready to install the tail
INSTALLED!! WOOO!!

Couple things.
The bolts I took out in the midsection could not be reinstalled due to all the electronics on the left and right side of the sub frame. ALSO The Nuts and bolts I used near the battery section of the undertail had to be LOOSENED, the tail section was covering the round part of the undertail by about 2mm because the bolts in the front made the undertail TOO CLOSE for the round area to be seen completely. Once i loosened up the oem plastic and undertail by the battery It moved the undertail ebough to fit perfect. If you decide to bolt the front part of the undertail together make sure you make the holes elongated so you can move the sections a couple milimeters something I didnt do but I got lucky.
I tired to use the OEM type anchors but there were just not long enough.
So I ended up using some sheetrock anchors to push through the tail section holes and through the undertail holes as well. I actually had to shave the anchors with a razor so there was no out of roundness I then used a NIce aluminum philps head machine screw to screw through both pieces. The idea here is when the bolt goes through the anchor it will open up the plastic anchor and hold it together.
here are the lights. they are REALLY BRIGHT im very happy with this setup!!

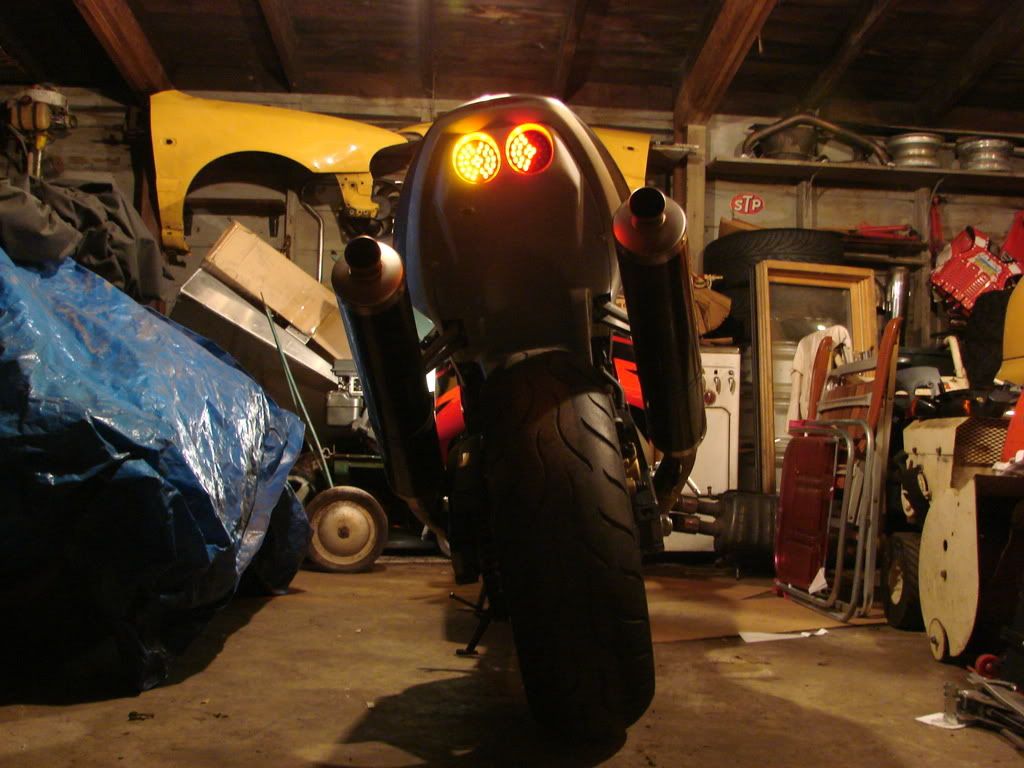
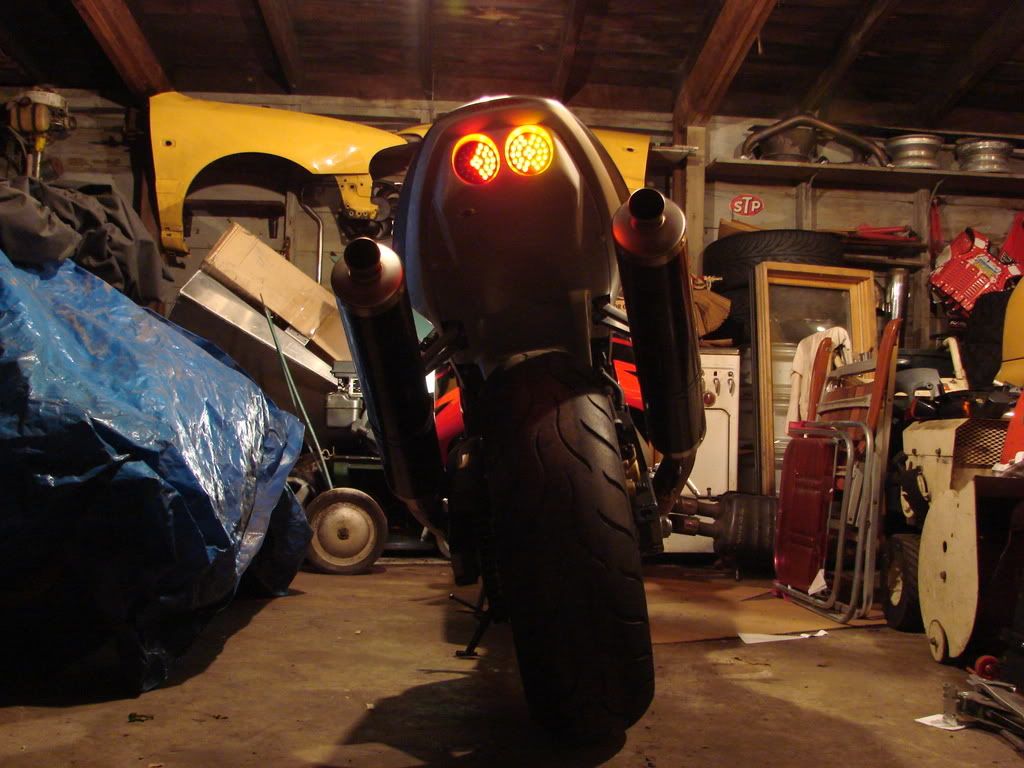
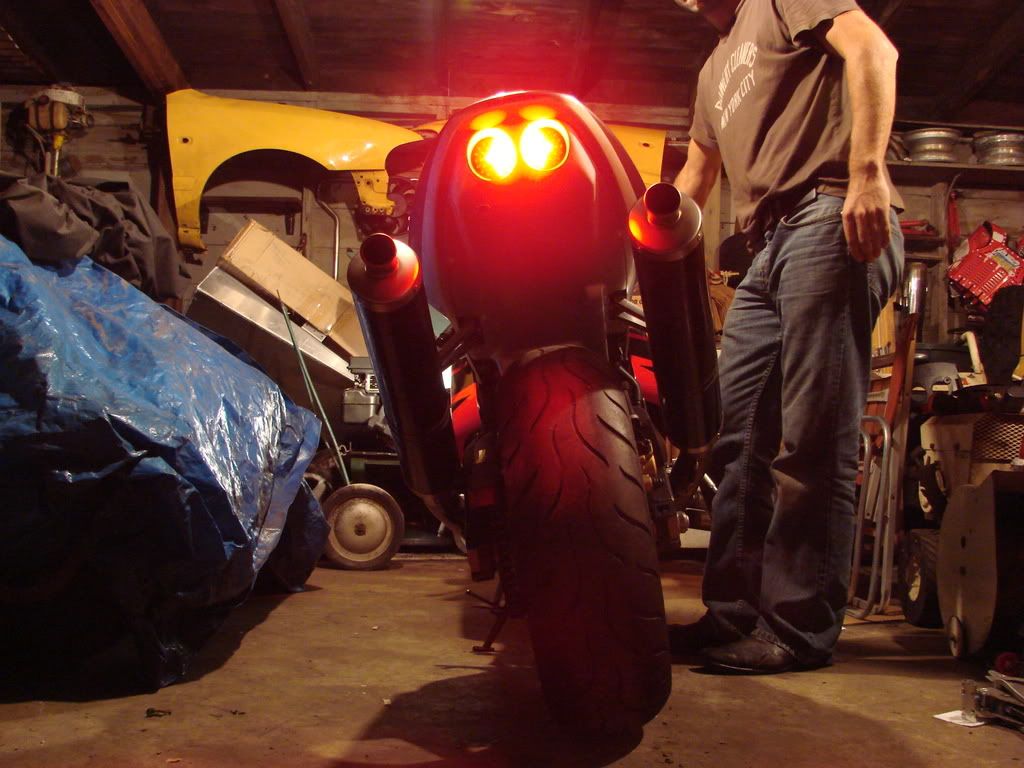
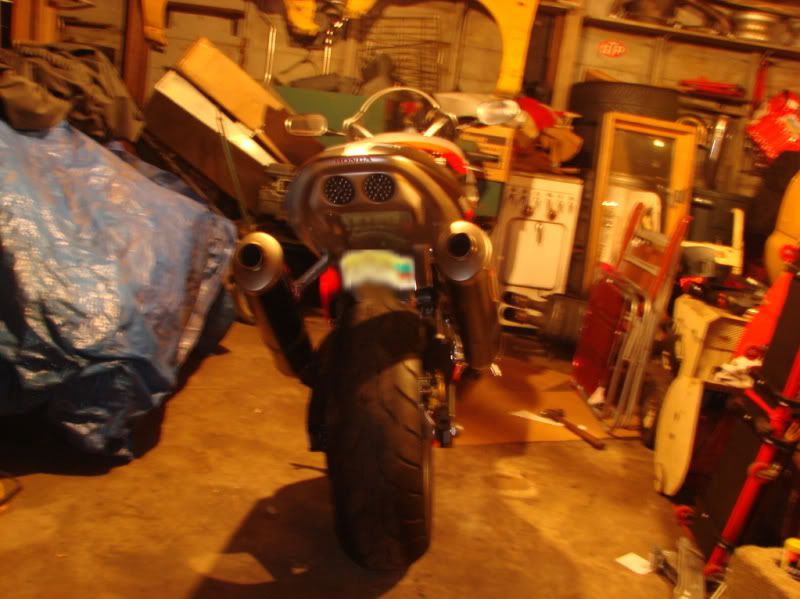
then I mounted the plate. the undertail came with a carbon fiber lisc bracket but I didnt want to ruin the undertail with a plate right in back of the lock area so i didnt use is and just bolted it up near the front of the undertail. Hope i dont get tickets for this.


<a href="http://s35.photobucket.com/albums/d194/beerock69/me%20pics/rc51/?action=view¤t=DSC03933.jpg" target="_blank"><img src="http://i35.photobucket.com/albums/d194/beerock69/me%20pics/rc51/DSC03933.jpg" border="0" alt="Photobucket"></a>
it comes with instructions and pictures. I used them and went my own route from there.
the wiring can mess you up. the ground wire is for the brake/parking light only. I tested out the brake light wires to make sure i had it right. You owuld think the black wire is ground on the rc51 but it isnt. just check out the pics.
You only use one wire for the left and right signal and it may cause you to think you use a return wire but you dont.
so heres some pics!!
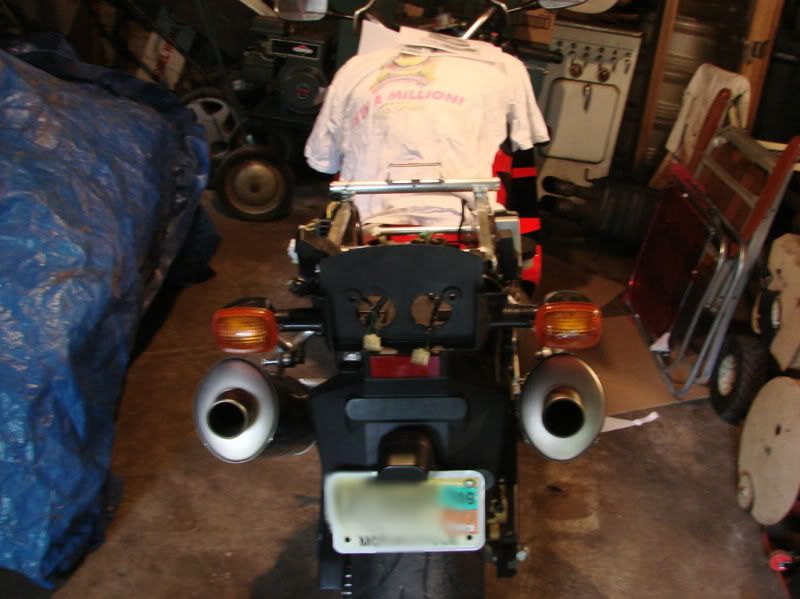
first i took the rear tail off
then i took the undertailout and took off al the wires that held ontot he undertail. battery was taken out.
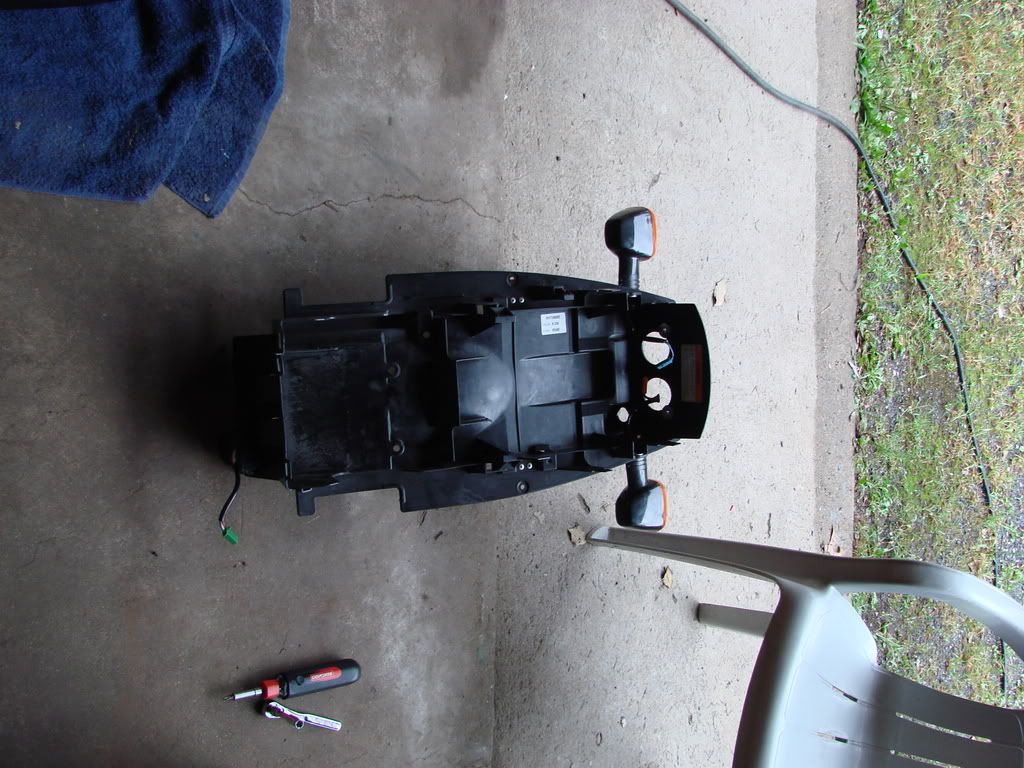
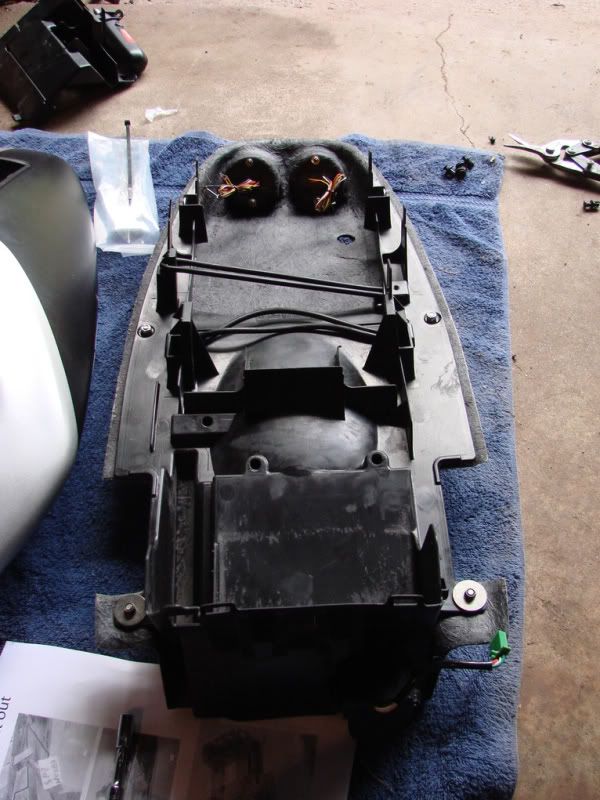
all the rubber electrical components sat on the subframe waiting for the modified one
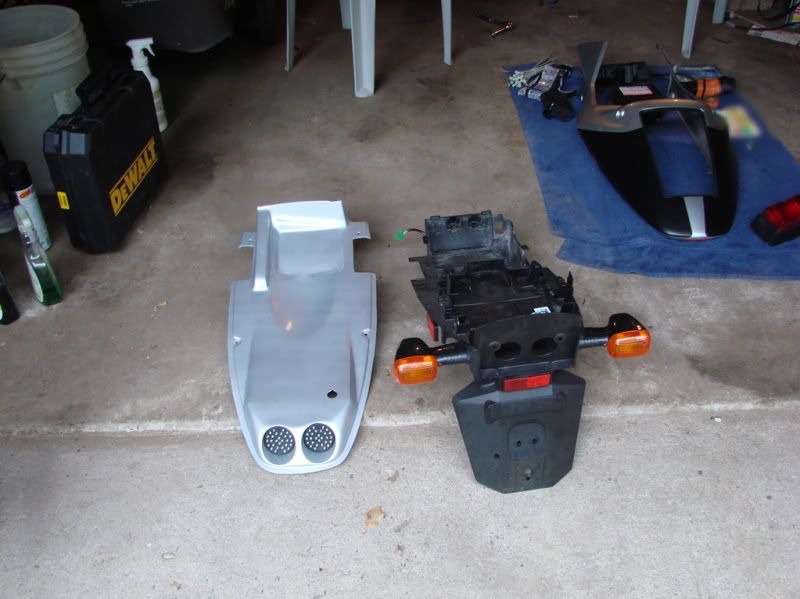
here is the modified undertail, I used a pair of sheetmetal shears to start off some cuts, as well as a 1/4" drill bit so I could fit the shears in to cut away.
I actually used a cordless saw zaw to cut the thick piece of plastic out fromt he underside of the OEM undertail(see pic below)
once there was enough room i used a razor blade and cut it like butter!
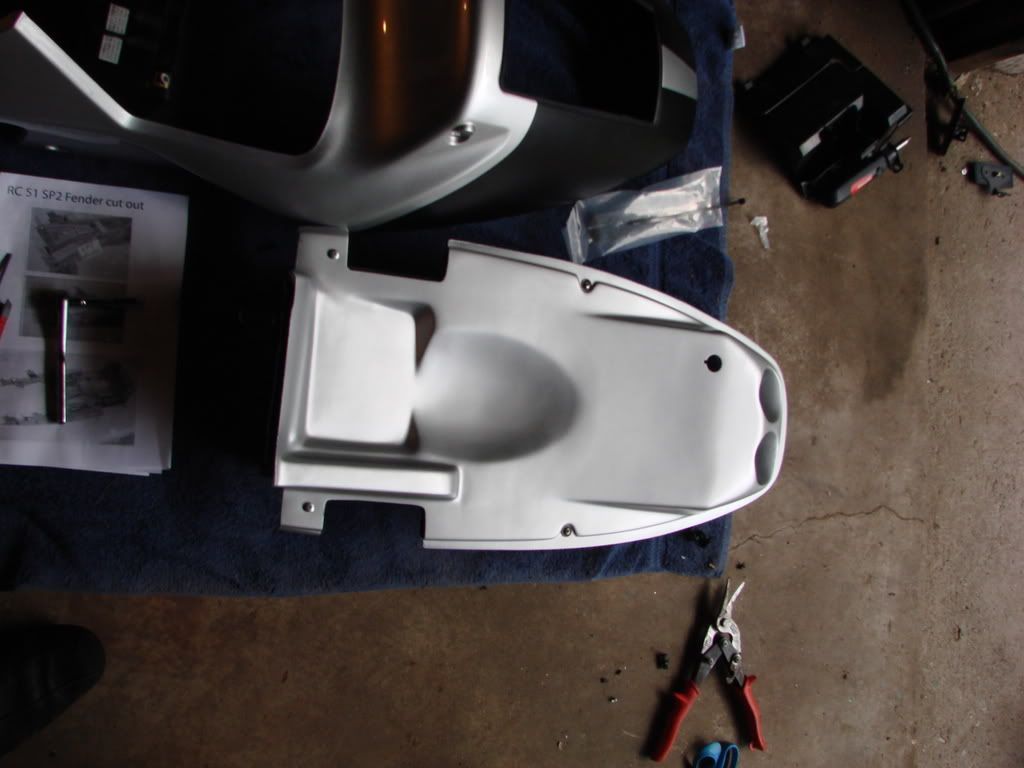
here is what remained
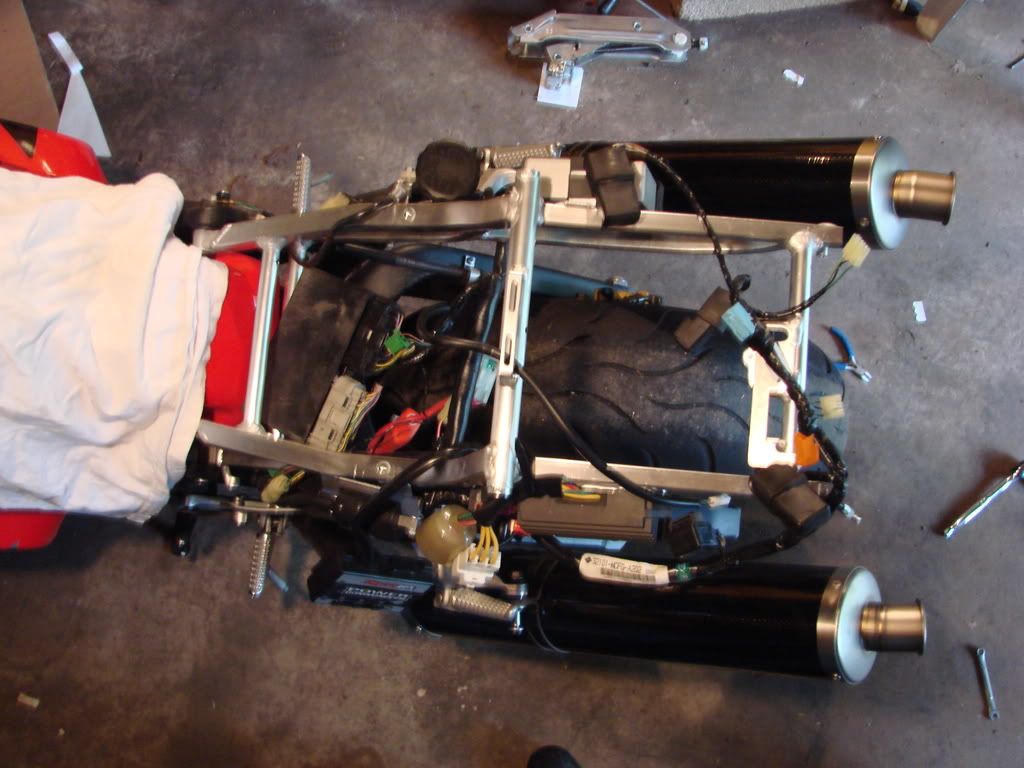
Here is the modifed oem plastic bolted up to the NEW undertail. I ha tons of OEM mtoorcycle bolts so I bolted together the oem piece with the aftermarket undertail. to make it sturdy. However I had to remove the locknuts and bolts form the middle portion of the undertail. since the tail section has a bolt up area there.
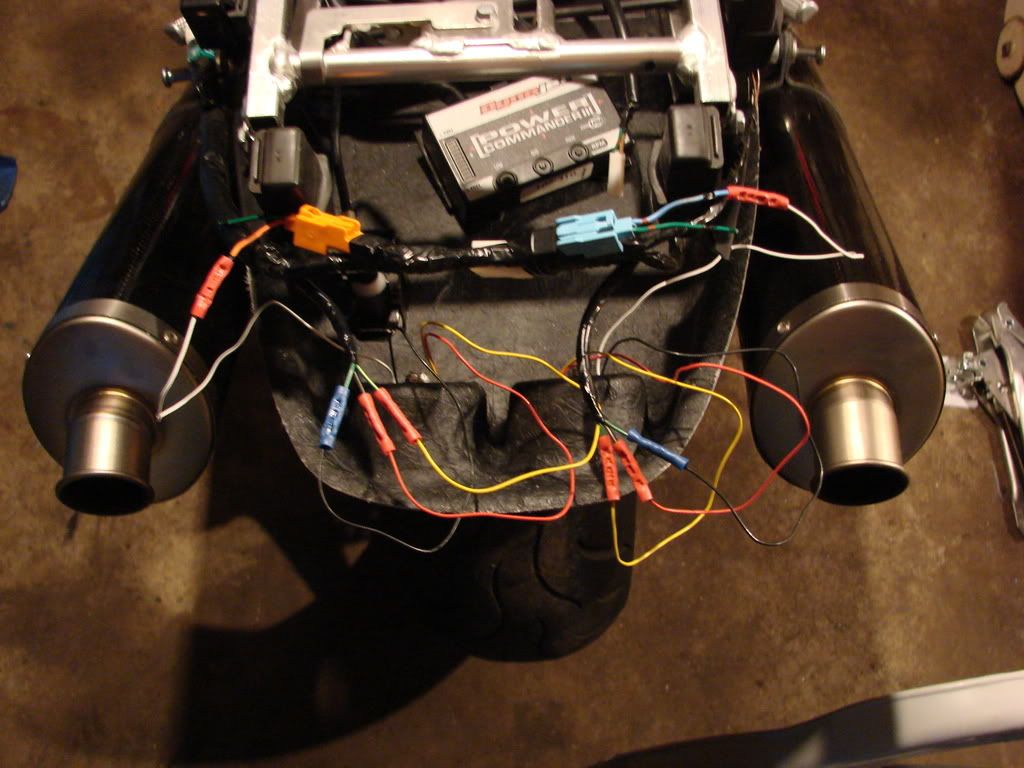
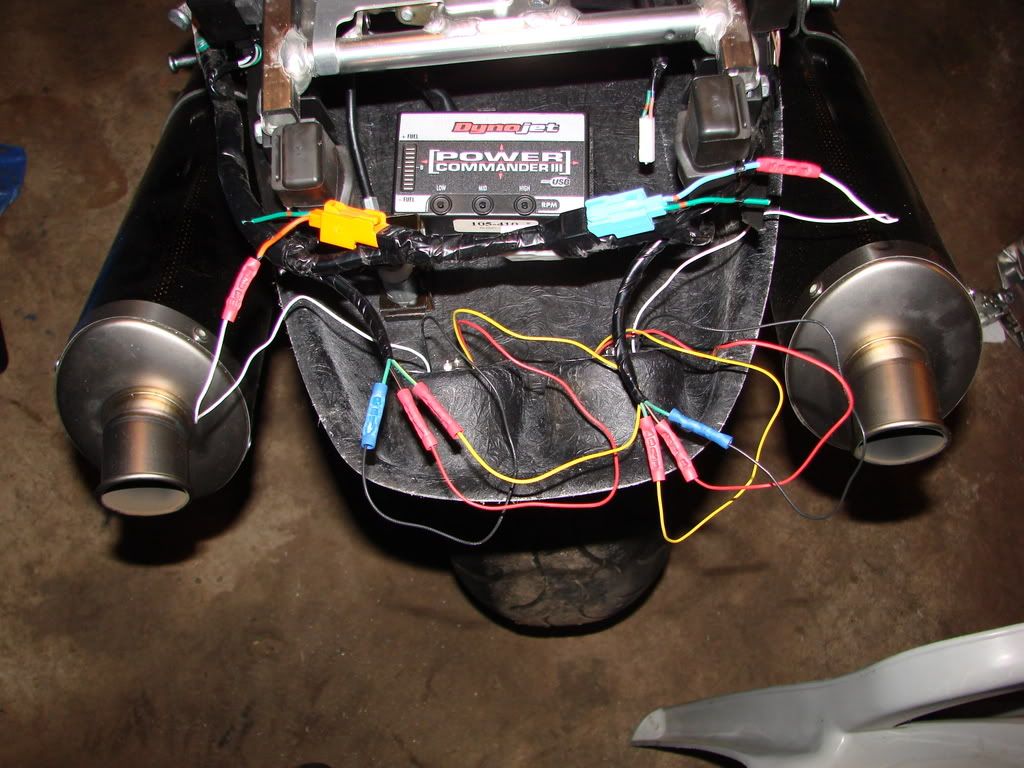
here is the undertail installed and the correct wiring I used the stock connectors for the signals and electrical taped it all up nice and neat.
all taped up
ready to install the tail
INSTALLED!! WOOO!!
Couple things.
The bolts I took out in the midsection could not be reinstalled due to all the electronics on the left and right side of the sub frame. ALSO The Nuts and bolts I used near the battery section of the undertail had to be LOOSENED, the tail section was covering the round part of the undertail by about 2mm because the bolts in the front made the undertail TOO CLOSE for the round area to be seen completely. Once i loosened up the oem plastic and undertail by the battery It moved the undertail ebough to fit perfect. If you decide to bolt the front part of the undertail together make sure you make the holes elongated so you can move the sections a couple milimeters something I didnt do but I got lucky.
I tired to use the OEM type anchors but there were just not long enough.
So I ended up using some sheetrock anchors to push through the tail section holes and through the undertail holes as well. I actually had to shave the anchors with a razor so there was no out of roundness I then used a NIce aluminum philps head machine screw to screw through both pieces. The idea here is when the bolt goes through the anchor it will open up the plastic anchor and hold it together.
here are the lights. they are REALLY BRIGHT im very happy with this setup!!
then I mounted the plate. the undertail came with a carbon fiber lisc bracket but I didnt want to ruin the undertail with a plate right in back of the lock area so i didnt use is and just bolted it up near the front of the undertail. Hope i dont get tickets for this.
<a href="http://s35.photobucket.com/albums/d194/beerock69/me%20pics/rc51/?action=view¤t=DSC03933.jpg" target="_blank"><img src="http://i35.photobucket.com/albums/d194/beerock69/me%20pics/rc51/DSC03933.jpg" border="0" alt="Photobucket"></a>
 08-11-2008, 09:42 AM
#2
Junior Member

Join Date: Dec 2006
Posts: 740
Likes: 0
Received 0 Likes
on
0 Posts
so I took my time and did everything needed to get this undertail to work.
it comes with instructions and pictures. I used them and went my own route from there.
the wiring can mess you up. the ground wire is for the brake/parking light only. I tested out the brake light wires to make sure i had it right. You owuld think the black wire is ground on the rc51 but it isnt. just check out the pics.
You only use one wire for the left and right signal and it may cause you to think you use a return wire but you dont.
so heres some pics!!
first i took the rear tail off
<img src="http://i35.photobucket.com/albums/d194/beerock69/me%20pics/rc51/DSC03906.jpg">
then i took the undertailout and took off al the wires that held ontot he undertail. battery was taken out.
<img src="http://i35.photobucket.com/albums/d194/beerock69/me%20pics/rc51/DSC03907.jpg">
<img src="http://i35.photobucket.com/albums/d194/beerock69/me%20pics/rc51/DSC03909.jpg">
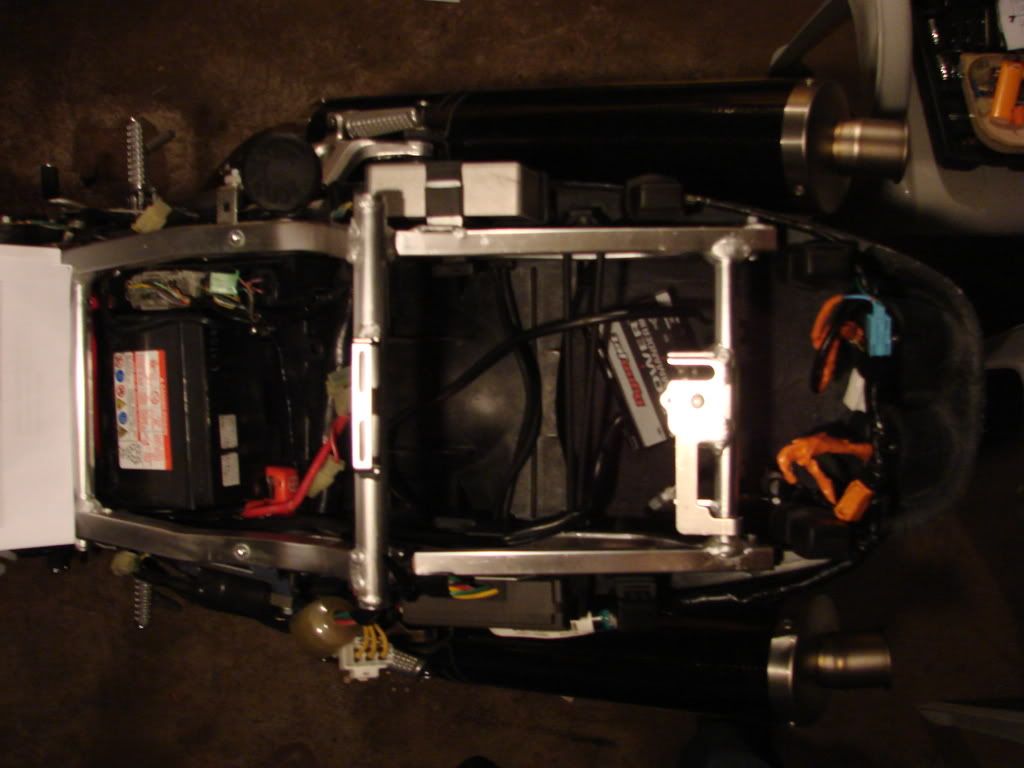
all the rubber electrical components sat on the subframe waiting for the modified one
<img src="http://i35.photobucket.com/albums/d194/beerock69/me%20pics/rc51/DSC03910.jpg">
<img src="http://i35.photobucket.com/albums/d194/beerock69/me%20pics/rc51/DSC03911.jpg">
here is the modified undertail, I used a pair of sheetmetal shears to start off some cuts, as well as a 1/4" drill bit so I could fit the shears in to cut away.
I actually used a cordless saw zaw to cut the thick piece of plastic out fromt he underside of the OEM undertail(see pic below)
once there was enough room i used a razor blade and cut it like butter!
<img src="http://i35.photobucket.com/albums/d194/beerock69/me%20pics/rc51/DSC03912.jpg">
<img src="http://i35.photobucket.com/albums/d194/beerock69/me%20pics/rc51/DSC03913.jpg">
here is what remained
<img src="http://i35.photobucket.com/albums/d194/beerock69/me%20pics/rc51/DSC03914.jpg">
Here is the modifed oem plastic bolted up to the NEW undertail. I ha tons of OEM mtoorcycle bolts so I bolted together the oem piece with the aftermarket undertail. to make it sturdy. However I had to remove the locknuts and bolts form the middle portion of the undertail. since the tail section has a bolt up area there.
<img src="http://i35.photobucket.com/albums/d194/beerock69/me%20pics/rc51/DSC03915.jpg">
<img src="http://i35.photobucket.com/albums/d194/beerock69/me%20pics/rc51/DSC03916.jpg">
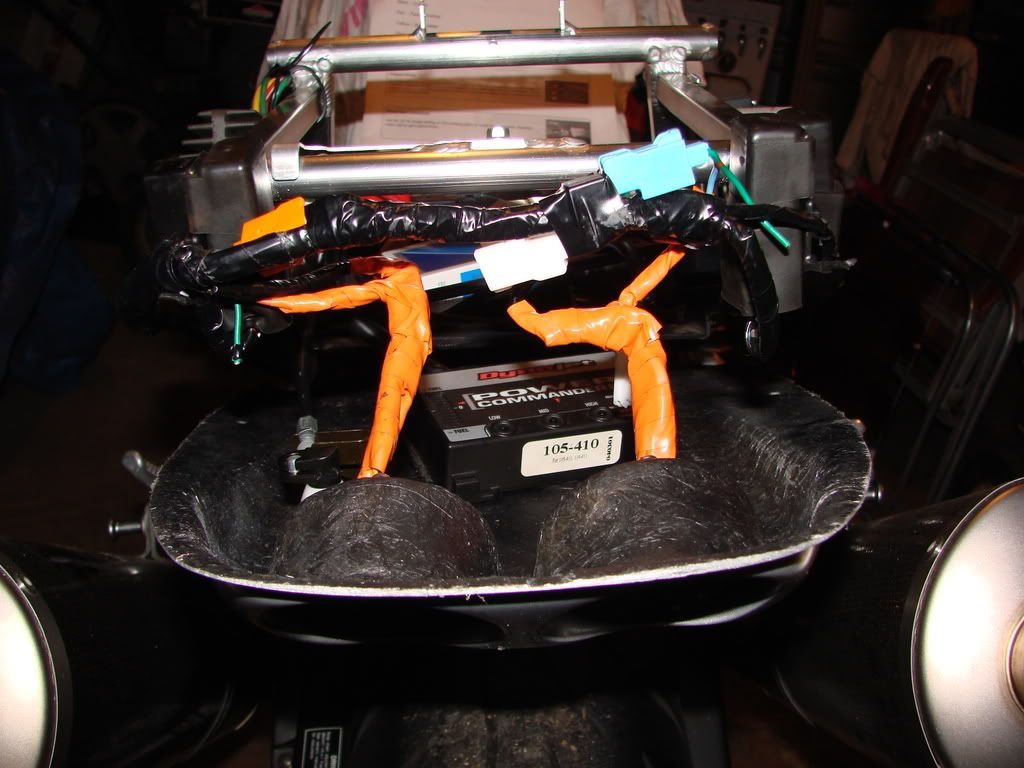
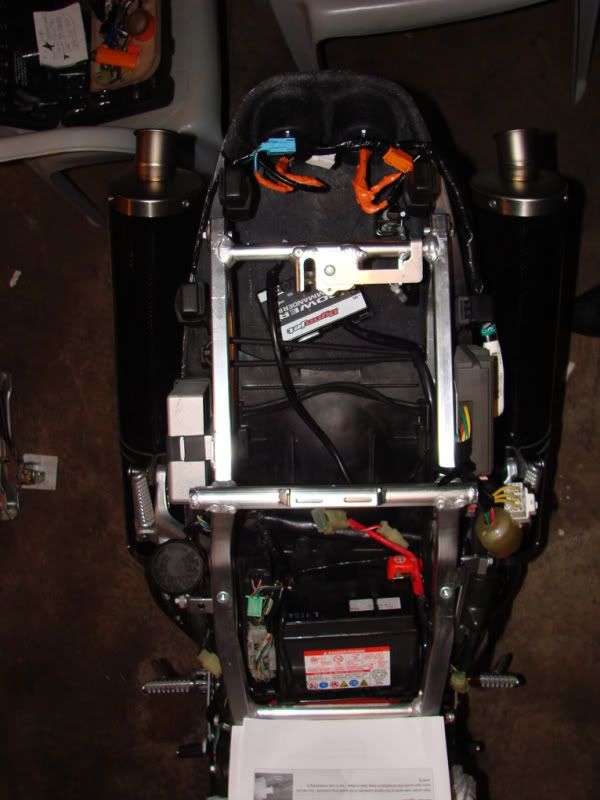
here is the undertail installed and the correct wiring I used the stock connectors for the signals and electrical taped it all up nice and neat.
<img src="http://i35.photobucket.com/albums/d194/beerock69/me%20pics/rc51/DSC03917.jpg">
<img src="http://i35.photobucket.com/albums/d194/beerock69/me%20pics/rc51/DSC03918.jpg">
all taped up
<img src="http://i35.photobucket.com/albums/d194/beerock69/me%20pics/rc51/DSC03919.jpg">
ready to install the tail
<img src="http://i35.photobucket.com/albums/d194/beerock69/me%20pics/rc51/DSC03920.jpg">
<img src="http://i35.photobucket.com/albums/d194/beerock69/me%20pics/rc51/DSC03921.jpg">
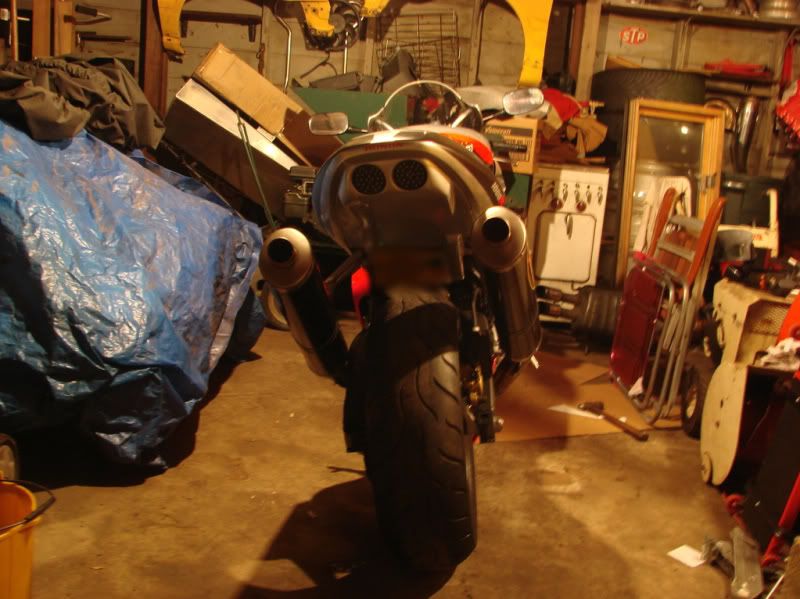
INSTALLED!! WOOO!!
<img src="http://i35.photobucket.com/albums/d194/beerock69/me%20pics/rc51/DSC03922.jpg">
Couple things.
The bolts I took out in the midsection could not be reinstalled due to all the electronics on the left and right side of the sub frame. ALSO The Nuts and bolts I used near the battery section of the undertail had to be LOOSENED, the tail section was covering the round part of the undertail by about 2mm because the bolts in the front made the undertail TOO CLOSE for the round area to be seen completely. Once i loosened up the oem plastic and undertail by the battery It moved the undertail ebough to fit perfect. If you decide to bolt the front part of the undertail together make sure you make the holes elongated so you can move the sections a couple milimeters something I didnt do but I got lucky.
I tired to use the OEM type anchors but there were just not long enough.
So I ended up using some sheetrock anchors to push through the tail section holes and through the undertail holes as well. I actually had to shave the anchors with a razor so there was no out of roundness I then used a NIce aluminum philps head machine screw to screw through both pieces. The idea here is when the bolt goes through the anchor it will open up the plastic anchor and hold it together.
<img src="http://i35.photobucket.com/albums/d194/beerock69/me%20pics/rc51/DSC03933.jpg">
here are the lights. they are REALLY BRIGHT im very happy with this setup!!
<img src="http://i35.photobucket.com/albums/d194/beerock69/me%20pics/rc51/DSC03925.jpg">
<img src="http://i35.photobucket.com/albums/d194/beerock69/me%20pics/rc51/DSC03926.jpg">
<img src="http://i35.photobucket.com/albums/d194/beerock69/me%20pics/rc51/DSC03927.jpg">
<img src="http://i35.photobucket.com/albums/d194/beerock69/me%20pics/rc51/DSC03928.jpg">
then I mounted the plate. the undertail came with a carbon fiber lisc bracket but I didnt want to ruin the undertail with a plate right in back of the lock area so i didnt use is and just bolted it up near the front of the undertail. Hope i dont get tickets for this.
<img src="http://i35.photobucket.com/albums/d194/beerock69/me%20pics/rc51/DSC03929.jpg">
<img src="http://i35.photobucket.com/albums/d194/beerock69/me%20pics/rc51/DSC03930.jpg">
<img src="http://i35.photobucket.com/albums/d194/beerock69/me%20pics/rc51/DSC03931.jpg">
<img src="http://i35.photobucket.com/albums/d194/beerock69/me%20pics/rc51/DSC03933.jpg">
it comes with instructions and pictures. I used them and went my own route from there.
the wiring can mess you up. the ground wire is for the brake/parking light only. I tested out the brake light wires to make sure i had it right. You owuld think the black wire is ground on the rc51 but it isnt. just check out the pics.
You only use one wire for the left and right signal and it may cause you to think you use a return wire but you dont.
so heres some pics!!
first i took the rear tail off
<img src="http://i35.photobucket.com/albums/d194/beerock69/me%20pics/rc51/DSC03906.jpg">
then i took the undertailout and took off al the wires that held ontot he undertail. battery was taken out.
<img src="http://i35.photobucket.com/albums/d194/beerock69/me%20pics/rc51/DSC03907.jpg">
<img src="http://i35.photobucket.com/albums/d194/beerock69/me%20pics/rc51/DSC03909.jpg">
all the rubber electrical components sat on the subframe waiting for the modified one
<img src="http://i35.photobucket.com/albums/d194/beerock69/me%20pics/rc51/DSC03910.jpg">
<img src="http://i35.photobucket.com/albums/d194/beerock69/me%20pics/rc51/DSC03911.jpg">
here is the modified undertail, I used a pair of sheetmetal shears to start off some cuts, as well as a 1/4" drill bit so I could fit the shears in to cut away.
I actually used a cordless saw zaw to cut the thick piece of plastic out fromt he underside of the OEM undertail(see pic below)
once there was enough room i used a razor blade and cut it like butter!
<img src="http://i35.photobucket.com/albums/d194/beerock69/me%20pics/rc51/DSC03912.jpg">
<img src="http://i35.photobucket.com/albums/d194/beerock69/me%20pics/rc51/DSC03913.jpg">
here is what remained
<img src="http://i35.photobucket.com/albums/d194/beerock69/me%20pics/rc51/DSC03914.jpg">
Here is the modifed oem plastic bolted up to the NEW undertail. I ha tons of OEM mtoorcycle bolts so I bolted together the oem piece with the aftermarket undertail. to make it sturdy. However I had to remove the locknuts and bolts form the middle portion of the undertail. since the tail section has a bolt up area there.
<img src="http://i35.photobucket.com/albums/d194/beerock69/me%20pics/rc51/DSC03915.jpg">
<img src="http://i35.photobucket.com/albums/d194/beerock69/me%20pics/rc51/DSC03916.jpg">
here is the undertail installed and the correct wiring I used the stock connectors for the signals and electrical taped it all up nice and neat.
<img src="http://i35.photobucket.com/albums/d194/beerock69/me%20pics/rc51/DSC03917.jpg">
<img src="http://i35.photobucket.com/albums/d194/beerock69/me%20pics/rc51/DSC03918.jpg">
all taped up
<img src="http://i35.photobucket.com/albums/d194/beerock69/me%20pics/rc51/DSC03919.jpg">
ready to install the tail
<img src="http://i35.photobucket.com/albums/d194/beerock69/me%20pics/rc51/DSC03920.jpg">
<img src="http://i35.photobucket.com/albums/d194/beerock69/me%20pics/rc51/DSC03921.jpg">
INSTALLED!! WOOO!!
<img src="http://i35.photobucket.com/albums/d194/beerock69/me%20pics/rc51/DSC03922.jpg">
Couple things.
The bolts I took out in the midsection could not be reinstalled due to all the electronics on the left and right side of the sub frame. ALSO The Nuts and bolts I used near the battery section of the undertail had to be LOOSENED, the tail section was covering the round part of the undertail by about 2mm because the bolts in the front made the undertail TOO CLOSE for the round area to be seen completely. Once i loosened up the oem plastic and undertail by the battery It moved the undertail ebough to fit perfect. If you decide to bolt the front part of the undertail together make sure you make the holes elongated so you can move the sections a couple milimeters something I didnt do but I got lucky.
I tired to use the OEM type anchors but there were just not long enough.
So I ended up using some sheetrock anchors to push through the tail section holes and through the undertail holes as well. I actually had to shave the anchors with a razor so there was no out of roundness I then used a NIce aluminum philps head machine screw to screw through both pieces. The idea here is when the bolt goes through the anchor it will open up the plastic anchor and hold it together.
<img src="http://i35.photobucket.com/albums/d194/beerock69/me%20pics/rc51/DSC03933.jpg">
here are the lights. they are REALLY BRIGHT im very happy with this setup!!
<img src="http://i35.photobucket.com/albums/d194/beerock69/me%20pics/rc51/DSC03925.jpg">
<img src="http://i35.photobucket.com/albums/d194/beerock69/me%20pics/rc51/DSC03926.jpg">
<img src="http://i35.photobucket.com/albums/d194/beerock69/me%20pics/rc51/DSC03927.jpg">
<img src="http://i35.photobucket.com/albums/d194/beerock69/me%20pics/rc51/DSC03928.jpg">
then I mounted the plate. the undertail came with a carbon fiber lisc bracket but I didnt want to ruin the undertail with a plate right in back of the lock area so i didnt use is and just bolted it up near the front of the undertail. Hope i dont get tickets for this.
<img src="http://i35.photobucket.com/albums/d194/beerock69/me%20pics/rc51/DSC03929.jpg">
<img src="http://i35.photobucket.com/albums/d194/beerock69/me%20pics/rc51/DSC03930.jpg">
<img src="http://i35.photobucket.com/albums/d194/beerock69/me%20pics/rc51/DSC03931.jpg">
<img src="http://i35.photobucket.com/albums/d194/beerock69/me%20pics/rc51/DSC03933.jpg">
08-11-2008, 09:57 AM
#3
Junior Member
Join Date: Dec 2006
Posts: 740
Likes: 0
Received 0 Likes
on
0 Posts
about my rear turn signals being difficult to see. (mainly during the day, and can be completely washed out in direct sunlight) I would guess because most leds are fairly directional so when viewing very far off axis they appear considerably dim.
Can't beat that clean look though!
Can't beat that clean look though!
08-11-2008, 11:14 AM
#4
AudiWorld Super User
Thread Starter
Join Date: Jan 2006
Posts: 6,072
Likes: 0
Received 0 Likes
on
0 Posts
my buddy has the 400 dollaer carbon fiber undertail with the same LED's and there bright as **** even in direct sunlight
08-11-2008, 11:16 AM
#5
AudiWorld Super User
Thread Starter
Join Date: Jan 2006
Posts: 6,072
Likes: 0
Received 0 Likes
on
0 Posts
some time. I was tired and didnt feel like doing in html
think you could email me your post in NOTEPAD so I can use the html posting for another site?
think you could email me your post in NOTEPAD so I can use the html posting for another site?
 08-11-2008, 01:52 PM
#7
Junior Member
Join Date: Dec 2006
Posts: 740
Likes: 0
Received 0 Likes
on
0 Posts
replace <b>[IMG]</b> with <b><img src="</b>
then replace <b>[/IMG]</b> with <b>"> </b>
pretty easy
Good to know they are high quality lights. They do make LEDs with both high viewing angle and high mcd ratings (millicandles) that are much brighter. Really, I should probably upgrade mine.
then replace <b>[/IMG]</b> with <b>"> </b>
pretty easy
Good to know they are high quality lights. They do make LEDs with both high viewing angle and high mcd ratings (millicandles) that are much brighter. Really, I should probably upgrade mine.
Trending Topics
08-11-2008, 02:21 PM
#9
Member

Join Date: Aug 2007
Posts: 2,762
Likes: 0
Received 0 Likes
on
0 Posts
Please mount your Power Commander so it's not flopping around in the tail. Having that shut down mid corner at high speeds would NOT be fun. Secure it ASAP.
Also, where you mounted your plate, you will most likely get pulled over somewhat frequently. You may want to hint that a relocation kit is on the way or something if that happens. What concerns me though is how you mounted it. Is it completely fixed, as in there's no way it's moving up or down? If it's fixed, you'll be slamming your tire hugger in to it when your rear suspension is loaded. You'll bend your plate or tear your hugger to shreds...and then your tire, which you probably want to avoid ; )
Also, where you mounted your plate, you will most likely get pulled over somewhat frequently. You may want to hint that a relocation kit is on the way or something if that happens. What concerns me though is how you mounted it. Is it completely fixed, as in there's no way it's moving up or down? If it's fixed, you'll be slamming your tire hugger in to it when your rear suspension is loaded. You'll bend your plate or tear your hugger to shreds...and then your tire, which you probably want to avoid ; )
08-11-2008, 02:35 PM
#10
AudiWorld Super User
Thread Starter
Join Date: Jan 2006
Posts: 6,072
Likes: 0
Received 0 Likes
on
0 Posts
the power commander is mounted with velcro right under the lock nice and neat.(couldnt you tell everything i did was nice and neat? I wouldnt leave that out
also the plate I was concerned about being pulled over. i do have a carbon fiber lisc holder that came with it but honestly it ruins the look of the undertail.
2nd the lisc plate is mounted with screws and lock nuts all OEM motorcycle parts. where its mounted it is right on the undertail. its about 2" in front of the rear tire, even under suspension load...
thanks though!!!