Audi UR Quattro Rally Build
 10-17-2018, 04:53 AM
#41
AudiWorld Member
Thread Starter
TIRES
It�s time to start thinking about wheels and tires. Well, it�s a bit early but a) we are obsessed about wheels and tires and b) this project is as much about showing off our BRAID wheels as anything. At least that�s how we justify it.
You may recall we previously purchased a set of BRAID Serie 6 in 16x9 and mounted some 245/45-16 Bridgestones on them.
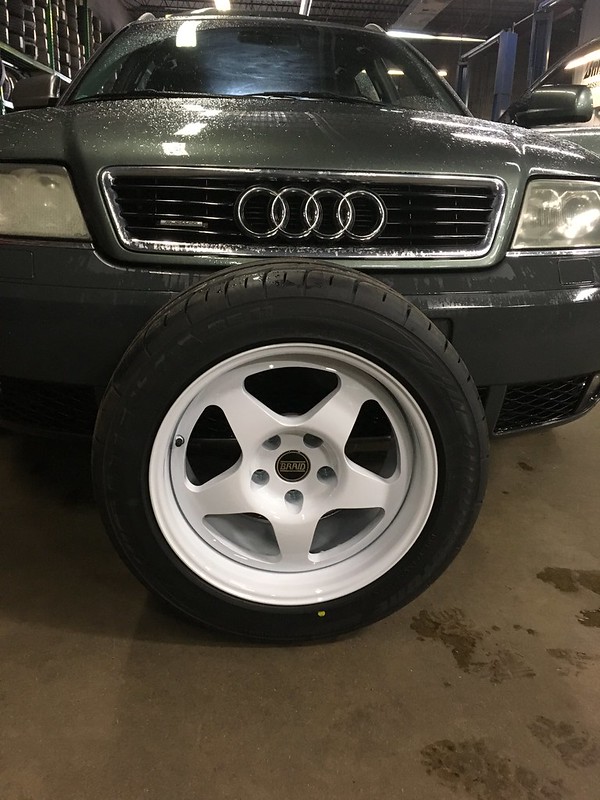
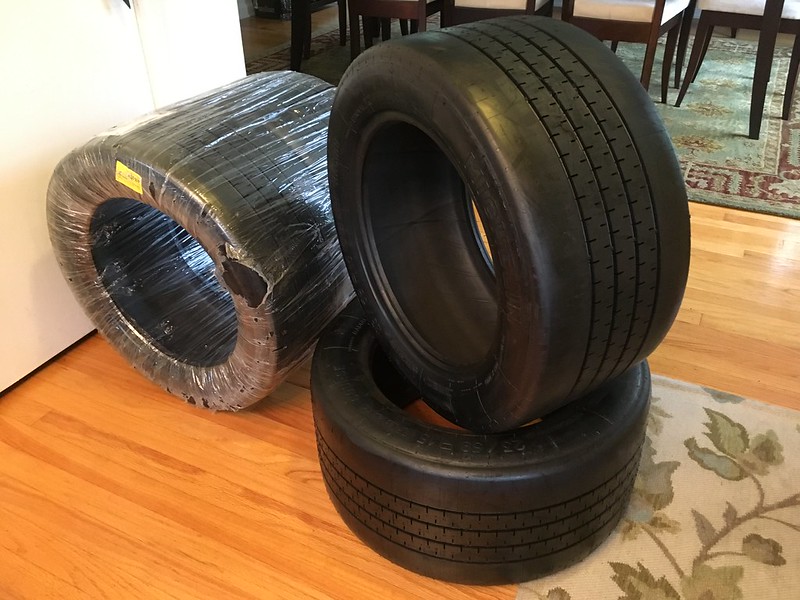
This size combination seems to be typical of what people run on these tribute cars but we ordered them way too soon (obsessed remember) and another build needed them for their project so we let them go. We always thought we would order up the exact same thing again at a more sensible phase of the project. Then we saw this:
And we knew what we had to do.
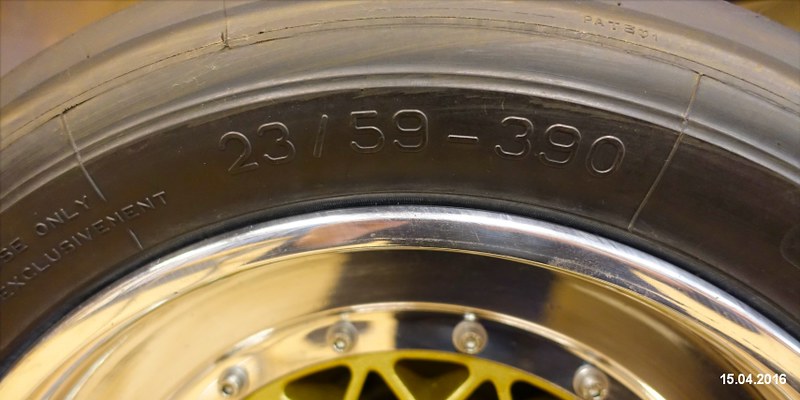
We have always loved the Michelin TB15s as we sell hundreds of 911 wheels for them and they look just perfect on those RSR recreations, but we never thought we�d have a car suitable for them as the sizes they come in are either too narrow or too wide for anything we have. Or so we thought. It turns out that back in the day at least some Quattros were running the 23/59 - 15 TB15s (about a 270/40R15) so we knew they should fit on our car too. Unknown though is at what offset and rim width. Michelin only make the 23/59 � 15 in a TB5 now so we ordered up a TB15 in 23/62 � 15 from Coker tire on the condition that we could return it if we didn�t mount it. Specs for the tire are:
Section width: 10.6�/270mm
Tread width: 9�/229mm
Diameter: 24.6�/625mm
Rim width: 8.5�-10.5�
Measured rim: 9�
Unfortunately we had nothing similar in the shop to test with; or so we thought. One of our customers keeps his 944 Turbo race car in the building and it runs Hoosiers in 275/35R17. The specs on those: are
Section width: 11�/279mm
Tread width: 10.3�/261mm
Diameter: 24.7�/627mm
So just slightly larger than the TB15, apart from tread width which is quite a bit larger. We had us a surrogate.
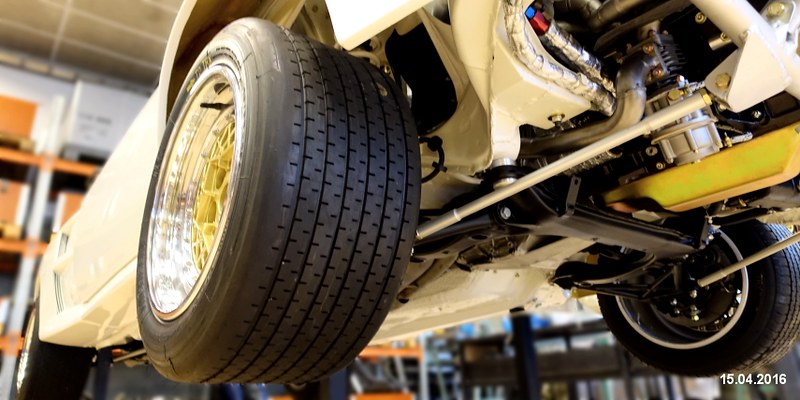
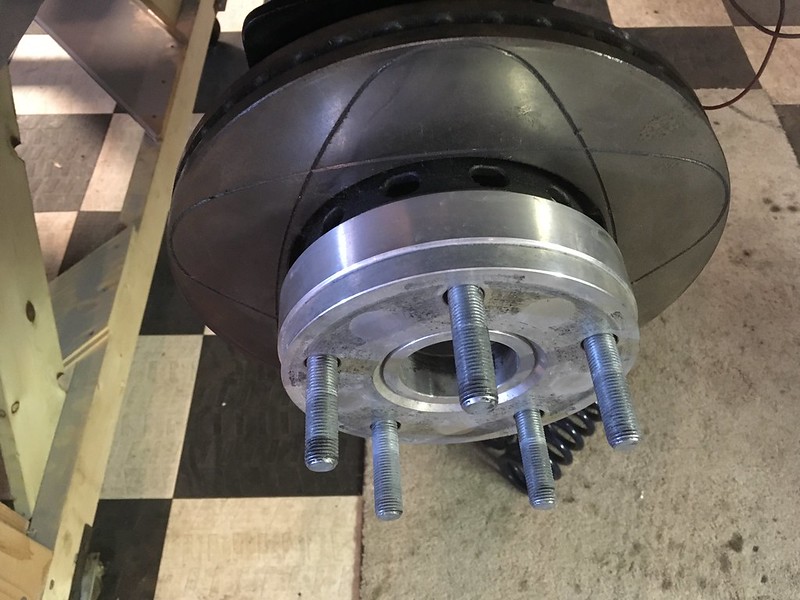
Now some of you might point out that a Porsche 944 is not going to bolt up to a Quattro. Well normally that�s right but we have some hub adapters that allow us to bolt a set of 911 Safari wheels to our Audi Allroad so we employed one of those in our test fit. The 944 wheel, which coincidentally is a BRAID Serie 6, has an offset of 55. Our hub adapter is 27 and we also have some 18mm spacers. That makes the resultant offset of the test setup et11, right about where we anticipate our new wheels need to be. Time to find out.
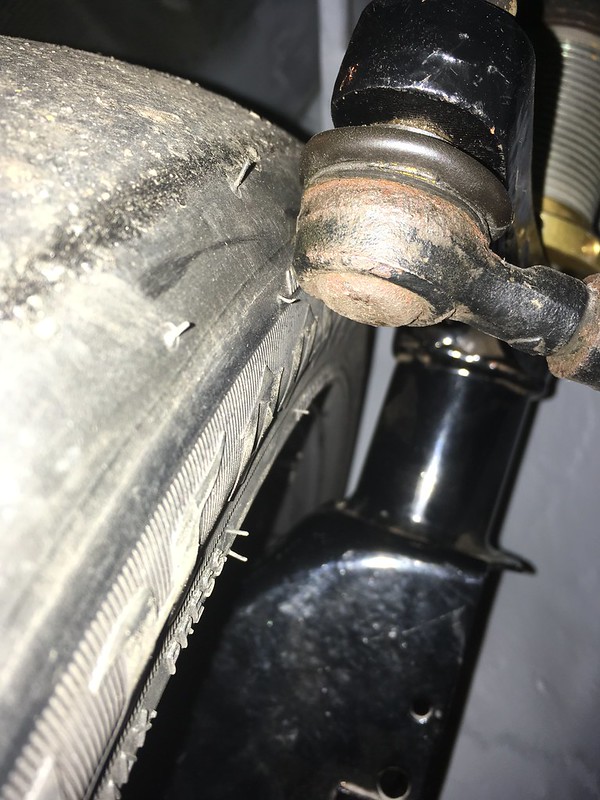
The Hoosier cleared the strut but kissed the tie rod ball joint. Not to worry, The TB15 is not as wide at that point so should clear.
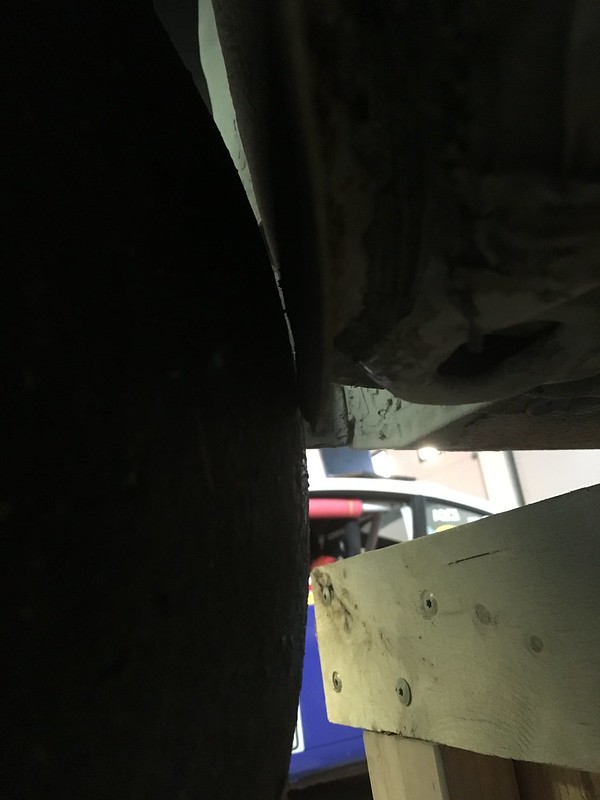
On full lock and full compression the Hoosier barley kissed the rear inner fender. OK, same as above, the TB15 should clear.
Lots of room under the front fender too:
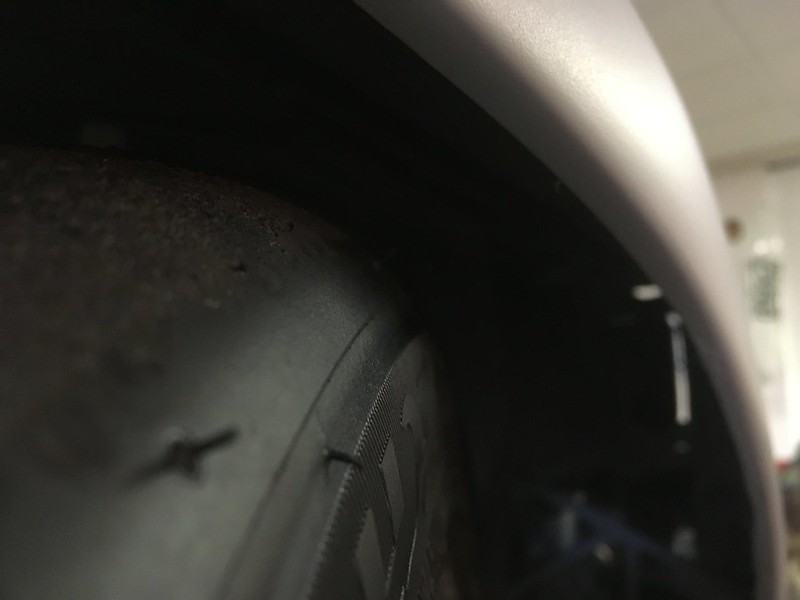
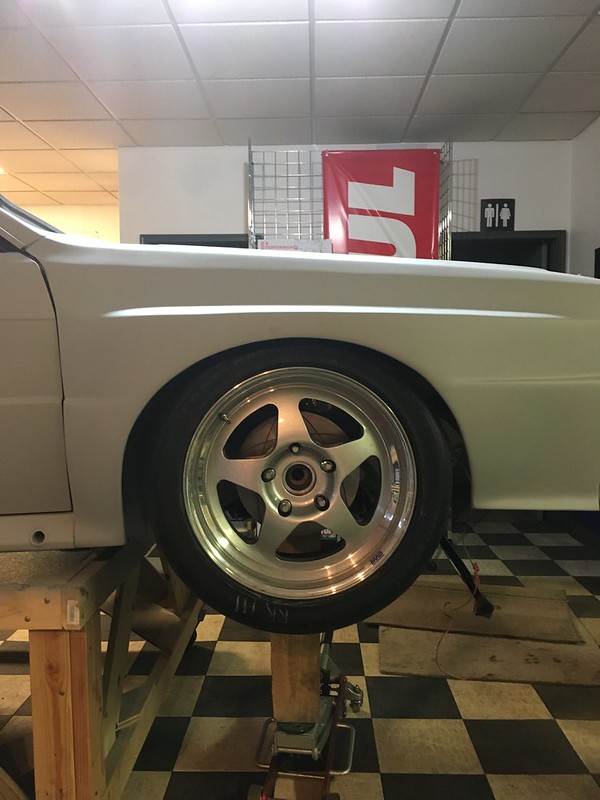
So with the front suspension in its worst orientation (full lock and full compression) the big Hoosier almost fit. We were so happy as we came away very confident that the smaller TB15 would have no issues. Still, we best throw it on the rear just for fun right? Uh oh! What�s this?
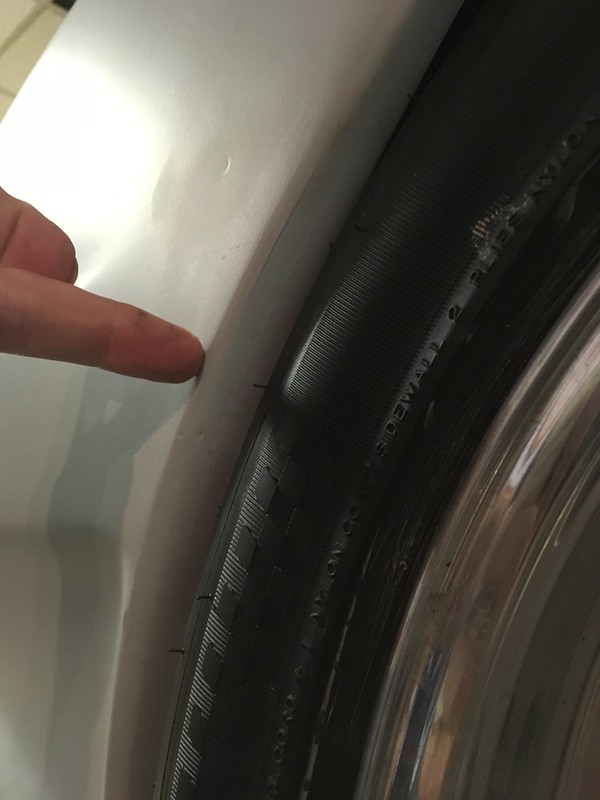
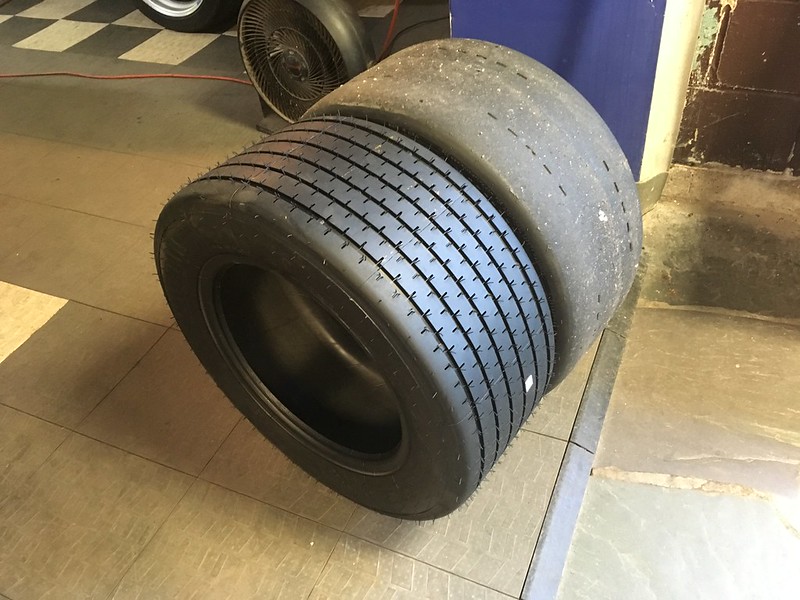
Lots of interference with the rear arch. Who would have thought? It only has to go up and down. It might fit if we tucked it in a chunk and hacked the arches up but then it might rub on the front inside and look odd. We concluded the overall diameter of the Hoosier and the TB15 precluded us from using the TB15 on this car. What to do? Well, remember the picture we found showed a much smaller diameter 23/59 -15? That size is available in a TB15 which might even be a better tread pattern for us anyway. So we returned the TB15 and ordered up Coker�s last set.
And mounted one on a 15x9 Porsche Serie 1 we had on display to see if that width would fit it well.
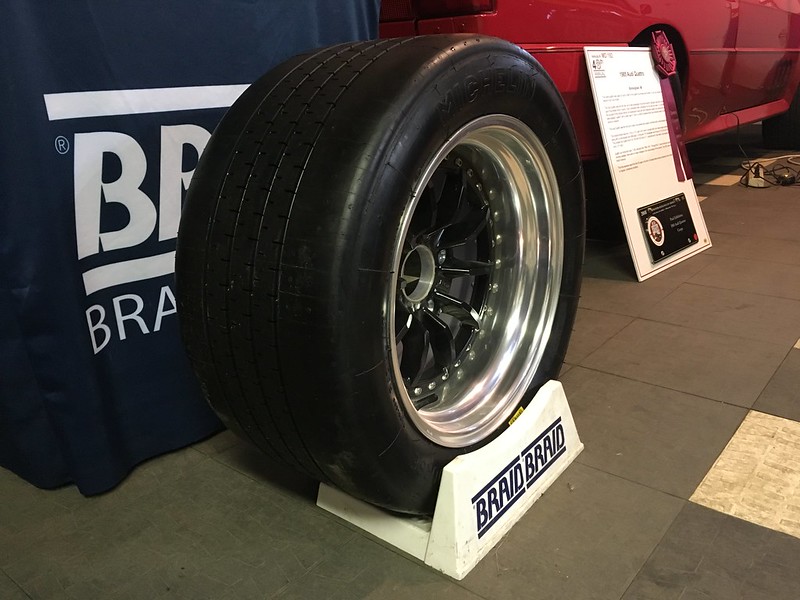
It would probably be happier on a 15x9.5 or even a 15x10 but by going with 15� we have somewhat painted ourselves into a corner, in that there aren�t any other 15� tires this wide available and who knows how long the TB5 will be around. By restricting ourselves to a 9� wide rim we have at least left the door open to some currently available and suitable 245 or even 225 tires. Hopefully we never need to go through that door.
So the next big issue to resolve: what 15x9 BRAID wheels to order to mount these on? Her are the candidates:
https://braidusa.com/collections/whe...5-x-112+15-x-9
What would you choose?
It�s time to start thinking about wheels and tires. Well, it�s a bit early but a) we are obsessed about wheels and tires and b) this project is as much about showing off our BRAID wheels as anything. At least that�s how we justify it.
You may recall we previously purchased a set of BRAID Serie 6 in 16x9 and mounted some 245/45-16 Bridgestones on them.
This size combination seems to be typical of what people run on these tribute cars but we ordered them way too soon (obsessed remember) and another build needed them for their project so we let them go. We always thought we would order up the exact same thing again at a more sensible phase of the project. Then we saw this:
And we knew what we had to do.
We have always loved the Michelin TB15s as we sell hundreds of 911 wheels for them and they look just perfect on those RSR recreations, but we never thought we�d have a car suitable for them as the sizes they come in are either too narrow or too wide for anything we have. Or so we thought. It turns out that back in the day at least some Quattros were running the 23/59 - 15 TB15s (about a 270/40R15) so we knew they should fit on our car too. Unknown though is at what offset and rim width. Michelin only make the 23/59 � 15 in a TB5 now so we ordered up a TB15 in 23/62 � 15 from Coker tire on the condition that we could return it if we didn�t mount it. Specs for the tire are:
Section width: 10.6�/270mm
Tread width: 9�/229mm
Diameter: 24.6�/625mm
Rim width: 8.5�-10.5�
Measured rim: 9�
Unfortunately we had nothing similar in the shop to test with; or so we thought. One of our customers keeps his 944 Turbo race car in the building and it runs Hoosiers in 275/35R17. The specs on those: are
Section width: 11�/279mm
Tread width: 10.3�/261mm
Diameter: 24.7�/627mm
So just slightly larger than the TB15, apart from tread width which is quite a bit larger. We had us a surrogate.
Now some of you might point out that a Porsche 944 is not going to bolt up to a Quattro. Well normally that�s right but we have some hub adapters that allow us to bolt a set of 911 Safari wheels to our Audi Allroad so we employed one of those in our test fit. The 944 wheel, which coincidentally is a BRAID Serie 6, has an offset of 55. Our hub adapter is 27 and we also have some 18mm spacers. That makes the resultant offset of the test setup et11, right about where we anticipate our new wheels need to be. Time to find out.
The Hoosier cleared the strut but kissed the tie rod ball joint. Not to worry, The TB15 is not as wide at that point so should clear.
On full lock and full compression the Hoosier barley kissed the rear inner fender. OK, same as above, the TB15 should clear.
Lots of room under the front fender too:
So with the front suspension in its worst orientation (full lock and full compression) the big Hoosier almost fit. We were so happy as we came away very confident that the smaller TB15 would have no issues. Still, we best throw it on the rear just for fun right? Uh oh! What�s this?
Lots of interference with the rear arch. Who would have thought? It only has to go up and down. It might fit if we tucked it in a chunk and hacked the arches up but then it might rub on the front inside and look odd. We concluded the overall diameter of the Hoosier and the TB15 precluded us from using the TB15 on this car. What to do? Well, remember the picture we found showed a much smaller diameter 23/59 -15? That size is available in a TB15 which might even be a better tread pattern for us anyway. So we returned the TB15 and ordered up Coker�s last set.
And mounted one on a 15x9 Porsche Serie 1 we had on display to see if that width would fit it well.
It would probably be happier on a 15x9.5 or even a 15x10 but by going with 15� we have somewhat painted ourselves into a corner, in that there aren�t any other 15� tires this wide available and who knows how long the TB5 will be around. By restricting ourselves to a 9� wide rim we have at least left the door open to some currently available and suitable 245 or even 225 tires. Hopefully we never need to go through that door.
So the next big issue to resolve: what 15x9 BRAID wheels to order to mount these on? Her are the candidates:
https://braidusa.com/collections/whe...5-x-112+15-x-9
What would you choose?
 11-09-2018, 06:49 AM
#42
AudiWorld Member
Thread Starter
Installation was relatively simple as we kept all the hardware.
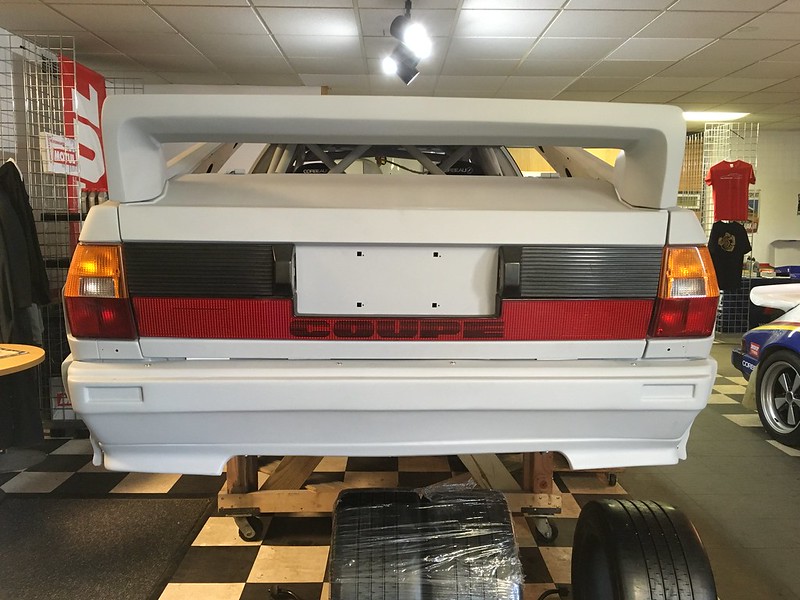
Then we remembered that we also have a broken reflector which we thought would be better used on this car rather than the pristine one that came off it as we are going to be wrapping it anyway a la Rothmans livery:

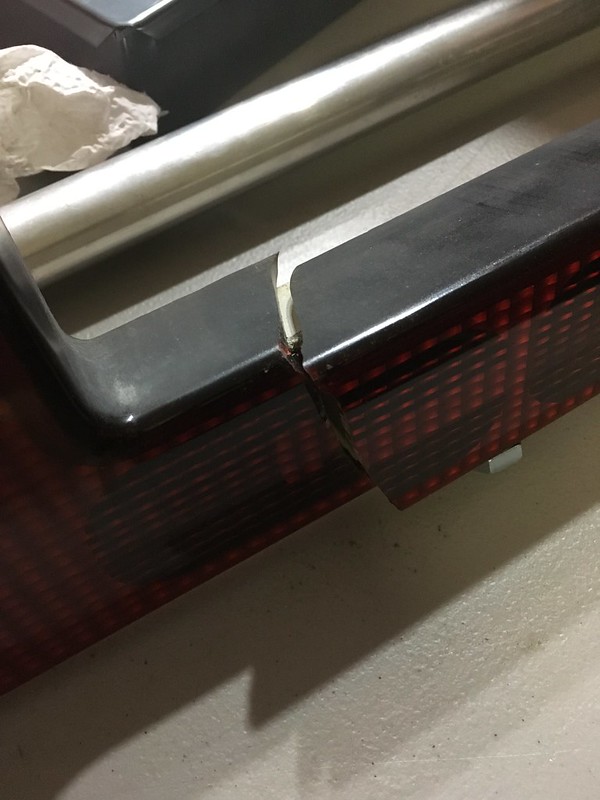
But how to fix the crack? It can be unsightly but has to be smooth as any hint of a crack will show up through the vinyl film. Fortunately one of our guys has a lot of experience with plastic adhesive and managed a nearly invisible repair.
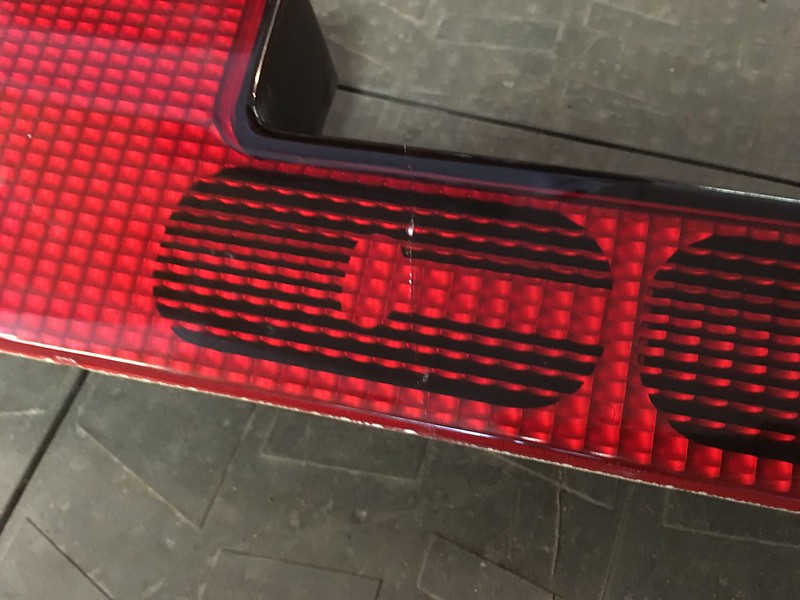
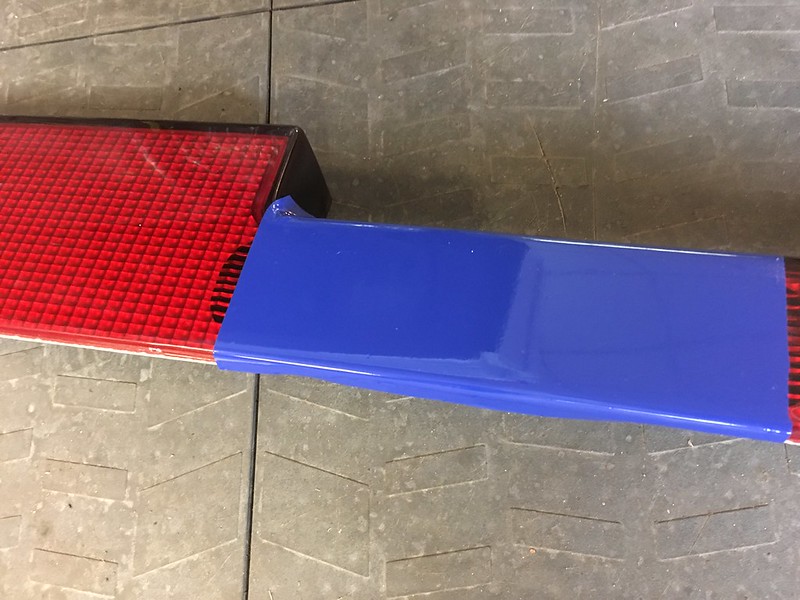
Now we have to figure out how to wrap the black side pieces. As they have horizontal grooves running along their lengths they won't take vinyl very well. We could try to paint them but it might not match the vinyl and we'd be ruining a set. We have considered filling the grooves with body filler and sanding them flat. That would wrap easily but we'd still be ruining a set. Currently considering making new filler panels. Fortunately we don't have to decide for a while though.
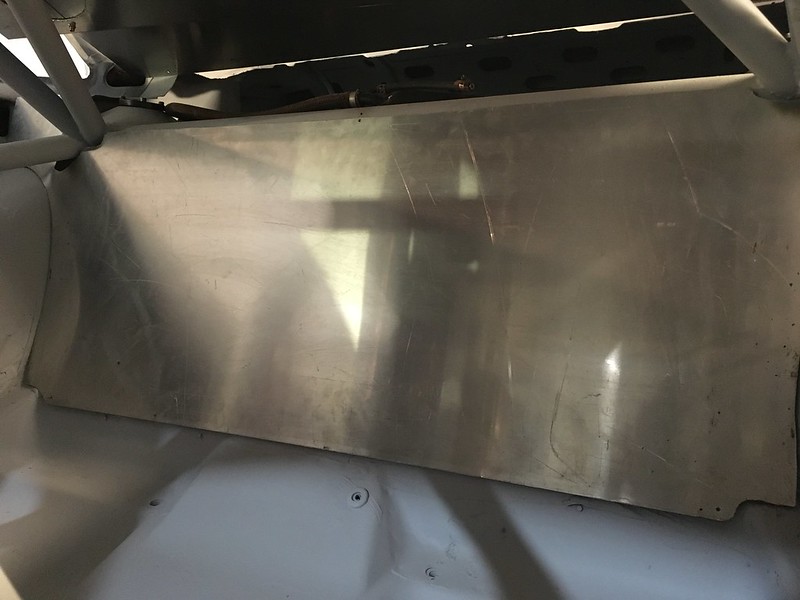
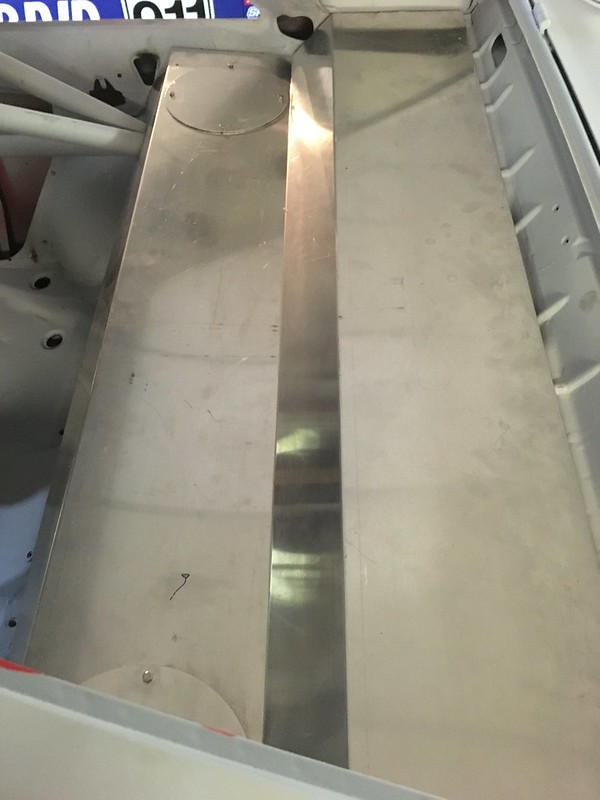
(BULKHEAD)
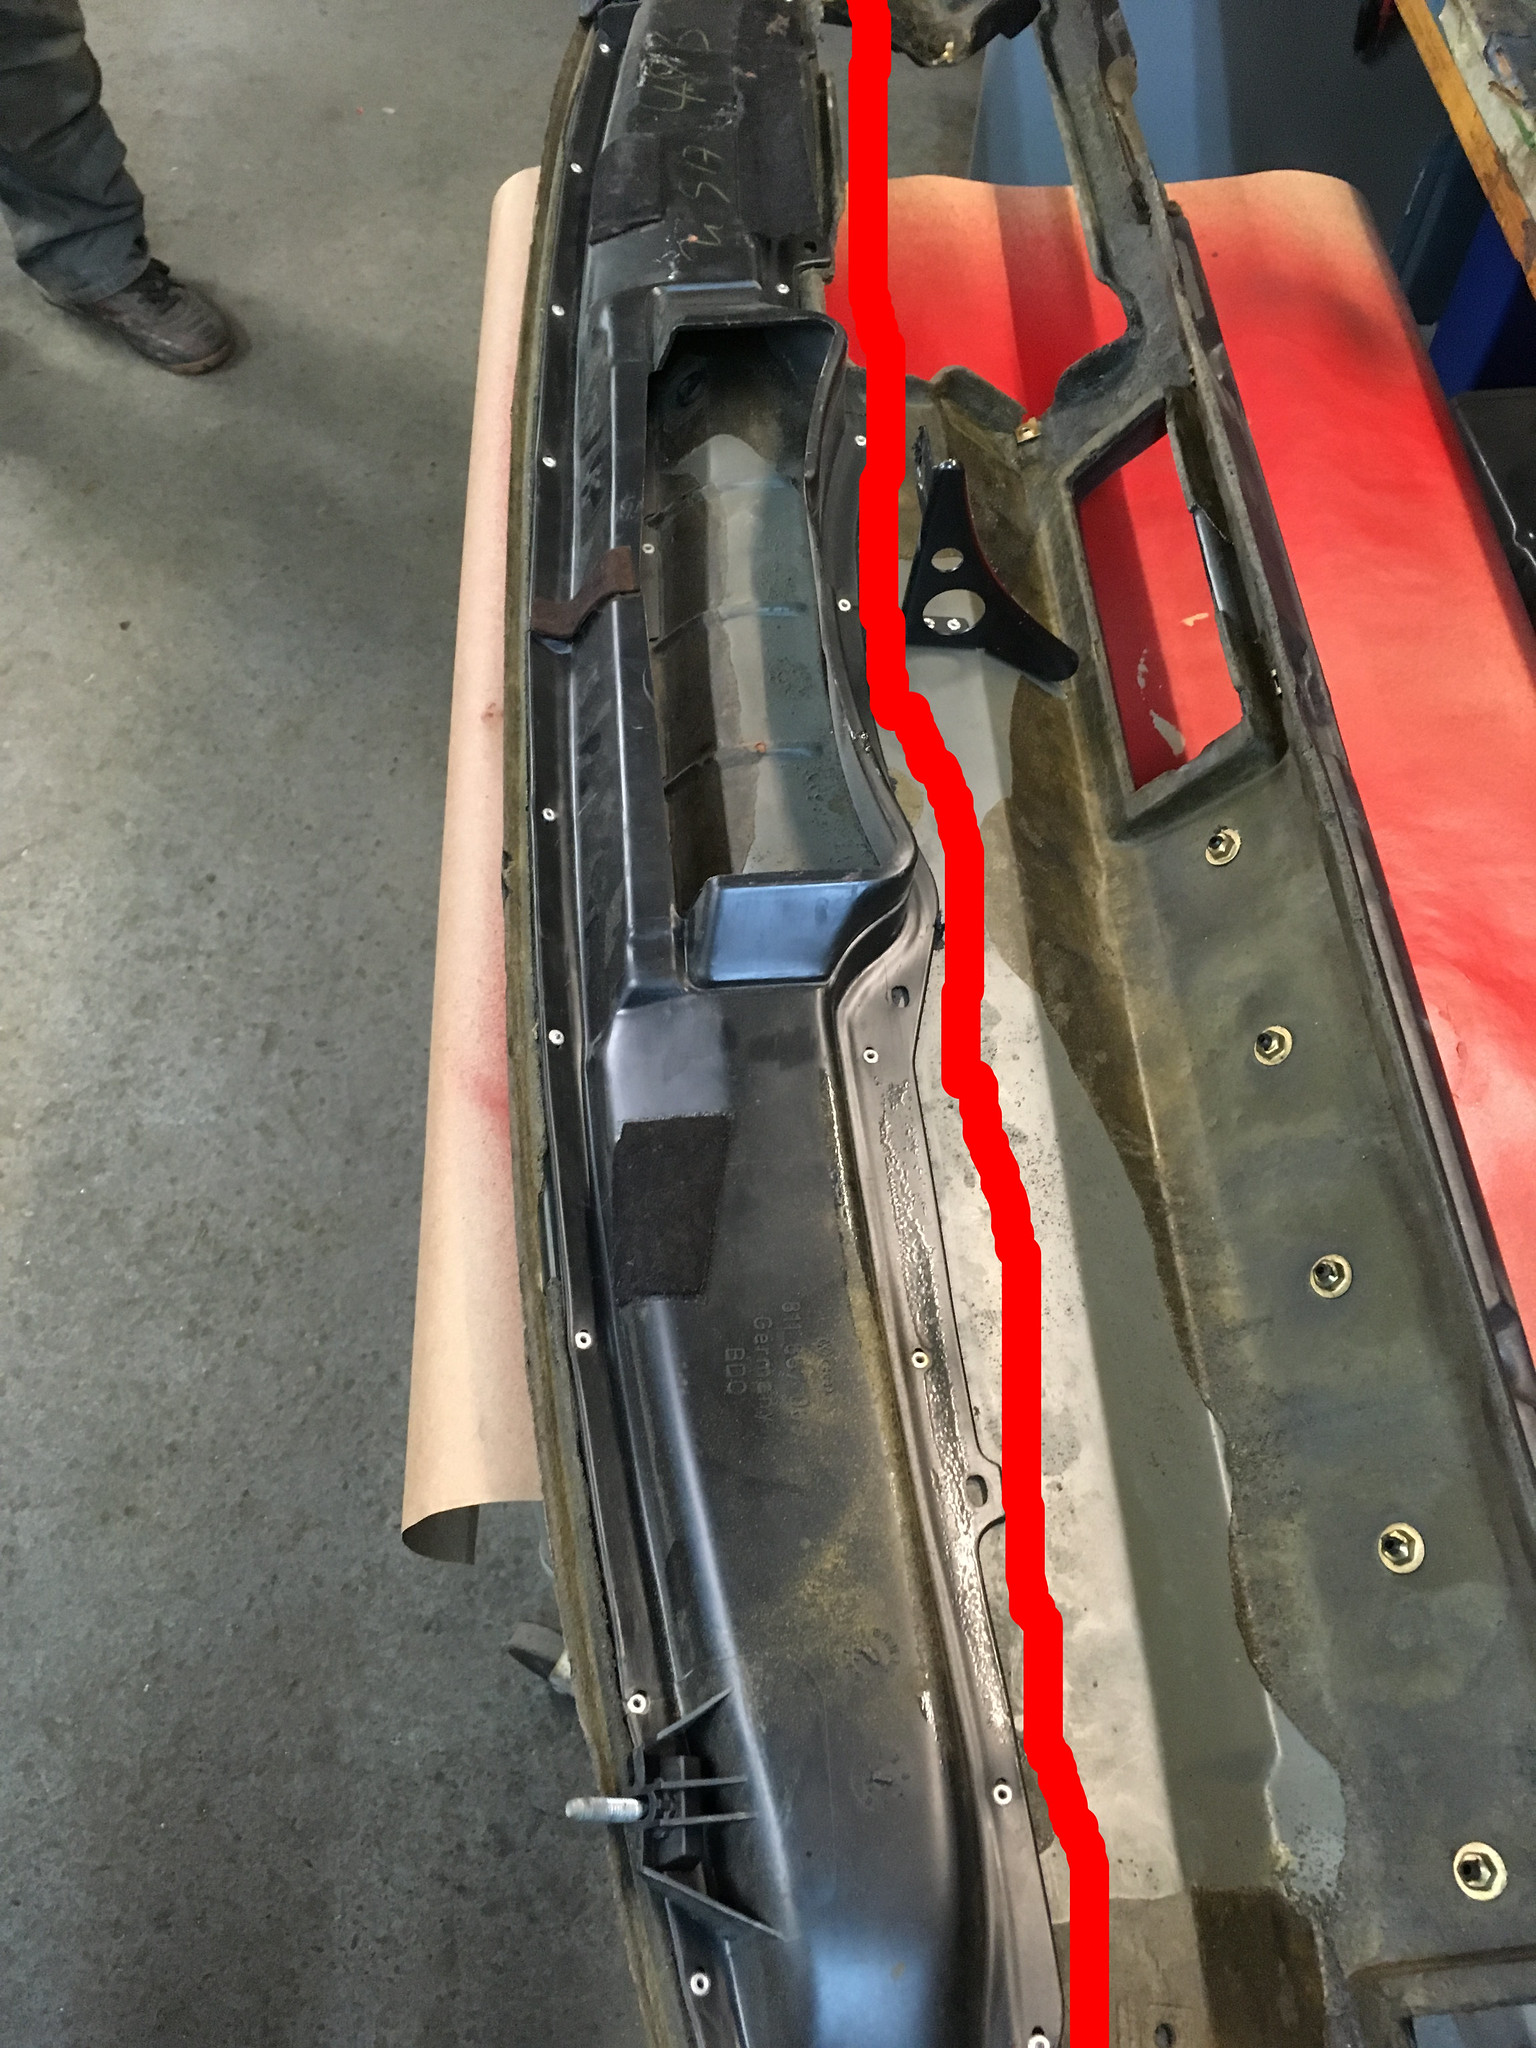
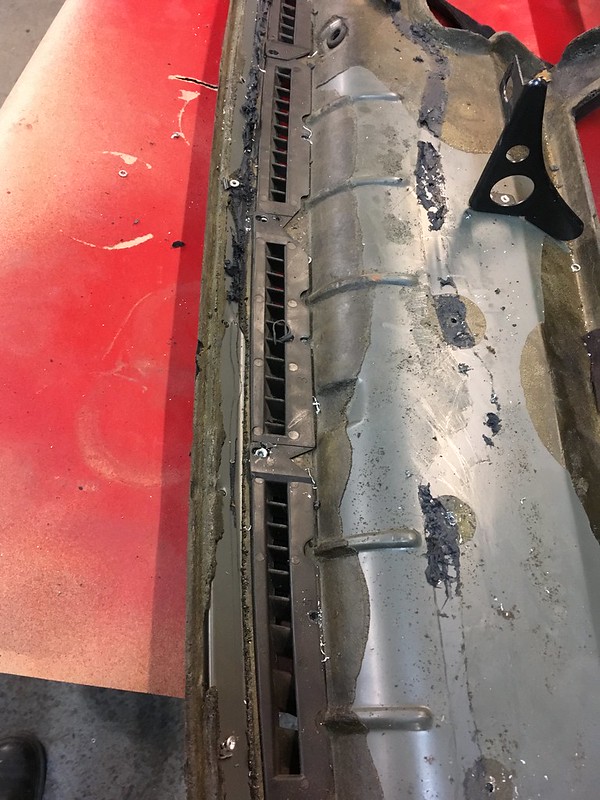
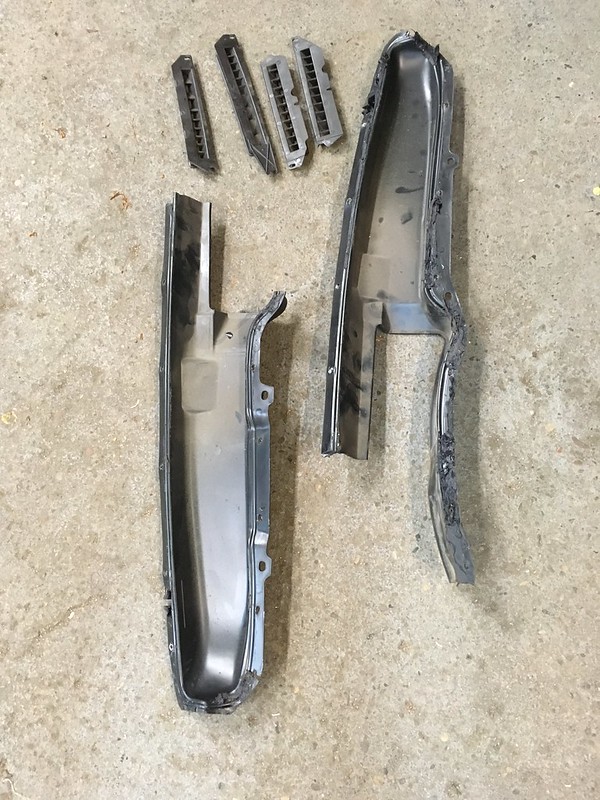
More rear of the car projects. Another piece (two actually) that would be better stored in the car is the rear bulkhead. It comes in two parts: a lower and an upper. The upper part is essentially a parcel shelf as it is mostly horizontal but is definitely not flat. No parcels will be stored here. We think this will be just a test fit as it may be in and out a lot in the course of the build, though it will be going to paint with it fully installed. It will definitely need to come out to allow us to clean up the aperture edges. Looks like that was cut with a torch.
Both pieces clearly needed to go through the side window openings. The lower panel fell into place without much trouble.
But the upper one fought us hard. We even called the cage builder and the body shop; the last people to mess with it but they couldn't remember how they did it. At least we now had the confidence to know that it does fit so we continued to jiggle it around and look for a way in. This seemed like the way it wanted to go but it wouldn't slide any further back.
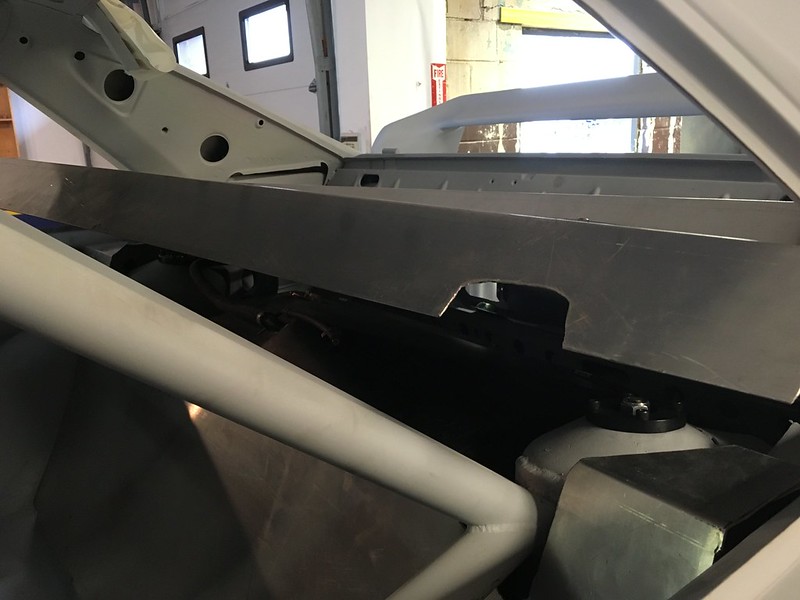
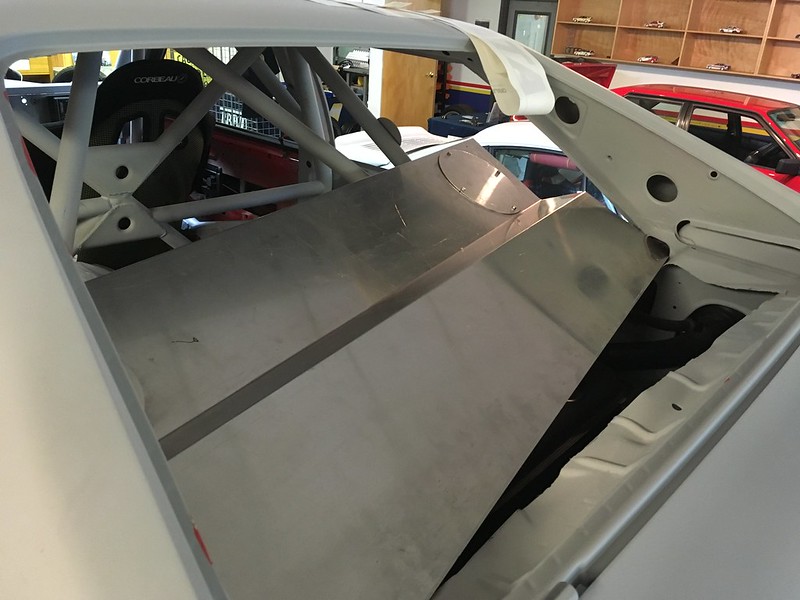
Eventually we sort of curved it as we slid it down the cage bars and then it fit nice and snug.
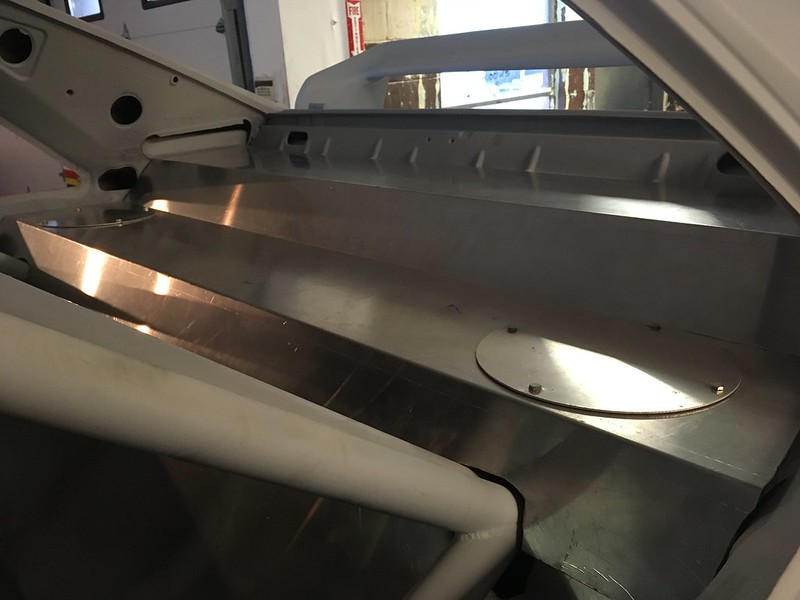
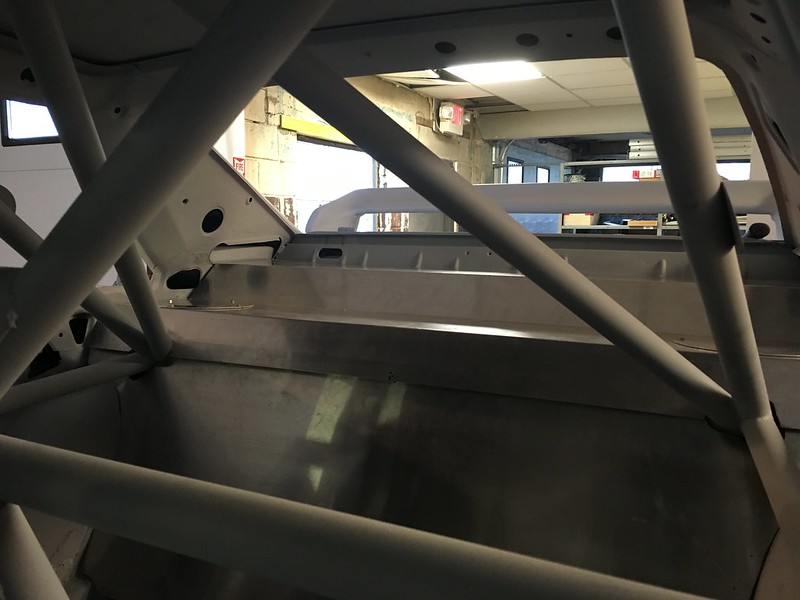
Now we have to get it out again!
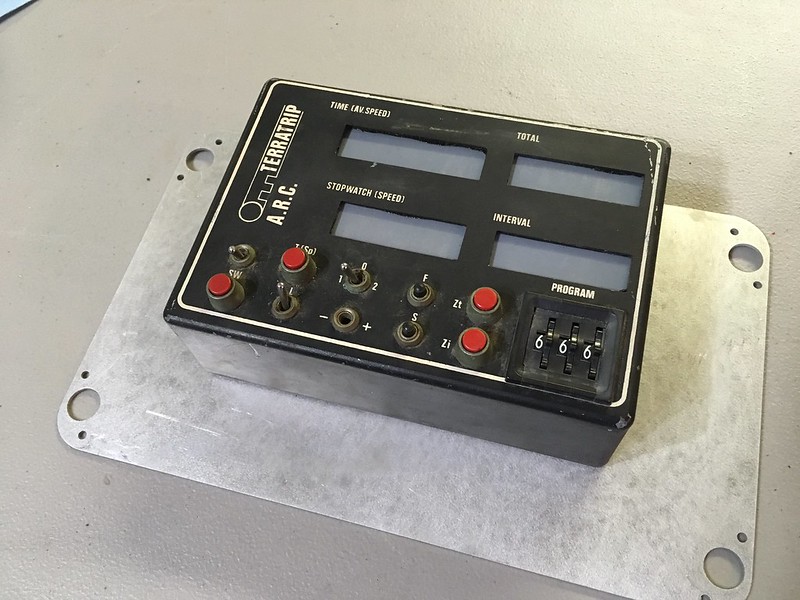
(DASH)
Work continues on the dash, bit by bit. We bought an old rally computer that came off a Rothmans car in the middle east. It has no internal parts but we have another one that does and that may find its way into the car eventually. For now this one is easier to install.
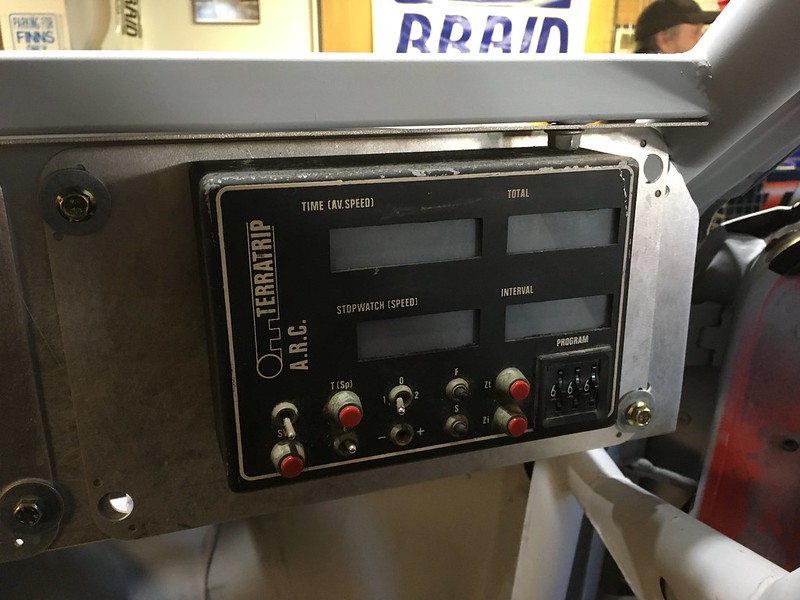
Then we thought we'd have some fun.
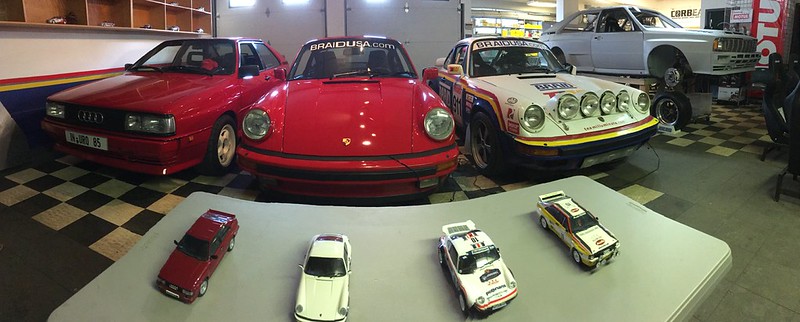
We just need to repaint one of the 911s and get a Rothmans Quattro model (on order) and we'll have a perfect set!
FUEL TANK
While we seem to be working on the rear of the car we thought we'd throw in the fuel tank. It's big and takes up a lot of space on the parts shelf. What more rationalization do you need. Oh, we also want to see where the fuels lines exit the trunk area so we can figure out where to locate lines, pumps and filters etc.
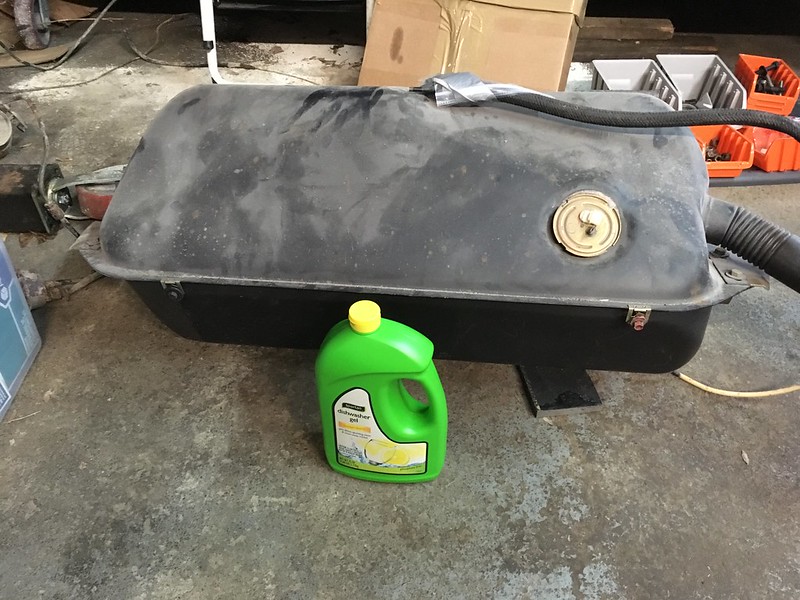
It was a bit awkward to wrestle into location, but soon cooperated.
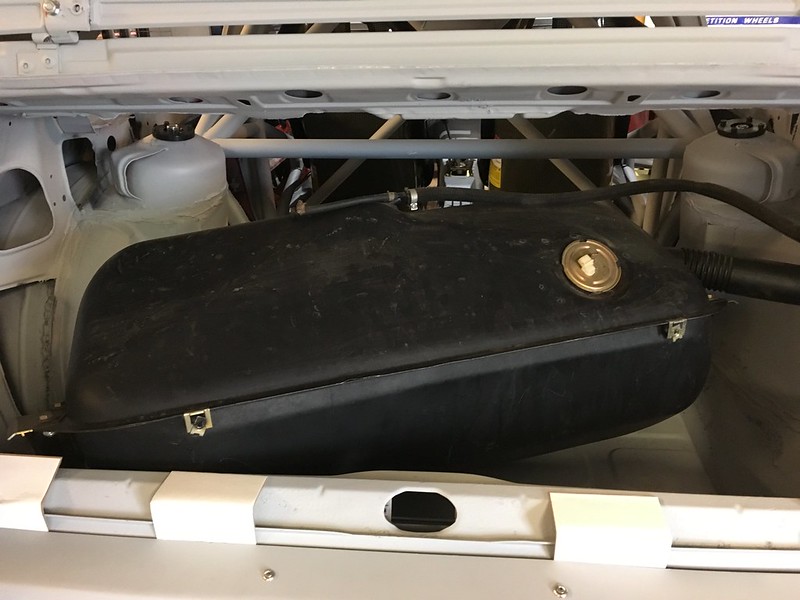
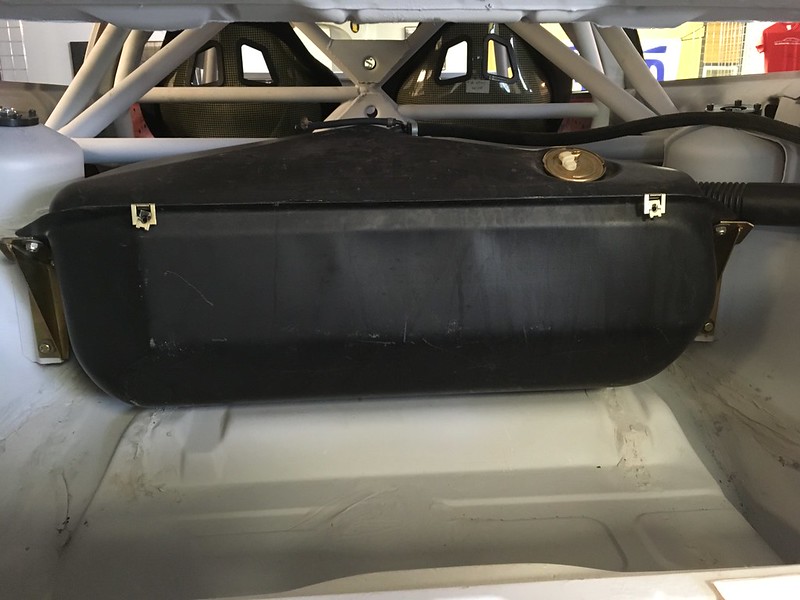
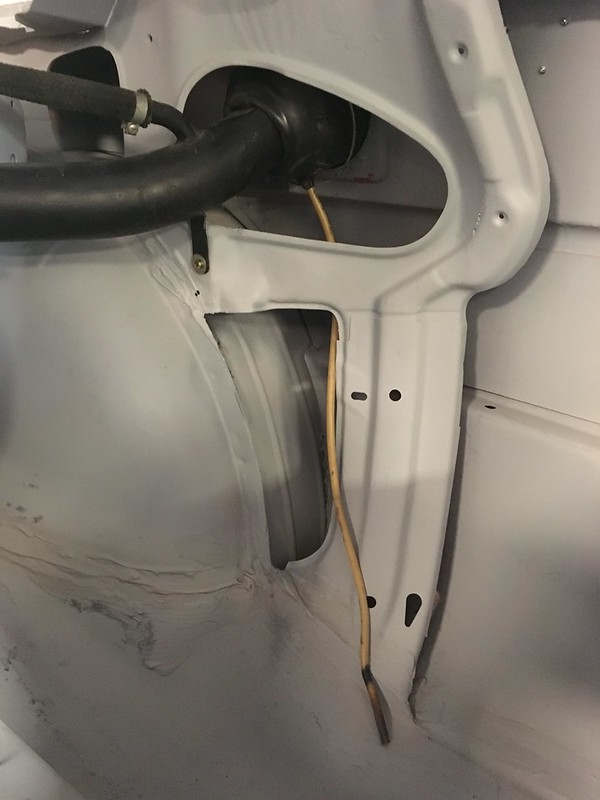
The fuel lines protrude through the trunk floor. Perhaps we can extended them through the lower rear bulkhead and mount the fuel pump/s in the cabin.
Then we remembered that we also have a broken reflector which we thought would be better used on this car rather than the pristine one that came off it as we are going to be wrapping it anyway a la Rothmans livery:
But how to fix the crack? It can be unsightly but has to be smooth as any hint of a crack will show up through the vinyl film. Fortunately one of our guys has a lot of experience with plastic adhesive and managed a nearly invisible repair.
Now we have to figure out how to wrap the black side pieces. As they have horizontal grooves running along their lengths they won't take vinyl very well. We could try to paint them but it might not match the vinyl and we'd be ruining a set. We have considered filling the grooves with body filler and sanding them flat. That would wrap easily but we'd still be ruining a set. Currently considering making new filler panels. Fortunately we don't have to decide for a while though.
(BULKHEAD)
More rear of the car projects. Another piece (two actually) that would be better stored in the car is the rear bulkhead. It comes in two parts: a lower and an upper. The upper part is essentially a parcel shelf as it is mostly horizontal but is definitely not flat. No parcels will be stored here. We think this will be just a test fit as it may be in and out a lot in the course of the build, though it will be going to paint with it fully installed. It will definitely need to come out to allow us to clean up the aperture edges. Looks like that was cut with a torch.
Both pieces clearly needed to go through the side window openings. The lower panel fell into place without much trouble.
But the upper one fought us hard. We even called the cage builder and the body shop; the last people to mess with it but they couldn't remember how they did it. At least we now had the confidence to know that it does fit so we continued to jiggle it around and look for a way in. This seemed like the way it wanted to go but it wouldn't slide any further back.
Eventually we sort of curved it as we slid it down the cage bars and then it fit nice and snug.
Now we have to get it out again!
(DASH)
Work continues on the dash, bit by bit. We bought an old rally computer that came off a Rothmans car in the middle east. It has no internal parts but we have another one that does and that may find its way into the car eventually. For now this one is easier to install.
Then we thought we'd have some fun.
We just need to repaint one of the 911s and get a Rothmans Quattro model (on order) and we'll have a perfect set!
FUEL TANK
While we seem to be working on the rear of the car we thought we'd throw in the fuel tank. It's big and takes up a lot of space on the parts shelf. What more rationalization do you need. Oh, we also want to see where the fuels lines exit the trunk area so we can figure out where to locate lines, pumps and filters etc.
It was a bit awkward to wrestle into location, but soon cooperated.
The fuel lines protrude through the trunk floor. Perhaps we can extended them through the lower rear bulkhead and mount the fuel pump/s in the cabin.
01-16-2019, 08:24 AM
#43
AudiWorld Member
Thread Starter
Another long gap between updates, sorry. We have been traveling and working a lot and then there was the holidays to contend with. Still, we did manage quite a few parts acquisitions but we didn�t get to merge much of them with the car.
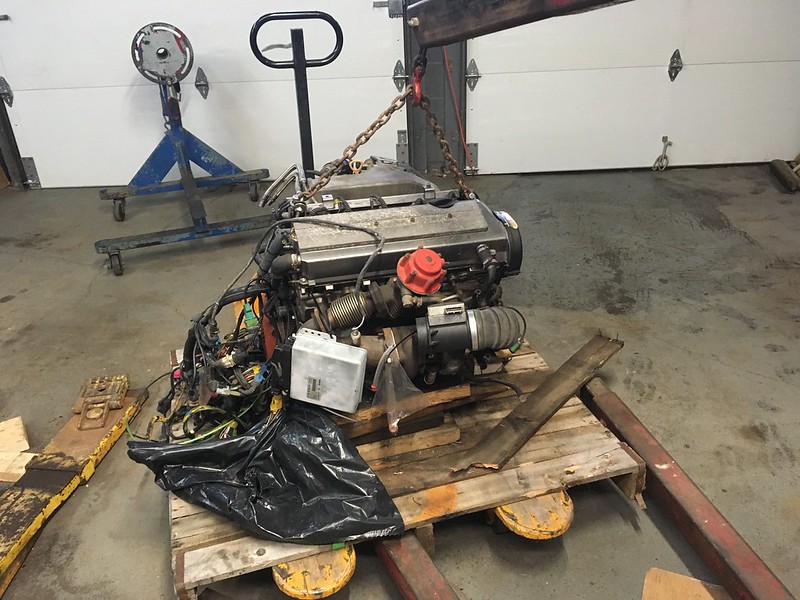
Our long awaited 20V engine arrived late last year. Thanks to Marc of EFI Express for assembling it for us. It�s a AAN engine out of an S4 or something like that. Marc tested and resealed it, replaced the head gasket, water pump, timing belt etc. Chipped the ECU, stripped the wiring harness and included an S4 down pipe. Then packed it in this amazing box.
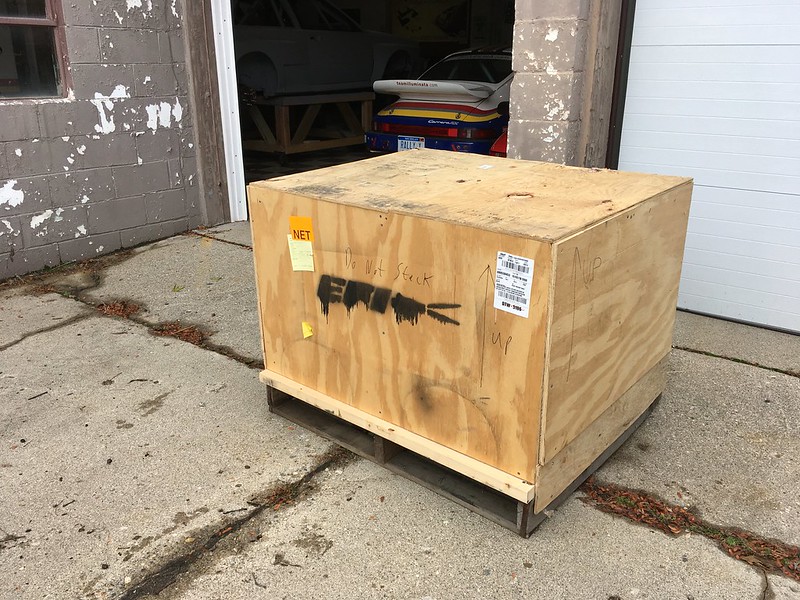
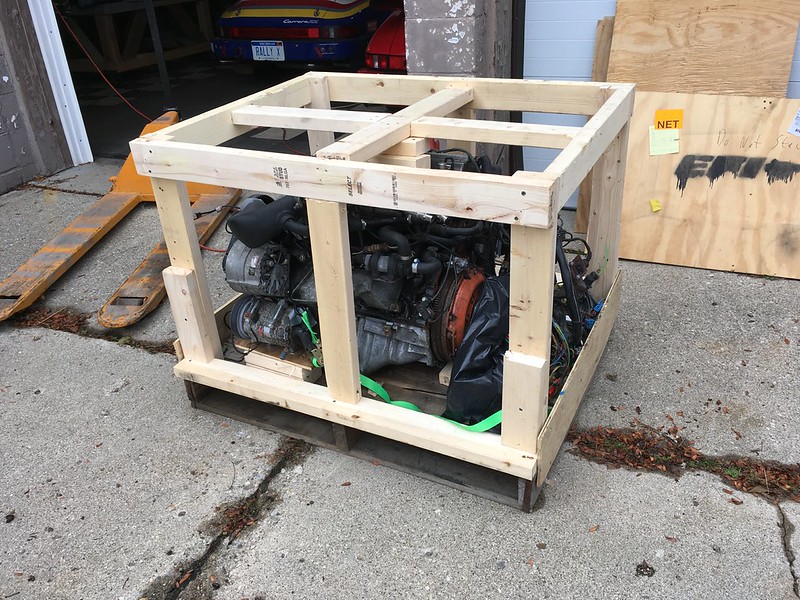
We feel we can have a more reliable 350hp out of this 20V than trying to make the 10V do the same.
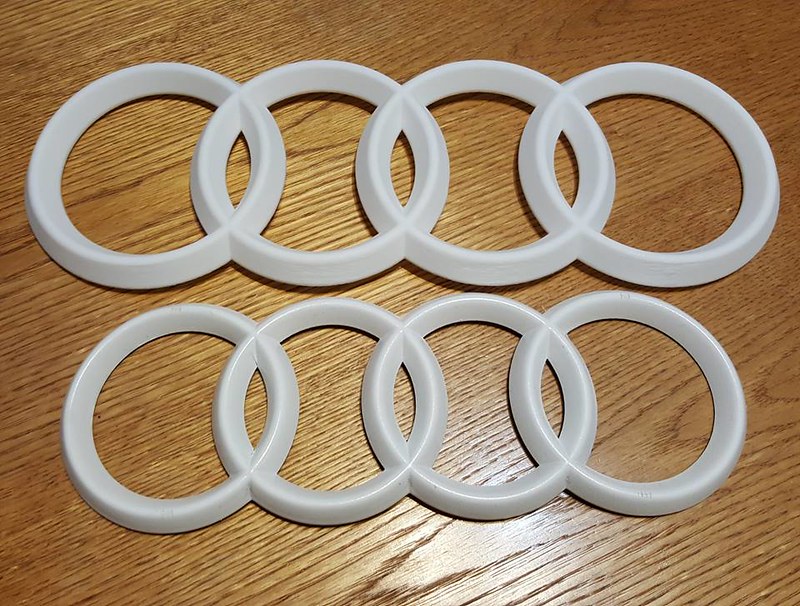
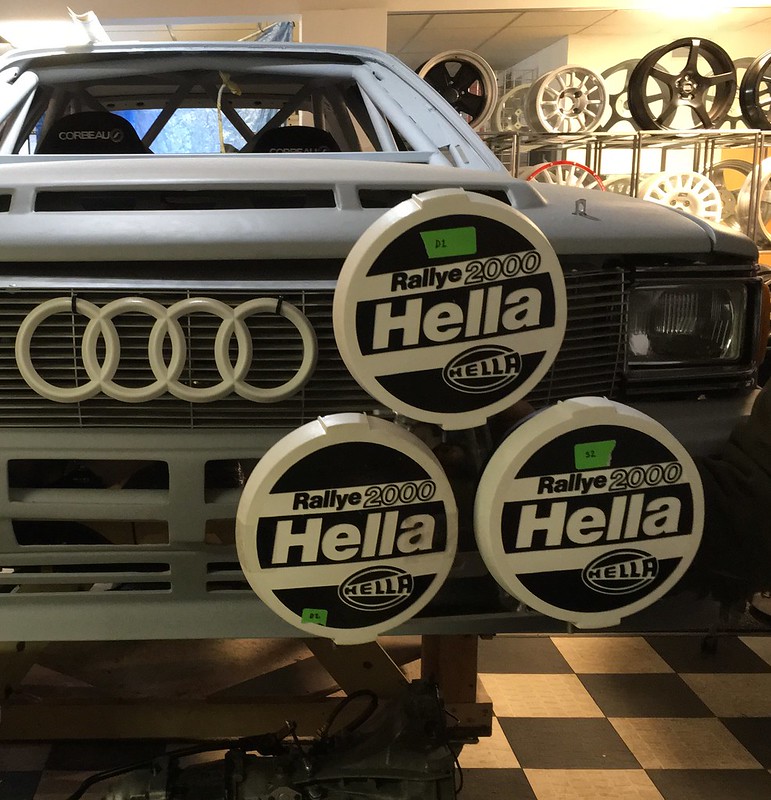
We had an oversized grill badge 3D printed by our friend Brandon Horsch.
During our travels we picked up some warning lights and switches from England. We did get to �merge these with the dash.
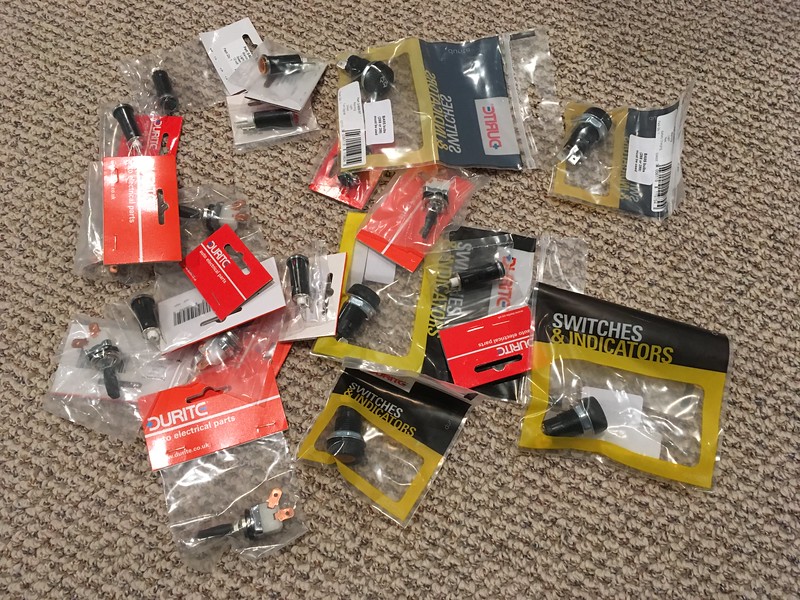
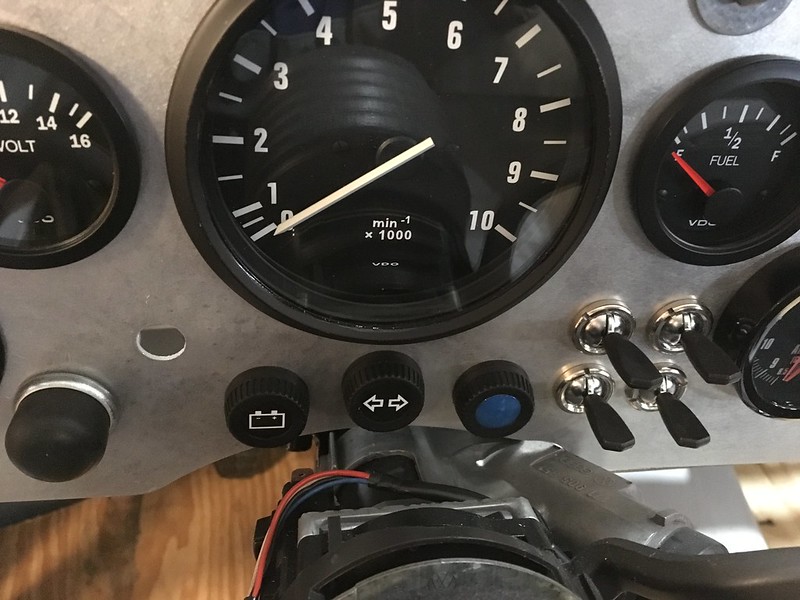
The dash just needs fuse panels and Dzus fasteners now..
Blower cover from Europe.

We also acquired some works of art from a fellow Audi rally enthusiast in England and couldn�t resist mocking one up.

We have now made it back into the workshop and have been busy refurbishing various parts. Hopefully our next update will be more about mergers than acquisitions. Stay tuned.
Our long awaited 20V engine arrived late last year. Thanks to Marc of EFI Express for assembling it for us. It�s a AAN engine out of an S4 or something like that. Marc tested and resealed it, replaced the head gasket, water pump, timing belt etc. Chipped the ECU, stripped the wiring harness and included an S4 down pipe. Then packed it in this amazing box.
We feel we can have a more reliable 350hp out of this 20V than trying to make the 10V do the same.
We had an oversized grill badge 3D printed by our friend Brandon Horsch.
During our travels we picked up some warning lights and switches from England. We did get to �merge these with the dash.
The dash just needs fuse panels and Dzus fasteners now..
Blower cover from Europe.
We also acquired some works of art from a fellow Audi rally enthusiast in England and couldn�t resist mocking one up.
We have now made it back into the workshop and have been busy refurbishing various parts. Hopefully our next update will be more about mergers than acquisitions. Stay tuned.
02-06-2019, 06:06 AM
#44
AudiWorld Member
Thread Starter
Rally Cars Need Heaters Too
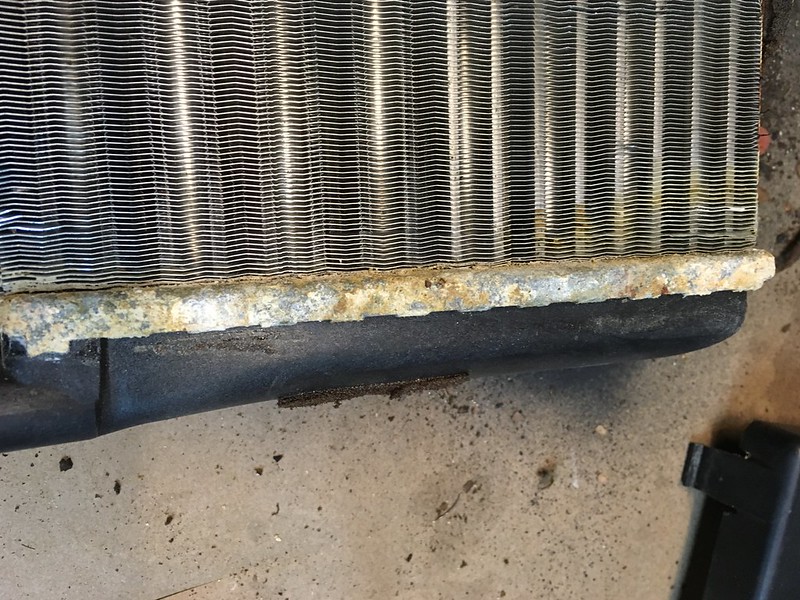
We could have just wiped the dust of the heater box a bolted back in place but we are glad we took it apart as we found the heater core had been weeping or leaking. Besides, all the seals needed replacing and it was full of leaves inside.

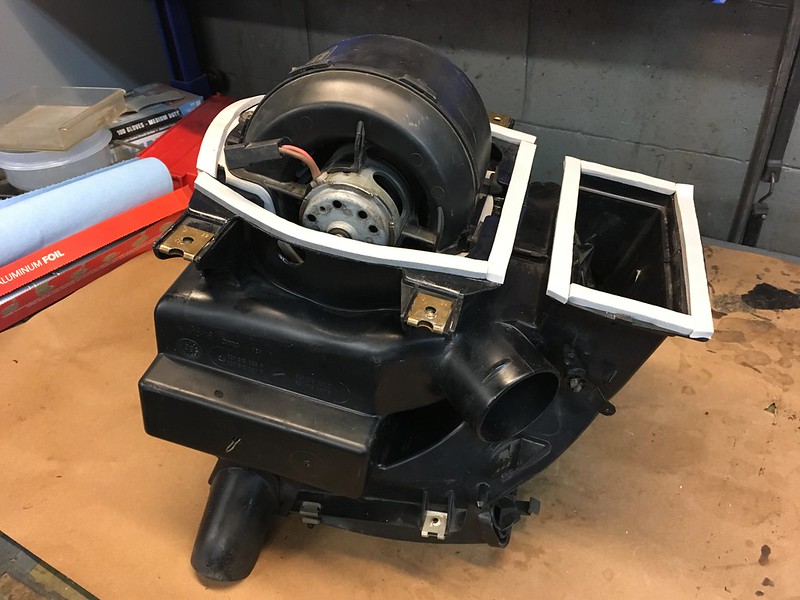
We had also broken off a tab from the blower while removing it from the heater box so that needed to be glued back together.
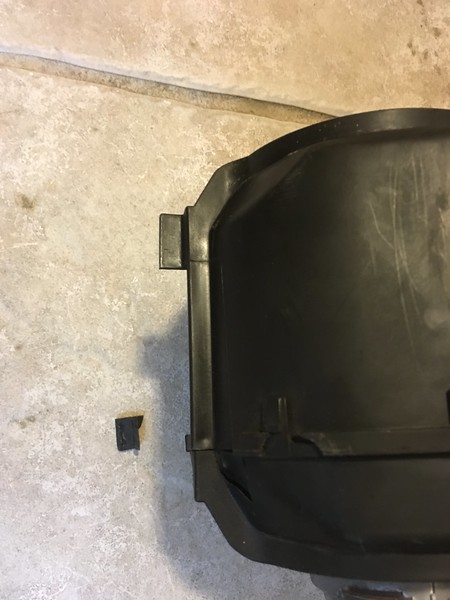
The heater box consists of two halves held together by spring clips. It didn't take long to split it.

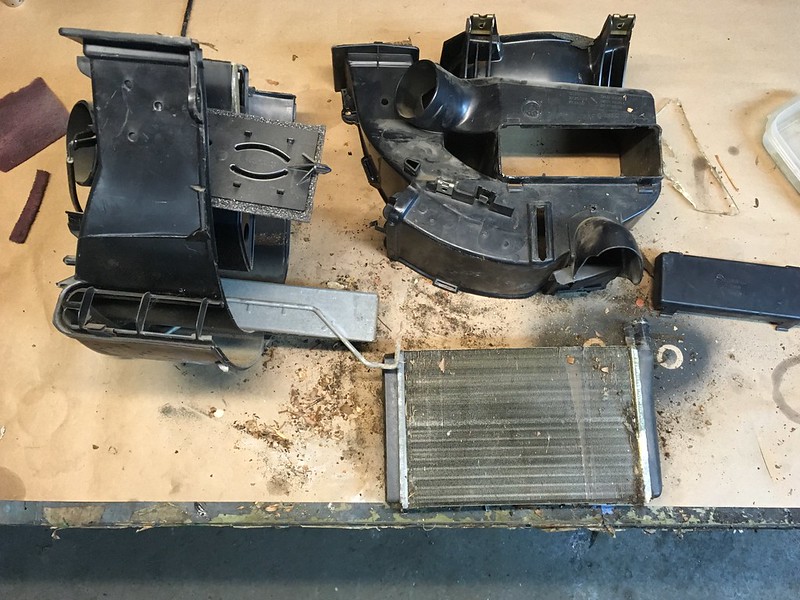
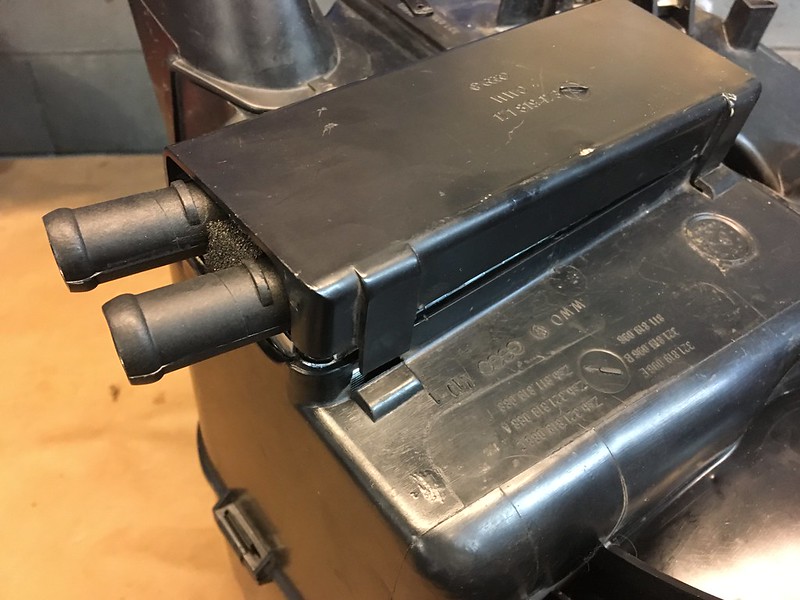
The leaky heater core and its replacement. These seem to have been used in every Audi, VW and Porsche made in the 80s so finding one was quite easy.

We broke a clip off the heater core lid but have already found a replacement on eBay. We'll pop that on after the dry build.
New seals and into the car with it and the cover we got from a fellow Quattro enthusiast.
It's nice to bolt things to the car. We get all warm and fuzzy inside, plus we'll be warm inside the car too.
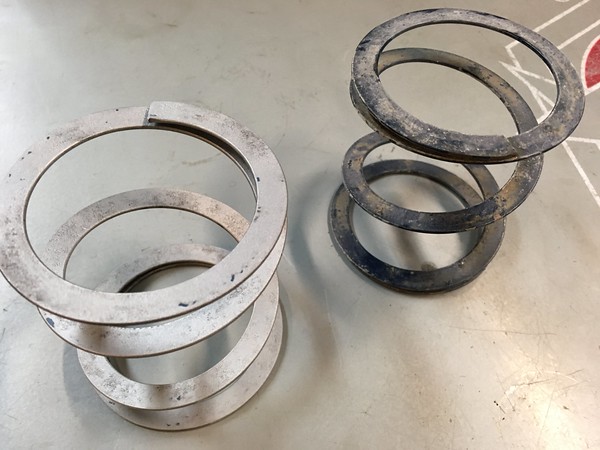
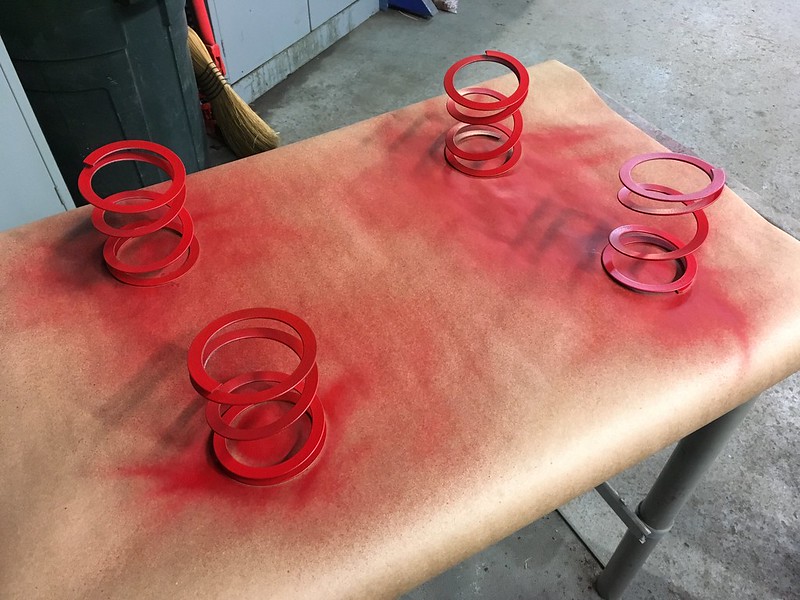
We also took the opportunity to refinish our helper springs for the coilovers. Even though these have never been used most of the powder coating had already deteriorated. We decided to try Plasti-dip rather than re powder coating as this is way more flexible and will not crack. We will see how well that works one day in the future.
Wipers, tie rods and heater are next up. Don’t miss it.
We could have just wiped the dust of the heater box a bolted back in place but we are glad we took it apart as we found the heater core had been weeping or leaking. Besides, all the seals needed replacing and it was full of leaves inside.
We had also broken off a tab from the blower while removing it from the heater box so that needed to be glued back together.
The heater box consists of two halves held together by spring clips. It didn't take long to split it.
The leaky heater core and its replacement. These seem to have been used in every Audi, VW and Porsche made in the 80s so finding one was quite easy.
We broke a clip off the heater core lid but have already found a replacement on eBay. We'll pop that on after the dry build.
New seals and into the car with it and the cover we got from a fellow Quattro enthusiast.
It's nice to bolt things to the car. We get all warm and fuzzy inside, plus we'll be warm inside the car too.
We also took the opportunity to refinish our helper springs for the coilovers. Even though these have never been used most of the powder coating had already deteriorated. We decided to try Plasti-dip rather than re powder coating as this is way more flexible and will not crack. We will see how well that works one day in the future.
Wipers, tie rods and heater are next up. Don’t miss it.
 02-28-2019, 10:01 AM
#46
AudiWorld Member
Thread Starter
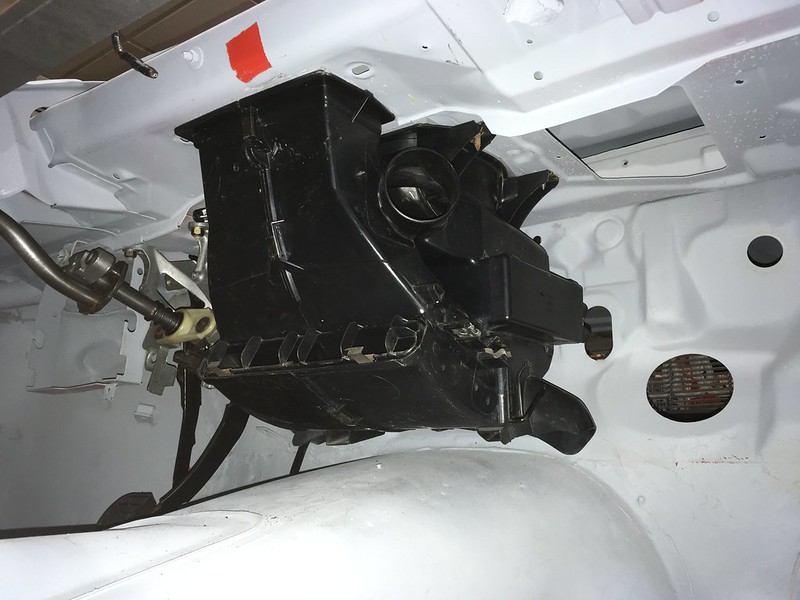
DEFROST MANIFOLD
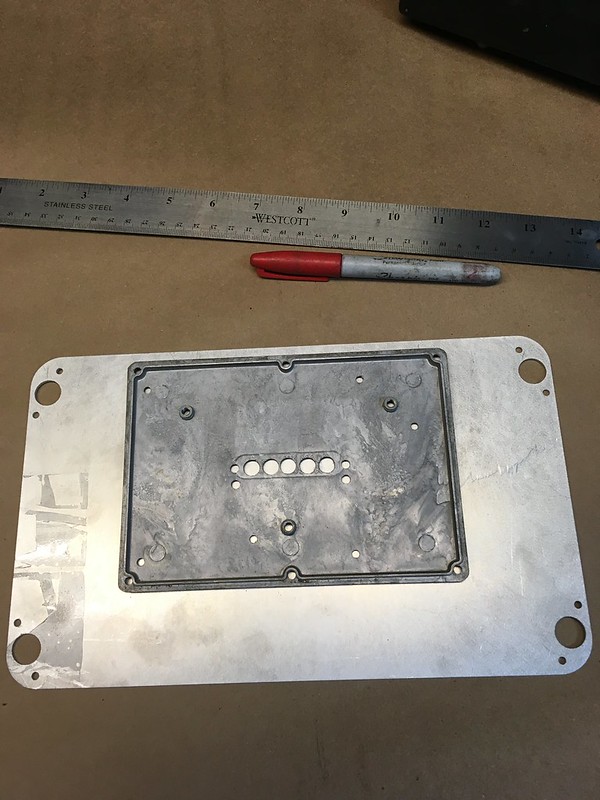
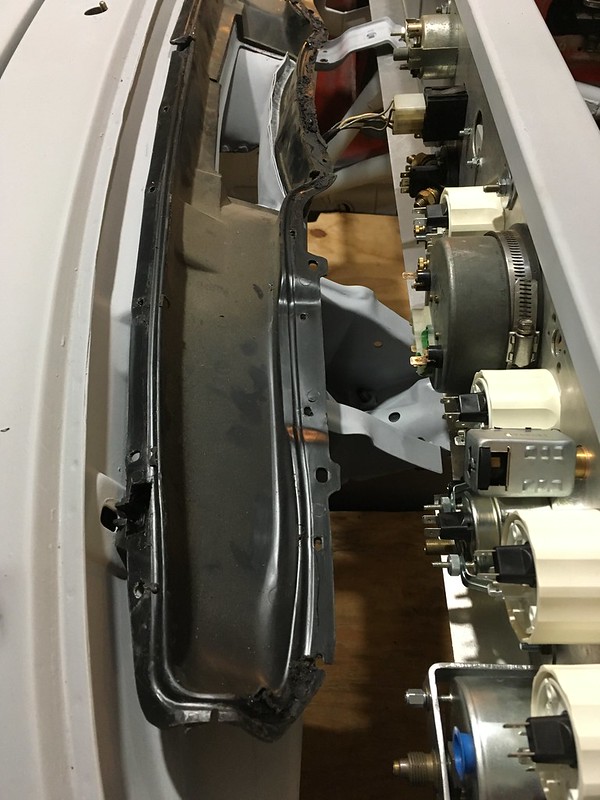
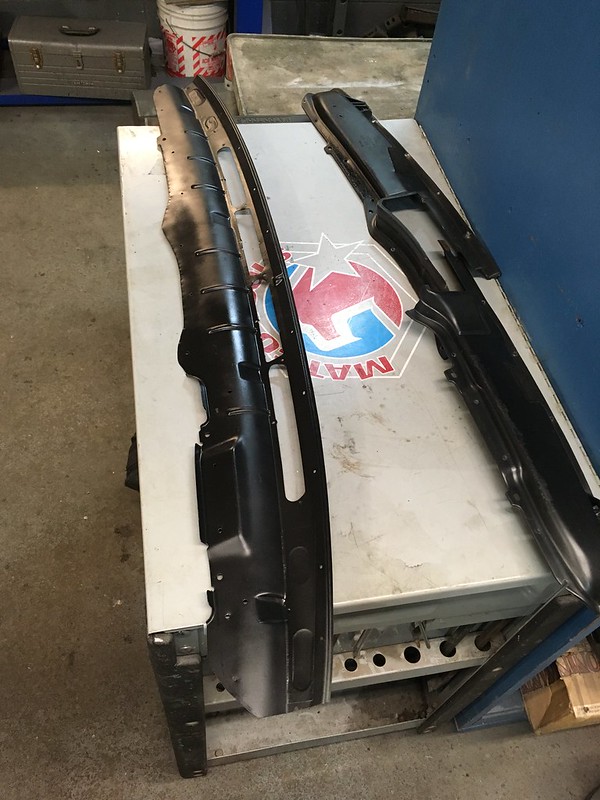
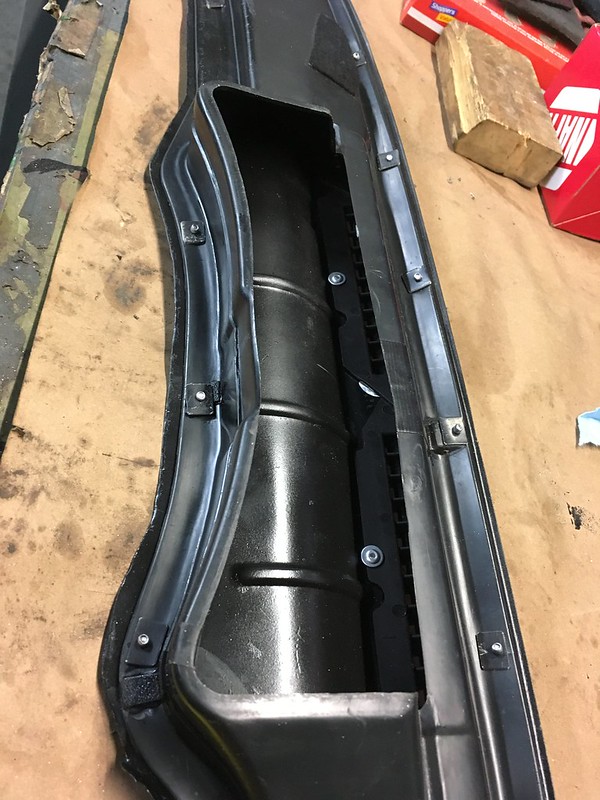
Now we had the heater in we thought it a good idea to install some of the ducting to spread that heat where it might be needed. The foot wells heat comes right out of the side of the heater box so we don’t have to deal with that, and the center and side vents are fed from flexible pipes so we can figure those out later. But the windshield defrost blows through the firewall bulkhead and into a distribution manifold that used to be part of the molded dash pad. Fortunately we hadn’t managed to throw the dash pad away.
This is the plastic distribution manifold on the underside of the dash pad.
From what we gleaned looking at hundreds of restoration pictures is that you cut the dash pad to leave just this front area containing the manifold and vents then remove all the molded on dash pad foam from the top and bolt it back into place. Of course our manifold was cracked so we had to disassemble the thing.
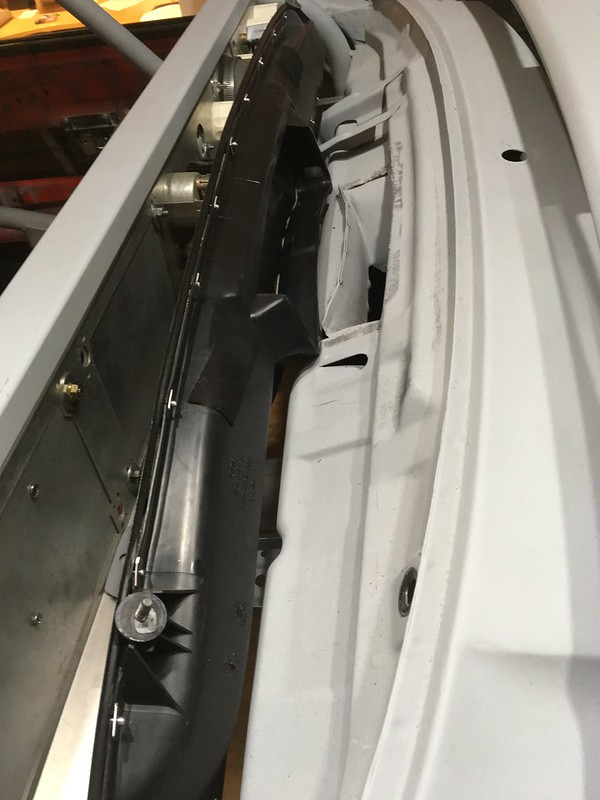
This is how the manifold interfaces with the bulkhead/dash tube once it’s all put back together. You can see the central feed from the heater box below the dash tube.
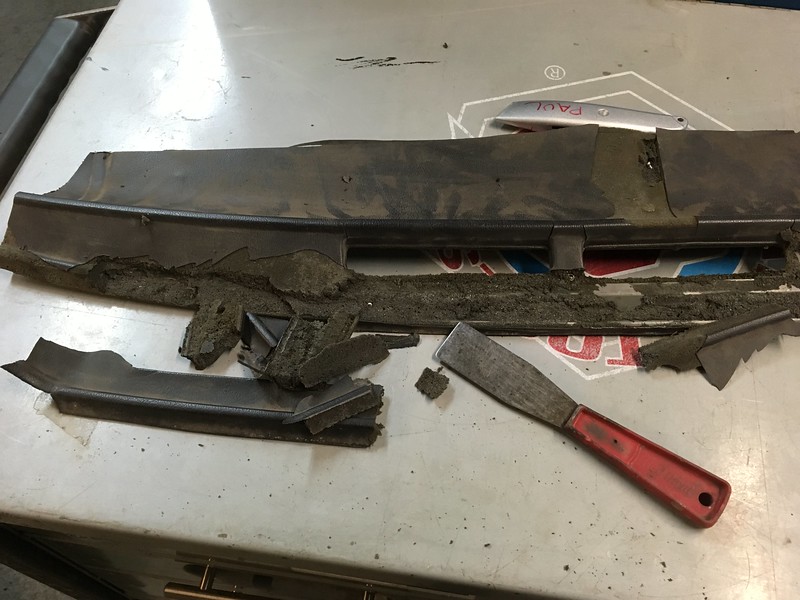
Next we removed the excess dash pad material with a cutoff wheel and set about cleaning it up.

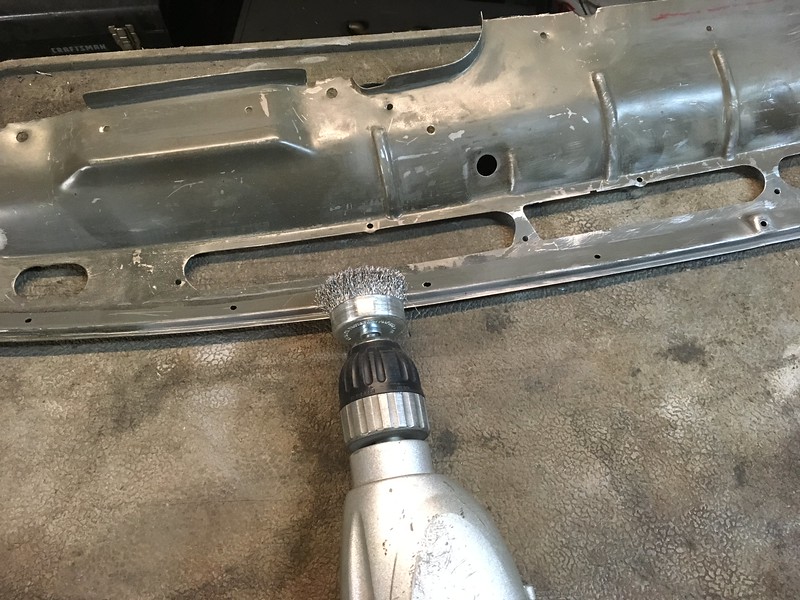
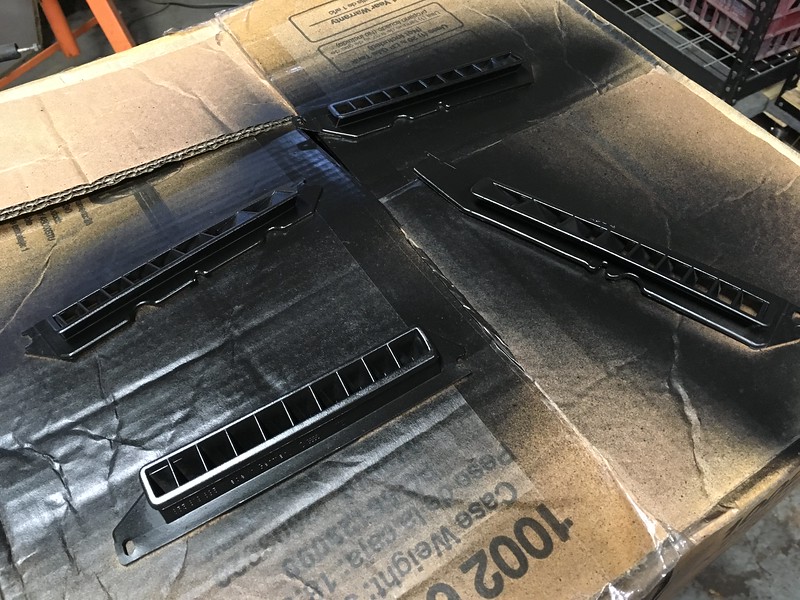
We covered up some excess holes that were previously blocked and painted it and the vents satin black.

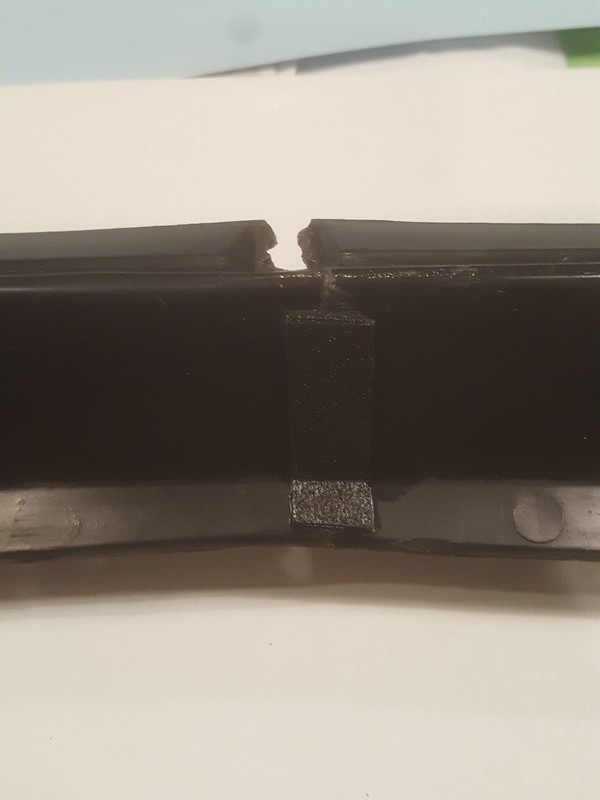
Then we set about fixing the plastic manifold.
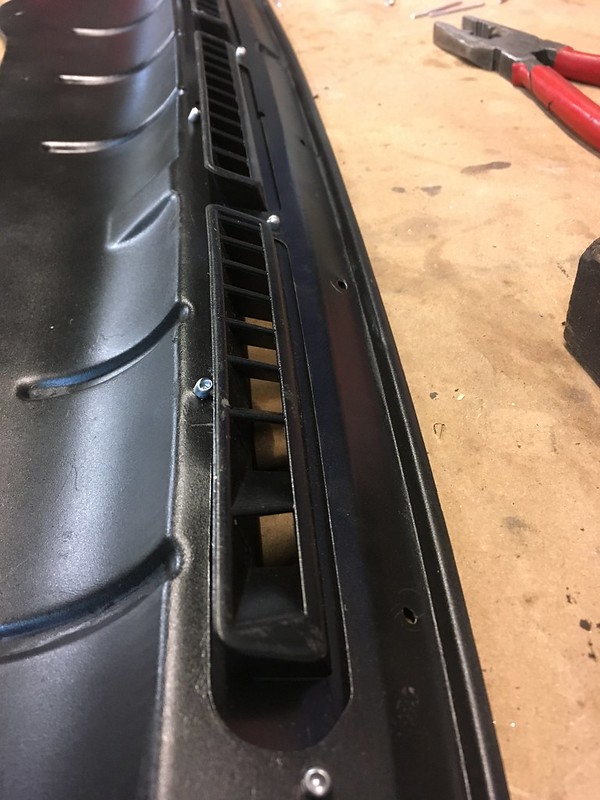
While the glue was setting up we riveted the vents back into place.

Then we applied some sealant before riveting the two parts back together.
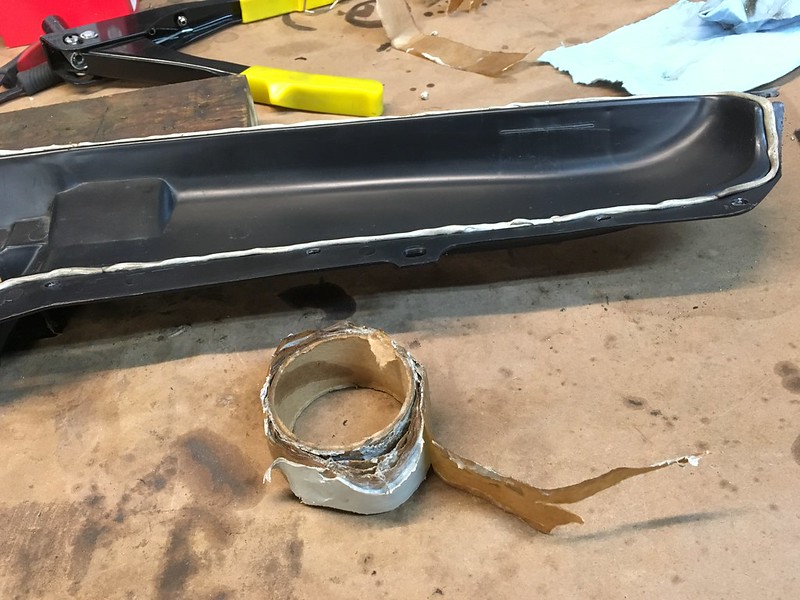
And then popped it into place.

For some reason this was one of the most satisfying projects we have tackled so far. Next time we’ll restore and install the washer bottle and coolant reservoir. Maybe not so satisfying.
Now we had the heater in we thought it a good idea to install some of the ducting to spread that heat where it might be needed. The foot wells heat comes right out of the side of the heater box so we don’t have to deal with that, and the center and side vents are fed from flexible pipes so we can figure those out later. But the windshield defrost blows through the firewall bulkhead and into a distribution manifold that used to be part of the molded dash pad. Fortunately we hadn’t managed to throw the dash pad away.
This is the plastic distribution manifold on the underside of the dash pad.
From what we gleaned looking at hundreds of restoration pictures is that you cut the dash pad to leave just this front area containing the manifold and vents then remove all the molded on dash pad foam from the top and bolt it back into place. Of course our manifold was cracked so we had to disassemble the thing.
This is how the manifold interfaces with the bulkhead/dash tube once it’s all put back together. You can see the central feed from the heater box below the dash tube.
Next we removed the excess dash pad material with a cutoff wheel and set about cleaning it up.
We covered up some excess holes that were previously blocked and painted it and the vents satin black.
Then we set about fixing the plastic manifold.
While the glue was setting up we riveted the vents back into place.
Then we applied some sealant before riveting the two parts back together.
And then popped it into place.
For some reason this was one of the most satisfying projects we have tackled so far. Next time we’ll restore and install the washer bottle and coolant reservoir. Maybe not so satisfying.
Last edited by team illuminata; 02-28-2019 at 10:04 AM. Reason: broken image
03-06-2019, 11:52 AM
#47
AudiWorld Member
Thread Starter
Cracking on with engine bay stuff we installed the clutch master cylinder. Remember, we have an 20V AAN engine just itching to try on this engine bay for size so we want to get as much engine bay stuff figured out before it crawls in there.
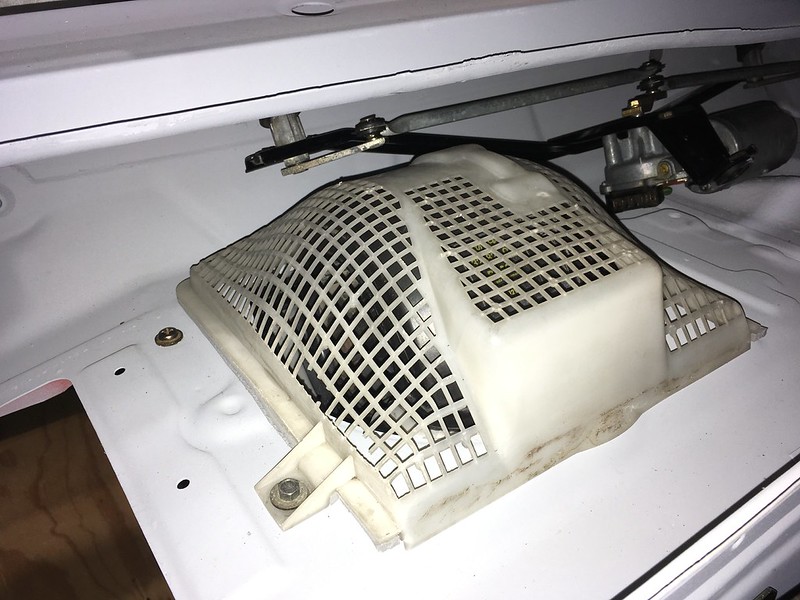
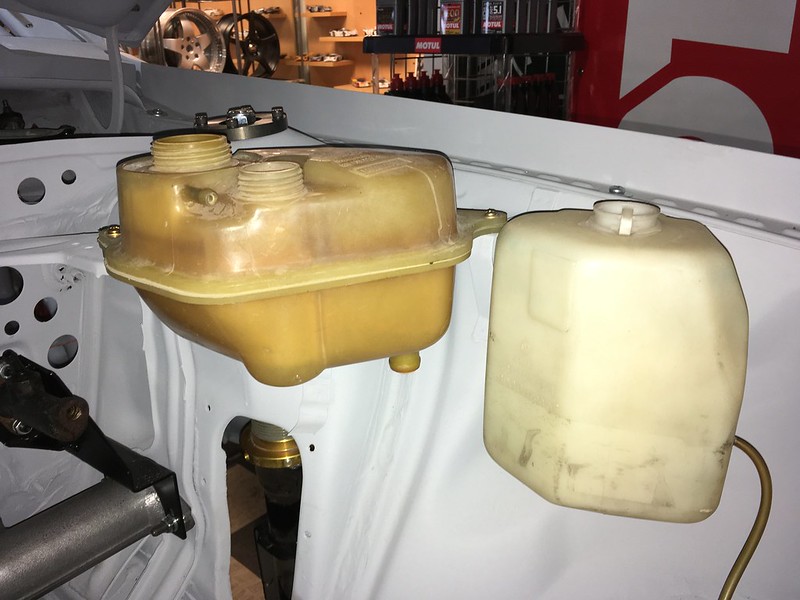
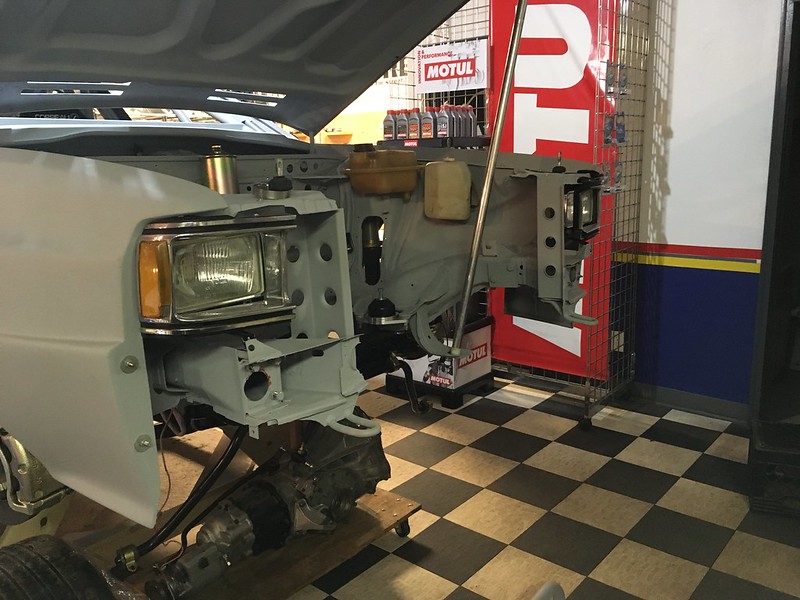
Not wanting to lose our bottle before the engine fit we also tested and installed the coolant reservoir. We rigged up this pressure test to see if it would hold 1.35 bar:


The reservoir didn’t leak but the cap let go at about 1.2 bar. We tried our cap from the 85 URQ and it held. We are going to need a new cap.

We cleaned it as best as we could and bolted it in place along with the washer bottle.
We should’ve thought about this earlier but after crawling under the front bumper all afternoon we decide it was time to take the front bumper and bumper bar off the car. Duh!

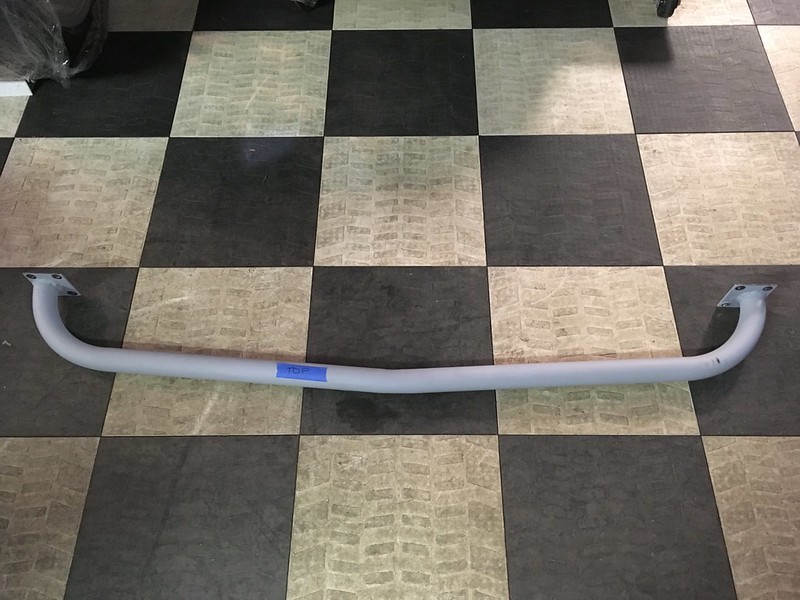
We now have a walk-in Quattro.
We know, not very exciting stuff but next we are going to work on the very trick twin master brake system with bias bar that we got from England! Riveting stuff! No, actually it bolts in.
Not wanting to lose our bottle before the engine fit we also tested and installed the coolant reservoir. We rigged up this pressure test to see if it would hold 1.35 bar:
The reservoir didn’t leak but the cap let go at about 1.2 bar. We tried our cap from the 85 URQ and it held. We are going to need a new cap.
We cleaned it as best as we could and bolted it in place along with the washer bottle.
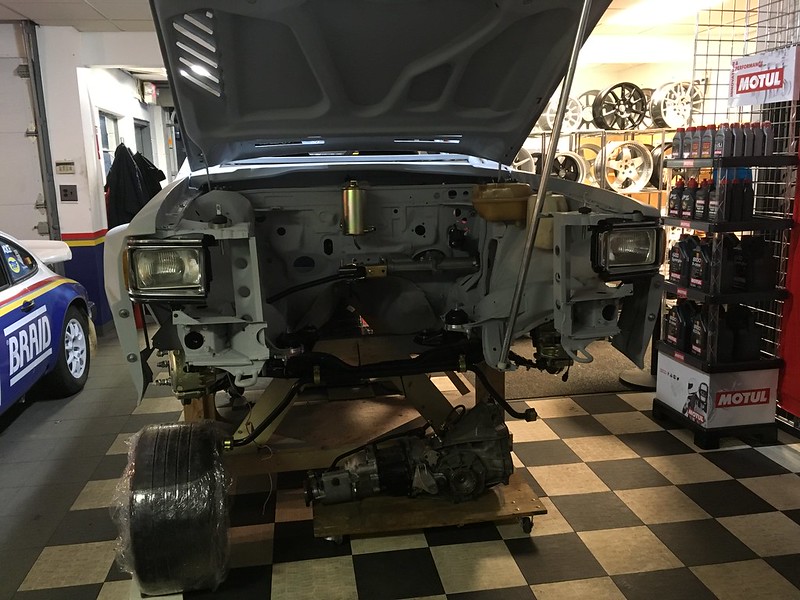
We should’ve thought about this earlier but after crawling under the front bumper all afternoon we decide it was time to take the front bumper and bumper bar off the car. Duh!
We now have a walk-in Quattro.
We know, not very exciting stuff but next we are going to work on the very trick twin master brake system with bias bar that we got from England! Riveting stuff! No, actually it bolts in.
03-29-2019, 08:27 AM
#49
AudiWorld Member
Thread Starter
BRAKE MASTER CYLINDERS
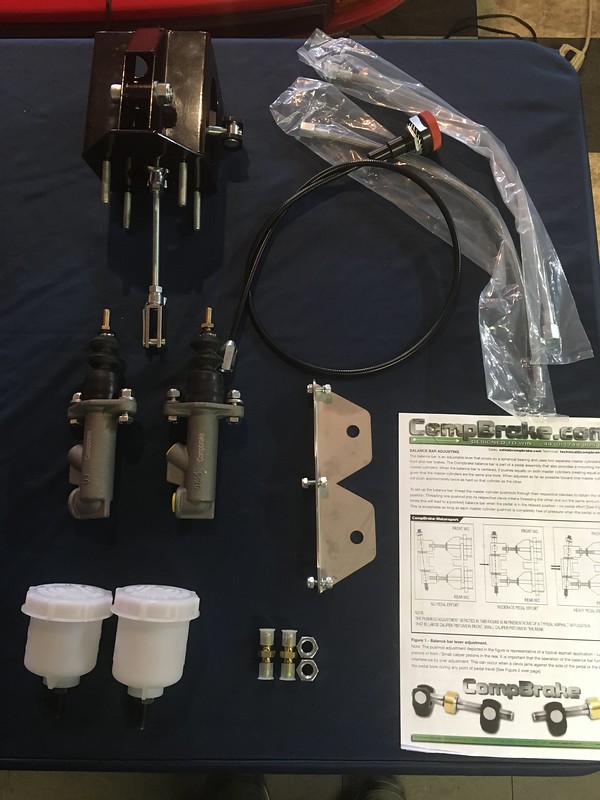
We decided some time back that this car would dispense with the hydraulically powered brakes and employ dual master cylinders with a bias bar adjuster but were never quite sure how we'd accomplish that. Then a friend turned us on to Compbrake in England who have a bolt-in kit for the Quattro. How could we say "no"?
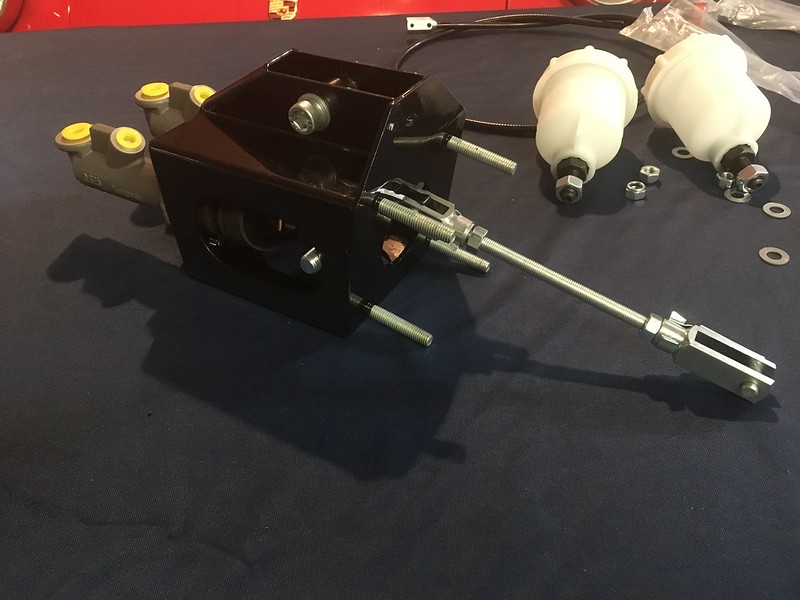
So we ordered one up and it arrived in just a few days. Seems to be very comprehensive. It even has a bracket and lines for remote reservoirs.
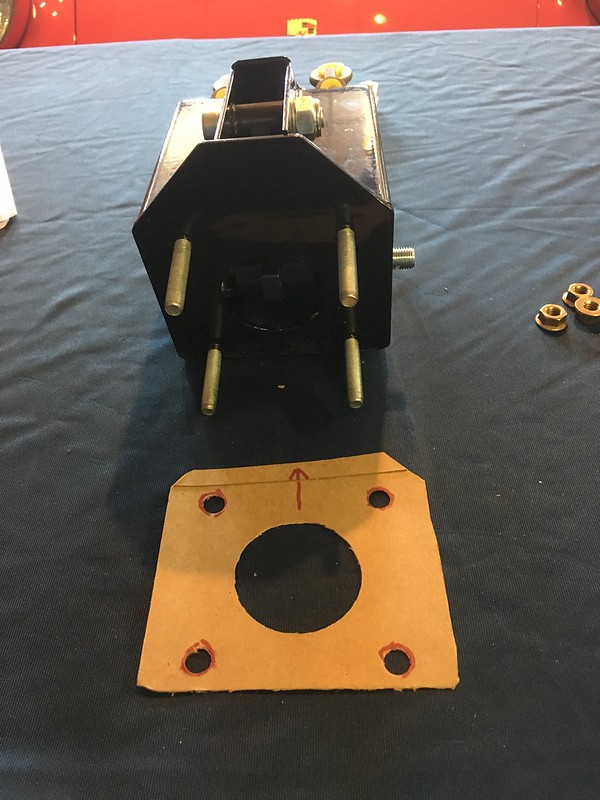
The first job was to figure out how to mate up its four bolts with three on the bulkhead. It was seemingly not as "bolt-in" as we'd hoped. We made a template and transferred it to the car and immediately discovered that the four required holes would interfere with the pedal mounts. Something did not seem quite right.

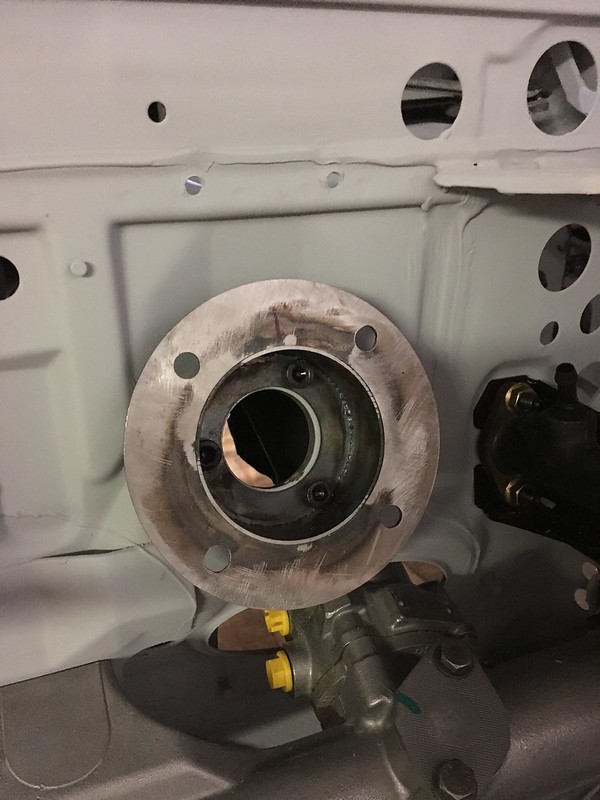
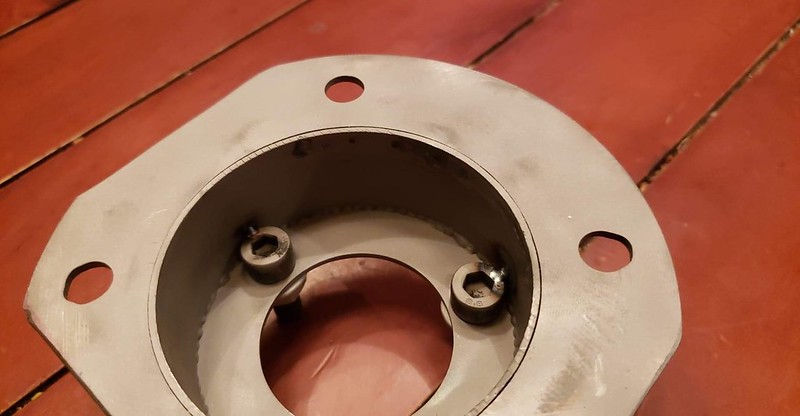
Then a gentleman and fellow Quattro rally car builder called Frank pointed out that the kit is designed to bolt to the OE brake booster not the firewall. He also highlighted how far into the engine bay this would make the assembly protrude because he had installed one himself. However, he had engineered a solution by way of an interface ring that was only about an inch thick rather than the 5"-6" of the booster. A few more emails and some PayPal and one showed up at our shop.

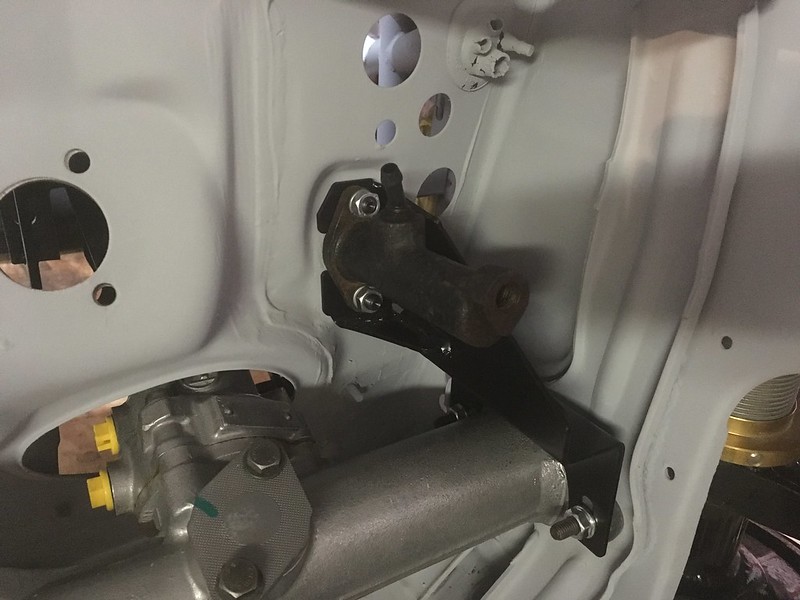
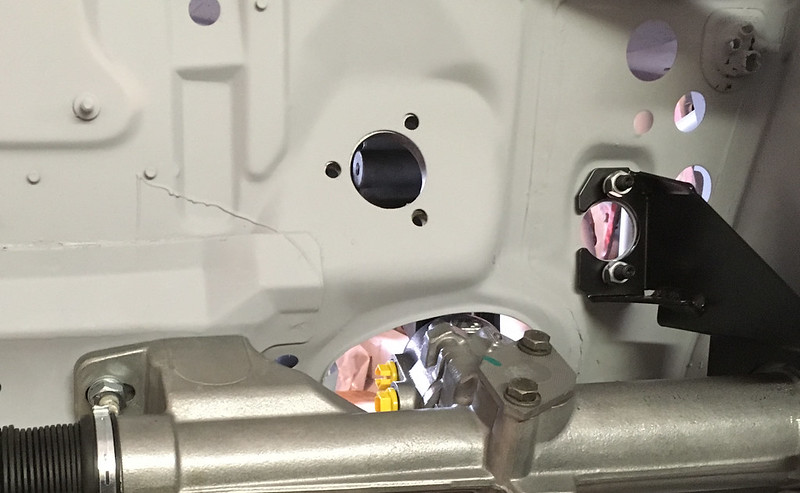
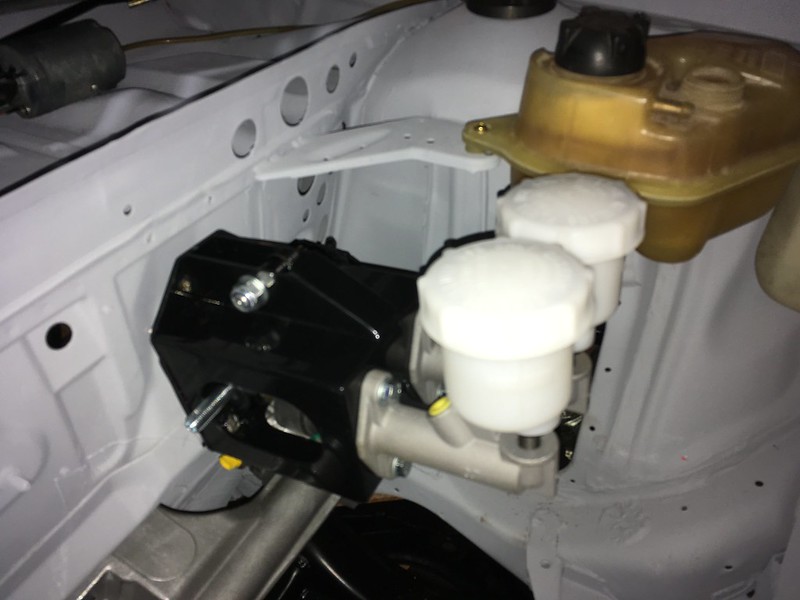
This made all the difference and we were able to mock it all up in short order:

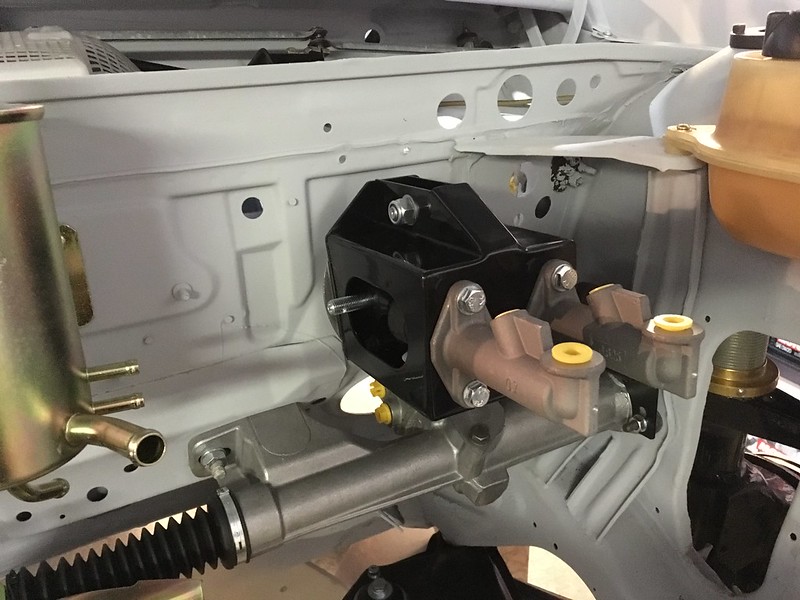
We then set about making it look nice by trimming it and painting it:
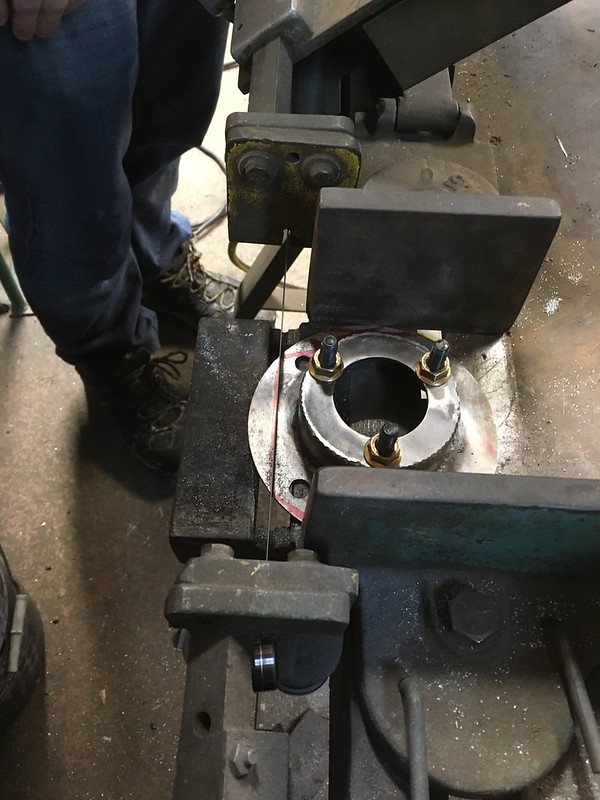


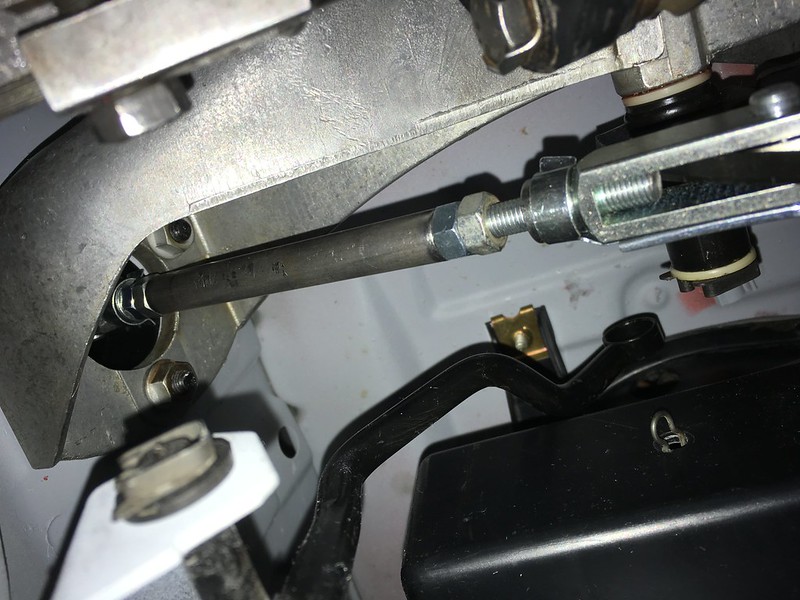
Frank also included some DOM tubing to replace the 5/16" threaded rod that came with the kit as this linkage was going to end up quite long. The DOM would be much stiffer and didn't take much work to cut it to the correct length, thread it and attach a couple of short, threaded rods to each end. We will probably have this assembly plated before the too long.

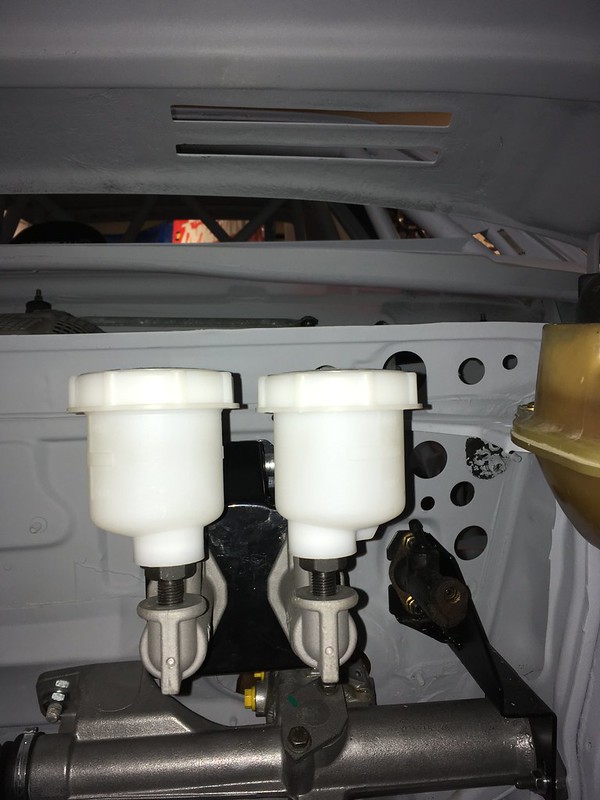
And here it all is installed. We attached the reservoirs directly to the cylinders for now as we don't yet know where everything else is going. The Group B cars had them mounted to the strut bar but we are not that particular. We'll see what seems the best location later in the build.

Next on the list is engine prep. Look out for that one soon.
We decided some time back that this car would dispense with the hydraulically powered brakes and employ dual master cylinders with a bias bar adjuster but were never quite sure how we'd accomplish that. Then a friend turned us on to Compbrake in England who have a bolt-in kit for the Quattro. How could we say "no"?
So we ordered one up and it arrived in just a few days. Seems to be very comprehensive. It even has a bracket and lines for remote reservoirs.
The first job was to figure out how to mate up its four bolts with three on the bulkhead. It was seemingly not as "bolt-in" as we'd hoped. We made a template and transferred it to the car and immediately discovered that the four required holes would interfere with the pedal mounts. Something did not seem quite right.
Then a gentleman and fellow Quattro rally car builder called Frank pointed out that the kit is designed to bolt to the OE brake booster not the firewall. He also highlighted how far into the engine bay this would make the assembly protrude because he had installed one himself. However, he had engineered a solution by way of an interface ring that was only about an inch thick rather than the 5"-6" of the booster. A few more emails and some PayPal and one showed up at our shop.
This made all the difference and we were able to mock it all up in short order:
We then set about making it look nice by trimming it and painting it:
Frank also included some DOM tubing to replace the 5/16" threaded rod that came with the kit as this linkage was going to end up quite long. The DOM would be much stiffer and didn't take much work to cut it to the correct length, thread it and attach a couple of short, threaded rods to each end. We will probably have this assembly plated before the too long.
And here it all is installed. We attached the reservoirs directly to the cylinders for now as we don't yet know where everything else is going. The Group B cars had them mounted to the strut bar but we are not that particular. We'll see what seems the best location later in the build.
Next on the list is engine prep. Look out for that one soon.
04-09-2019, 09:26 AM
#50
AudiWorld Member
Thread Starter
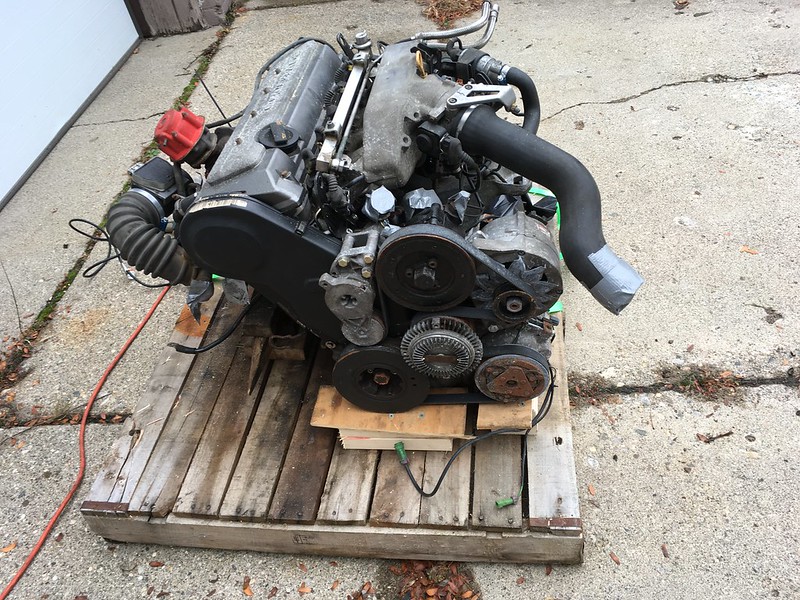
ENGINE Teardown
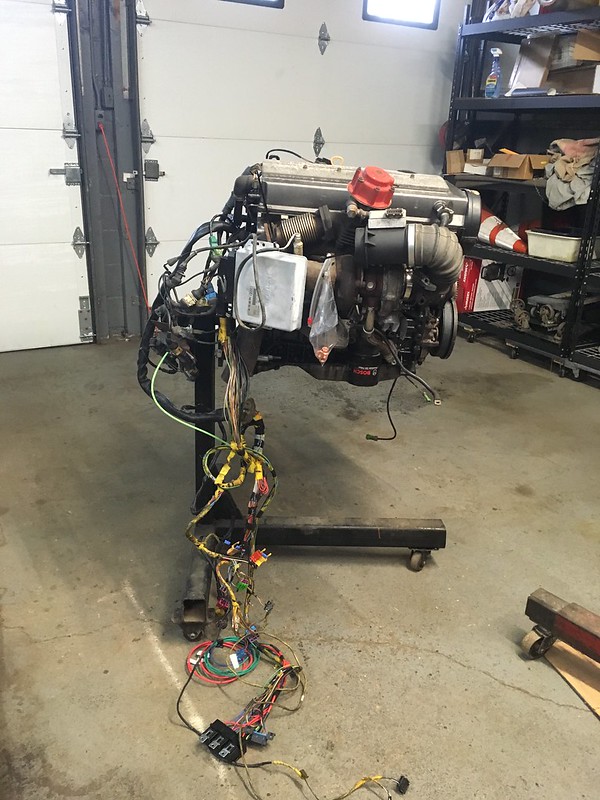
Well, this is a big step forward for the project. It’s time to take the engine off its pallet and get it into the car. Of course it is not that simple. We have lots of ways to make it complicated.
As we’ve previously discussed, we decided to go with a fairly stock later AAN 20 valve engine rather than try to wring extra power from the original 10 valve that came with the car. We should be able to see 300hp from this without creating a stressed out monster nor breaking the bank. Purists may scoff but they aren’t paying the bills.
We sourced this one from Marc over at EFI Express. They are huge Audi fans and know a lot about these engines. This is a tested and resealed, good engine, basically ready to bolt in. Marc chipped the ECU and stripped the harness of all unnecessary body wiring.
However, our aesthetic bar has been raised somewhat over the course of the build so now we feel we need to strip it down externally and clean, paint a re-plate every last nut and washer. We will try to restrain ourselves however. It’s just an engine and this is supposed to be a rally car. Let’s see how this goes.
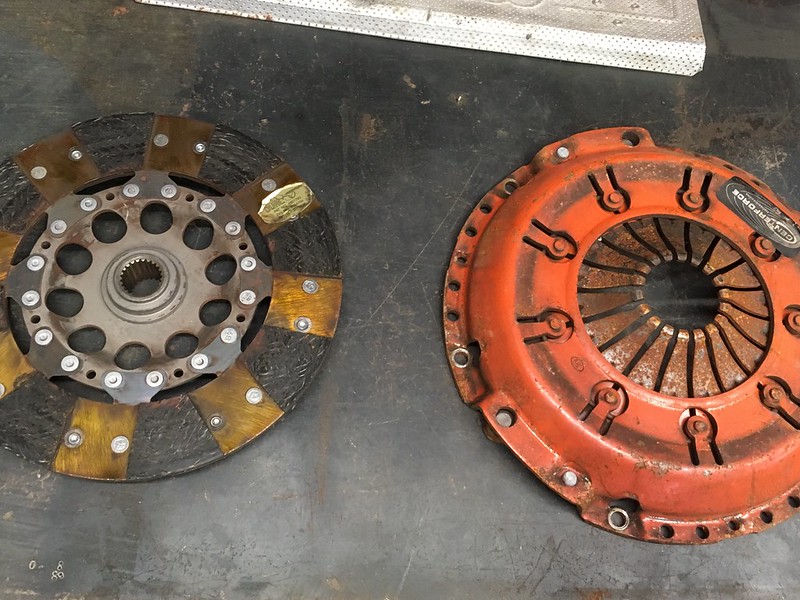
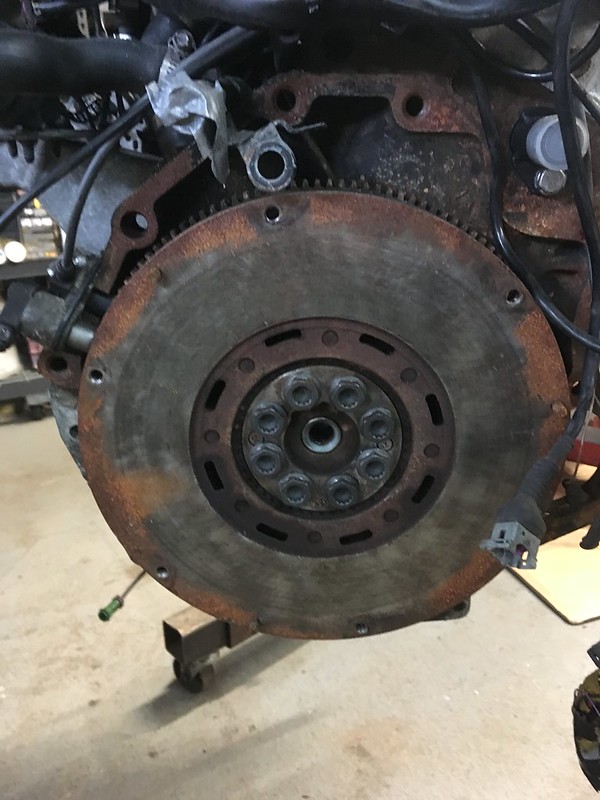
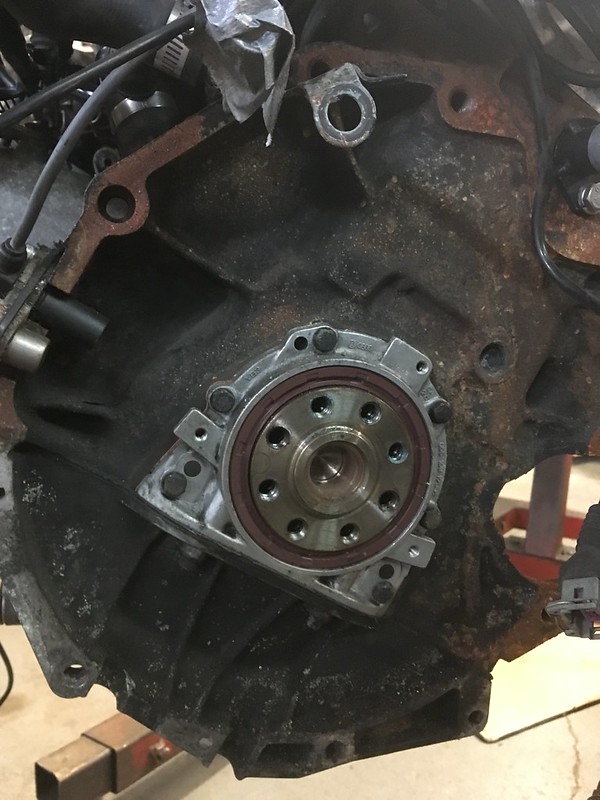
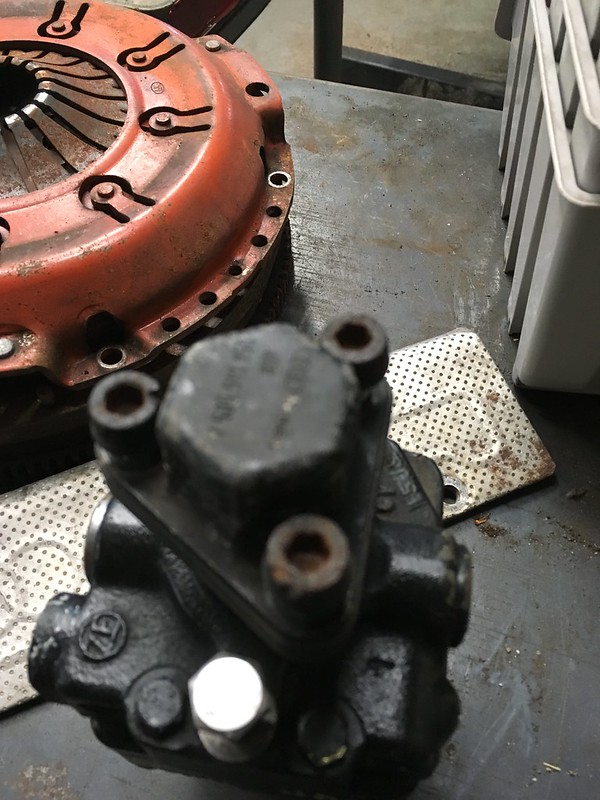
First step was to get the thing in the air and on to our engine stand but before we could do that we wanted to remove the clutch and flywheel. This revealed a new crankshaft seal as expected but a bonus stage 3 CenterForce clutch that looked like it might even be serviceable. Thanks Marc.
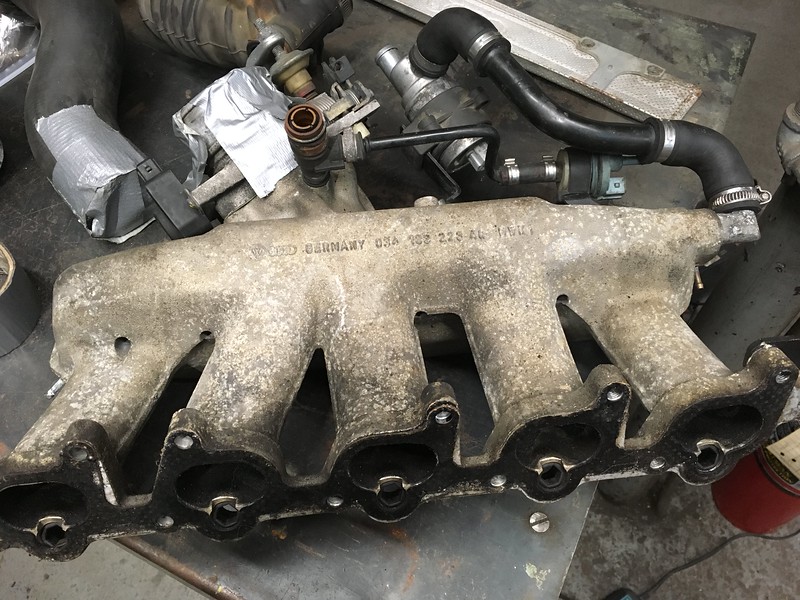
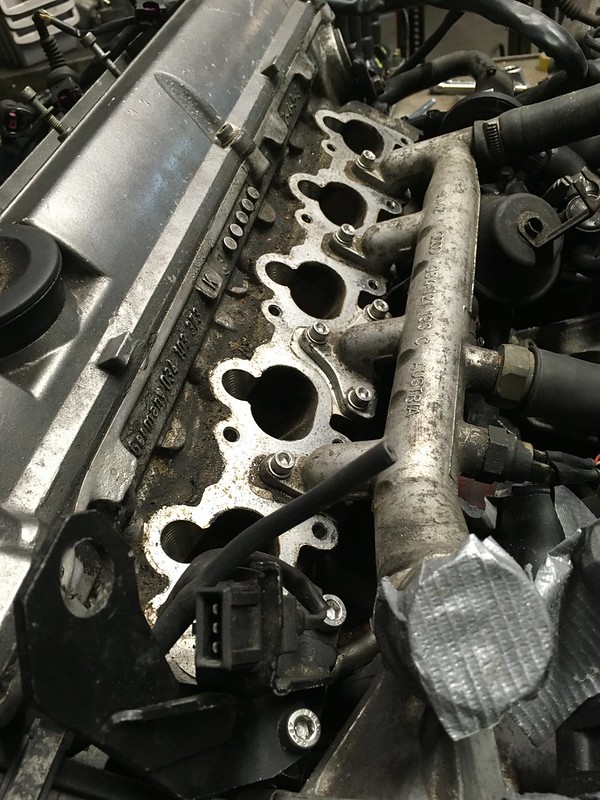
We were always going to have to replace or modify the intake manifold as the stock location of the throttle body will interfere with our side mounted radiator, so we started dismantling the intake side of the engine first. Getting at the ten Allen bolts that held it on was a big PITA. It would have been easier if we’d realised there are access holes going through the manifold before we started rather than after we’d finished DOH!

We also needed to delete the AC compressor so the belt and all the ancillaries came off.


Unfortunately we decided the idler and belt tensioner pulley bearings were both near the end of their useful life so we’ll add those to the list of refurbishments.
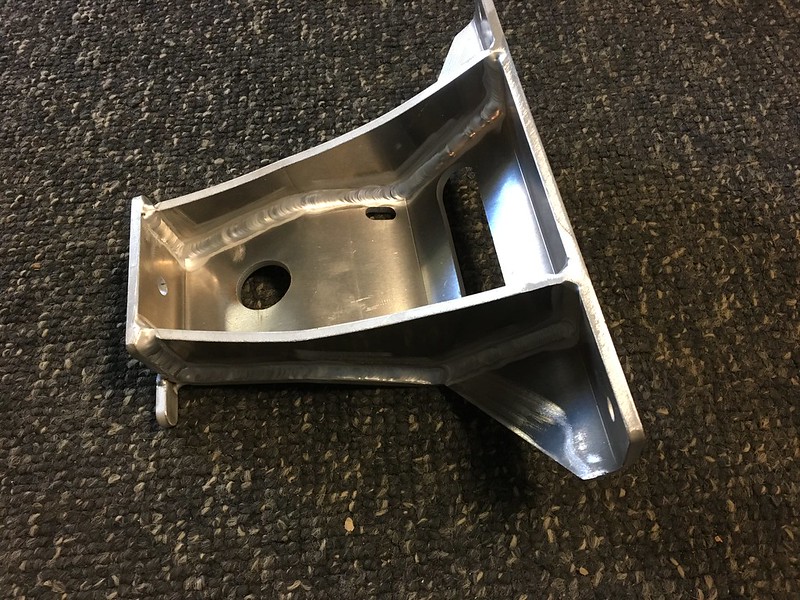
We also discovered our engine came without the front engine mount; the one that stops it moving up and down when you get on the gas, so we’ll have to source or make one of these.

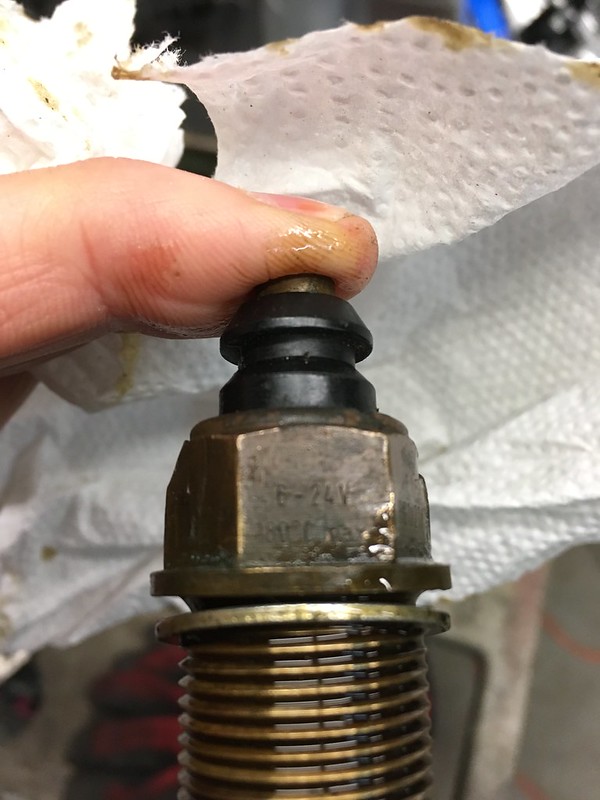
We are also going to need some different senders and sensors to drive our non-stock VDO gauges. At least they’ll be clean and shiny.
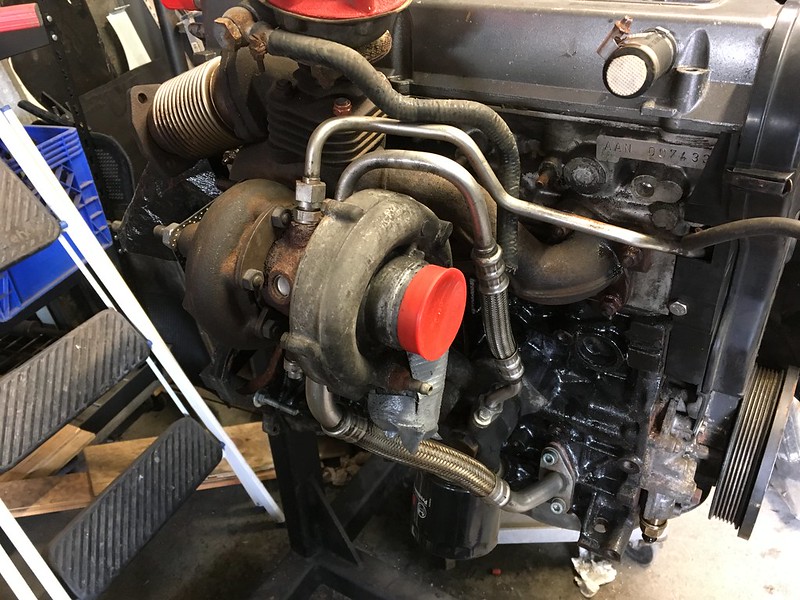
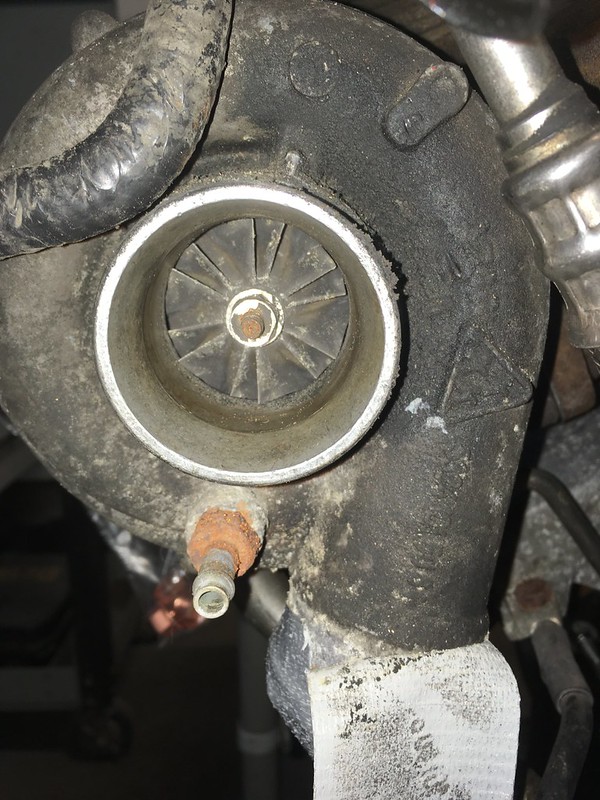
We believe the turbo is good and are reluctant to open up this rabbit hole so we think we will just clean up the exhaust side in situ. Let’s see how that goes.
So check back later to see if we manage to not replace, repaint or re-plate every last piece of this engine.

SIGNATURE
Well, this is a big step forward for the project. It’s time to take the engine off its pallet and get it into the car. Of course it is not that simple. We have lots of ways to make it complicated.
As we’ve previously discussed, we decided to go with a fairly stock later AAN 20 valve engine rather than try to wring extra power from the original 10 valve that came with the car. We should be able to see 300hp from this without creating a stressed out monster nor breaking the bank. Purists may scoff but they aren’t paying the bills.
We sourced this one from Marc over at EFI Express. They are huge Audi fans and know a lot about these engines. This is a tested and resealed, good engine, basically ready to bolt in. Marc chipped the ECU and stripped the harness of all unnecessary body wiring.
However, our aesthetic bar has been raised somewhat over the course of the build so now we feel we need to strip it down externally and clean, paint a re-plate every last nut and washer. We will try to restrain ourselves however. It’s just an engine and this is supposed to be a rally car. Let’s see how this goes.
First step was to get the thing in the air and on to our engine stand but before we could do that we wanted to remove the clutch and flywheel. This revealed a new crankshaft seal as expected but a bonus stage 3 CenterForce clutch that looked like it might even be serviceable. Thanks Marc.
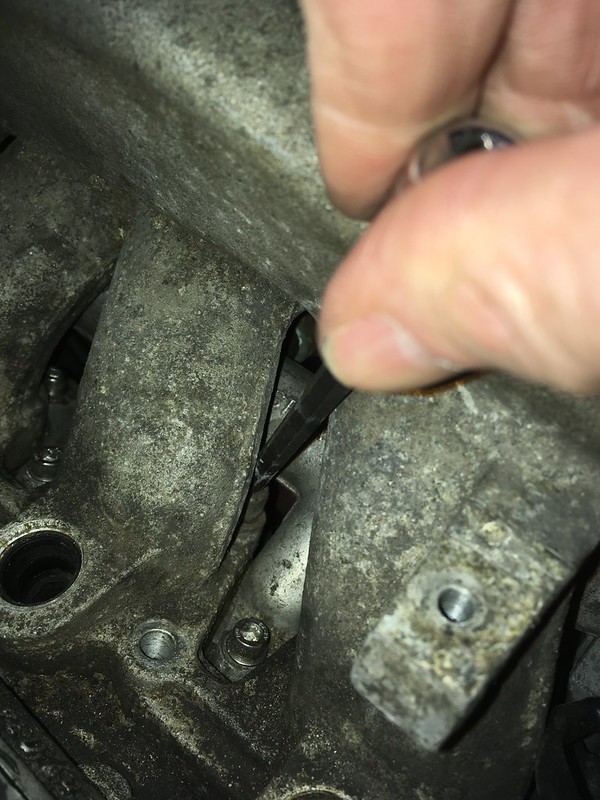
We were always going to have to replace or modify the intake manifold as the stock location of the throttle body will interfere with our side mounted radiator, so we started dismantling the intake side of the engine first. Getting at the ten Allen bolts that held it on was a big PITA. It would have been easier if we’d realised there are access holes going through the manifold before we started rather than after we’d finished DOH!
We also needed to delete the AC compressor so the belt and all the ancillaries came off.
Unfortunately we decided the idler and belt tensioner pulley bearings were both near the end of their useful life so we’ll add those to the list of refurbishments.
We also discovered our engine came without the front engine mount; the one that stops it moving up and down when you get on the gas, so we’ll have to source or make one of these.
We are also going to need some different senders and sensors to drive our non-stock VDO gauges. At least they’ll be clean and shiny.
We believe the turbo is good and are reluctant to open up this rabbit hole so we think we will just clean up the exhaust side in situ. Let’s see how that goes.
So check back later to see if we manage to not replace, repaint or re-plate every last piece of this engine.
SIGNATURE

