Audi UR Quattro Rally Build

 04-24-2019, 01:05 PM
#52
AudiWorld Member
Thread Starter
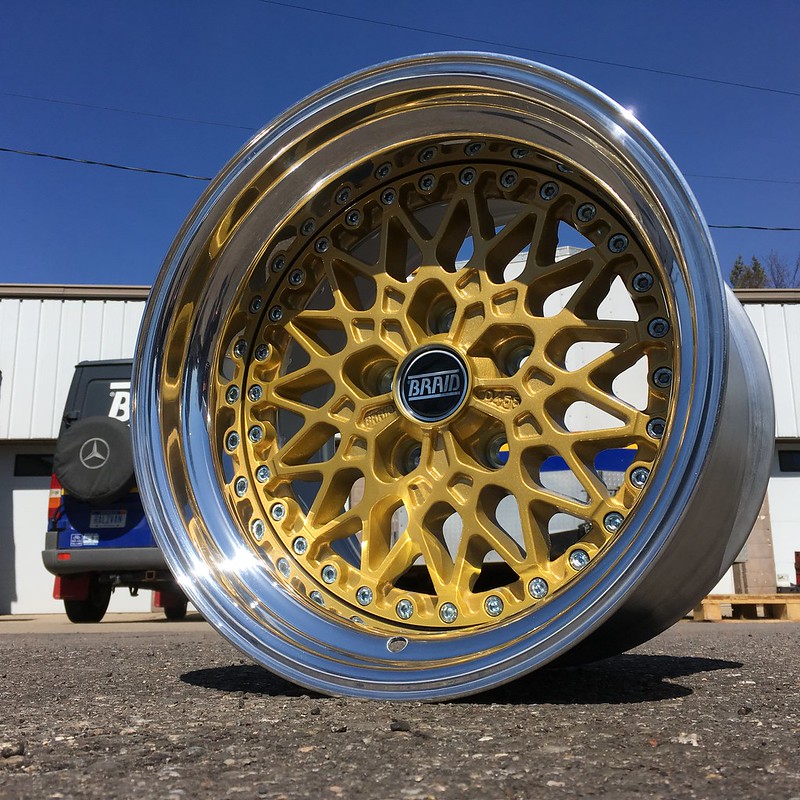
WHEELS
Halfway through our engine tear down our new wheels showed up. Yes, they did distract us.

We chose these from BRAID’s catalogue because they look very similar to the BBS wheels the Rothmans (and some others) rally Quattros ran back in the day. Look:
[img] http://www.slotforum.com/forums/uplo...1510_26293.jpg [/img]
Specs are:
- BRAID Serie 4 RC
- 15x10
- Et0
- 5x112
- 57.1 center bore
As far as our research suggests, the same as the originals.
Of course we took lots of pictures.


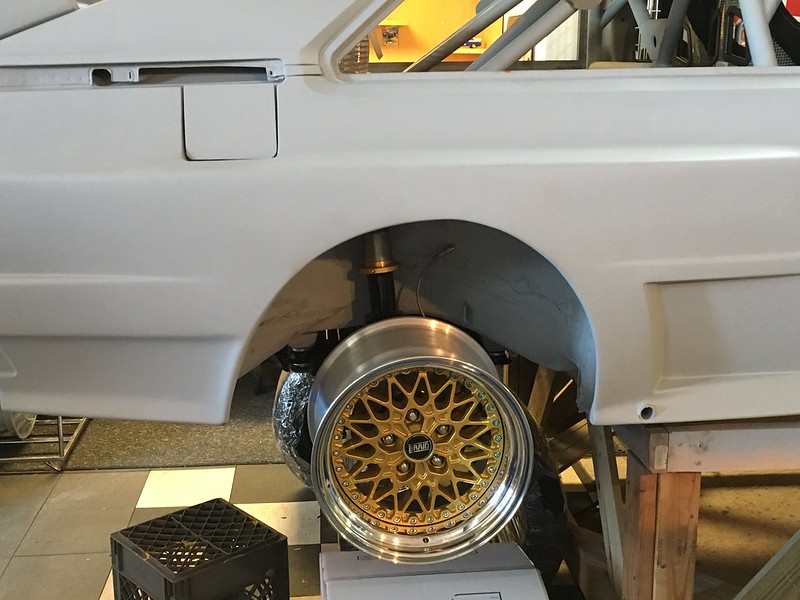
Then, we installed a couple of our TB5 tires to make sure the wheel and tire package would actually work.
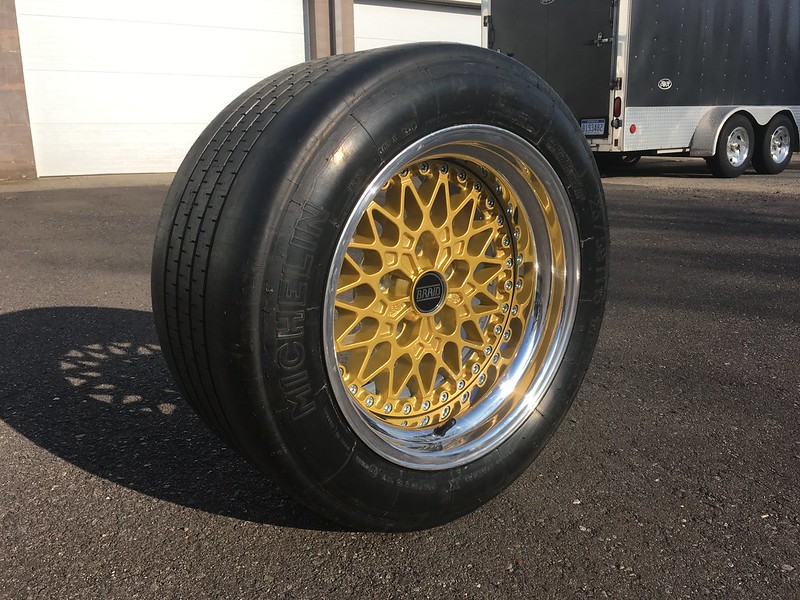


Nailed it!

In case you weren’t paying attention earlier these tires are Michelin TB5 historic tarmac rally tires in size 265/40-15 and are just 23.3” overall diameter. Again, the same size these cars ran in period, at least in tarmac trim.
Next week back to the engine, we promise.
Halfway through our engine tear down our new wheels showed up. Yes, they did distract us.
We chose these from BRAID’s catalogue because they look very similar to the BBS wheels the Rothmans (and some others) rally Quattros ran back in the day. Look:
[img] http://www.slotforum.com/forums/uplo...1510_26293.jpg [/img]
Specs are:
- BRAID Serie 4 RC
- 15x10
- Et0
- 5x112
- 57.1 center bore
As far as our research suggests, the same as the originals.
Of course we took lots of pictures.
Then, we installed a couple of our TB5 tires to make sure the wheel and tire package would actually work.
Nailed it!
In case you weren’t paying attention earlier these tires are Michelin TB5 historic tarmac rally tires in size 265/40-15 and are just 23.3” overall diameter. Again, the same size these cars ran in period, at least in tarmac trim.
Next week back to the engine, we promise.
05-15-2019, 07:48 AM
#53
AudiWorld Member
Thread Starter
We promised you an engine-based post this week so here you are.
As we mentioned in an earlier post we were supposed to just bolt this in but have recently gotten carried away with cleaning and polishing everything on this car so let's see how nuts we can go with an engine. Is there therapy available for this stuff? We need help.
So we started by painting the block, even though nobody will ever see it once it's in the car. It's not like it didn't have paint on before. Jeez!
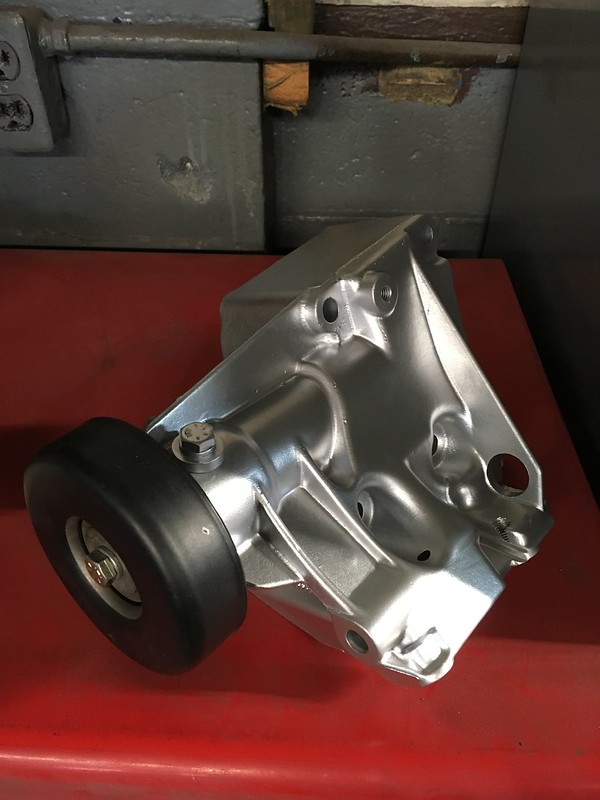
Then we turned our attention to refurbishing the cluster of accessories we previously took off.
We decided to reduce the size of the AC and alternator bracket as we are deleting the AC. We could have just found a non-AC bracket but they were expemsive and all in Europe because Americans can't drive without the windows up (electric) and the AC on.

We couldn't make ours quite the same shape but we did cut a sizable chunk off the rear:


The idler pulley bearing was noisy and NLA so we just replaced the pulley with a GM something or other.

About the same size but has the bearing in the pulley like a normal one not inside the bracket like an Audi one. Consequently some re-engineering was required.


It turned out pretty nice, if that's not a pun.
We also blasted and painted the engine mount brackets because, well, we're sick. Next week we'l probably paint something else; maybe gold! Stay tuned.
As we mentioned in an earlier post we were supposed to just bolt this in but have recently gotten carried away with cleaning and polishing everything on this car so let's see how nuts we can go with an engine. Is there therapy available for this stuff? We need help.
So we started by painting the block, even though nobody will ever see it once it's in the car. It's not like it didn't have paint on before. Jeez!
Then we turned our attention to refurbishing the cluster of accessories we previously took off.
We decided to reduce the size of the AC and alternator bracket as we are deleting the AC. We could have just found a non-AC bracket but they were expemsive and all in Europe because Americans can't drive without the windows up (electric) and the AC on.
We couldn't make ours quite the same shape but we did cut a sizable chunk off the rear:
The idler pulley bearing was noisy and NLA so we just replaced the pulley with a GM something or other.
About the same size but has the bearing in the pulley like a normal one not inside the bracket like an Audi one. Consequently some re-engineering was required.
It turned out pretty nice, if that's not a pun.
We also blasted and painted the engine mount brackets because, well, we're sick. Next week we'l probably paint something else; maybe gold! Stay tuned.
06-13-2019, 07:23 AM
#54
AudiWorld Member
Thread Starter
ENGINE REFURB 2
We know, engine stuff. (Focus TIM). But look what arrived this week!

We could have just tried to convince you that we had a surge of enthusiasm and finished the car but that wouldn't be right.
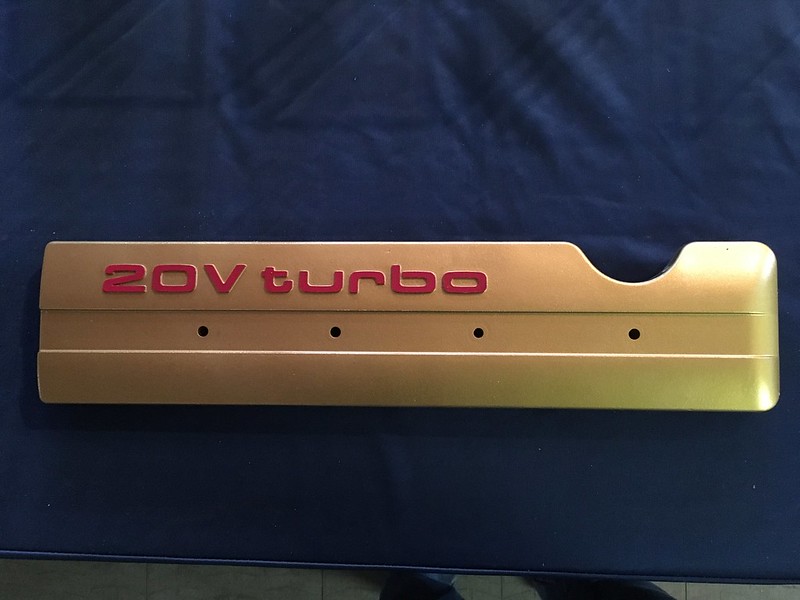
We did paint something though, as promised:

Gold too!

and red!
We also had a go at cleaning up the oil pan. It's not obvious in the pictures but it did make quite a bit of difference.
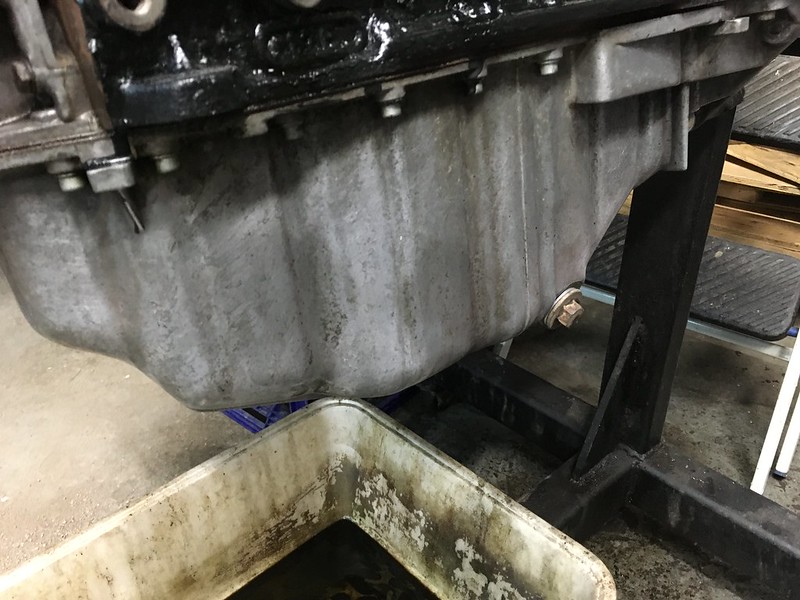


Enough that we think we might want to have another go at the transmission case with this stuff.
The last thing we worked on this week is only peripherally related to the engine but, as we were about to send a load of parts to the platers we wanted to include the power steering lines fittings. This is the 83 URQ's lines and oil tank along with the AAN's pump. The gap on the lower run is where the accumulator would go for the power brakes but as we are not using power brakes we can dispense with that. That means we need to come up with one continuous high pressure line and also some fittings for the pump end.
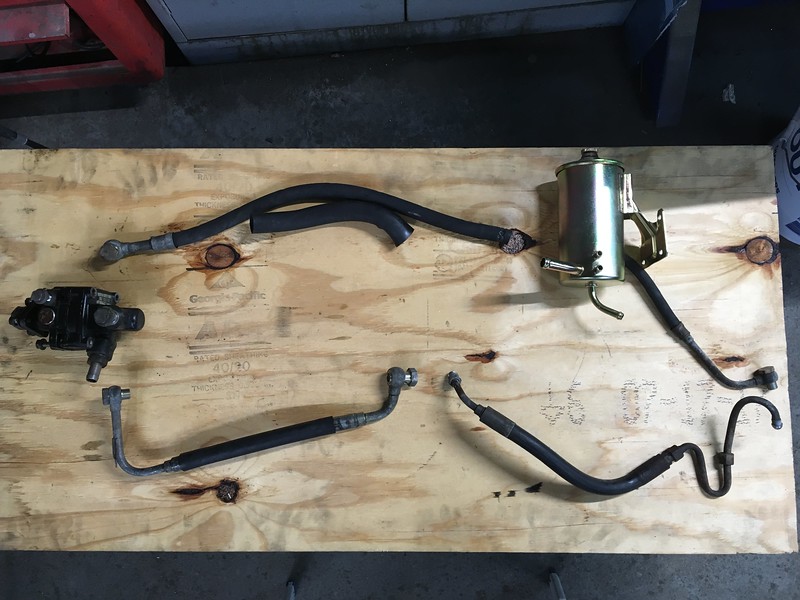
We sourced a high pressure line from a servo boosted car as it's fitting routes better around the steering rack because it does not have to go first to the accumulator. Then we cut out all the fittings and sand blasted them ready for plating.


We know, engine stuff. (Focus TIM). But look what arrived this week!
We could have just tried to convince you that we had a surge of enthusiasm and finished the car but that wouldn't be right.
We did paint something though, as promised:
Gold too!
and red!
We also had a go at cleaning up the oil pan. It's not obvious in the pictures but it did make quite a bit of difference.
Enough that we think we might want to have another go at the transmission case with this stuff.
The last thing we worked on this week is only peripherally related to the engine but, as we were about to send a load of parts to the platers we wanted to include the power steering lines fittings. This is the 83 URQ's lines and oil tank along with the AAN's pump. The gap on the lower run is where the accumulator would go for the power brakes but as we are not using power brakes we can dispense with that. That means we need to come up with one continuous high pressure line and also some fittings for the pump end.
We sourced a high pressure line from a servo boosted car as it's fitting routes better around the steering rack because it does not have to go first to the accumulator. Then we cut out all the fittings and sand blasted them ready for plating.
06-20-2019, 06:41 AM
#55
AudiWorld Member
Thread Starter
Quattro Rally Project - Hot Side Engine Refurb
This week we turned our attention to the hot side of the engine and removed the turbo, exhaust manifold and waste gate. The turbo will be sent out to be refurbished, the exhaust manifold will be replaced with a slightly better one and the waste gate will be, well, we are not sure. We know we are not keen on the red cover however.
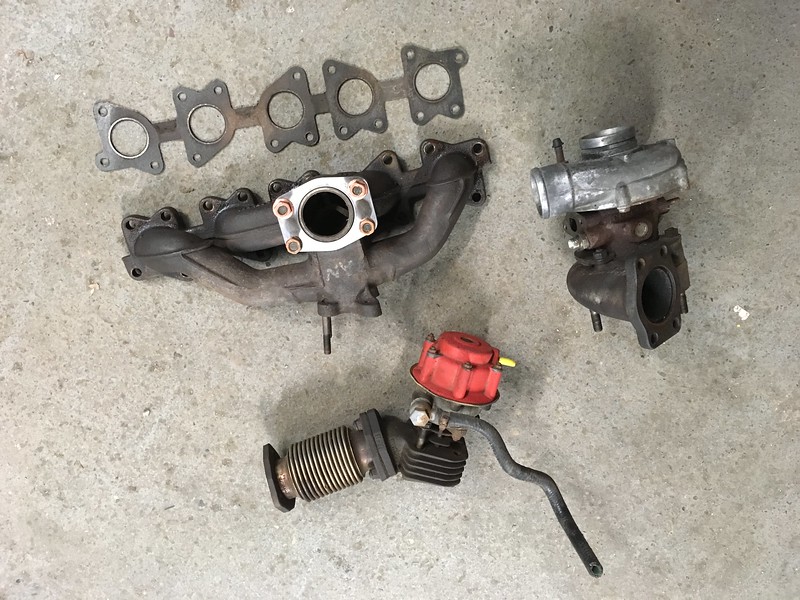

This is the eBay special $85 exhaust manifold we got. If nothing else it doesn't need sand blasting! When the turbo comes back we will have to decide whether and how to refinish it.

Inspired by our gold coil cover we finished the rest of the valve cover. We know, it's a bit flash but it is rather reminiscent of the Group B 10 valve engines so we feel good about it.


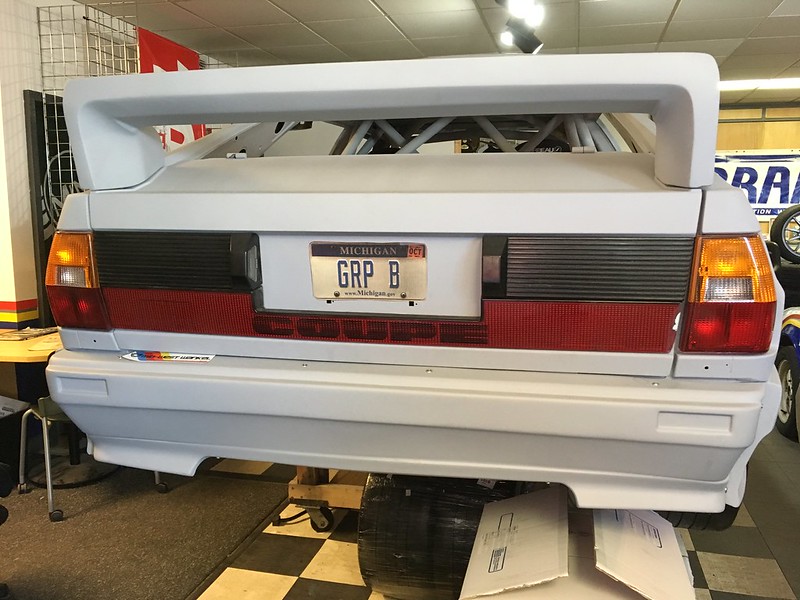
Then we got distracted again and made a fake license plate. It's the little things...

This week we turned our attention to the hot side of the engine and removed the turbo, exhaust manifold and waste gate. The turbo will be sent out to be refurbished, the exhaust manifold will be replaced with a slightly better one and the waste gate will be, well, we are not sure. We know we are not keen on the red cover however.
This is the eBay special $85 exhaust manifold we got. If nothing else it doesn't need sand blasting! When the turbo comes back we will have to decide whether and how to refinish it.
Inspired by our gold coil cover we finished the rest of the valve cover. We know, it's a bit flash but it is rather reminiscent of the Group B 10 valve engines so we feel good about it.
Then we got distracted again and made a fake license plate. It's the little things...
06-27-2019, 04:12 AM
#56
AudiWorld Member
Thread Starter
Turbo Trouble & Fuse Dash Panel
We received some bad news from our turbo shop, G-Pop Shop this week. Our turbo is bad. Exhaust turbine ate something that didn’t agree with it.


We got on the blower to our engine supplier, EFI Express and they soon had another core sent out. This one turned out to be fine. The other good news is that the bad turbo was never on our engine, it was just one of many EFI Express had on the shelf so whatever did the damage almost certainly did not pass through our engine. PHEW. Can’t wait to get the refurbished turbo back now.
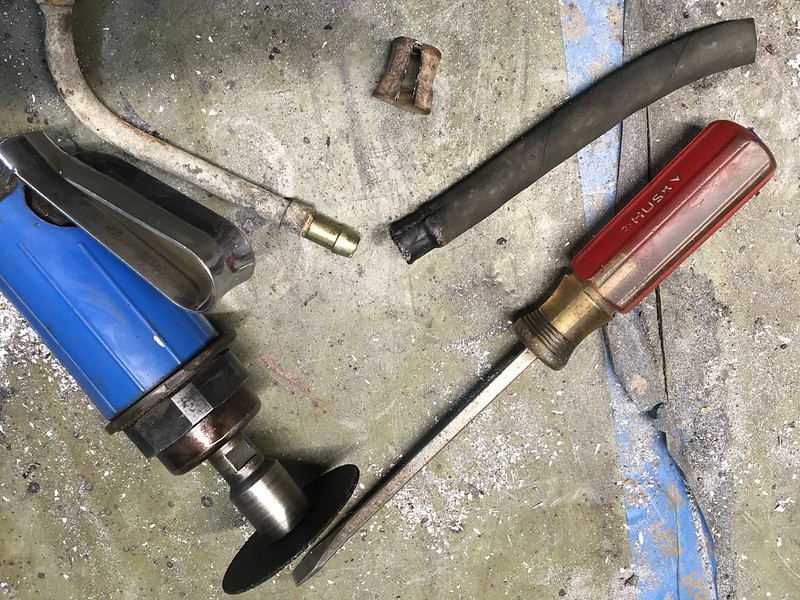
While that was all playing out we reassembled our belt tensioner. These are NLA and ours had a bad bearing. We sourced and new bearing but had to make our own rivets to put the pulley back together around it, followed by a lick of paint of course.

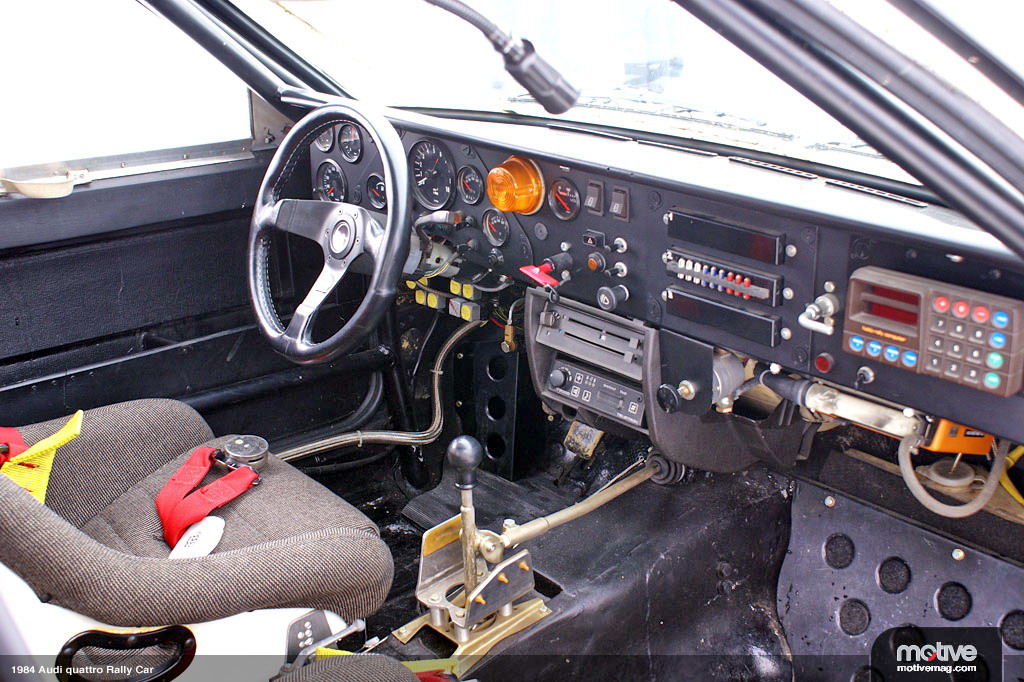
We also continued to work on our dash mounted fuse panel design. The original works cars had three fuse blocks holding ceramic fuses mounted through the center removable panel. We want to use three similarly sized panels but with more modern blade fuses. You’d think that would be quite simple but it’s proving quite difficult. We can find side entry versions but our wires have to come in from the rear.
Group B fuse blocks:
The collection of candidates we have assembled so far:
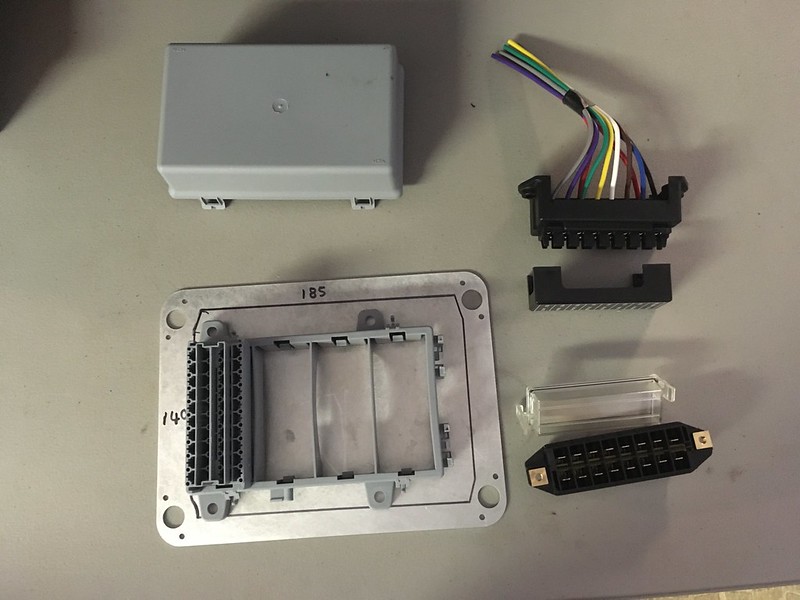
The one on the bottom right would be perfect if it held 12 fuses instead of 8. You’d think that were available wouldn’t you. Nope. We may have to compromise.
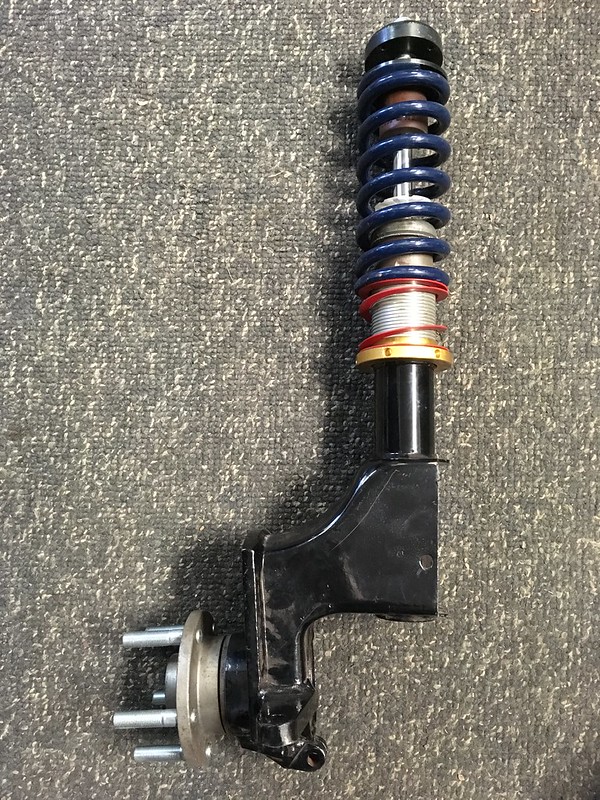
Now we have the wheels on the car the only thing stopping us putting it on the ground was the lack of springs. That and a good reason to actually do so. Undaunted we installed the springs.

We received some bad news from our turbo shop, G-Pop Shop this week. Our turbo is bad. Exhaust turbine ate something that didn’t agree with it.
We got on the blower to our engine supplier, EFI Express and they soon had another core sent out. This one turned out to be fine. The other good news is that the bad turbo was never on our engine, it was just one of many EFI Express had on the shelf so whatever did the damage almost certainly did not pass through our engine. PHEW. Can’t wait to get the refurbished turbo back now.
While that was all playing out we reassembled our belt tensioner. These are NLA and ours had a bad bearing. We sourced and new bearing but had to make our own rivets to put the pulley back together around it, followed by a lick of paint of course.
We also continued to work on our dash mounted fuse panel design. The original works cars had three fuse blocks holding ceramic fuses mounted through the center removable panel. We want to use three similarly sized panels but with more modern blade fuses. You’d think that would be quite simple but it’s proving quite difficult. We can find side entry versions but our wires have to come in from the rear.
Group B fuse blocks:
The collection of candidates we have assembled so far:
The one on the bottom right would be perfect if it held 12 fuses instead of 8. You’d think that were available wouldn’t you. Nope. We may have to compromise.
Now we have the wheels on the car the only thing stopping us putting it on the ground was the lack of springs. That and a good reason to actually do so. Undaunted we installed the springs.
07-04-2019, 10:17 AM
#57
AudiWorld Member
Thread Starter
Quattro Rally Build - More Engine Bay Work
More distraction this week but look at it! Wouldn't you be distracted?

Some of this is for the engine refurb but some has been holding up some ancillary stuff so we got busy. We installed the wipers (can you spot the long awaited plated parts?)


This piece of automotive jewelry holds the blower motor resistor!

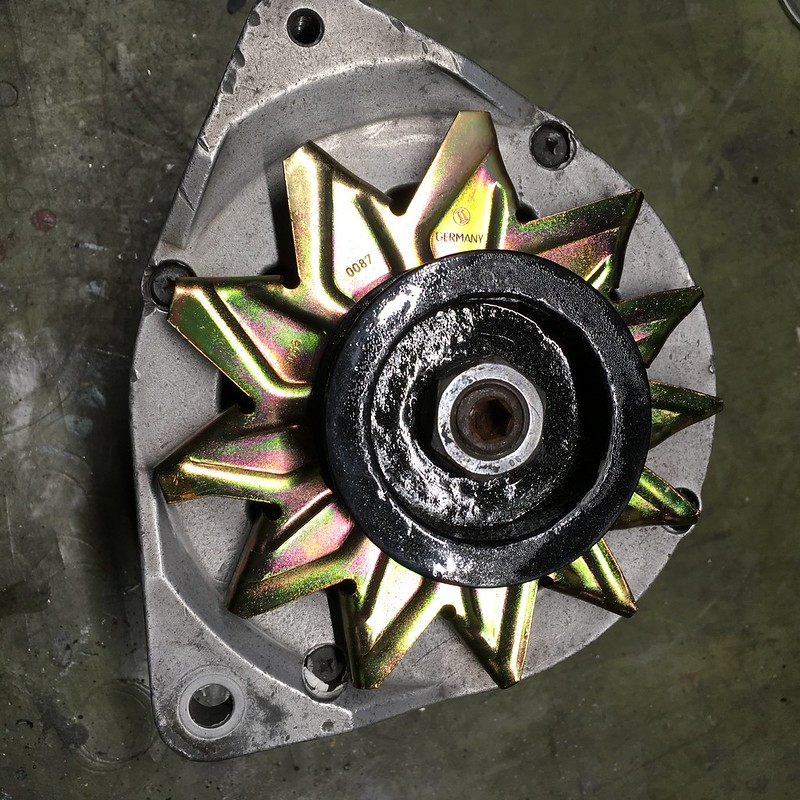
Alternator fan (that's engine related)
Power steering rack fittings.

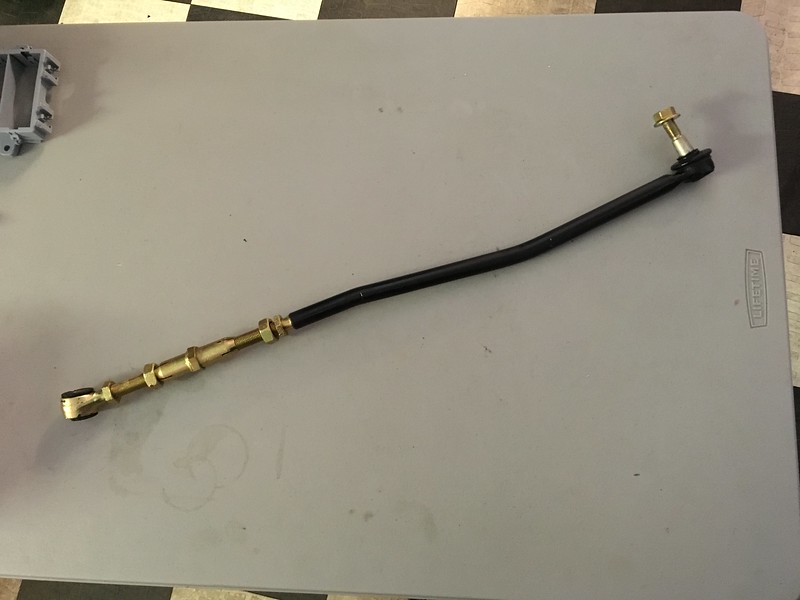
and the front left tie rod adjusters.

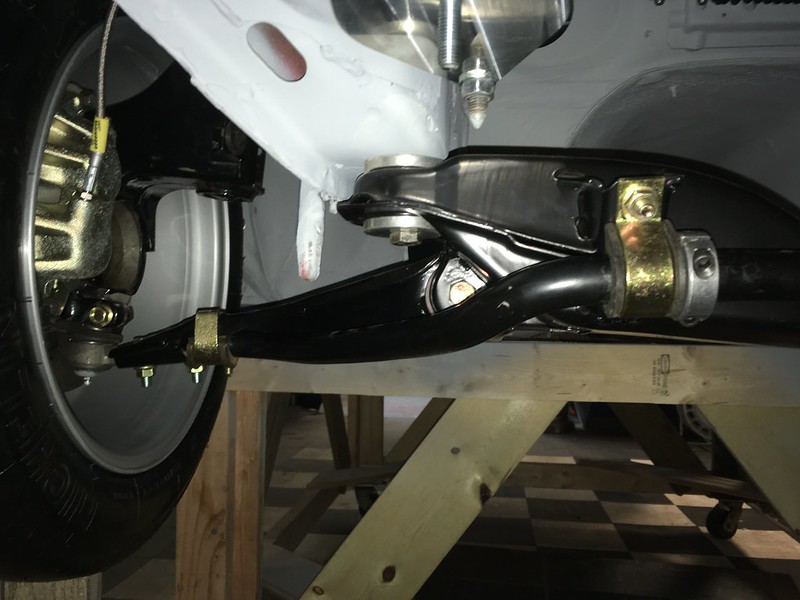
We even got our anti-roll bar clamps back.

So we got to cross a ton of stuff off the list; all be it, little stuff. Still, it's all progress, right? Got to keep moving forward.
More distraction this week but look at it! Wouldn't you be distracted?
Some of this is for the engine refurb but some has been holding up some ancillary stuff so we got busy. We installed the wipers (can you spot the long awaited plated parts?)
This piece of automotive jewelry holds the blower motor resistor!
Alternator fan (that's engine related)
Power steering rack fittings.
and the front left tie rod adjusters.
We even got our anti-roll bar clamps back.
So we got to cross a ton of stuff off the list; all be it, little stuff. Still, it's all progress, right? Got to keep moving forward.
Last edited by team illuminata; 07-04-2019 at 10:25 AM.
07-11-2019, 07:43 AM
#58
AudiWorld Member
Thread Starter
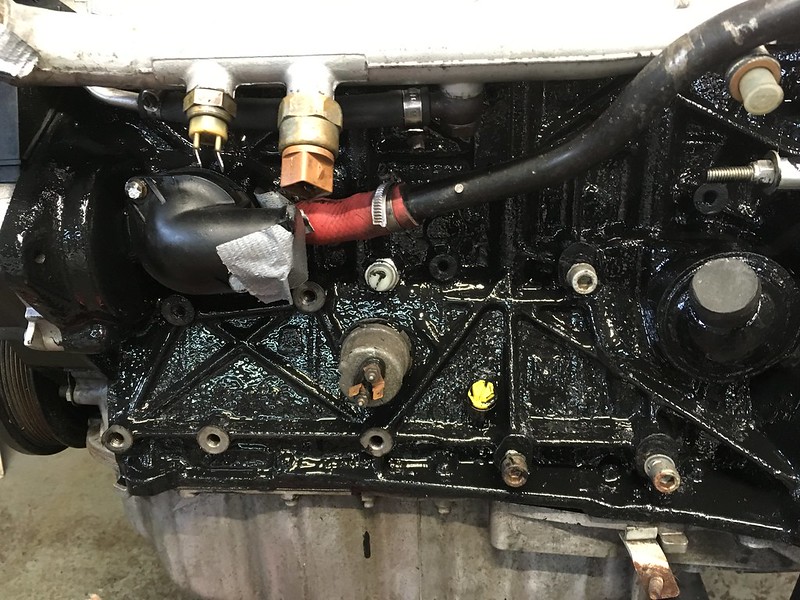
It's Time to Get Serious - Cold Side Engine Reassembly
This week we started on the serious reassembly of the engine. We’ll try not to get distracted. We started on the intake side as that has the most shiny bits ready to go. First up the modified alternator mount:

Then the coolant adapter. We were advised to get a straight one in metal for better fitment:

Then we installed the alternator, power steering pump and belt tensioner:


We still need to find a shorter accessory belt but that’s not what’s stopping us completing the intake side of the engine; we need an intake manifold solution. Because the radiator on the UR Quattro sits the side of the engine, the AAN throttle body would interfere with it because that is located on the center of the AAN intake plenum:

We either need to modify our stock one or source an aftermarket version with the throttle body on the front. We favor the aftermarket options from BST, Wagner or whoever else sells one. Unfortunately finding one is proving troublesome as they are basically NLA. Let’s see what we come up with.
Hey, look, we didn’t get distracted. Next week’s topic will depend on what shows up first: a refurbished turbo or a cool intake manifold.
This week we started on the serious reassembly of the engine. We’ll try not to get distracted. We started on the intake side as that has the most shiny bits ready to go. First up the modified alternator mount:
Then the coolant adapter. We were advised to get a straight one in metal for better fitment:
Then we installed the alternator, power steering pump and belt tensioner:
We still need to find a shorter accessory belt but that’s not what’s stopping us completing the intake side of the engine; we need an intake manifold solution. Because the radiator on the UR Quattro sits the side of the engine, the AAN throttle body would interfere with it because that is located on the center of the AAN intake plenum:
We either need to modify our stock one or source an aftermarket version with the throttle body on the front. We favor the aftermarket options from BST, Wagner or whoever else sells one. Unfortunately finding one is proving troublesome as they are basically NLA. Let’s see what we come up with.
Hey, look, we didn’t get distracted. Next week’s topic will depend on what shows up first: a refurbished turbo or a cool intake manifold.
07-18-2019, 06:41 AM
#59
AudiWorld Member
Thread Starter
Refurbished Turbo - Hot Side Engine Reassembly
The turbo won. Turns out it takes longer to find a unicorn aftermarket intake manifold than it does to refurbish a turbo. Well it does if you are a professional outfit like G-Pop Shop https://gpopshop.com/


So we’re going to assemble the exhaust side next. First we’ll need a heat shield:

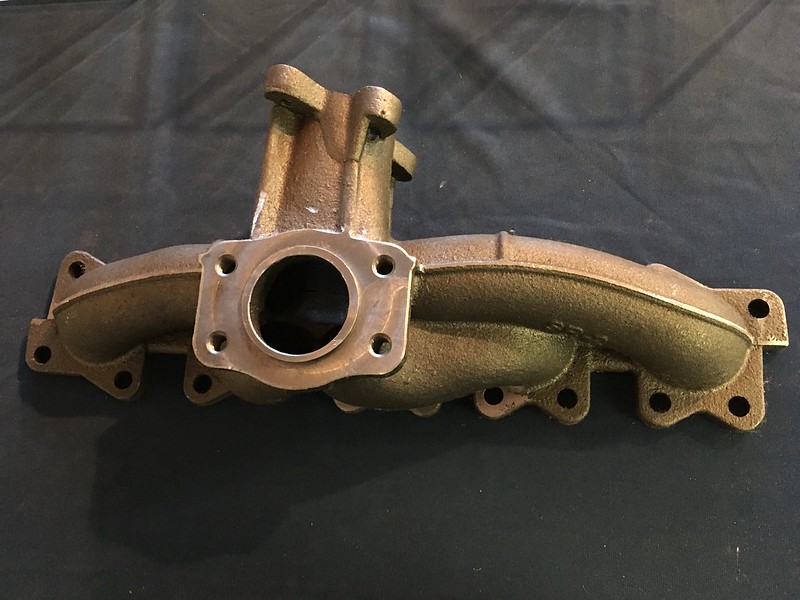
Our new exhaust manifold fit well but we did have to shorten some studs to get the nuts on.

The rest was easy bolt on stuff. New gaskets of course.


And we think we’ve found an intake manifold. Subscribe if you want to find out what kind.
The turbo won. Turns out it takes longer to find a unicorn aftermarket intake manifold than it does to refurbish a turbo. Well it does if you are a professional outfit like G-Pop Shop https://gpopshop.com/
So we’re going to assemble the exhaust side next. First we’ll need a heat shield:
Our new exhaust manifold fit well but we did have to shorten some studs to get the nuts on.
The rest was easy bolt on stuff. New gaskets of course.
And we think we’ve found an intake manifold. Subscribe if you want to find out what kind.
08-24-2019, 06:17 AM
#60
AudiWorld Junior Member

Hi I love the post.
I have one Audi rim marked "6Jx15H2 ET45 Germany 437601025D" on the front on the back " IV, LWF, 85 " rim is in excellent condition I can send pictures if you are interested in it?
Kris
I have one Audi rim marked "6Jx15H2 ET45 Germany 437601025D" on the front on the back " IV, LWF, 85 " rim is in excellent condition I can send pictures if you are interested in it?
Kris

