Successfully installed eBay hitch & wiring
#1
This weekend I successfully installed a Drawtite hitch with the Teconsha 119180 ModuLite Protector w/Integrated Circuit Protection & Installation Kit. Everyone says it cannot be installed. I do not need electric brakes, so all I needed was the 4 wire connector for trailer lights so I can pull a snowmobile trailer and didn't want to spend a small fortune for something I'll use MAYBE 10 times.
Here's the stuff I encountered and how I worked around it.
Installing the hitch was pretty straightforward. After removing all screws (15 total between both sides and underneath, and the 4 nuts from within the spare tire well, all it took was a strong yank on each side to release the fittings, and the bumper came right off. Note that when removing the 4 nuts from inside, unscrew them as much as you can, then gently remove the socket, leaving the nuts in place. Then gently with a magnetic grab tool, attach to the nut and gently slide it off and out of the cavity. The magnetic tool is a MUST. The same process is to reinstall them later. With the magnetic tool, slide the nut onto the post, then slide the magnet sideways off the nut leaving it on the shaft to then screw on with the socket.
Removing the bumper and replacing it with the receiver was pretty straightforwards EXCEPT the plastic cage per se is too far forward and I had to cut out a square relief in the middle. This was necessary so once the bumper was back on, it would line up with the bumper cover. Otherwise it wont, and you won't be able to reattach the small access cover. I made this mistake and had to take off the bumper cover after reinstalling it. I used an oscillating tool. Was quick and easy.
Now, for the wiring.
I ran the wire from the receiver to the control unit. However, I CUT the 4 wires close to the control unit to make it easy to route them inside from the outside thru the existing grommet under the passenger side taillight area. I reconnected them later using crimp connects.
Now, since the Q7 uses the same bulbs for the turn signals and brake lights, it's essentially a 2 wire system. Hence, the red wire was grounded WITH the white wire.
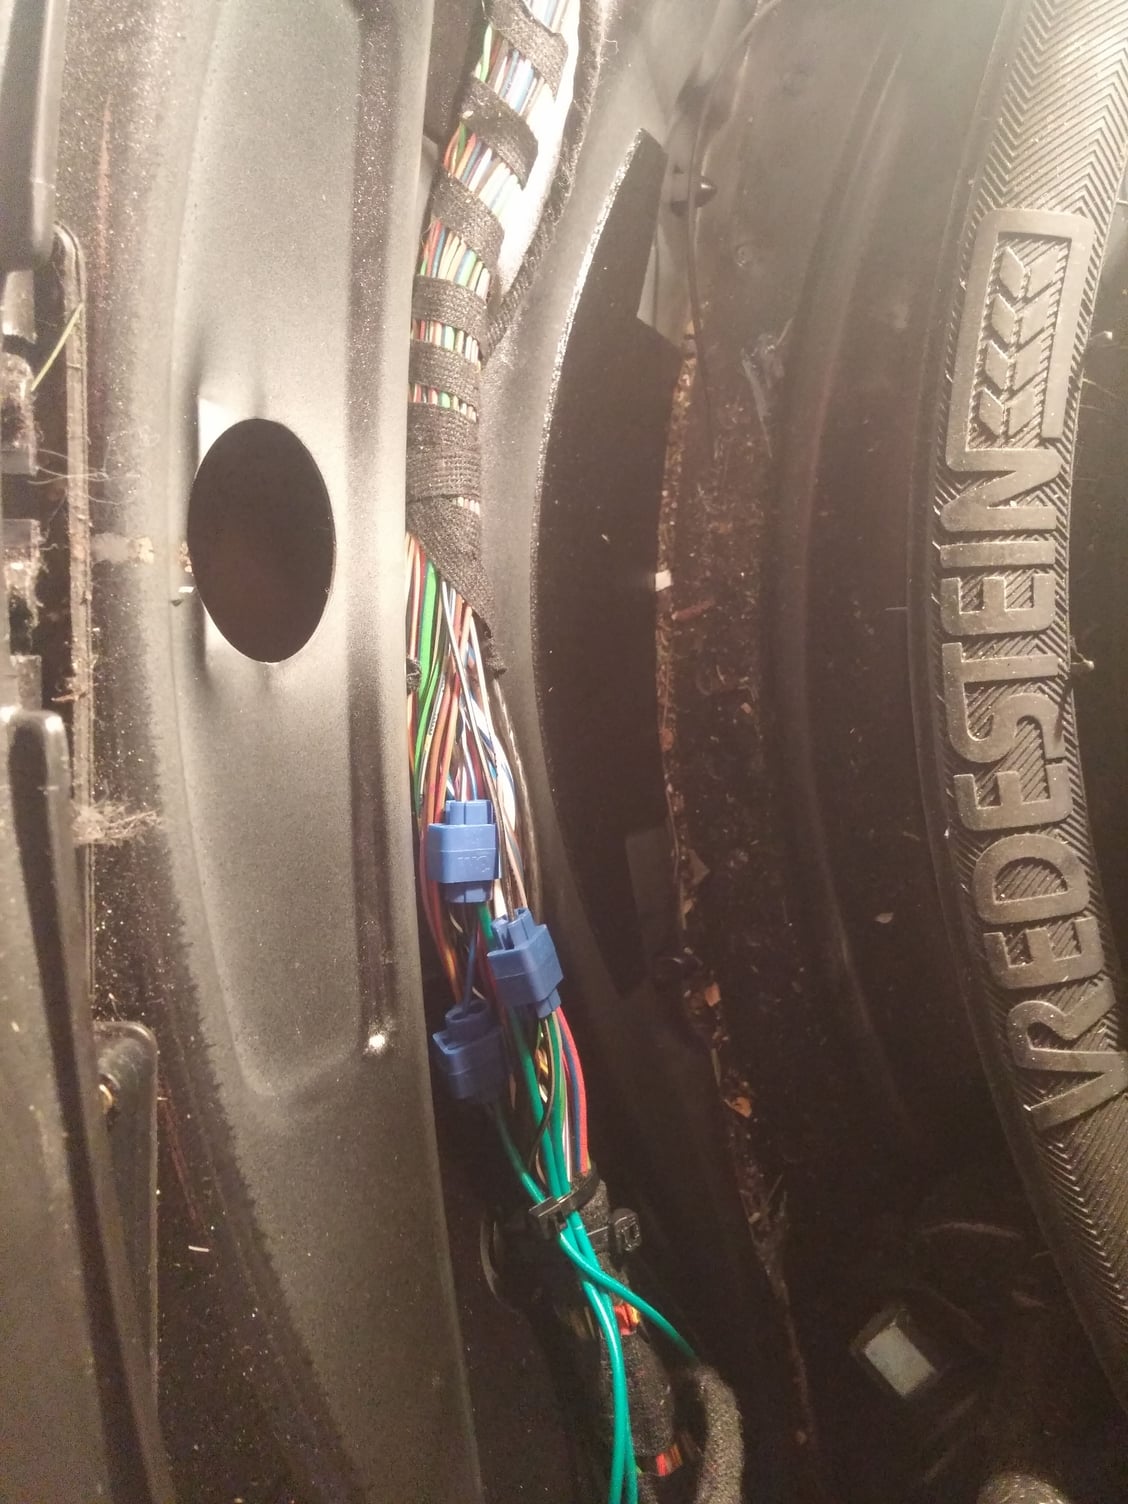
Now for the tricky part. I undid some of the wire harness behind the spare tire in the well to find the color code wires I traced and tested from both rear taillights. Each taillight has TWO wires that are energized with 12 volts when on, so I used the comparable locations from each and only used one wire from each, and it worked.
The Drivers side Brake/Turn Signal wire, I used the Black with Gray Stripe. Be VERY careful to ensure you use the correct wire. You can verify the color by popping off the access cover from the tailgate to access the plug for the taillight connector to see the black with gray stripe in the upper left corner of the connector. You can even perform a continuity test between this and the wire you're going to tap into by gently piercing it with a safety pin, and checking continuity. It's easier with two people though.
Since all the running lights need is a signal that's non-directional, I chose to use the Gray with Black stripe wire which can also be traced to the drivers side taillight connector in the upper right corner. This wire can also be found in the same location within the wires running along the back of the spare tire well.
The Passenger side Brake/Turn Signal wire, I used the Blue with Red Stripe wire. This wire was also run within the same grouping of wires in the back of the spare tire well.
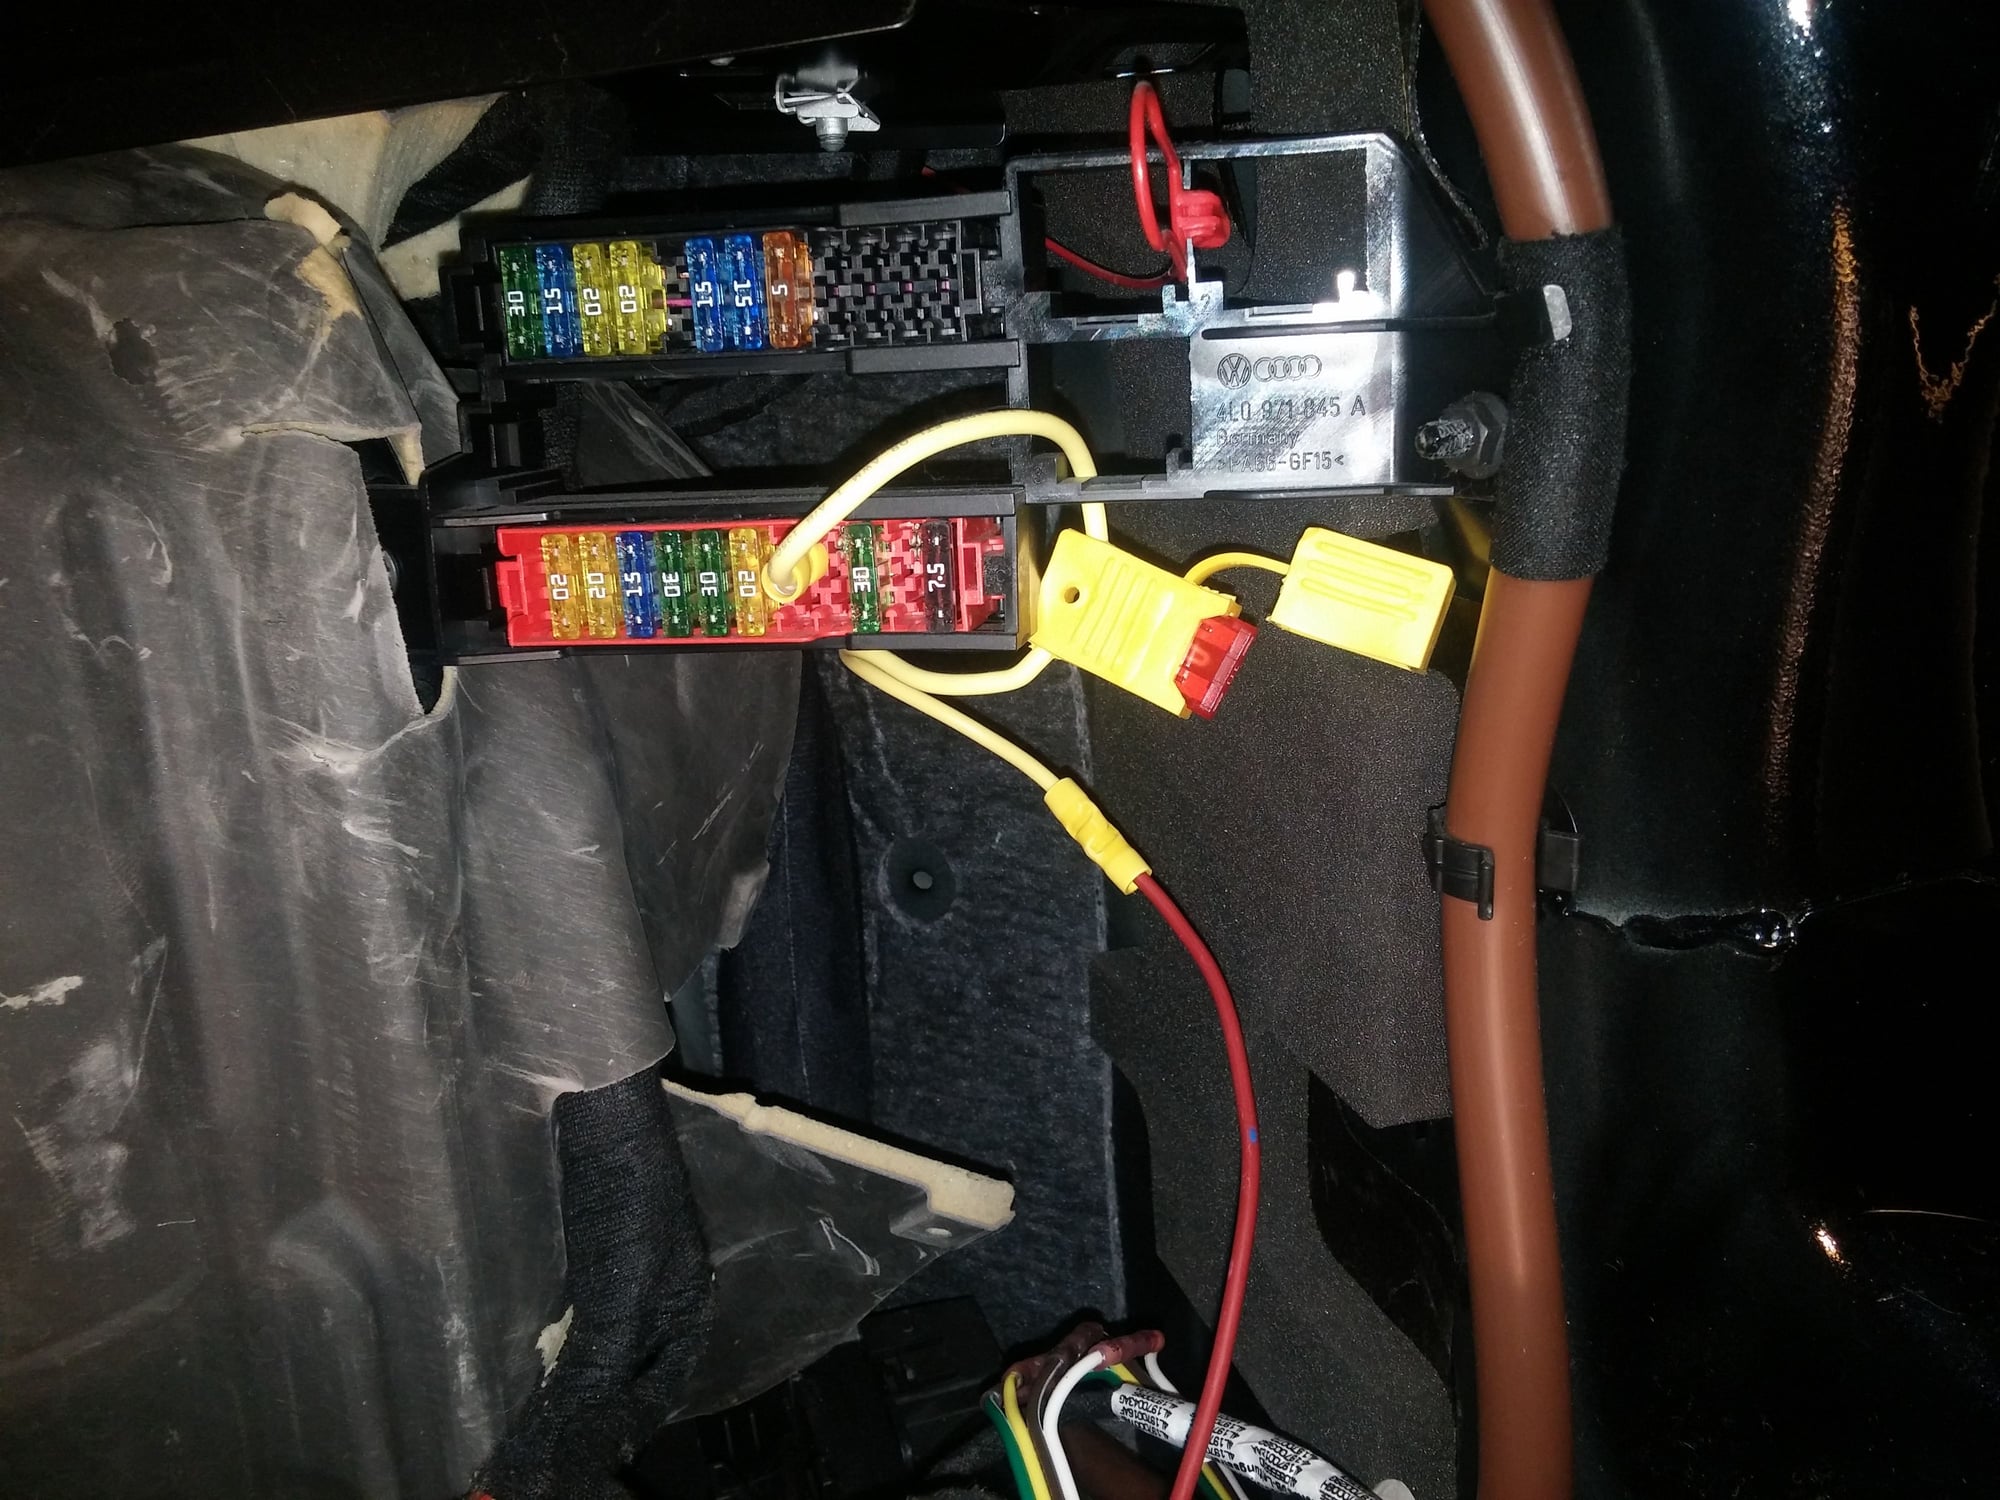
Since the battery is by the engine compartment, I needed a source for power. I chose to install a connector on the power wire, with fuse, and simply plugged it into one of the available slots not currently used with a fuse, but still energized.
One thing to be aware of by wiring it this way is that this is wired in conjunction with the taillights on the hatch only. When the hatch is opened, the auxillary lights on the bumper illuminate to serve as the brake/turn/marker lights. Hence, the trailer lights will no longer be illuminated. This can be a hazard at night if you pull over and open the hatch. However, pending you only need the lights while travelling, this shouldn't be an issue. Note this is the case for the warning/hazard lights, too. They will not be illuminated with the hatch open.
This method worked for me, and saved me a lot of money, yet did take me quite a few hours to trace the wires and figure out the best method. Note that this was done on a 2011 Audi Q7 Prestige. I do NOT know if the wiring is the same for every model, and every year, so I am NOT responsible if you use this and it either doesn't work or does any damage to your vehicle. I'm just posting this to possible help others, since there are so many other hitch options out there far less than what Audi sells, and most people do NOT need full trailer control with electric brakes. Between buying the kit, and some crimp connects, my total cost to install was about $250.
Good luck.
#4
Thread
Thread Starter
Forum
Replies
Last Post
Deckardk
Parts For Sale - Archive (NO NEW POSTS HERE)
11
06-25-2018 08:39 AM
stilljester
TT (Mk1) Discussion
24
12-04-2005 02:47 PM


