When you click on links to various merchants on this site and make a purchase, this can result in this site earning a commission. Affiliate programs and affiliations include, but are not limited to, the eBay Partner Network.
Installed this a few weeks ago and forgot to take pics during the install. So I'll try to recall as much as I can.
The gray plastic cover comes off pretty easily, just pull the top towards the center armrest. Ran the wire from here to the passenger A pillar, then tucked it in between where the A pillar and headliner meet leading to the front door.
This is where the front door window curves down to the front. I was able to tuck the wire in the rubber weatherstripping, then on back to the B pillar.
From the front door to the rear was the easiest part of the install.
I hadn't noticed this until I went to take pictures for this article. I'll need to tuck it up there better. Take your time with some of the tight turns, you don't want to mess up the cable. Also after you button everything up, connect the camera and make sure it still works. If you bent a cable and broke a connection, now is the time to find that out.
The headliners have enough slack to bend and tuck wires easily.
Because I had so much slack, and the wiring would look better, I ran it to the left tailgate support. The black curved plastic piece snaps right off. There is already bundled cable in there so I just ziptied mine along with it. All of the slack is coiled back in the headliner where the tailgate support goes in to and to the right. I couldn't figure out how to get the textured black plastic off, so I just used a cable stay and made it look like what you see above.
The rear sunshade barely touches the camera and doesn't affect it's function. So don't worry about stretching around it. It seems like it'll block it. I had the camera down a few rows in the defrost lines, but moved it up for a better view.
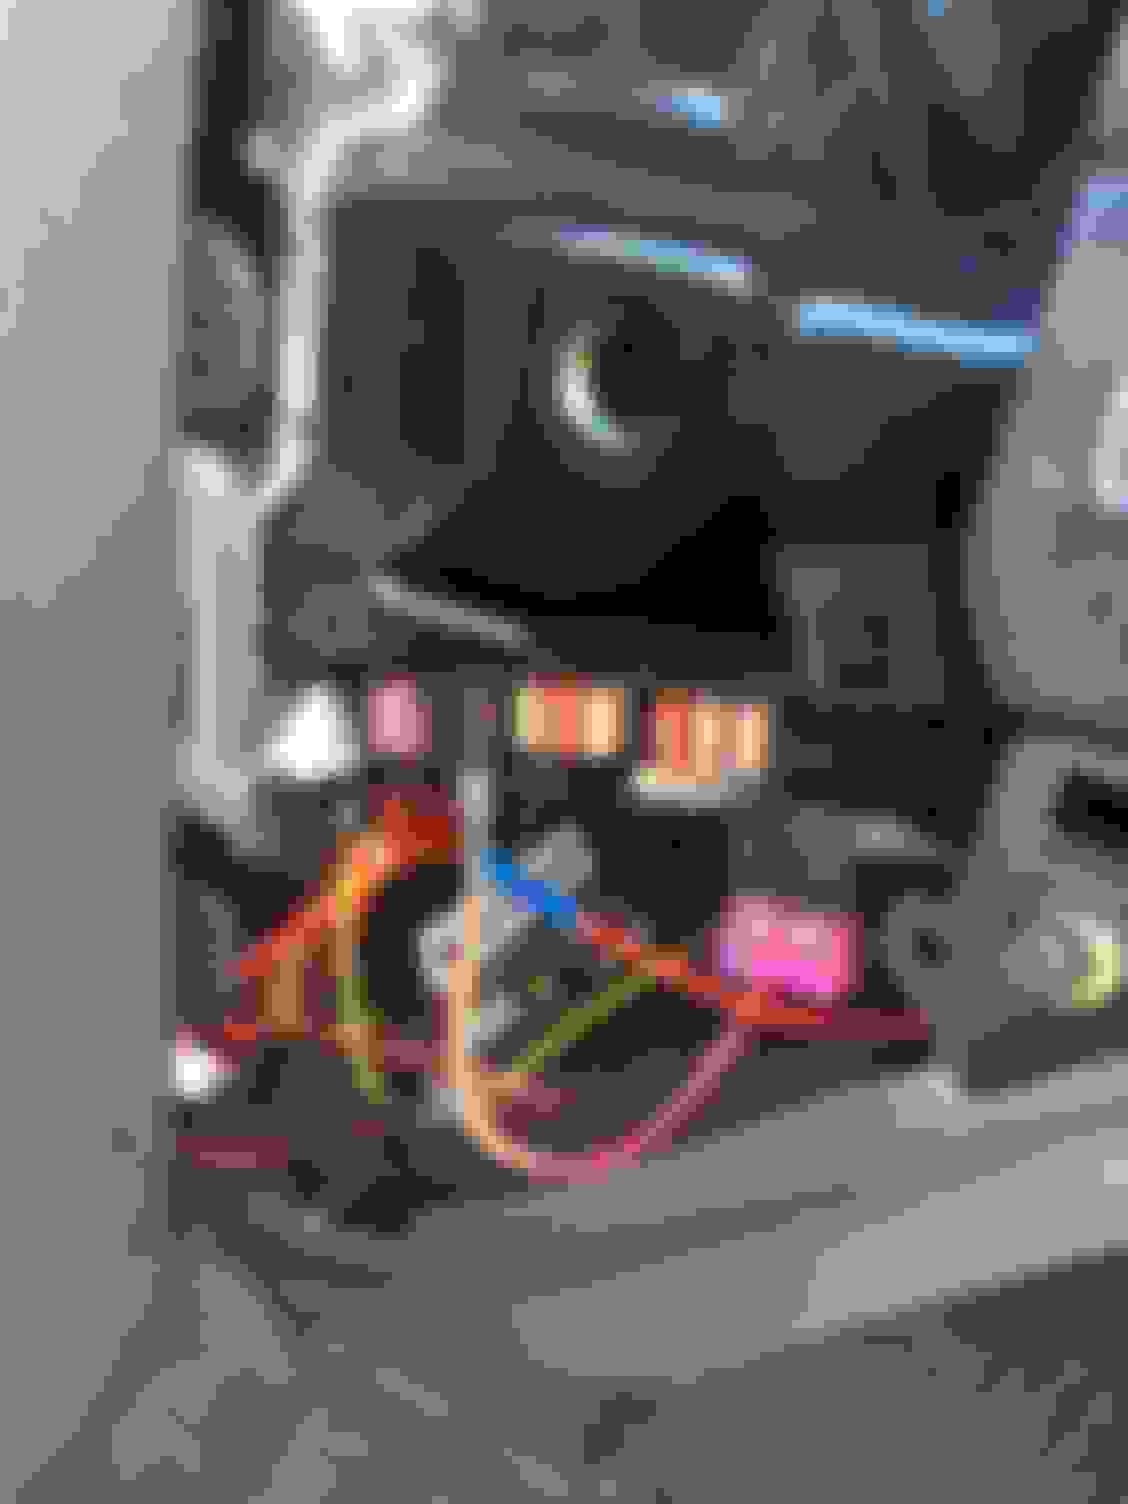
I ran the power cable down the driver side, just like the passenger side. I used my meter on these fuses and one was 12V, the other was like 3V, so I assumed the power magic would decide that was "off". It's hard with these cars because it's not like the old days where wires either had power or not depending on the ignition position. I ran my ground to a bold just to the upper right of this picture. It looks like the black one that you can see on the right.
Feel free to ask for more pics or ask questions. My car is about 50 feet from where I typed this so I can run and grab pics.
Thanks for the instruction. On the last photo, are you sure that one is 12V and the other is 3V? I measured on mine and both are 12V, when car is switched off. I had to route the power magic pro wires to the fuse box under driver footwell in order to find the fuse that's 0V when car is off.
Thanks for the instruction. On the last photo, are you sure that one is 12V and the other is 3V? I measured on mine and both are 12V, when car is switched off. I had to route the power magic pro wires to the fuse box under driver footwell in order to find the fuse that's 0V when car is off.
I'll check again, but I had all the doors open and did the wiring last. So by then I assumed the car was sleeping. And I know I got around 3V, or some similarly weird voltage I'd never expect in a car.
I'm 40 and spent my formative years installing stereos and security systems in cars. So not new to the idea, but yea these new cars are weird.
One thing I wondered that what if I have it hooked in to something that's not supposed to have a draw when the car is shut off. So now the camera is always on, will the car will think this line shouldn't be pulling current and something is wrong? Times were simpler back then.
The following is an option on the Q7 in EU, why the US doesn’t offer this is beyond me because there are no appendages hanging or wiring issues and the hardware already exists.
Universal Traffic Recorder for the video recording of situations ahead and behind your vehicle – when driving and parking. In Standard, Event and Park modes the camera system is fine-tuned for the various driving and parking situations. The recorded situations are saved on a removable SD card. User specific settings can be carried out using the respective Audi UTR App. Other functions such as Car Finder and Live View are also available. The Universal Traffic Recorder fulfils all the respective points of safety standards ADR 69/00, TRIAS 47, ECE-R94 and 96/79/EG.
Colour: anthracite
The following is an option on the Q7 in EU, why the US doesn�t offer this is beyond me because there are no appendages hanging or wiring issues and the hardware already exists.
Universal Traffic Recorder for the video recording of situations ahead and behind your vehicle � when driving and parking. In Standard, Event and Park modes the camera system is fine-tuned for the various driving and parking situations. The recorded situations are saved on a removable SD card. User specific settings can be carried out using the respective Audi UTR App. Other functions such as Car Finder and Live View are also available. The Universal Traffic Recorder fulfils all the respective points of safety standards ADR 69/00, TRIAS 47, ECE-R94 and 96/79/EG.
Colour: anthracite
Looks like the front/rear one translastes to about $643 usd ($459 on ebay, so that's not so bad). My dash cam was $400 and does the same stuff, and seems a little smaller.
The ebay auction talks about an "Audi UTR" app you use with the dash cam, but I can't find that app. So importing one to the USA may not be a good idea just yet.
EDIT: Watching this Video, If it ever comes to US, I would give it a definite look.
Hi - It looks like you had good success with the install. I purchased qty(2) DR650S-2CH for my A4 and Silverado. I am in the process of installing it first on the 2011 A4 Quattro.
I am running into some issues installing the Power Magic Pro. I have the power running down the drivers side fuse panel to the left of the steering wheel. I believe I cannot identify a "Switched" and "Constant Power" 12V fuse. When I hooked everything up the first and second time I could never get the green LED light to turn on the Power Magic Pro.
Can you tell me which fuse slots you used for the switch and constant power?
-Andrew
I'll be interested to hear where switched fuse is too. Maybe it depends on model year or build date. Mine is March 2016. I tried to find switched power for another purpose and was never able to find a switched fuse slot in either the footwell or end-of-dash fuse panels. I ended up running a wire up all the way from the back of the rear cargo area 12V socket.
 12-11-2017, 09:33 AM