85 UR quattro
 04-21-2017, 03:39 AM
#181
AudiWorld Member
Thread Starter
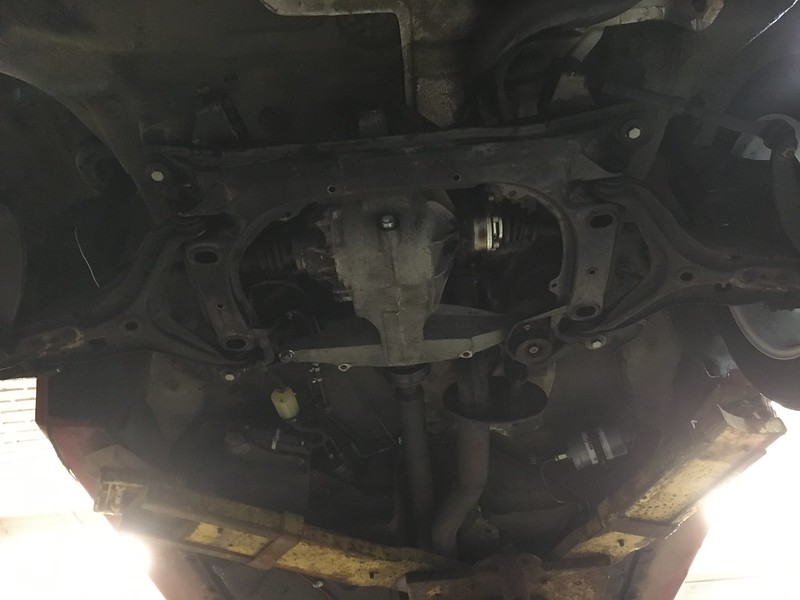
It�s been another slow project. Who would have thought replacing three diff seals would take this long? LOL
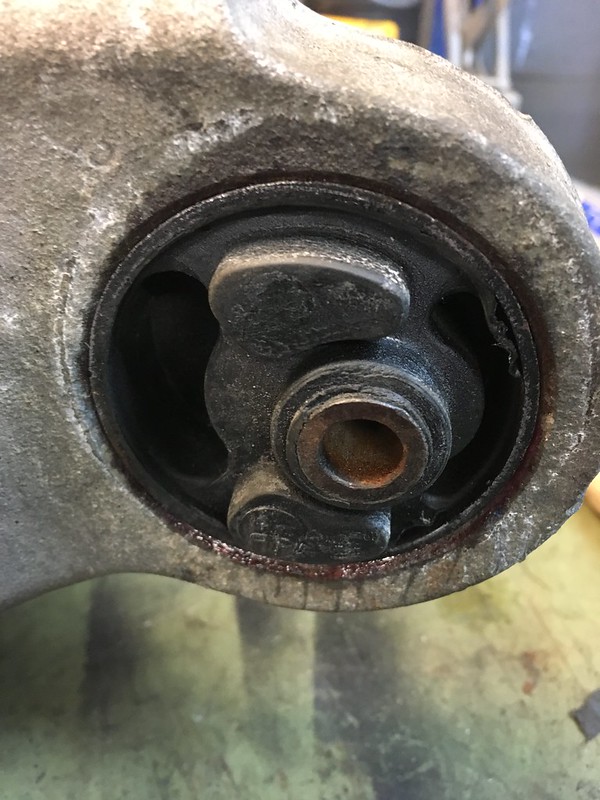
So we replaced the rear diff mount. The old one came out on the press but the new one only needed a g-clamp and some grease to persuade it home. Fortunately we took pictures so we were able to orient it correctly; or at least the same.
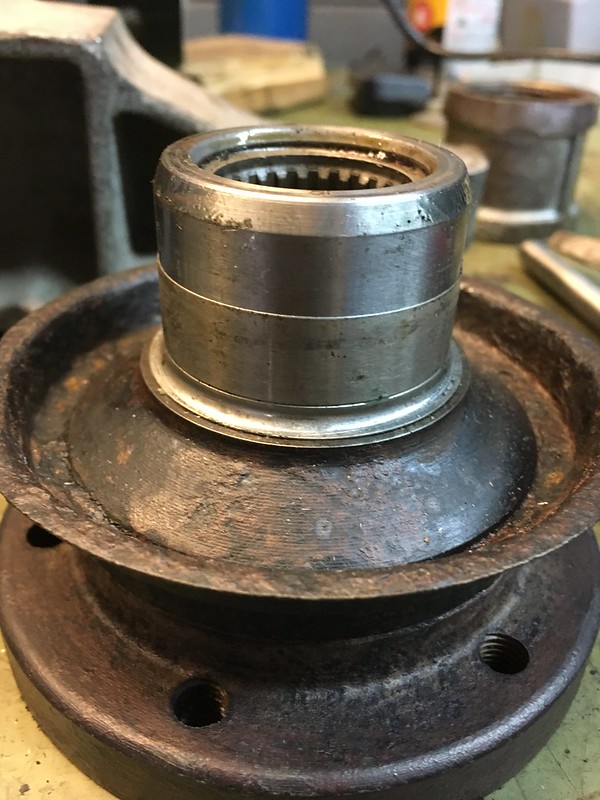
We searched hi and low for a new shaft repair sleeve that was the right size and not made by SKF. You may remember the last one was distorted by it�s own installation tool. Finally settled on one from National but when we opened the box the instructions were from SKF! Anyway we were a lot more wary installing his one and managed to keep it staright by making our own installation tool out of a pipe clamp.
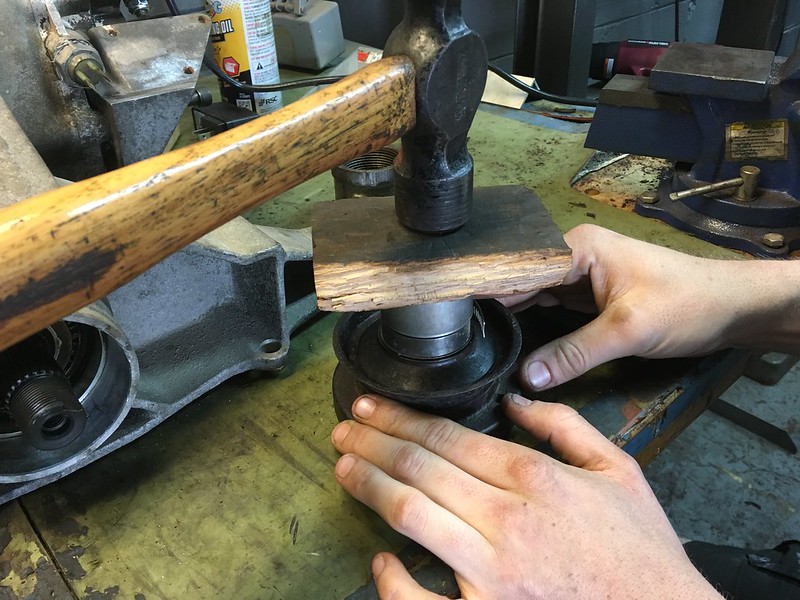
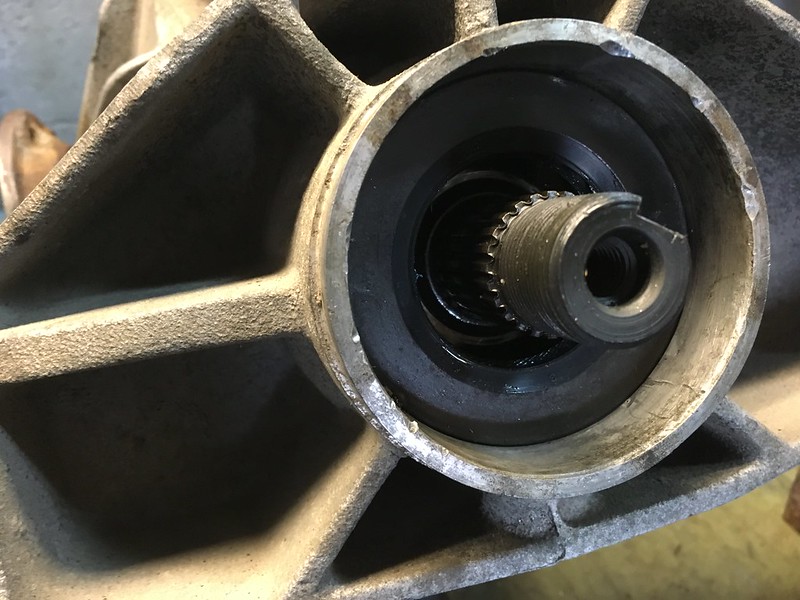
Then we pressed in all the seals, The left one is huge and does not have a shoulder to press it against. We measured the old one�s depth before taking it out and gradually tapped the new one home around it�s circumference till it measured the same all round.
Then we turned our attention to the diff lock actuator. We used the same Mercedes part we had used for the center diff. We had to drill another hole in the mounting plate as the back hole is in a different place. Not a big deal. We managed to salvage the original yoke and had to tap the Merc actuator shaft to mate up to it. Then we slapped it all together. There�s something magical about operating the diff lock on the bench. Maybe it�s the lack of driving the car.

With the diff done it�s time for the tricky bit: sub-frame bushings! We destroyed one last time remember?
So we replaced the rear diff mount. The old one came out on the press but the new one only needed a g-clamp and some grease to persuade it home. Fortunately we took pictures so we were able to orient it correctly; or at least the same.
We searched hi and low for a new shaft repair sleeve that was the right size and not made by SKF. You may remember the last one was distorted by it�s own installation tool. Finally settled on one from National but when we opened the box the instructions were from SKF! Anyway we were a lot more wary installing his one and managed to keep it staright by making our own installation tool out of a pipe clamp.
Then we pressed in all the seals, The left one is huge and does not have a shoulder to press it against. We measured the old one�s depth before taking it out and gradually tapped the new one home around it�s circumference till it measured the same all round.
Then we turned our attention to the diff lock actuator. We used the same Mercedes part we had used for the center diff. We had to drill another hole in the mounting plate as the back hole is in a different place. Not a big deal. We managed to salvage the original yoke and had to tap the Merc actuator shaft to mate up to it. Then we slapped it all together. There�s something magical about operating the diff lock on the bench. Maybe it�s the lack of driving the car.
With the diff done it�s time for the tricky bit: sub-frame bushings! We destroyed one last time remember?
 04-27-2017, 04:50 AM
#182
AudiWorld Member
Thread Starter
Well, the diff project is done, not without with some casualties. Read on���.
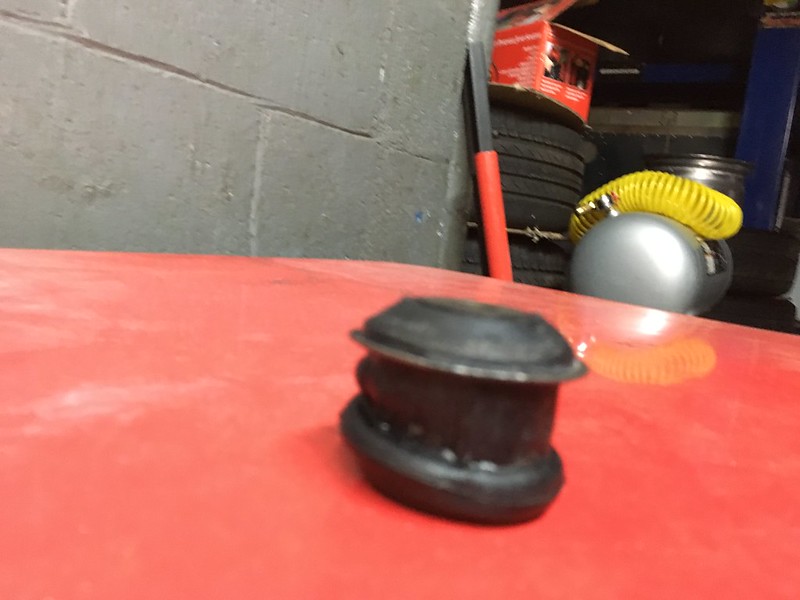
Our friend Carlos, a venerated old car genius, made a jig for the press to keep everything aligned while pressing in the notorious pair of small sub frame bushings. The large pair went in like you�d hope a bushing went in: easily.
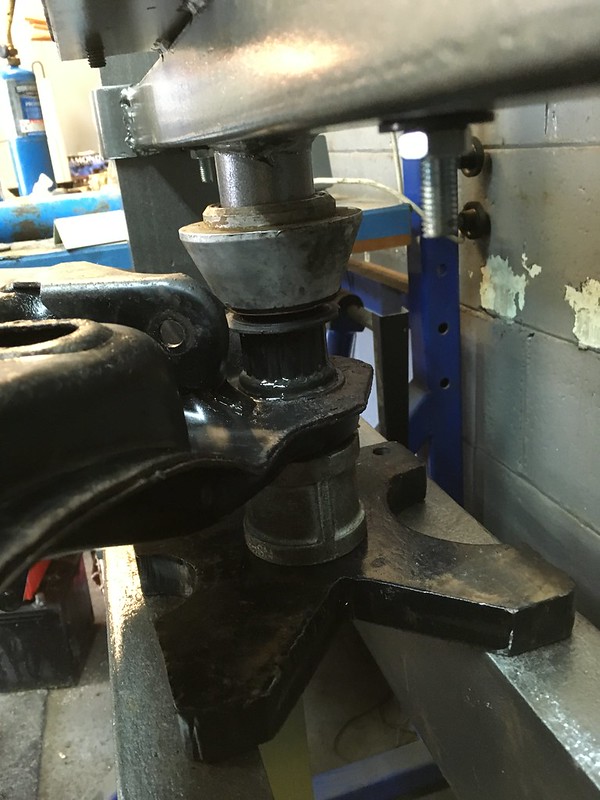
Well that didn�t work and we destroyed one $50, only available from Germany bushing. Apparently there is always a 50% failure rate when pressing these in which is why we had a spare!
So we gave up with the jig and just used a bolt down the middle and lots and lots of patience. This took several attempts with each bushing as we eye-balled them intensely looking for any sign of them starting to twist.

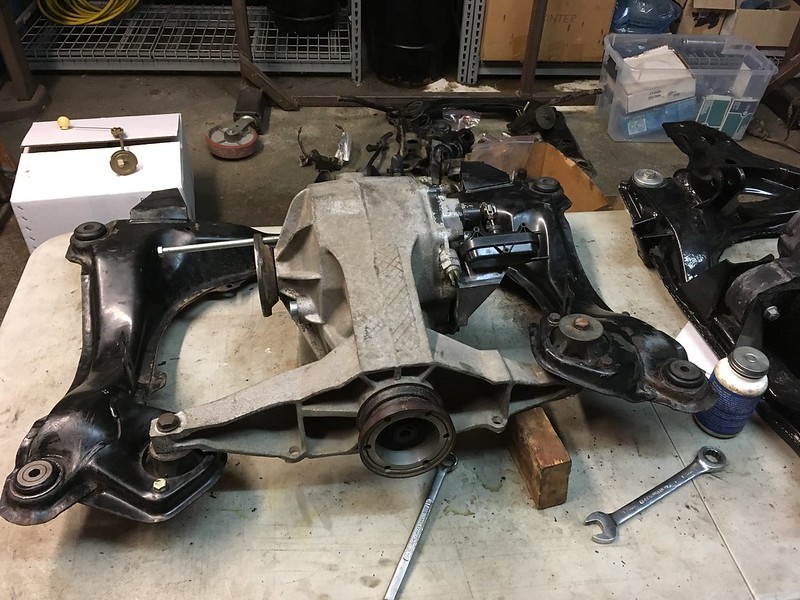
Once they are happy they go in nicely, like you�d expect but the slightest mis-alignment causes them to rotate and if you persist, distort. It was a bit stressful as ruining one more would set us back a month. Once in we soon had the diff mounted in the sub-frame again.
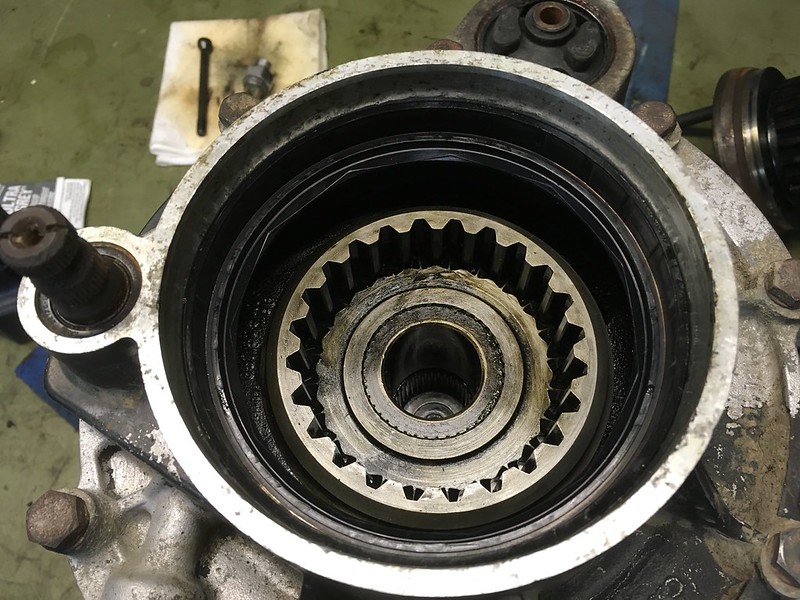
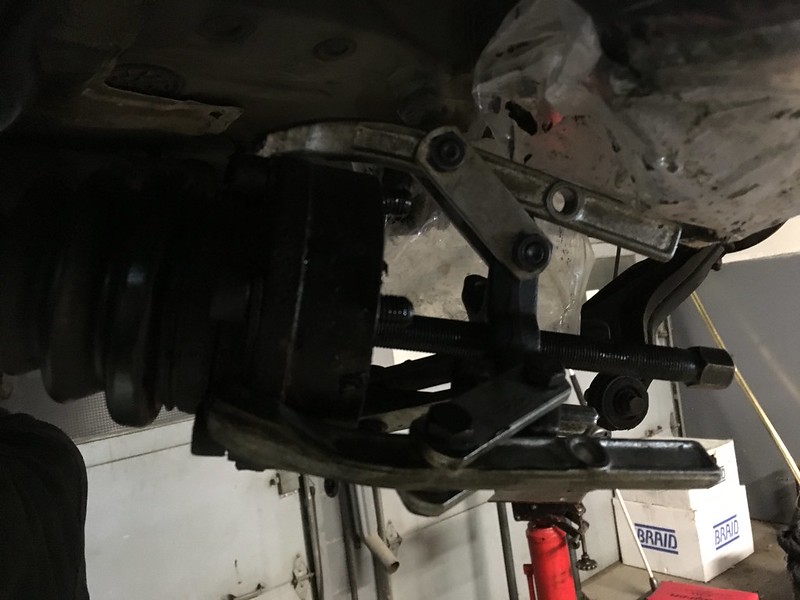
Before we could reinstall the assembly in the car we still had one more bit of housekeeping to perform. One rather rough inner CV joint. Fortnately you can still get these from an OE supplier and we were able to work on it still attached to the car, though it was a little dark under there. Once cleaned the old CV joint came off with some elbow grease and a puller.
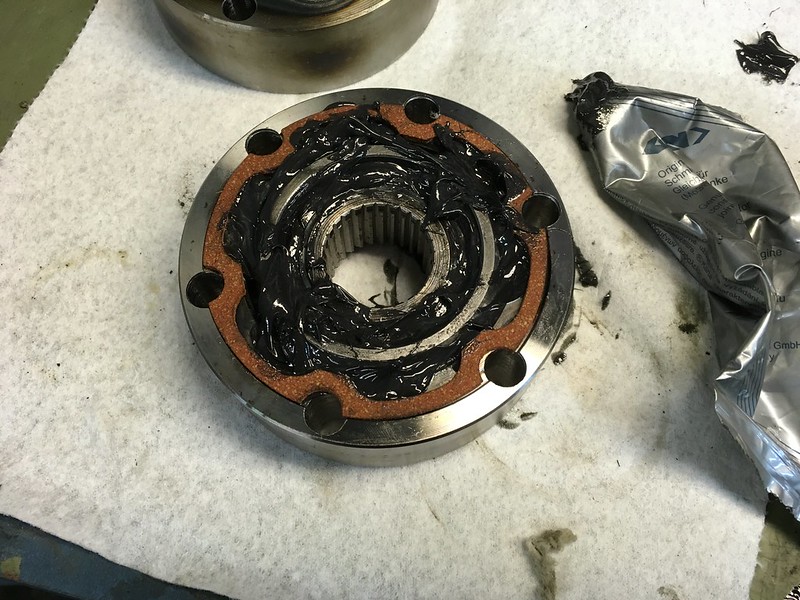
We assembled the new joint on the bench and packed it full of grease.
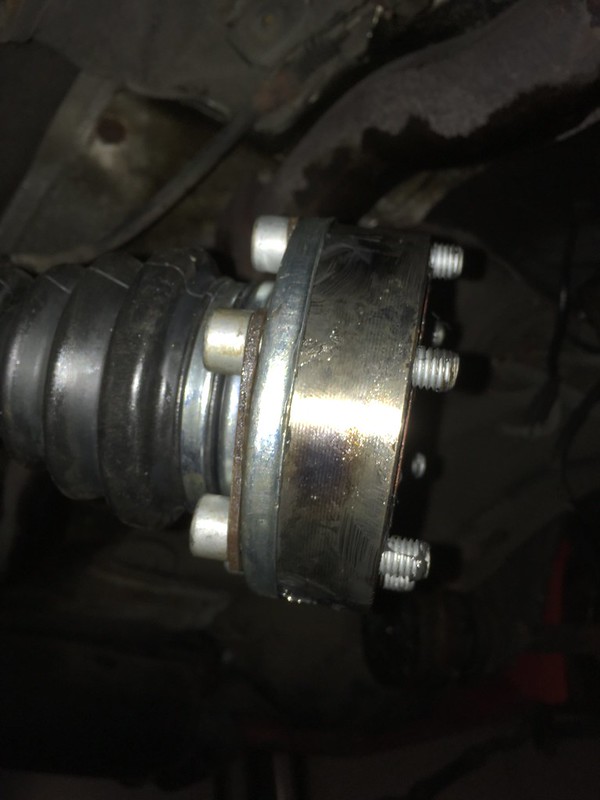
Then drove it home with a drift. They are surprisingly tight on the axle splines.
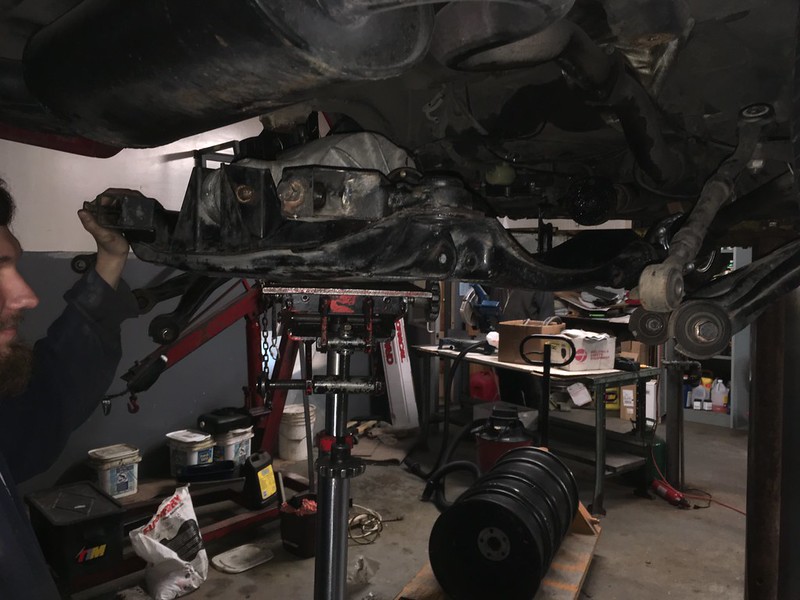
Then we were finally ready to throw this thing back in the car and tighten everything back up
Except for the lower control arm bushings off course, which have to be tightened with the car on the ground. Unless you have some BRAID wheels lying around that is. Don�t try this without proper wheels!

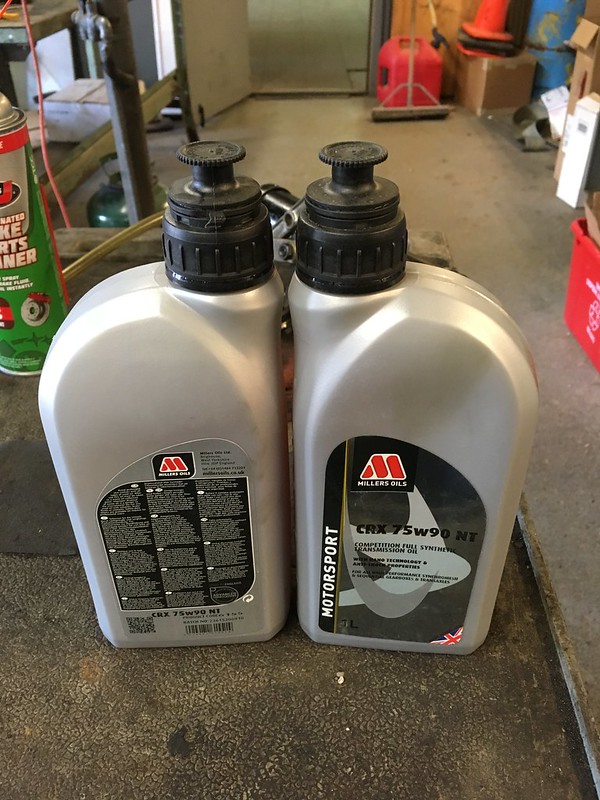
And of course, don�t forget to put some nice diff lube in it.
By then it was 1am so we waited till the next day to take it for a test drive
Before returning it to the stable with its friends.
Now the car needs an alignment and a tune. Still have some hesitation under load.
Our friend Carlos, a venerated old car genius, made a jig for the press to keep everything aligned while pressing in the notorious pair of small sub frame bushings. The large pair went in like you�d hope a bushing went in: easily.
Well that didn�t work and we destroyed one $50, only available from Germany bushing. Apparently there is always a 50% failure rate when pressing these in which is why we had a spare!
So we gave up with the jig and just used a bolt down the middle and lots and lots of patience. This took several attempts with each bushing as we eye-balled them intensely looking for any sign of them starting to twist.
Once they are happy they go in nicely, like you�d expect but the slightest mis-alignment causes them to rotate and if you persist, distort. It was a bit stressful as ruining one more would set us back a month. Once in we soon had the diff mounted in the sub-frame again.
Before we could reinstall the assembly in the car we still had one more bit of housekeeping to perform. One rather rough inner CV joint. Fortnately you can still get these from an OE supplier and we were able to work on it still attached to the car, though it was a little dark under there. Once cleaned the old CV joint came off with some elbow grease and a puller.
We assembled the new joint on the bench and packed it full of grease.
Then drove it home with a drift. They are surprisingly tight on the axle splines.
Then we were finally ready to throw this thing back in the car and tighten everything back up
Except for the lower control arm bushings off course, which have to be tightened with the car on the ground. Unless you have some BRAID wheels lying around that is. Don�t try this without proper wheels!
And of course, don�t forget to put some nice diff lube in it.
By then it was 1am so we waited till the next day to take it for a test drive
Before returning it to the stable with its friends.
Now the car needs an alignment and a tune. Still have some hesitation under load.
04-28-2017, 05:17 AM
#186
AudiWorld Member
Thread Starter
 05-11-2017, 10:15 AM
#188
AudiWorld Member
Thread Starter
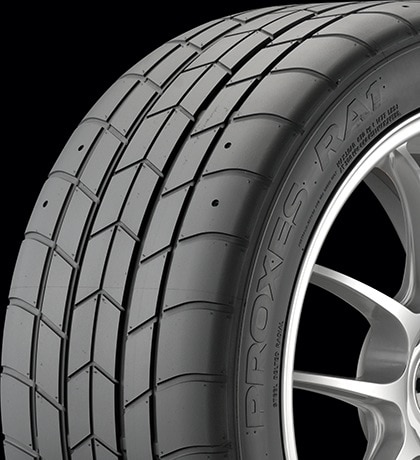
HELP ME CHOOSE SOME TIRES.
The Kumho all seasons (no seasons) that are on the car are done so it's time for some new rubber. The stock size of 215/50-15 is NLA in anything affordable and streetable so it's going to be 225/50-15 again. The car does not see winter so summer tires are a must. I don't track it but want the most grip I can afford in case I have to stop or swerve in a hurry. They should look cool or period or both. Treadwear is a non-issue as these will age out before they wear out.
I've narrowed it down to 4 but can't quite decide:
P ZERO TROFEO R $169
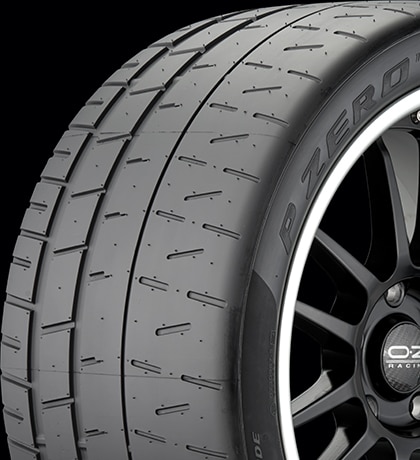
PROXES R888 $138
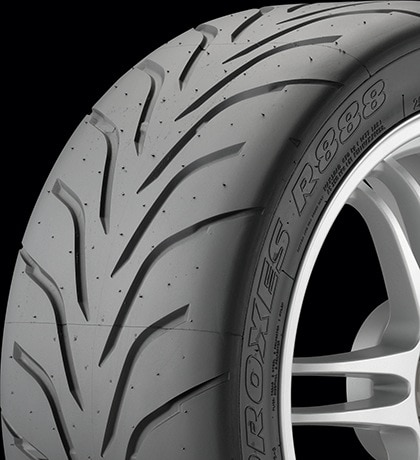
PROXES R888R $140
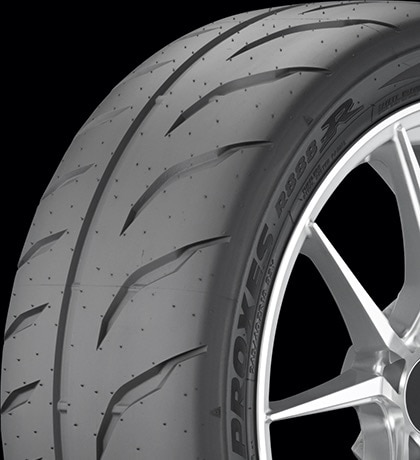
PROXES RA1 $189
The Kumho all seasons (no seasons) that are on the car are done so it's time for some new rubber. The stock size of 215/50-15 is NLA in anything affordable and streetable so it's going to be 225/50-15 again. The car does not see winter so summer tires are a must. I don't track it but want the most grip I can afford in case I have to stop or swerve in a hurry. They should look cool or period or both. Treadwear is a non-issue as these will age out before they wear out.
I've narrowed it down to 4 but can't quite decide:
P ZERO TROFEO R $169
PROXES R888 $138
PROXES R888R $140
PROXES RA1 $189
Last edited by team illuminata; 05-11-2017 at 10:22 AM.
05-27-2017, 01:04 PM
#189
AudiWorld Member
Thread Starter
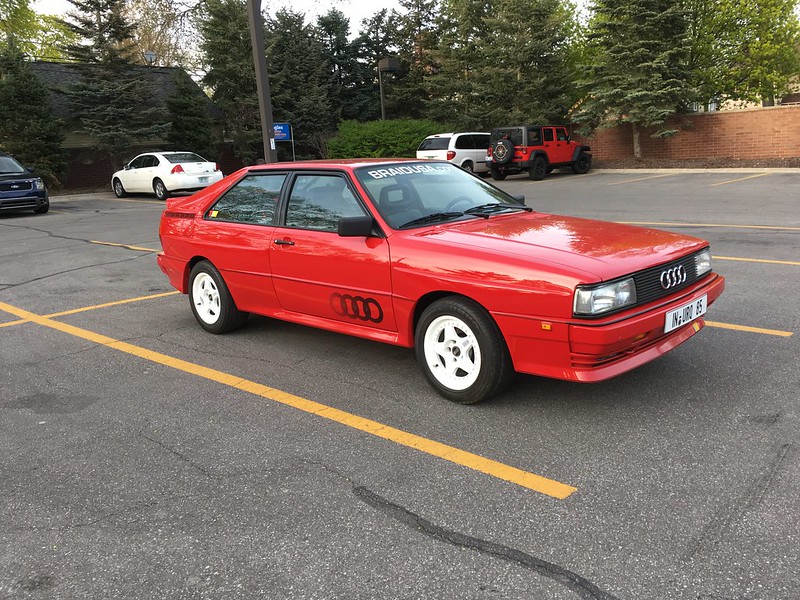
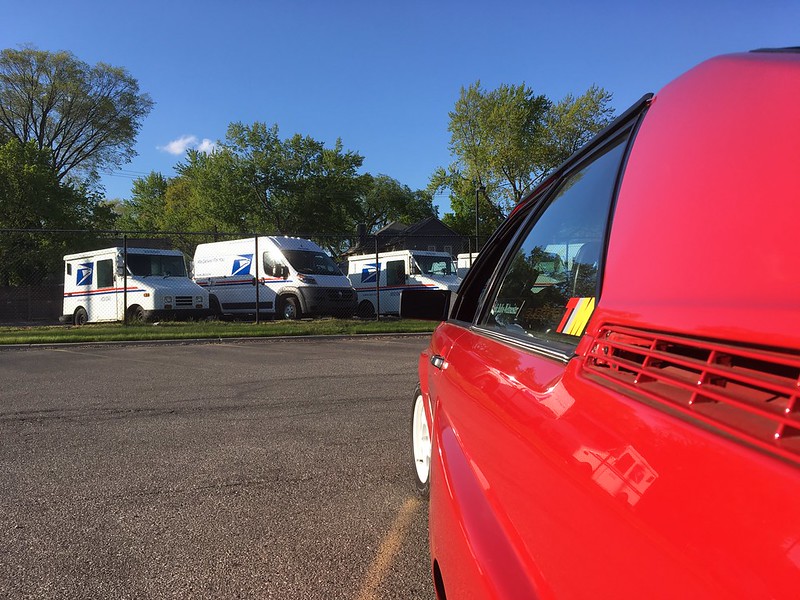
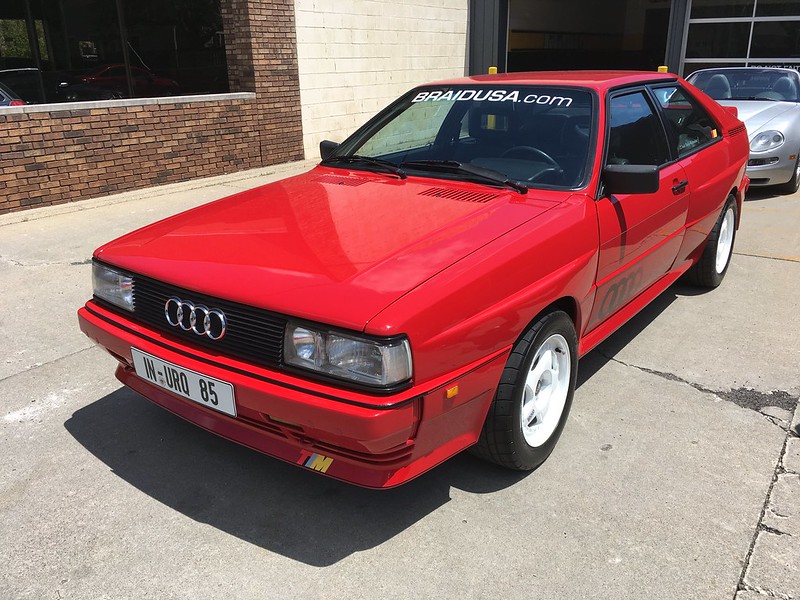
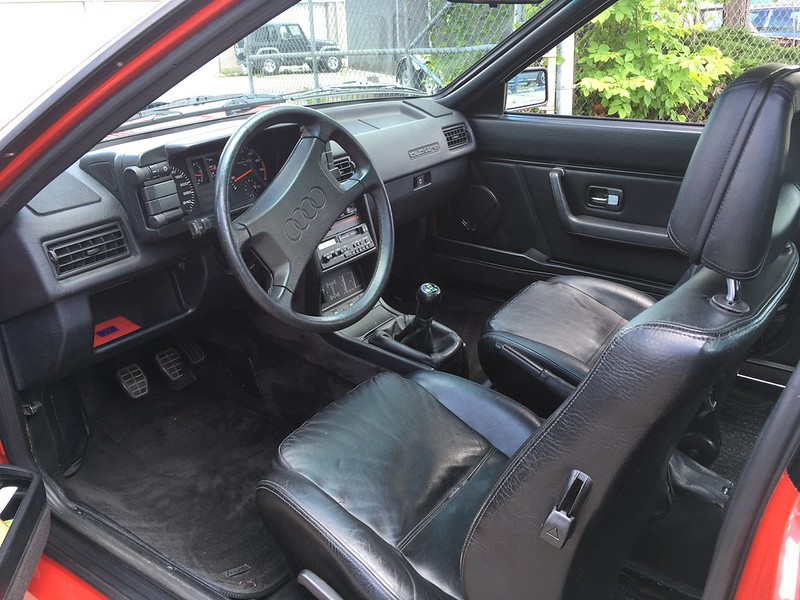
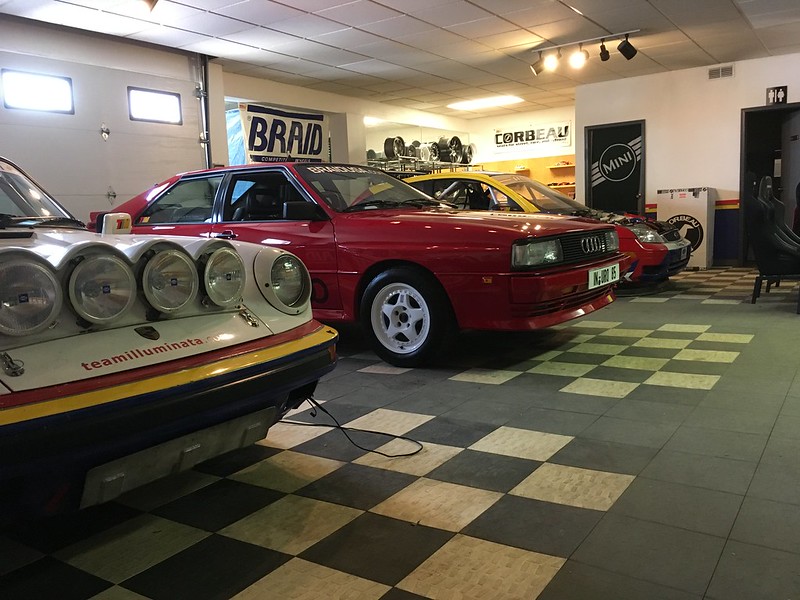
The car is running but not perfectly (more later) so I have been taking every opportunity to drive it and pose around in it. Took it to the post office:

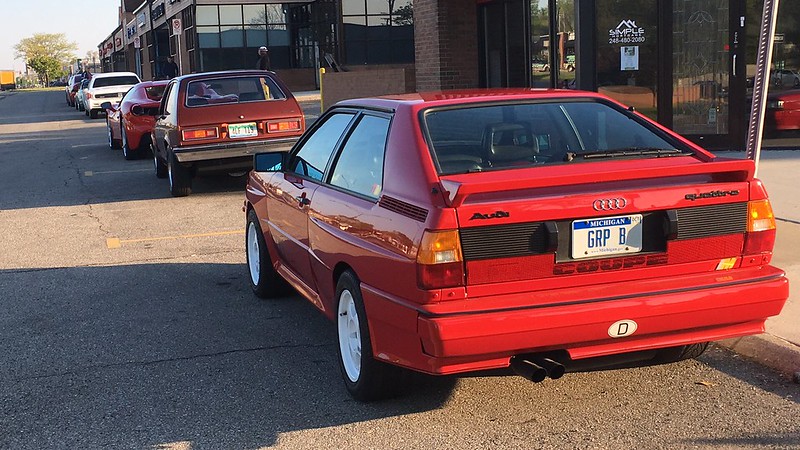
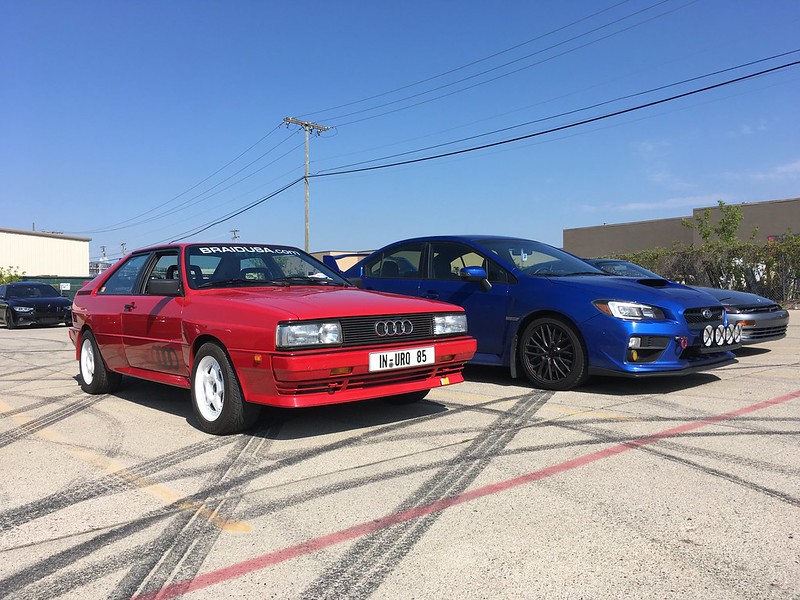
A cars and coffee or two:

Parked in in the driveway:

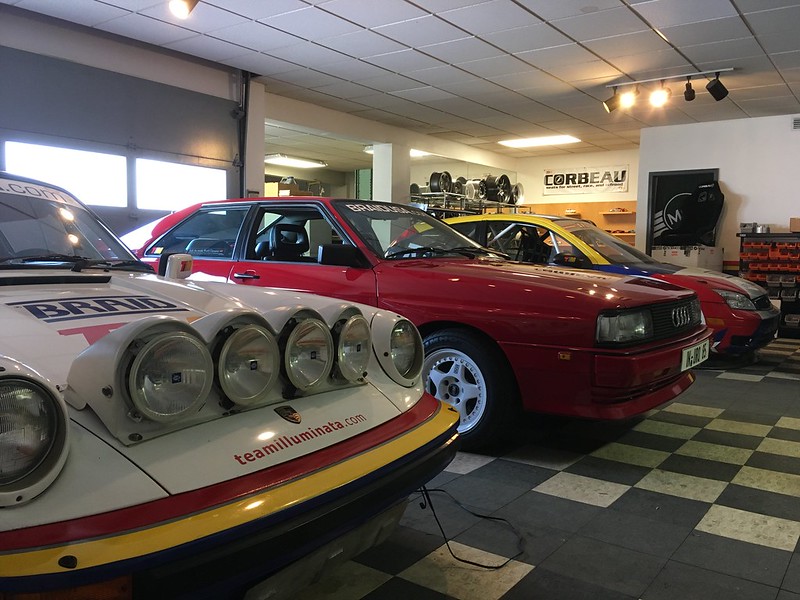
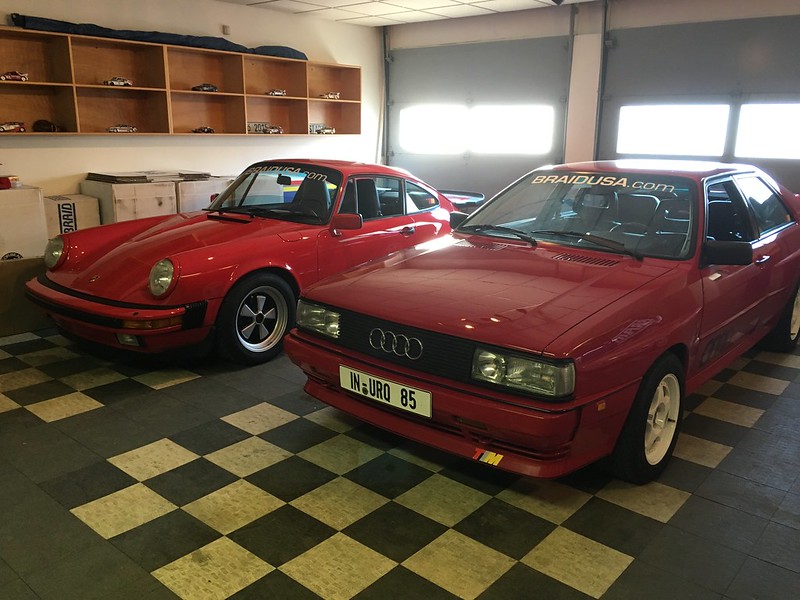
and at the showroom:

I even parked it outside the local Audi dealer:
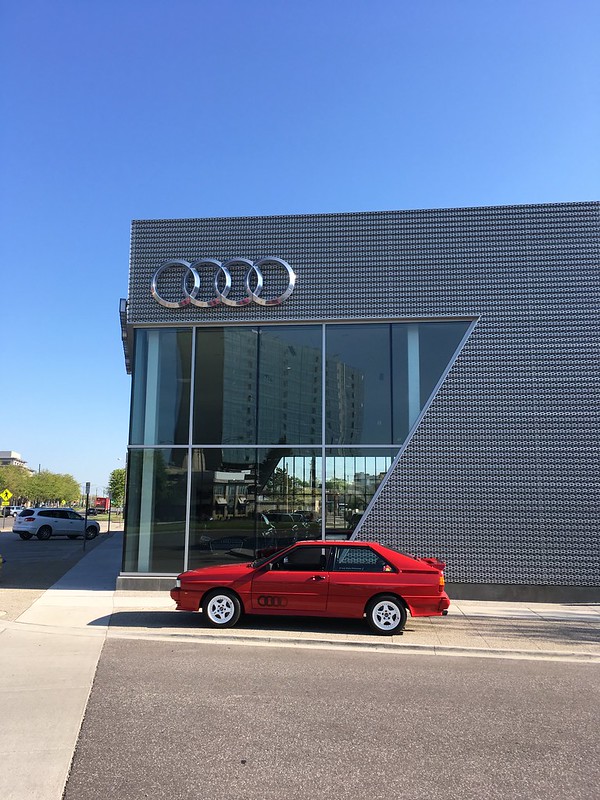
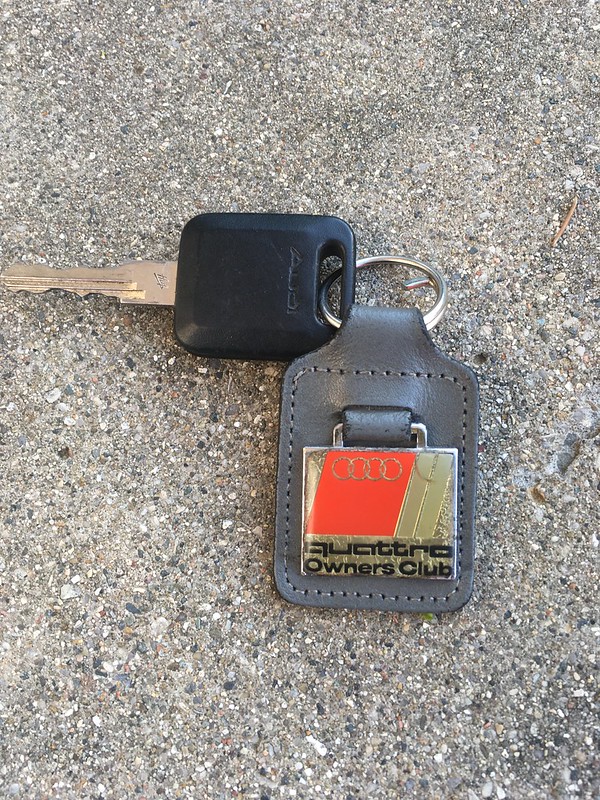
This really is the key to happiness.
A cars and coffee or two:
Parked in in the driveway:
and at the showroom:
I even parked it outside the local Audi dealer:
This really is the key to happiness.
06-09-2017, 08:35 AM
#190
AudiWorld Member
Thread Starter
Took the car to AutoEurope in Birmingham for:
new tires
alignment
detailing
dent removal
Now so clean. Hadn't been cleaned for three years!
They did a great job. Shame it's parked back in the showroom and not in my drive.
Next on the agenda is to address the hesitation under load at around 3-4000rpm. Any ideas?
new tires
alignment
detailing
dent removal
Now so clean. Hadn't been cleaned for three years!
They did a great job. Shame it's parked back in the showroom and not in my drive.
Next on the agenda is to address the hesitation under load at around 3-4000rpm. Any ideas?