DIY: Fog lamp replacement


 09-06-2013, 04:59 PM
#52
AudiWorld Member
great write up, allowed me to install a set in just a few minutes.
These Ziza "HID 6000K looking" ones from ecstuning look great.
http://www.ecstuning.com/Audi-B8_S4-...ights/ES11134/
These Ziza "HID 6000K looking" ones from ecstuning look great.
http://www.ecstuning.com/Audi-B8_S4-...ights/ES11134/
Last edited by will13k7; 09-06-2013 at 06:25 PM.
 09-07-2013, 10:00 AM
#54
AudiWorld Member
http://www.ecstuning.com/Audi-B8_S4-...hts/ES2526575/
Last edited by will13k7; 09-07-2013 at 10:04 AM.
 09-08-2013, 03:45 PM
#56
Audiworld Junior Member

Join Date: Feb 2010
Location: Nor Cal Bay Area
Posts: 30
Likes: 0
Received 0 Likes
on
0 Posts
 03-21-2014, 12:26 PM
#58
AudiWorld Super User
10-12-2014, 12:23 PM
#60
AudiWorld Newcomer

Join Date: Sep 2014
Posts: 1
Likes: 0
Received 0 Likes
on
0 Posts
Also gave me a chance to glass polish the outer lens. very pitted
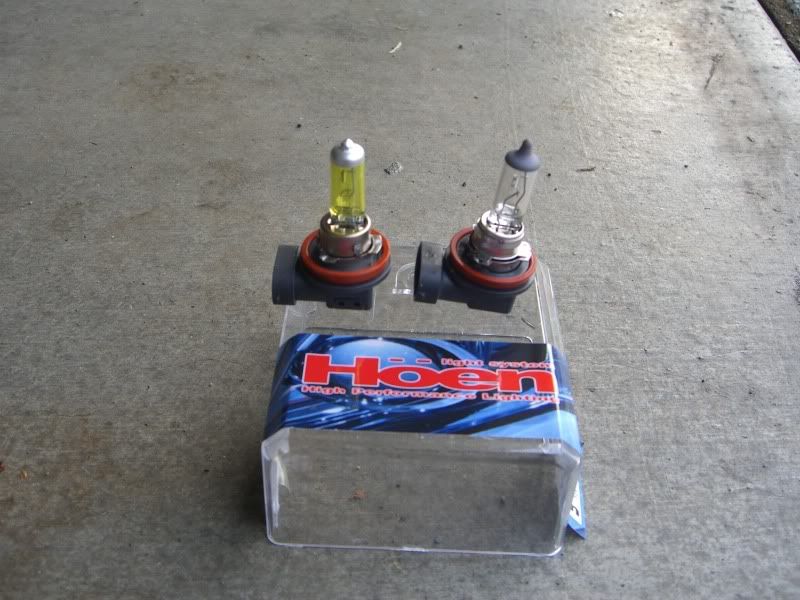
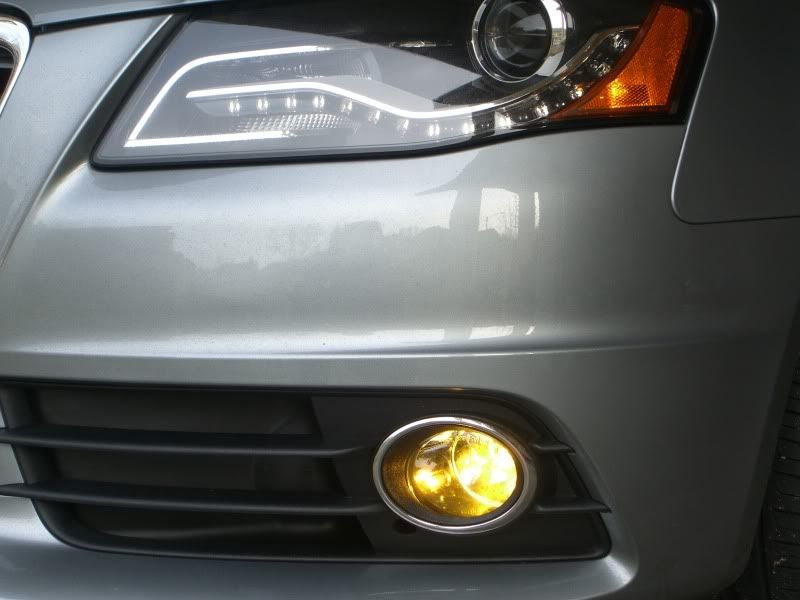
OK gang, I had the time to bang out another mod, and document this. I ordered the Hoen H11 Endurance (very yellow) fog bulbs to replace the near white stock ones. Why? To aid in sight distance at night. Yellow cuts fog much better and farther, it is also easier to see for oncoming traffic, which might hit you!
You can find them at the bottom of this link:
Hoen
They look like this compared to our stock bulbs:
Tools needed:
#25 Torx bit - all screws for this use this size
Universal bit driver for torx bit
Clean dry soft cloth
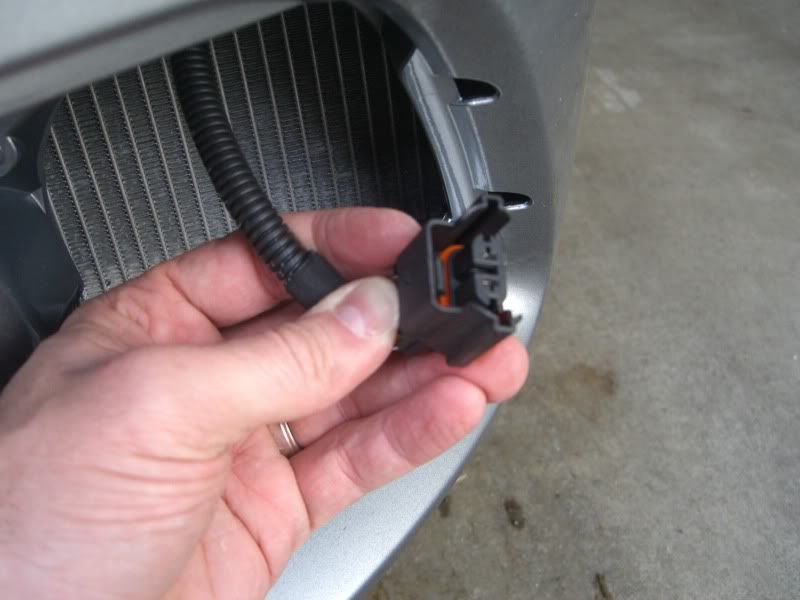
Each side for our car is a little different, so I will go over both, starting with driver side. The drivers side black grille around the fog, is open due to the smaller cooler for the transmission placed here. Reaching inside the top and bottom where the black meets the painted portion of the valance, you can feel the little tabs shown here are the top tabs:
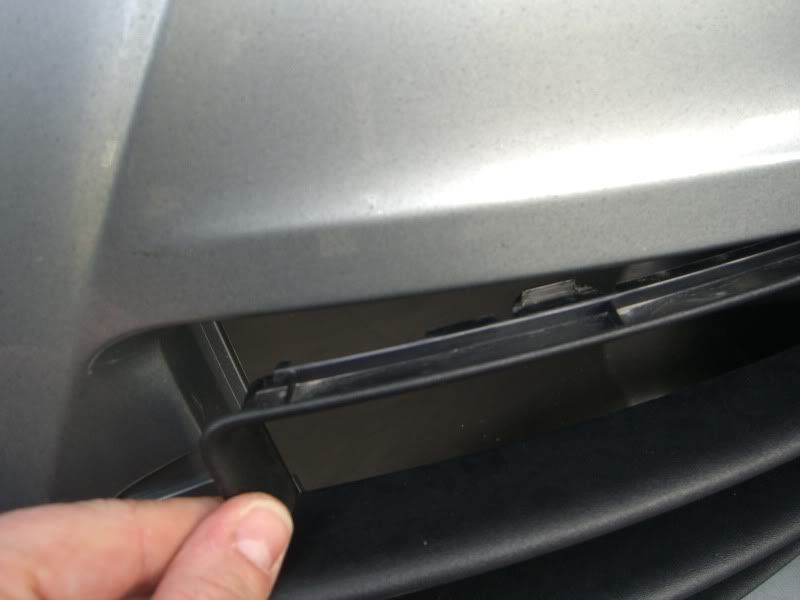
Here I have peeled it away to show the locations of the lower tabs, you will want to pull it away from the center of the car to the outside, as the fins of the grill actually penetrate the valance on the outer edge. Then you just pull it free.

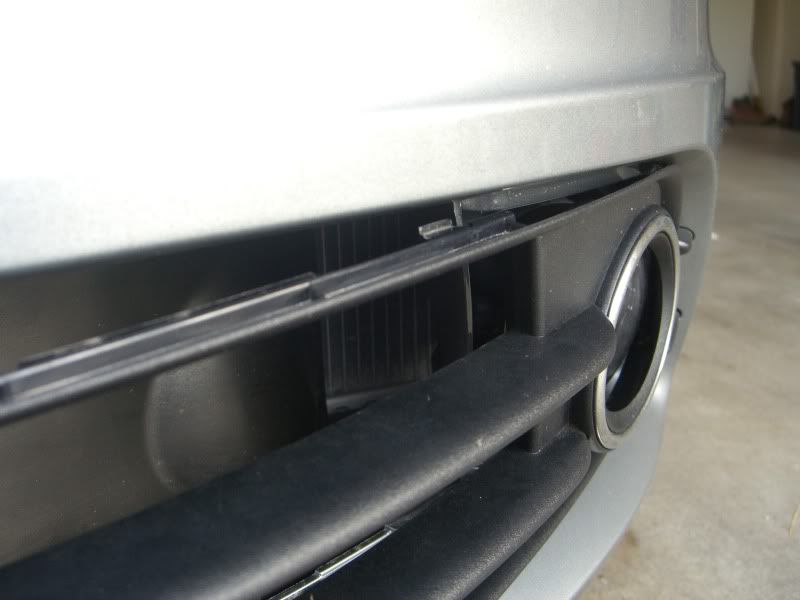
You can see the bulb housing and lens clearly now on the drivers side, there are 2 silver screws to undo here, upper left (already removed here) and lower right (still in place).

Removing these allows the housing to come out (there is a small tab at the top of the housing which adds a 3rd point in addition to the removed screws, so slide it out of this)
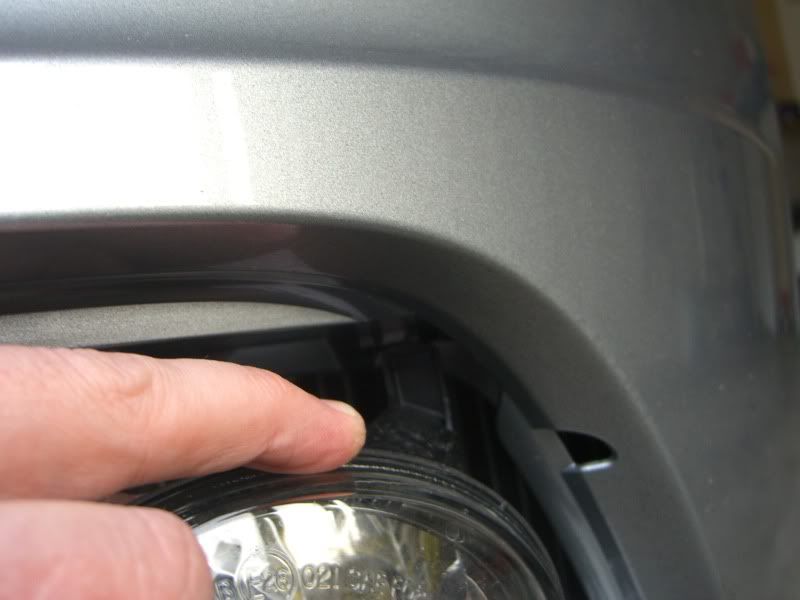
Once out, you will twist the bulb counter clockwise (looking at the rear of the housing) and pull it out, wiring connector and all. Once loose of the housing, you will remove the bulb from the wiring harness by depressing tab at the rear of the bulb area, and pulling the bulb free once the clip is depressed enough (my thumb is on the clip portion you need to depress)
The bulbs have a tab which only allows them to be plugged in the correct way, so line up the tab, insert the bulb, and snap it to the wiring harness. Put the harness back into the light housing, and twist to tighten (the red gasket will seat on the back of the housing to form a water tight seal). Be sure the wiring harness is pointed DOWN when you have it done, to allow water to drip away from the wiring. Now just interst the tab at the top of the housing into the slot in the valance, and resecure the 2 silver screws. Replace the grille and snap this into place - Driver's side is done!
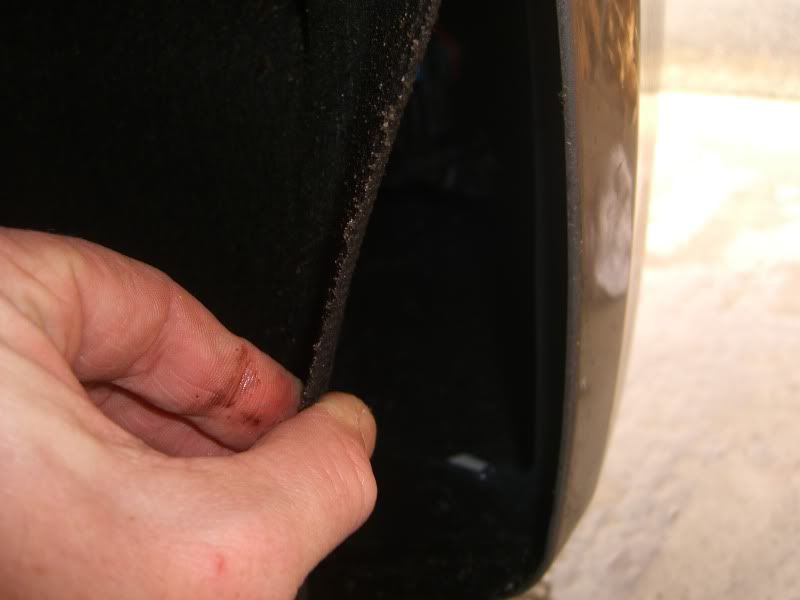
Since the passenger side is solid (no radiator here), ease of entry is to pull back the wheel well liner seen here:

This lower most screw (pictured) on the front of the well is all we need to remove.
Once out, just pull the liner back, it's soft and malleable:
Once pulled back, you can see inside with good lighting or a flashlight, and reach the back of the fog lamp easily - a quick counter clock turn and pull the bulb and wiring harness out:
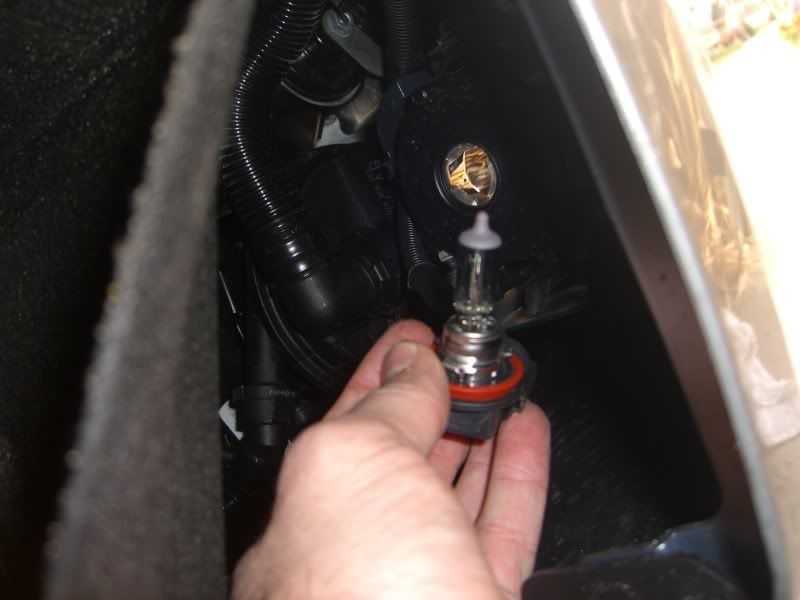
Replace the bulb the same as the other side, re-insert into the housing back, twist clock wise to secure snugly, and be sure the wiring is pointing DOWN again. Replace the screw into the wheel well liner, and you are done!
Completed pics:
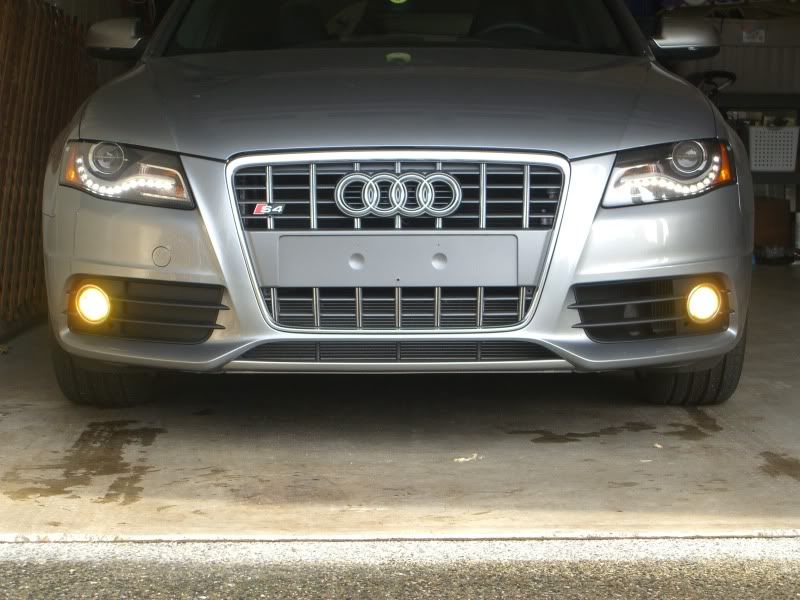
Close up:
I'll try to get some night shots of both the 6K HID's and these and update both threads.
You can find them at the bottom of this link:
Hoen
They look like this compared to our stock bulbs:
Tools needed:
#25 Torx bit - all screws for this use this size
Universal bit driver for torx bit
Clean dry soft cloth
Each side for our car is a little different, so I will go over both, starting with driver side. The drivers side black grille around the fog, is open due to the smaller cooler for the transmission placed here. Reaching inside the top and bottom where the black meets the painted portion of the valance, you can feel the little tabs shown here are the top tabs:
Here I have peeled it away to show the locations of the lower tabs, you will want to pull it away from the center of the car to the outside, as the fins of the grill actually penetrate the valance on the outer edge. Then you just pull it free.
You can see the bulb housing and lens clearly now on the drivers side, there are 2 silver screws to undo here, upper left (already removed here) and lower right (still in place).
Removing these allows the housing to come out (there is a small tab at the top of the housing which adds a 3rd point in addition to the removed screws, so slide it out of this)
Once out, you will twist the bulb counter clockwise (looking at the rear of the housing) and pull it out, wiring connector and all. Once loose of the housing, you will remove the bulb from the wiring harness by depressing tab at the rear of the bulb area, and pulling the bulb free once the clip is depressed enough (my thumb is on the clip portion you need to depress)
The bulbs have a tab which only allows them to be plugged in the correct way, so line up the tab, insert the bulb, and snap it to the wiring harness. Put the harness back into the light housing, and twist to tighten (the red gasket will seat on the back of the housing to form a water tight seal). Be sure the wiring harness is pointed DOWN when you have it done, to allow water to drip away from the wiring. Now just interst the tab at the top of the housing into the slot in the valance, and resecure the 2 silver screws. Replace the grille and snap this into place - Driver's side is done!
Since the passenger side is solid (no radiator here), ease of entry is to pull back the wheel well liner seen here:
This lower most screw (pictured) on the front of the well is all we need to remove.
Once out, just pull the liner back, it's soft and malleable:
Once pulled back, you can see inside with good lighting or a flashlight, and reach the back of the fog lamp easily - a quick counter clock turn and pull the bulb and wiring harness out:
Replace the bulb the same as the other side, re-insert into the housing back, twist clock wise to secure snugly, and be sure the wiring is pointing DOWN again. Replace the screw into the wheel well liner, and you are done!
Completed pics:
Close up:
I'll try to get some night shots of both the 6K HID's and these and update both threads.

Thread
Thread Starter
Forum
Replies
Last Post
Audi Other FS: 2007 Audi RS4 black/black CCW
ilikeit
Vehicles For Sale - Archive (NO NEW POSTS HERE)
2
01-09-2016 09:24 AM
Audi A8 2005 Audi A8L
Jan_PL_S6
Vehicles For Sale - Archive (NO NEW POSTS HERE)
12
11-27-2015 07:27 AM

