When you click on links to various merchants on this site and make a purchase, this can result in this site earning a commission. Affiliate programs and affiliations include, but are not limited to, the eBay Partner Network.
Hello everyone. I took delivery of my MY15 Q5 Prestige SLine in Nov of last year. I have an obsession with wanting every car I own to have just about every option on it possible. I built my car at the dealer and waited 4 months for it to arrive. The only option I did not spec on it was the adaptive suspension. So far I have retrofitted Highbeam Assistant and I am currently in the process of doing the rear seat heaters. Two different versions of rear seat heating have been offered for the Q5. From MY09 to MY12 the switches in the center console were "rollers" that allowed you to set the level of temperature you desired. This system utilized an occupant sensor built directly into the heating element. If you look on the Kufatec web site you may see a wiring harness offered for rear seat heating for the Q5, however the harness they are offering is the one for this older system. They do not have one for the newer system (I asked). As far as the newer system (MY13-Current), it utilizes temperature switches similar to the ones in the front of the vehicle that have either setting1, setting2 or setting3. They also default to off whenever the car is turned off and back on again. These switches will also behave similarly to the front ones where after being on the highest setting for around 10 minutes they will automatically lower down to the second setting. Because this system is a little more complex, it requires a new control module in the right rear luggage compartment wheel housing but thankfully does not require coding. I am retrofitting the latter of the two systems. Here is a list of the parts needed to retrofit the system.
Backrest heating elements (2 of them)
8R0 963 557 Q
Seat cusion heating element (2 of them)
8R0 963 555 L
Seat pad connector - Male (2 of them)
4F0 937 731
Wires for seat pad connectors - Take note 2 different kinds.
000 979 026 E (2 of them)
000 979 152 E (2 of them)
Center console trim panel with holes for seat heating switches.
8R0 864 376 F 6PS (6PS means black)
Right seat heating switch
8K0 963 564
Left seat heating switch
8K0 963 563 A
Connector for right heating switch
8E0 906 236
Connector for left heating swtich
4D0 971636 B
Wires for switch connectors (6 of them needed)
000 979 009 E
Rear seat heating control module
3T0 959 772 B
Bracket for control module
8R0 907 333
Nuts for control module bracket (2 of them needed)
N 015 082 10
Connector for rear seat heating control module
6Q0 937 713
Wire for seat heating control module connector (this gets complicated, pay attention!)
3 different kinds of wires needed due to different power draws.
000 979 019 E (6 of these. They are .5mm wires that are used to communicate with the switches)
000 979 133 E (1 of these. These are 1.0mm wires that carry power to the heated seat pads.)
000 979 225 E (1 of these. These are 2.5mm wires that take power into the control module from the power distribution block.)
All of the parts except the pads are relatively inexpensive. The pads themselves are listed in ETKA at 296 a piece (Thats per pad not per seat). 4 pads = 1184. And no, you cannot use aftermarket pads because the audi ones have temperature sensors inside of them that the control module communicates with (sorry, I thought of that too).
I am 90% of the way done with this retrofit but I figured I might as well start posting pictures and the progress I have made.
Step 1 � Remove the Seats from the vehicle.
Step 2 � Remove the luggage compartment floor, the floor trim in the back that drapes over where the seats are and the passenger side luggage hold down trim.
Step 3 � Remove the right side luggage compartment trim that accesses the fuse holder box..
Step 4 � Remove the entire right luggage compartment wall trim.
Step 5 � Remove the rear passenger d pillar trim piece.
Step 6 � Remove the old center console trim where the switches will go.
New trim piece for switches.
Step 7 � Run 8 wires under the carpet from the rear seating area to the exposed center console compartment. There is a wiring channel concealed under the carpet on the rear passenger seat side right at the edge where it goes to the floor. If you pull back the carpet slightly, you will see this channel. It has several clips that you can undo with a flat screwdriver and lay your new wiring inside of it.
Step 8 � Run your new harness along the existing harness all of the way to the very back of the right luggage compartment. See Photos.
Step 9 � Center Console Switches � Strip all of your new wires and crimp your new repair wire leads onto them using heat shrink butt connectors. Insert all of your new leads into your new Switch connector housings. Install switches into new housing. Plug in switches. One wire from each connector needs to be connected to a (according to ELSA) gray/blue wire that is also connected to the 12v sockets, heated/cooled cup holder, ADS selection switches etc. The easiest way to connect this is right onto the one that is at the 12v lighter in the center console. Two other wires labeled blue in ELSA can share the same wire running back to the luggage compartment. Finished result should look like the following photo.
New switches in new trim piece.
Step 10 � Install new control module and bracket onto the existing posts in the right rear luggage compartment. Place new leads into the Control Module connector housing and crimp onto new harness wires using heat shrink butt connectors.
Step 11 � Two of the wires on the Control Module connector are 2.5mm wires and they are for incoming power to the module. I tied this power directly into the power distribution relay in the right rear luggage compartment at the exact terminal specified in ELSA. The other power wire specified on the control module needs to be attached to �Accessory Power� which is in the Drivers side A-Pillar. There should be a plug in the right rear luggage compartment that goes to the Towing Recognition Control Module. You can tie it into that wire.
Two of the Seat Heating elements arrived in the mail.
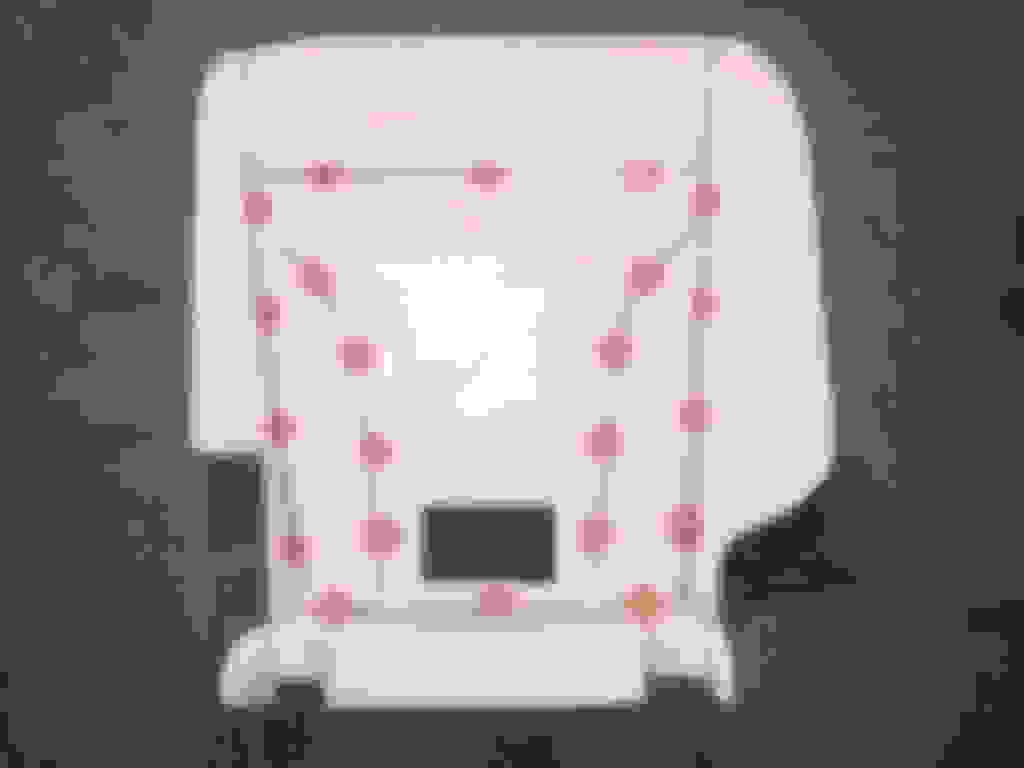
Step 12 - Remove leather upholstery from cushion base. Hog rings identified by red circles. Just use a pair of dikes to cut all of them off. You will need to re hog ring them. You can get a pair on Amazon and 300 hog rings for around 30 bucks.
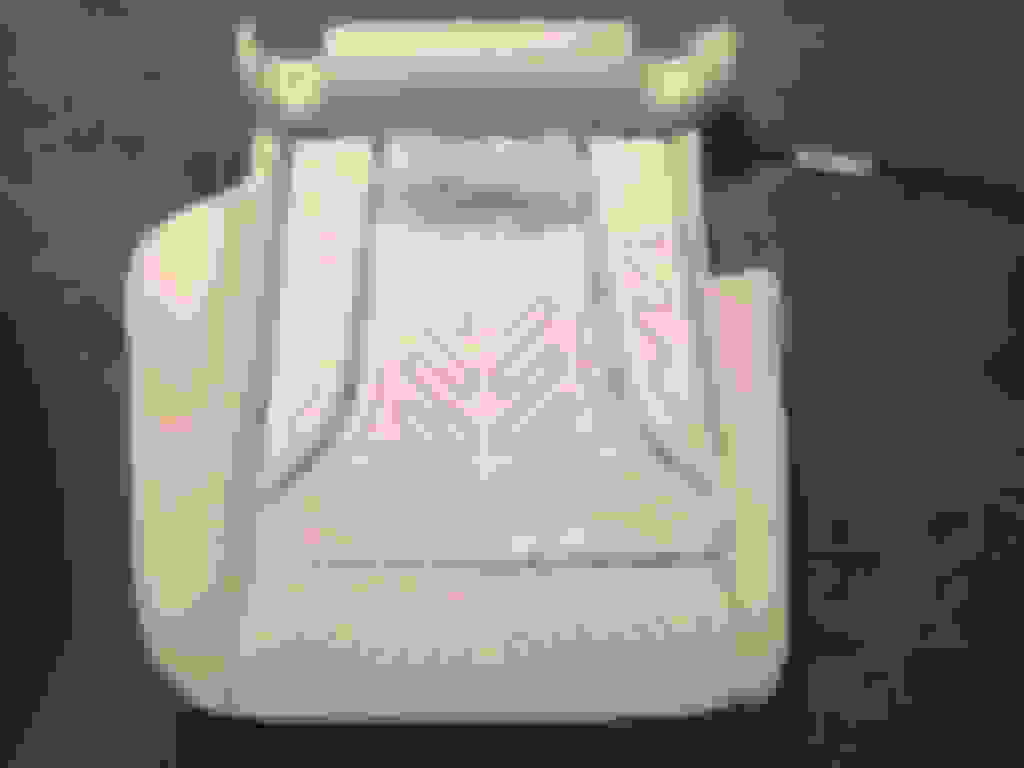
Step 13 - Attach heating element to cushion base and route harness wire through hole in back.
Step 14 - Re hog ring the upholstery back to the foam cushion. TAKE YOUR TIME!
Two rear backrest heating elements arrived.
Step 15 - Unclip the outer edge of the backrest from the frame. I suggest using something small and skinny to put in the metal channel to assist in prying out the plastic edge of the upholstery or you could damage it. Once you have the entire
Step 16 - Remove leather upholsterly from cushion base just like the bottom cushions. Hog Rings are only in the seams on the backrests.
Step 17 - Attach new heating element to the backrest cushion.
Step 18 - Re hog ring the uphosterly back to the cushion.
Step 19 - Run backrest element wire through the cushion and to the side where the seat hinge is. The wire will run under the plastic cover for the seat hinge and then attach to the underside of the seat base.
Attach new connectors to heating elements and you now have heated seats.
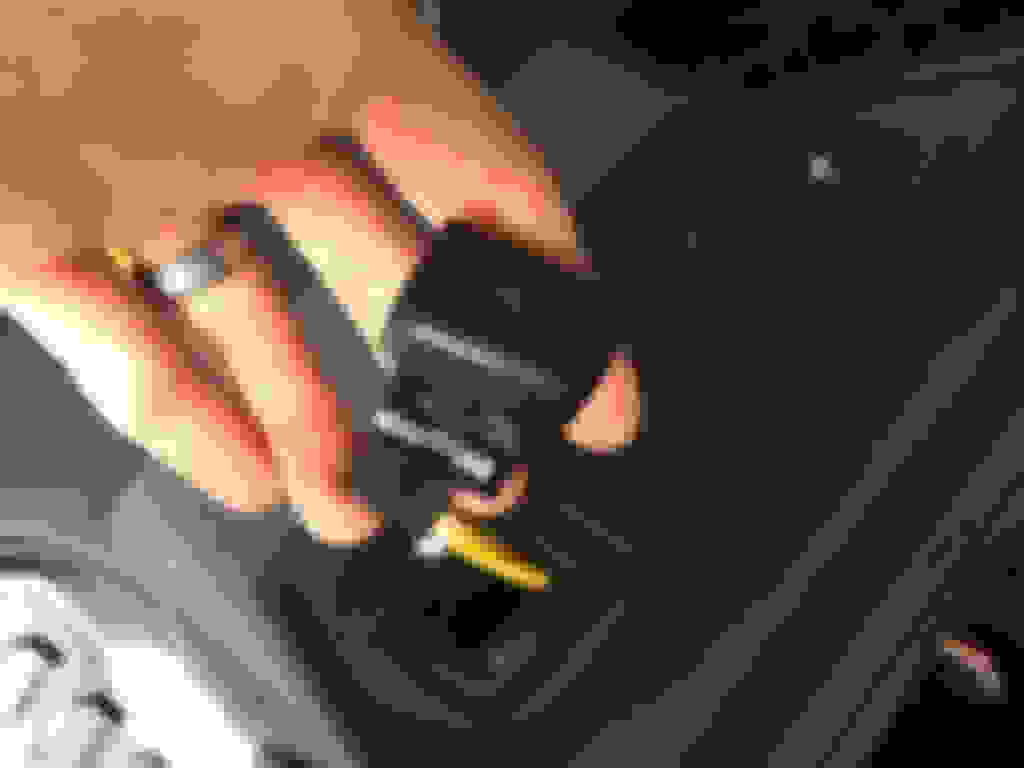
What I did find after I was all done was that the rear seat heaters do not heat up anywhere near to what the front seat heaters do. Im sure as you can imagine after all of the effort put into this mod, that that was quite a disappointment. I needed to fix this! The control module that does the temperature regulation is not attached to the CAN system so there was no way to alter it through software. Through some digging online, I found a schematic that has info on the temperature thermistor built into each seat pad and the amount of resistance in ohms it has at different temperatures. I went to Radioshack and purchased two 1.5k ohm resistors (one for each seat) and just soldered them onto the wires that go to the thermistors. It effectively tricks the control module into thinking the seats are colder than they actually are. With safety in mind and through plenty of testing, I made sure I installed the right amount of resistance that would allow the seats to reach the same temperature as the front seats but not overheat or even get to a level that anyone would consider too hot. Below is a picture of the new resistors soldered onto the wires coming out of the control modules. Each one was sealed in shrink tubing when finished.
All finished! After all wires were properly sized and run throughout all of the various components, the new loom was completely removed from the vehicle and wrapped in VW/AUDI wiring loom tape and then reinstalled. It looks 100% factory. This is very important for insulation reasons. If anyone has questions on this mod you can PM me. Thanks!
Last edited by Mrclopec; 05-06-2015 at 01:48 PM.
Reason: Updated Pics
Cool, looking forward to seeing this done. Hopefully the assembly isn't too bad, sounds like something that could be useful for those in colder areas. Heck, I'd consider doing it once the kids are out of boosters though here the heaters are more "nice to have" than "necessary", since I'd definitely have ordered it as an option were it available.
Quite a task. I sure admire your abilities. But, do I have this right....you went through all of this for heated rear seats and you live in Ca. ?
Ha. I know. Seems ridiculous but I travel into snow-territory quite often. I also live in a part of California that normally has 50 degree temperature swings. The evenings can get to the point where the heated seats would be practical. I also wanted to take on the task just because I really enjoy the challenge of retrofitting OEM features not offered in the US. I have already done Highbeam assistant and the next feature I will be retrofitting is Active Lane Assist. I already have some of the parts. Biggest pain will be replacing the windshield.
:-P
Wow. Well ok then. I'd like a few upgrades to mine. I'll have it delivered, squeeze it in when you have the time
Ha. I know. Seems ridiculous but I travel into snow-territory quite often. I also live in a part of California that normally has 50 degree temperature swings. The evenings can get to the point where the heated seats would be practical. I also wanted to take on the task just because I really enjoy the challenge of retrofitting OEM features not offered in the US. I have already done Highbeam assistant and the next feature I will be retrofitting is Active Lane Assist. I already have some of the parts. Biggest pain will be replacing the windshield.
:-P
Is the Highbeam Assistant the thing where it turns the highbeams on/off automatically? If so, how difficult/expensive was it to retrofit?
have already done Highbeam assistant and the next feature I will be retrofitting is Active Lane Assist. I already have some of the parts. Biggest pain will be replacing the windshield.
:-P
WOW parts for Active Lane Assist cost about $ 2700-3200
Is the Highbeam Assistant the thing where it turns the highbeams on/off automatically? If so, how difficult/expensive was it to retrofit?
That one was super easy. I just ordered the mirror off of ebay (8T0 857 511 AD). The new mirror uses the same exact connector as the non-assist mirror. You just need to add two wires into the connector for the CAN system. I ran them down the passenger side A-Pillar to the lower A-pillar kick panel where there is a relay station. Tapped into CAN system right there. Enter VAG-COM and under 09-Central Elec enable Highbeam Assist and Enable module 20 under the CAN Gateway installation list. No futher coding is needed beyond that. No component protection either.
 04-12-2015, 09:05 PM