Installed Rearview Camera Retrofit from Carsgadget.com (Pics)
 12-06-2015, 04:17 PM
#1
AudiWorld Member
Thread Starter

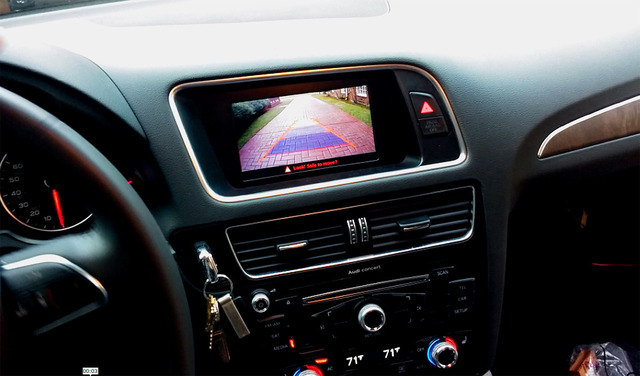
Just became the new owner of a 2013 Audi Q5 with the Concert Radio (non-mmi).
Got a great deal on the car, but the only thing I felt was missing and desperately wanted was a rear view camera.
So after copious amounts of research, I came across the online retailer carsgadget.com from their install video on youtube which can be seen here:
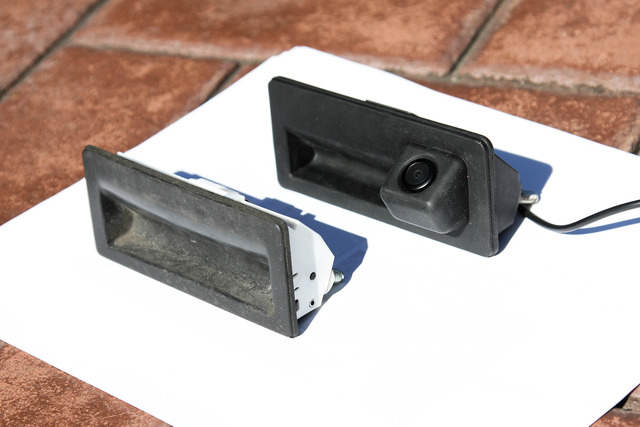
The kit was a bit pricey at $325. There are a lot of cheaper options which may be identical on ebay for example that are from China, but I just felt more comfortable with this site b/c the guy is in California. The kit included everything I needed, was plug and play (required zero modifications/cutting/wire tapping), has functioning active steering lines, he shipped Priority-Mail so it only took 2 days to get here. After I made the paypal payment, he also emailed me a .pdf of the instructions.
As a testimonial of the seller/website, I had some confusion on how to connect the power wire to the fuse box, and he promptly and politely replied to the several emails I sent him trying to troubleshoot the issue.
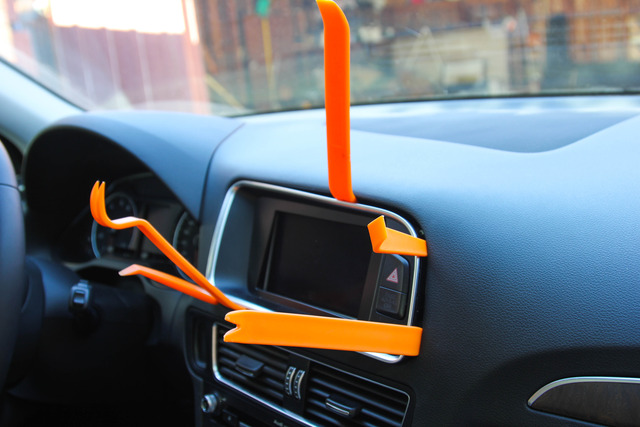
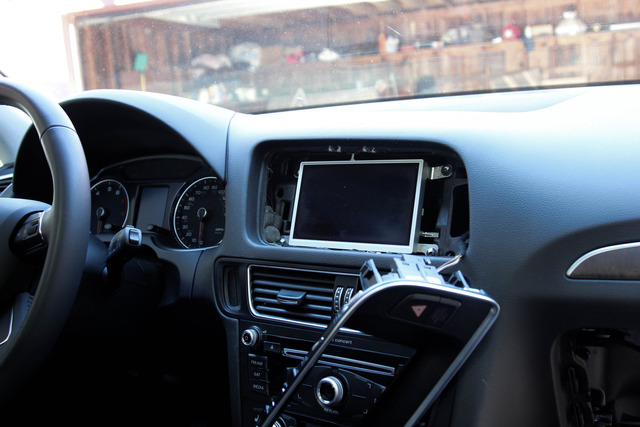
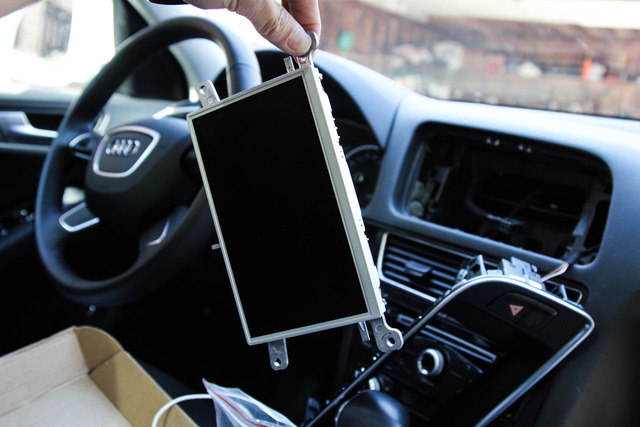
The whole install took about 5 hours total, with the majority of the time consisting of disassembling and reassembling the display, glove box, and trunk panels.
As a DIY, I would rate this job a 7/10 in difficulty. Not for the squeamish, but if you've ever installed your own head unit, then you should be comfortable doing it.

Got a great deal on the car, but the only thing I felt was missing and desperately wanted was a rear view camera.
So after copious amounts of research, I came across the online retailer carsgadget.com from their install video on youtube which can be seen here:
The kit was a bit pricey at $325. There are a lot of cheaper options which may be identical on ebay for example that are from China, but I just felt more comfortable with this site b/c the guy is in California. The kit included everything I needed, was plug and play (required zero modifications/cutting/wire tapping), has functioning active steering lines, he shipped Priority-Mail so it only took 2 days to get here. After I made the paypal payment, he also emailed me a .pdf of the instructions.
As a testimonial of the seller/website, I had some confusion on how to connect the power wire to the fuse box, and he promptly and politely replied to the several emails I sent him trying to troubleshoot the issue.
The whole install took about 5 hours total, with the majority of the time consisting of disassembling and reassembling the display, glove box, and trunk panels.
As a DIY, I would rate this job a 7/10 in difficulty. Not for the squeamish, but if you've ever installed your own head unit, then you should be comfortable doing it.


 12-06-2015, 08:10 PM
#3
AudiWorld Super User

I'm going to do this, a few questions........
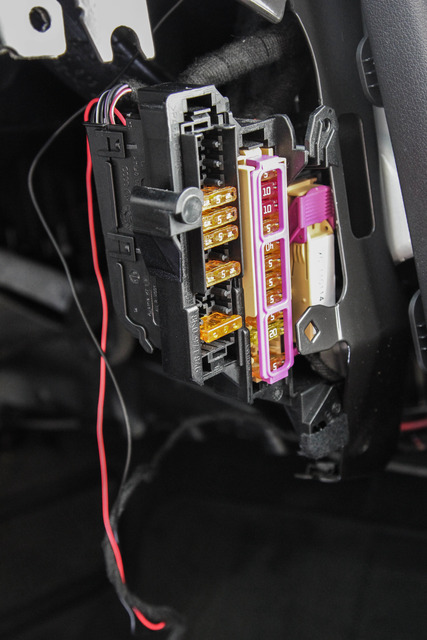
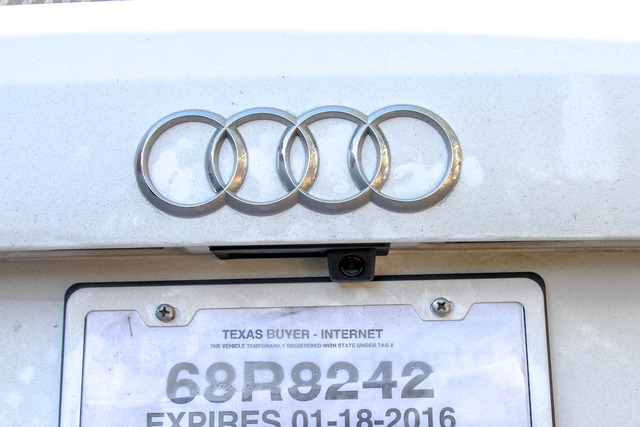
1. Where did the power wire connector go on the back of the fuse panel? Have any photos? If it now fused protected or not?
2. Where did you mount the interface box?
3. Also where did you route the harness cable from the display/interface box to the fuse panel so the glove box goes back properly and not hang up on the harness cable?
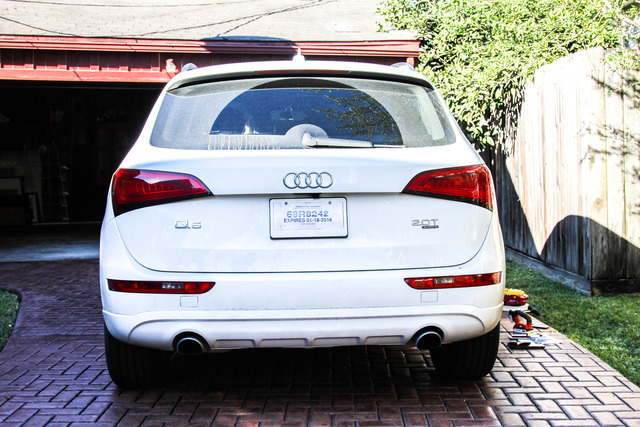
Do you have any other photos of the install?
1. Where did the power wire connector go on the back of the fuse panel? Have any photos? If it now fused protected or not?
2. Where did you mount the interface box?
3. Also where did you route the harness cable from the display/interface box to the fuse panel so the glove box goes back properly and not hang up on the harness cable?
Do you have any other photos of the install?
12-07-2015, 08:47 AM
#4
AudiWorld Member
Thread Starter
I'm going to do this, a few questions........
1. Where did the power wire connector go on the back of the fuse panel? Have any photos? If it now fused protected or not?
2. Where did you mount the interface box?
3. Also where did you route the harness cable from the display/interface box to the fuse panel so the glove box goes back properly and not hang up on the harness cable?
Do you have any other photos of the install?

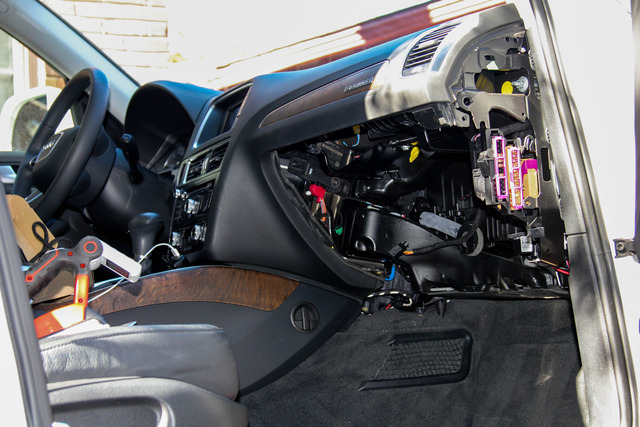
I liked it better b/c it has 2 separate fuses for both lines.
2. I put the interface box in the sliding cubby next to the media interface in the glovebox (where people usually put an ipod). It's small enough to fit in there after you cut a hole in the back of the tray for the wires to come through.
3. You don't need to worry about the wires behind the glovebox. There's actually a ton of space behind the glove box to where the fuse box is. It's almost basically just all open back there.
12-07-2015, 10:15 AM
#6
AudiWorld Super User
1. They give you a connector that piggybacks on the rear of the fuse box. But I ended up using a fuse tap that I got from walmart for $3 like this:
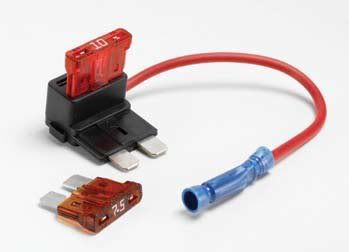
I liked it better b/c it has 2 separate fuses for both lines.
2. I put the interface box in the sliding cubby next to the media interface in the glovebox (where people usually put an ipod). It's small enough to fit in there after you cut a hole in the back of the tray for the wires to come through.
3. You don't need to worry about the wires behind the glovebox. There's actually a ton of space behind the glove box to where the fuse box is. It's almost basically just all open back there.
For #2, that's good news that it fits there. It also allows the interface box to be replaced with ease if it fails for some reason.
I'm ordering today............
Bob P.
12-08-2015, 11:00 AM
#7
AudiWorld Member
Thread Starter
I'd also recommend getting din removal tools like these to make the job easier:
He uses like coat hanger wire in the video, but I think it's easier with these and they're just a few bucks.
Trending Topics
12-08-2015, 06:36 PM
#8
AudiWorld Super User
I agree with the removal keys!!!
I made my own keys and it was still difficult to remove the AMI box, but I got it out!
I ordered a set of keys (3 types) from Ebay at $5.00, just to have around for next time.......
They were suppose to ship the kit out today, I have a tracking number, but still no indication that it entered the USPS. I hope that it makes it here before the weekend as the temp will be in the mid 50's here in PA and nice enough to work in comfort in my garage.
 12-12-2015, 02:55 PM
#10
AudiWorld Super User
As you stated it was sort of a PITA.
Took about 5 hours total time. I wasted 1 hour as the system would not work, I removed all the connectors 3 times, then noticed that one would not seat all the way on one side, shaved off the locating tab, BINGO! It worked just fine!
I emailed the seller a few times and he was very helpful. In fact after I found the poorly seated connector, I went to email him that it was now functioning, and he already emailed prior to make sure the
connectors are seated properly as they are a very tight fit.
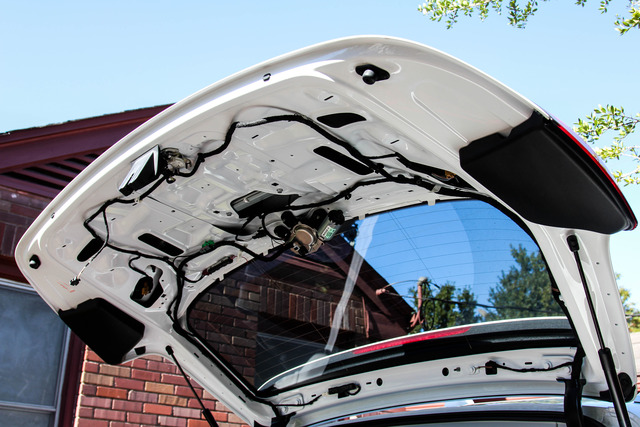
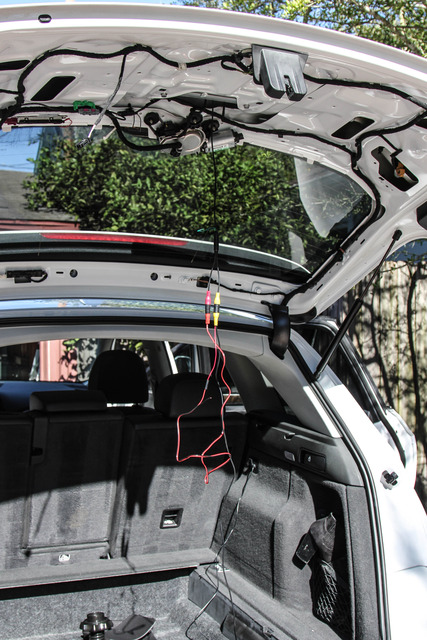
I think that the most difficult portion of this job is routing the video cable from the front to the rear, there just isn't an easy spot to run it along the floor in the cargo area tucked away, after that the plastic sill plate is the way to
the front but it's made of soooo stiff plastic it is very hard to lift up the edge to slide the cable under.
Anyone doing this you need to know how to remove the interior panels from the hatch, it will be difficult to just guess at it. I have the Elsawin repair manual for the Q5 and it definitely helped in disassembly.
You also need a lot of various tools, such as, a hefty pry bar to snap out those panel fasteners. Mine is about 2x12 inches and needed a lot of force to where you think the fasteners are going to break, but they do release.
At the very end the rear camera system works extremely well and I'm very happy with the final results.
Took about 5 hours total time. I wasted 1 hour as the system would not work, I removed all the connectors 3 times, then noticed that one would not seat all the way on one side, shaved off the locating tab, BINGO! It worked just fine!
I emailed the seller a few times and he was very helpful. In fact after I found the poorly seated connector, I went to email him that it was now functioning, and he already emailed prior to make sure the
connectors are seated properly as they are a very tight fit.
I think that the most difficult portion of this job is routing the video cable from the front to the rear, there just isn't an easy spot to run it along the floor in the cargo area tucked away, after that the plastic sill plate is the way to
the front but it's made of soooo stiff plastic it is very hard to lift up the edge to slide the cable under.
Anyone doing this you need to know how to remove the interior panels from the hatch, it will be difficult to just guess at it. I have the Elsawin repair manual for the Q5 and it definitely helped in disassembly.
You also need a lot of various tools, such as, a hefty pry bar to snap out those panel fasteners. Mine is about 2x12 inches and needed a lot of force to where you think the fasteners are going to break, but they do release.
At the very end the rear camera system works extremely well and I'm very happy with the final results.
Last edited by Bob Petruska; 12-14-2015 at 01:57 PM.