Test - TT RS MK 3 Fitting guide
 12-27-2017, 11:32 AM
#1
Audiworld Junior Member
Thread Starter
Join Date: Dec 2017
Posts: 32
Likes: 0
Received 0 Likes
on
0 Posts
I wrote a fitting guide for fitting coilovers to the Golf R - on the basis that the Golf shares the same parts with the TT RS, I'm adapting my guide for the Audi - I've fitted the rear KWs to my 2017 TT RS and will be doing the fronts this week.
Please do not use the guide just yet, whilst the process for the rears is the same as the Golf I do not know about the fronts yet - when this guide is finished I'll publish it in main forum.
************************************************** *****
Hi All,
Fitted my KW Variant 3 Coilovers today, not much info around on how to do it and half of what I found online was wrong plus the instructions are not the best. Due to the lack of info, I thought I'd write a quick how to.
Tools
For this job I used.
Spring compressors
13mm scocket
16mm socket
18mm ratchet spanner or 18mm ring spanner
21mm ring spanner or 21mm swan neck spanner
22mm ring spanner or 22mm swan neck spanner
7mm allen key - DO NOT START THIS JOB WITHOUT A 7MM ALLEN KEY - THIS DOES NOT COME IN MOST ALLEN KEY KITS
Socket set with 18mm sockets
1/4" ratchet with 1/4" extension
Vice or Mole grips
Flat head screwdriver
Masking tape
2 jacks (you only need one) but two is easier
18" piece of 2 x 4 wood or similar timber
2 x axle stands
M6CR-V splined drive
M14CR-V splined drive
Set of star bit screw driver bits
2 x 20mm long cable ties
Torque wrench and wheel sockets
Ruler
Let's start with the rear, break loose your wheel bolts, jack the car up, put your two axle stands where the rear arms bolt up to the center of the car, make sure you're careful to place the car gently on the stands when lowering the jack.
Remove you wheels and put them somewhere safe along with you wheel bolts and wheel nut caps.
Next move to the drivers side rear shock mount assembly and locate the three fasteners that hold the inner arch cover (you don't need to remove the cover just undo the two fastners that are closest to the shock as it's easier to get to the nuts that way)
Now pull the guard back around the top of the shock tower to reveal the upper shock mount, undo the two 16mm bolts to loosen them off but don't remove totally just yet.
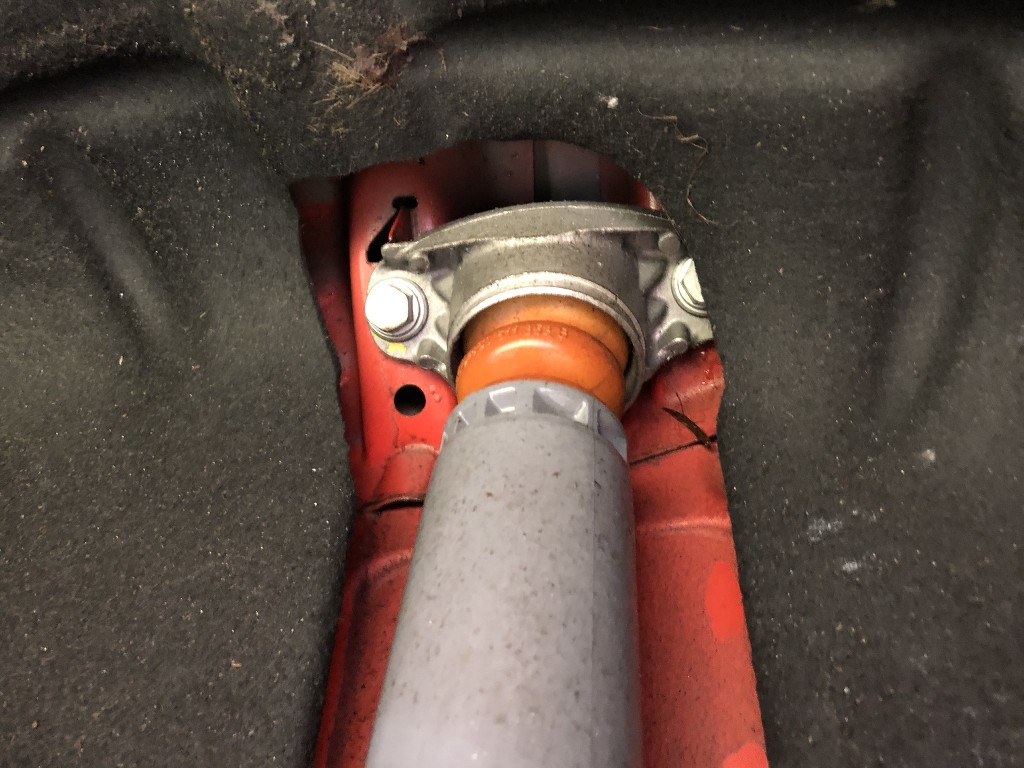
Next look at the rear ARB (anti roll bar), get your 13mm ratchet or ring spanner on the nut that secures the drop link to the lower arm and undo (don't try to pull it out yet as it's under tension)
Now unclip the little plastic arm which is your headlight leveler (green bit in the picture below), just pry it away from the lowest connecting point.
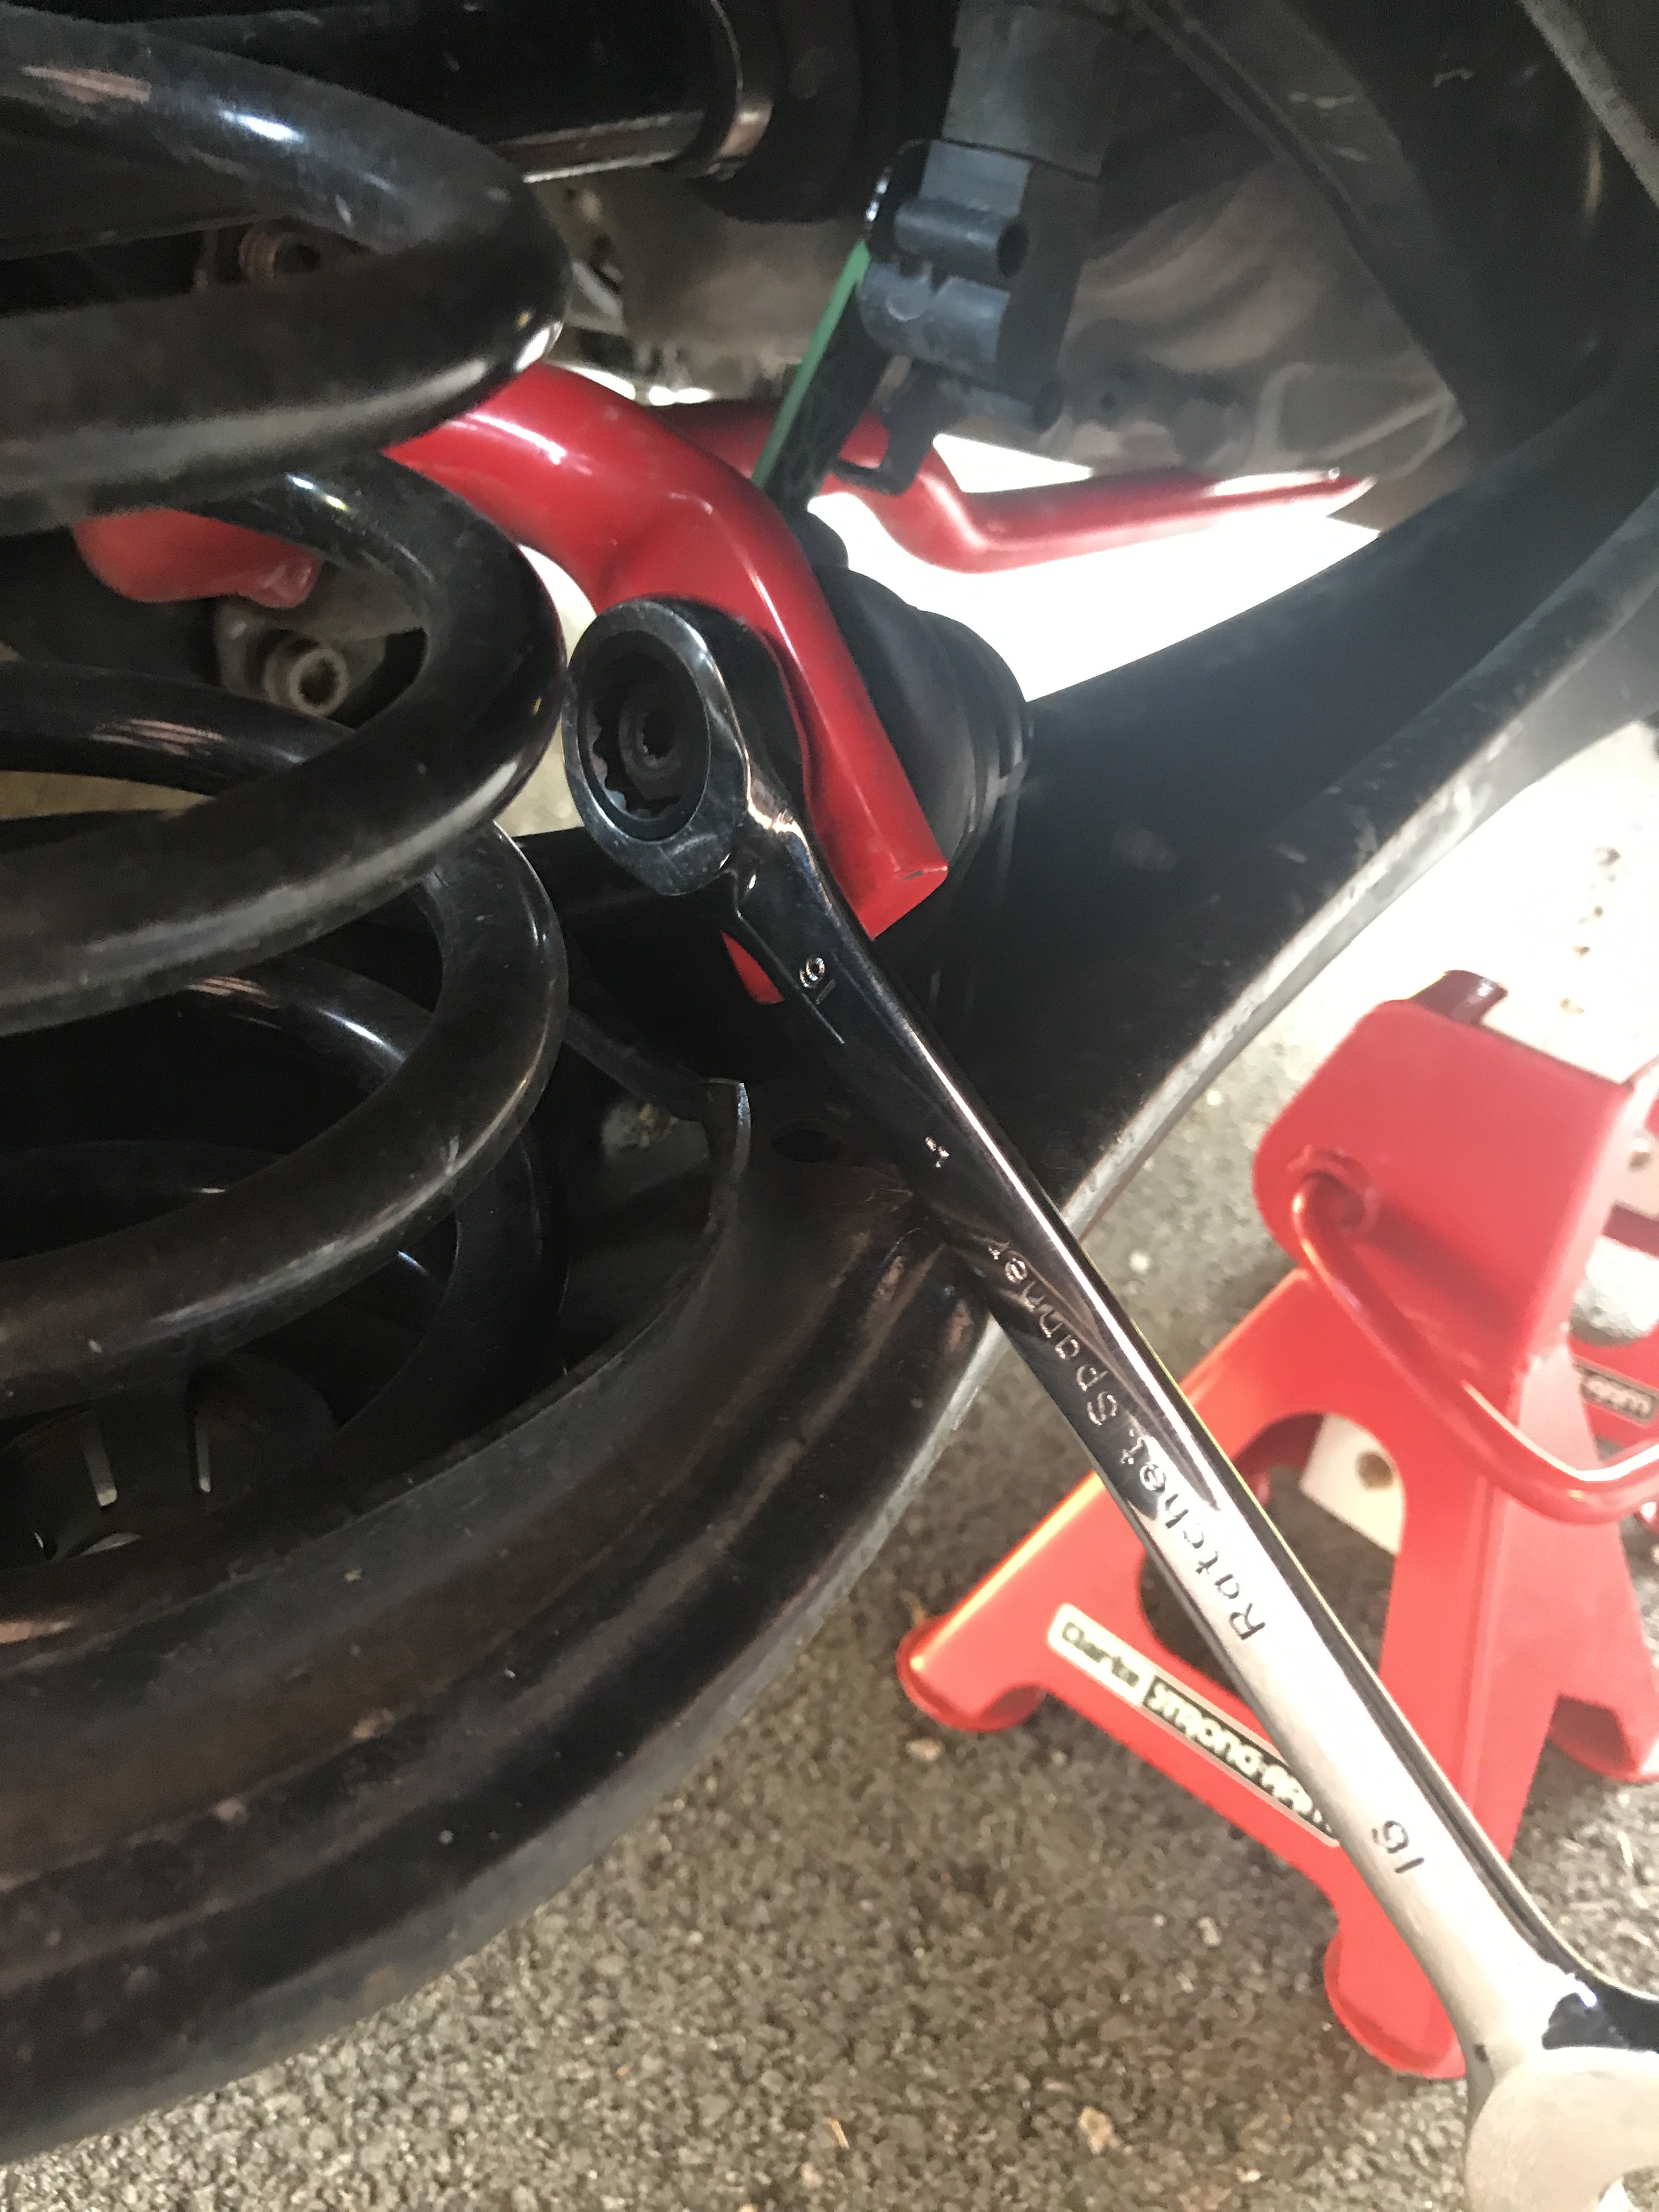
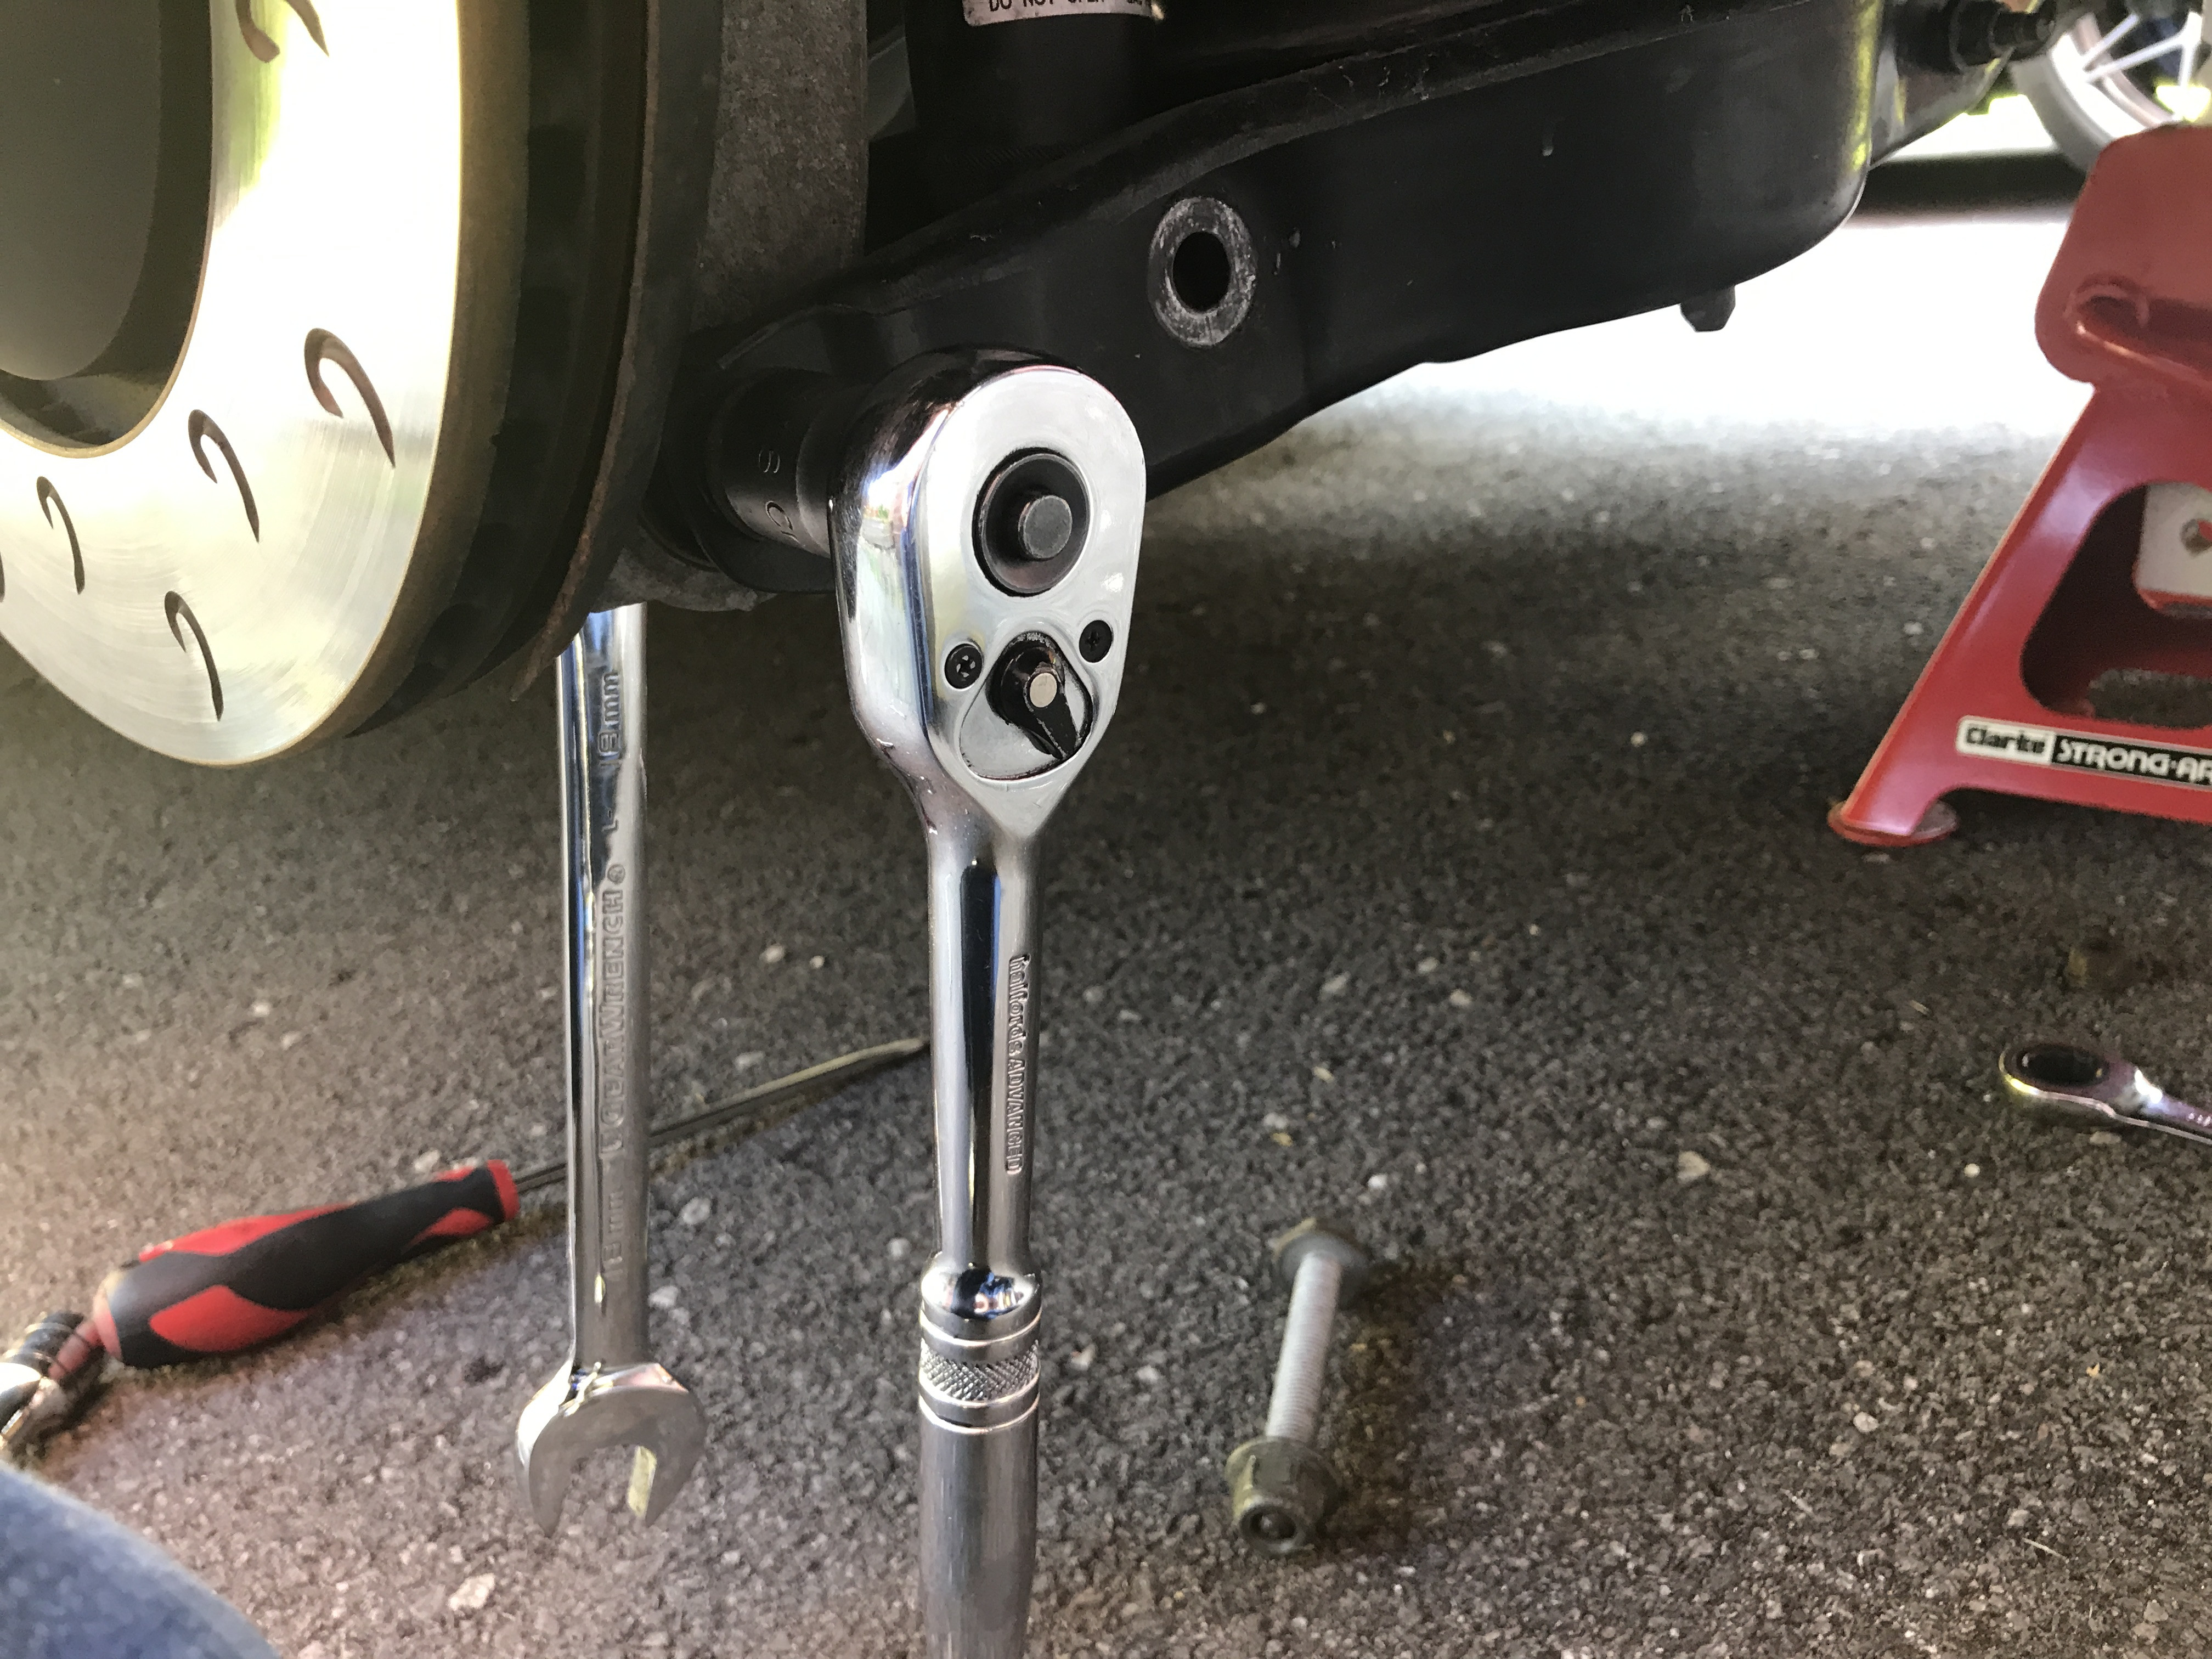
OK now there are two bolts between you and finishing the first part of this part, both require an 18mm ring or ratchet spanner along with a second 18mm spanner or 18mm socket. One holds the rear arm to the rear hub assembly and the other holds the bottom of the shock to the lower arm, remove them both.
Undo this bolt (I didn't picture this bit but I've did the same on my Golf R and the parts are identical)
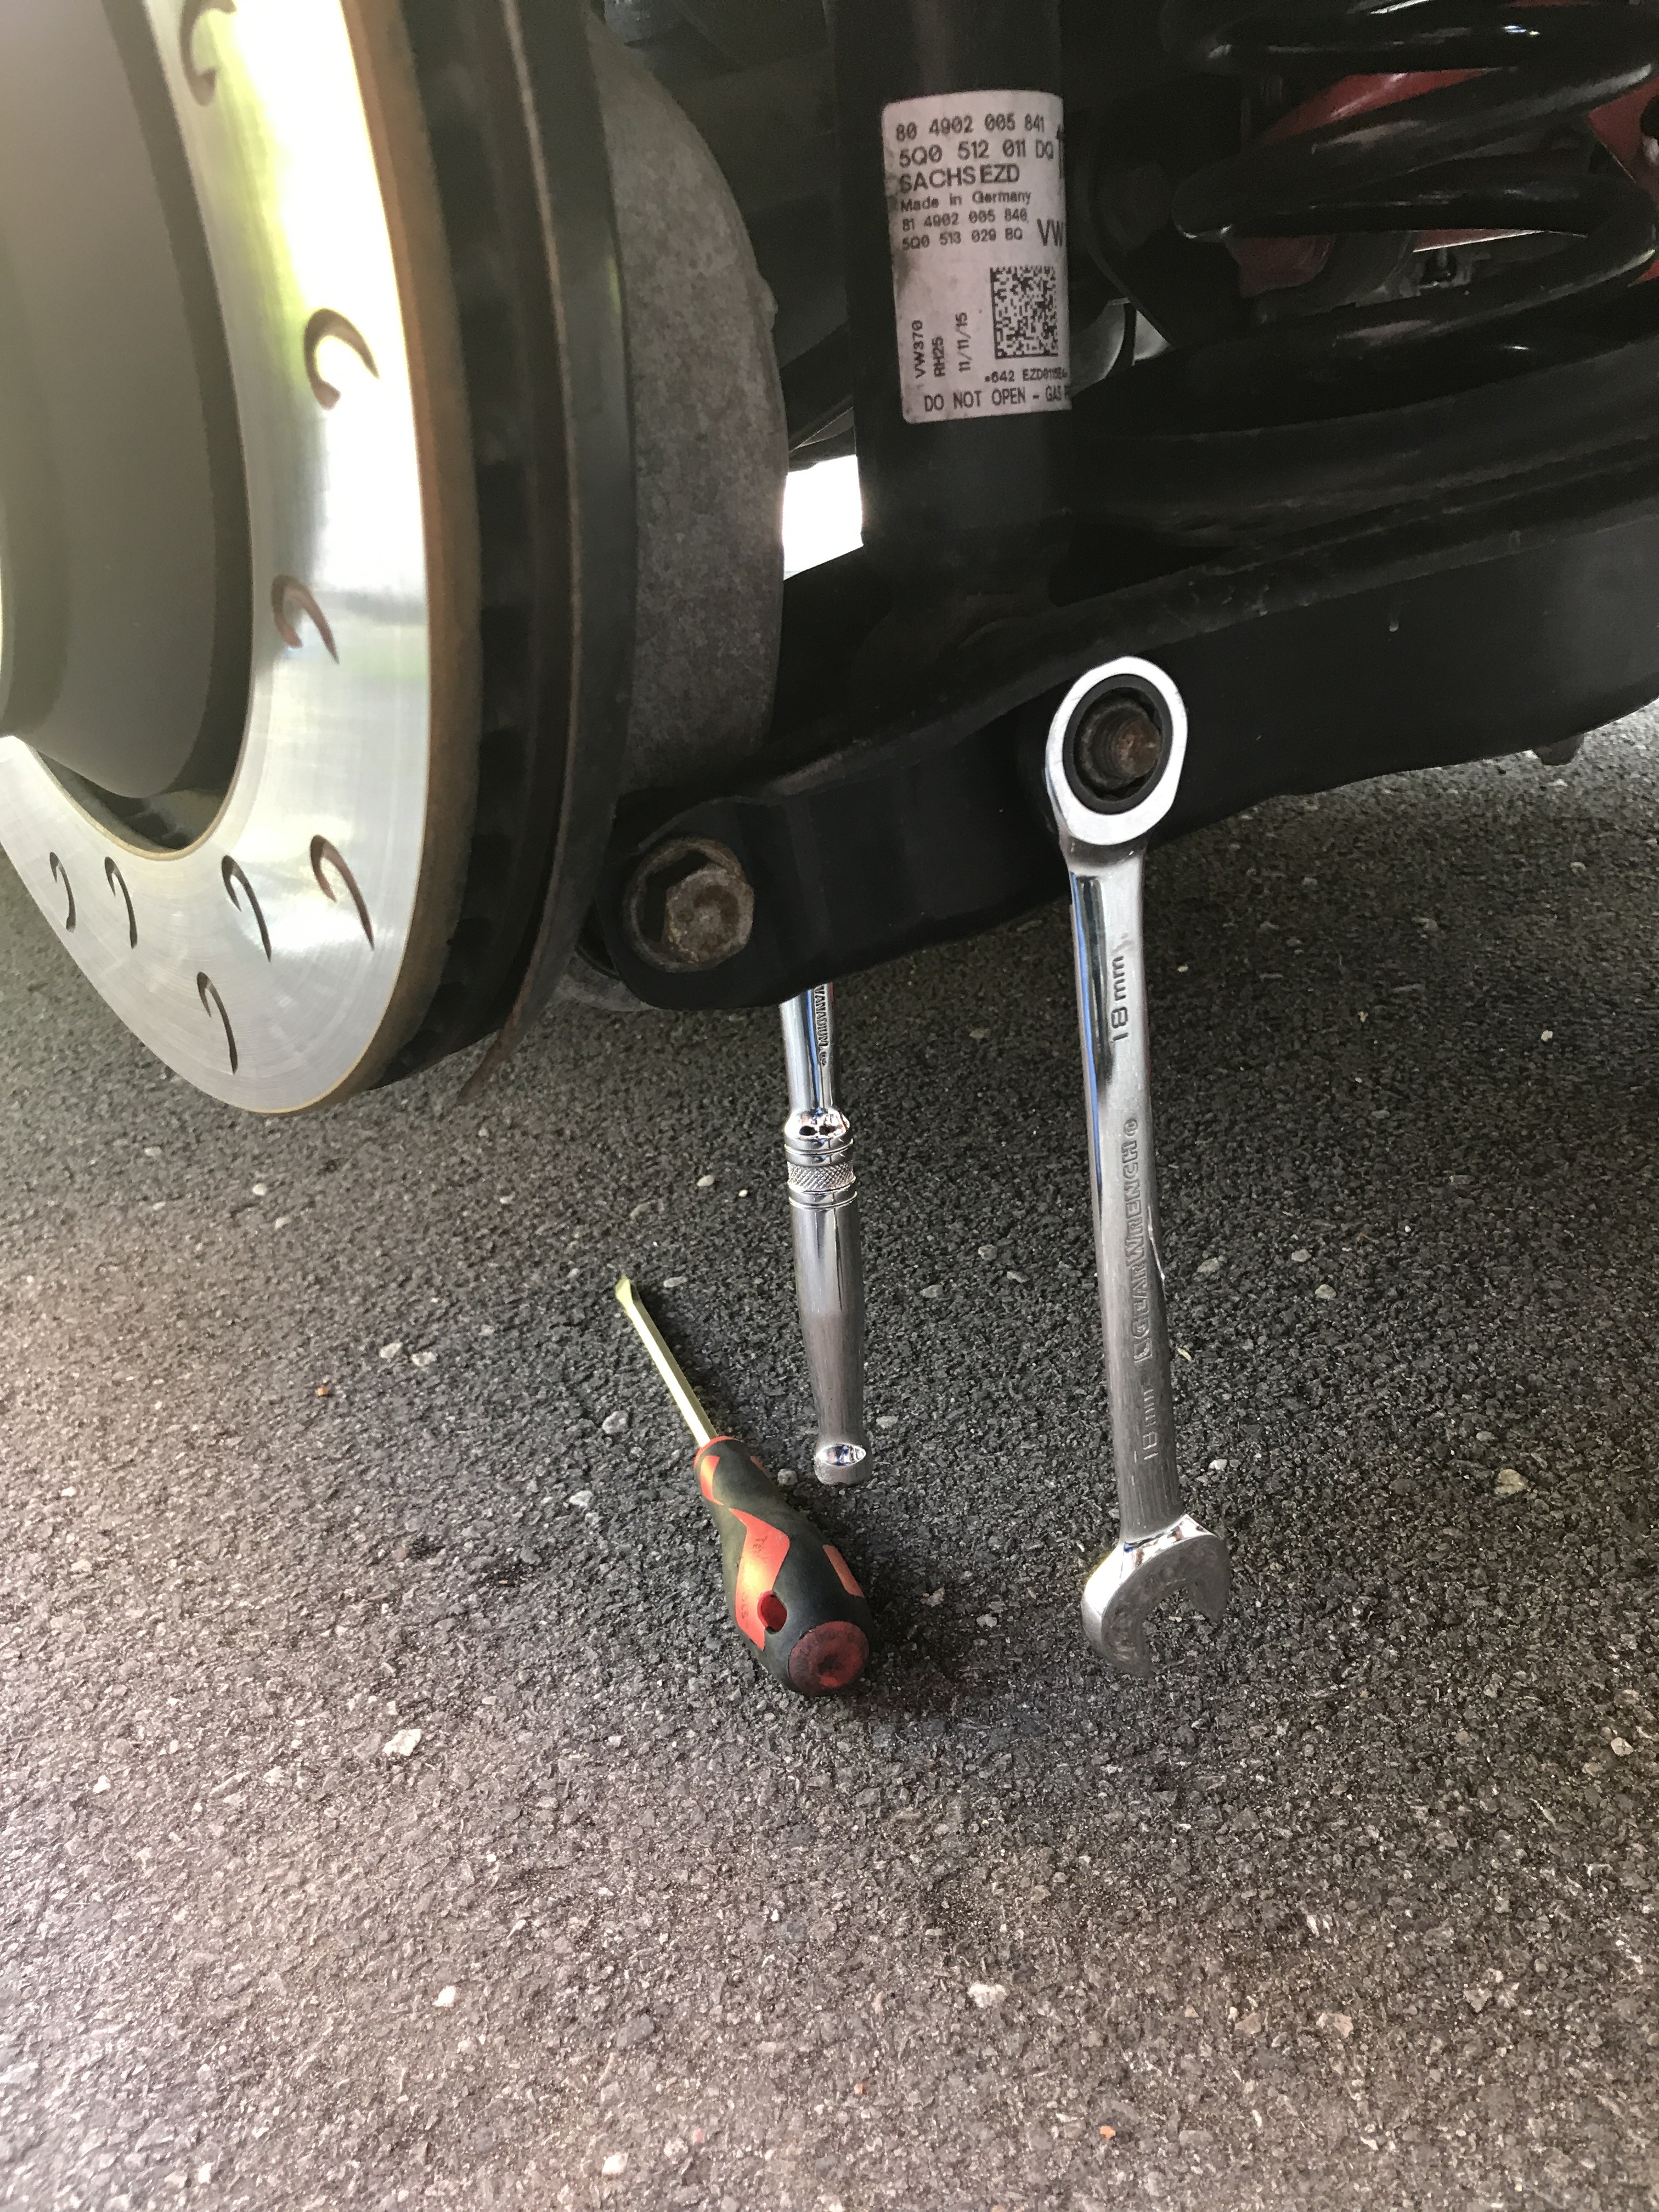
And this bolt
Now pull the rear hub assembly to the side to release the lower arm, now you can remove the two 16MM bolts at the top of the shock mount and remove the shock, if it wont come out, grab the top section of the shock in one and and the bottom section of the shock in the other and compress to shrink it down, now pull you can it out.
Finally, you can now push the lower arm up to take the tension off the ARB and pull the rear drop link out the way - you might have to use both hands to pull it away.
Part 2 - Disassembly & Reassembly - The Shock
Right, grab the black plastic dome on the top of the shock you've just removed and pop it off to reveal the top nut, I found this nut really hard to get to without a top nut box socket so I cheated.
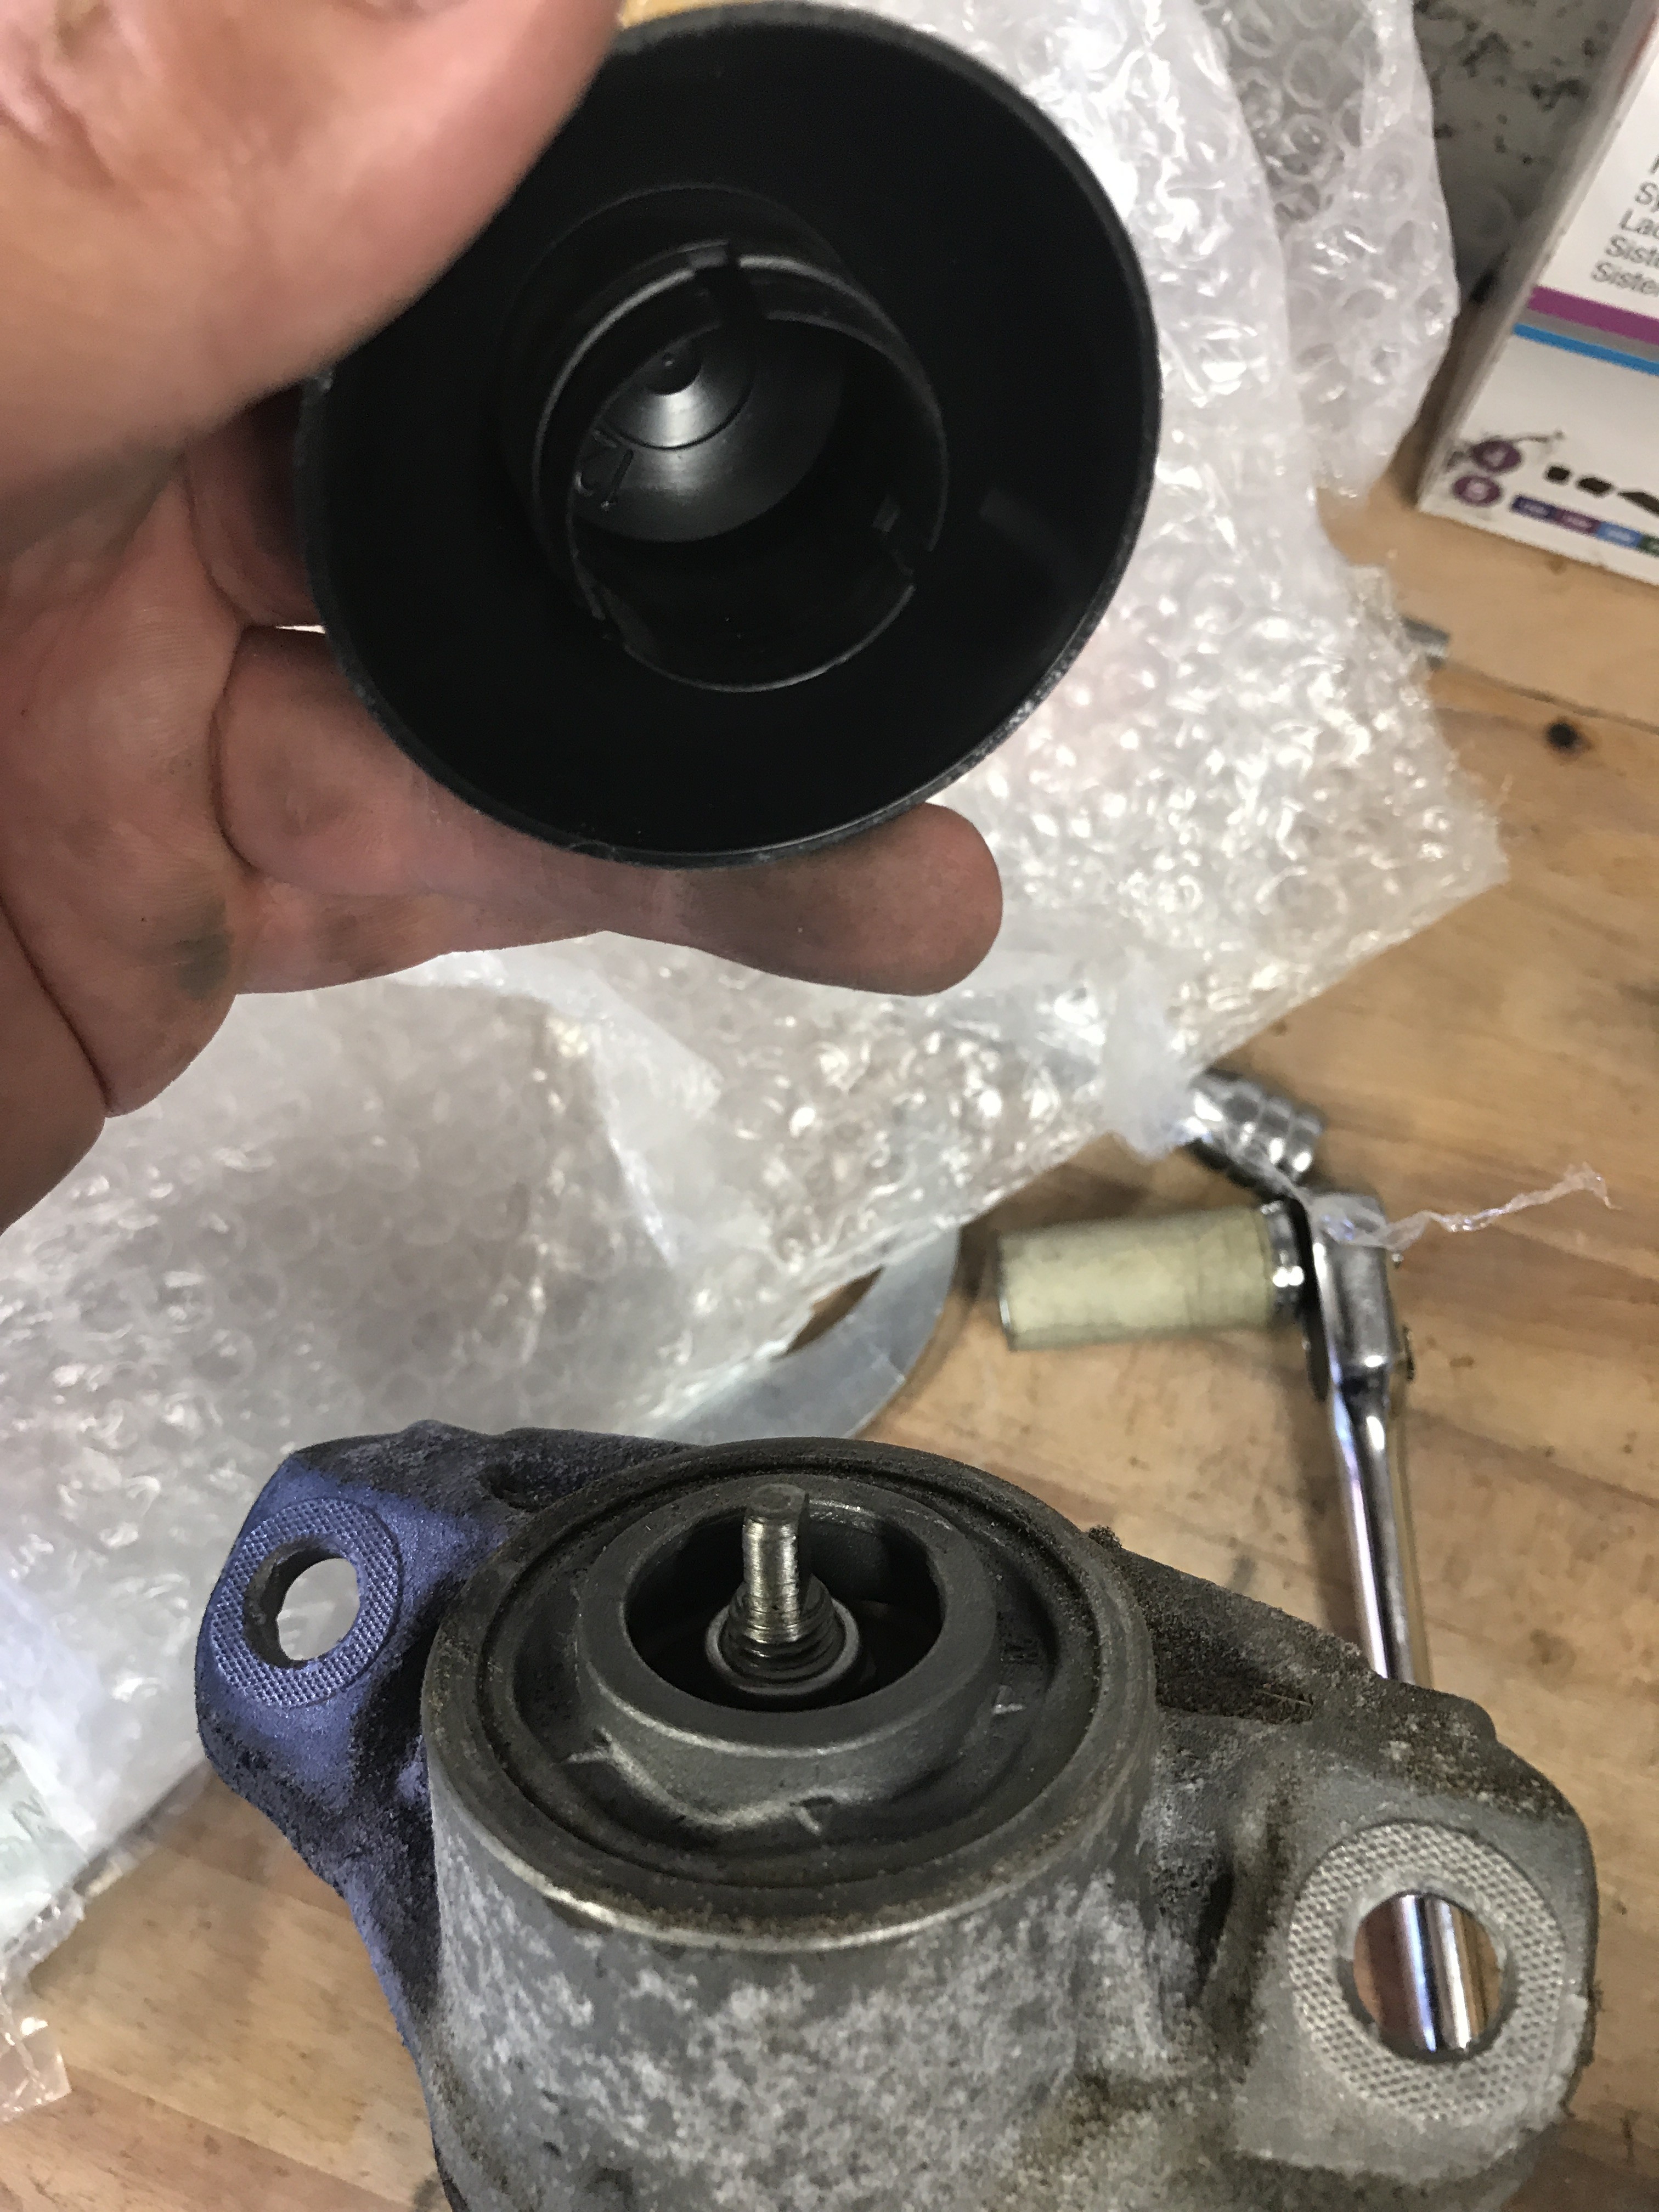
Pull the bump stop down, wrap some masking tape around the very top of the piston, grab it with your mole grips or vice and just undo the top nut with a 16mm socket, they're not done up tight and undo with ease.
Now pull off the top assembly, put the 16mm nut back on the old shock for safe keeping. Next pull the bump stop out of the top mount of the shock assembly and put it to the side - you don't need this but keep it in case you ever have to put the original suspension back on.
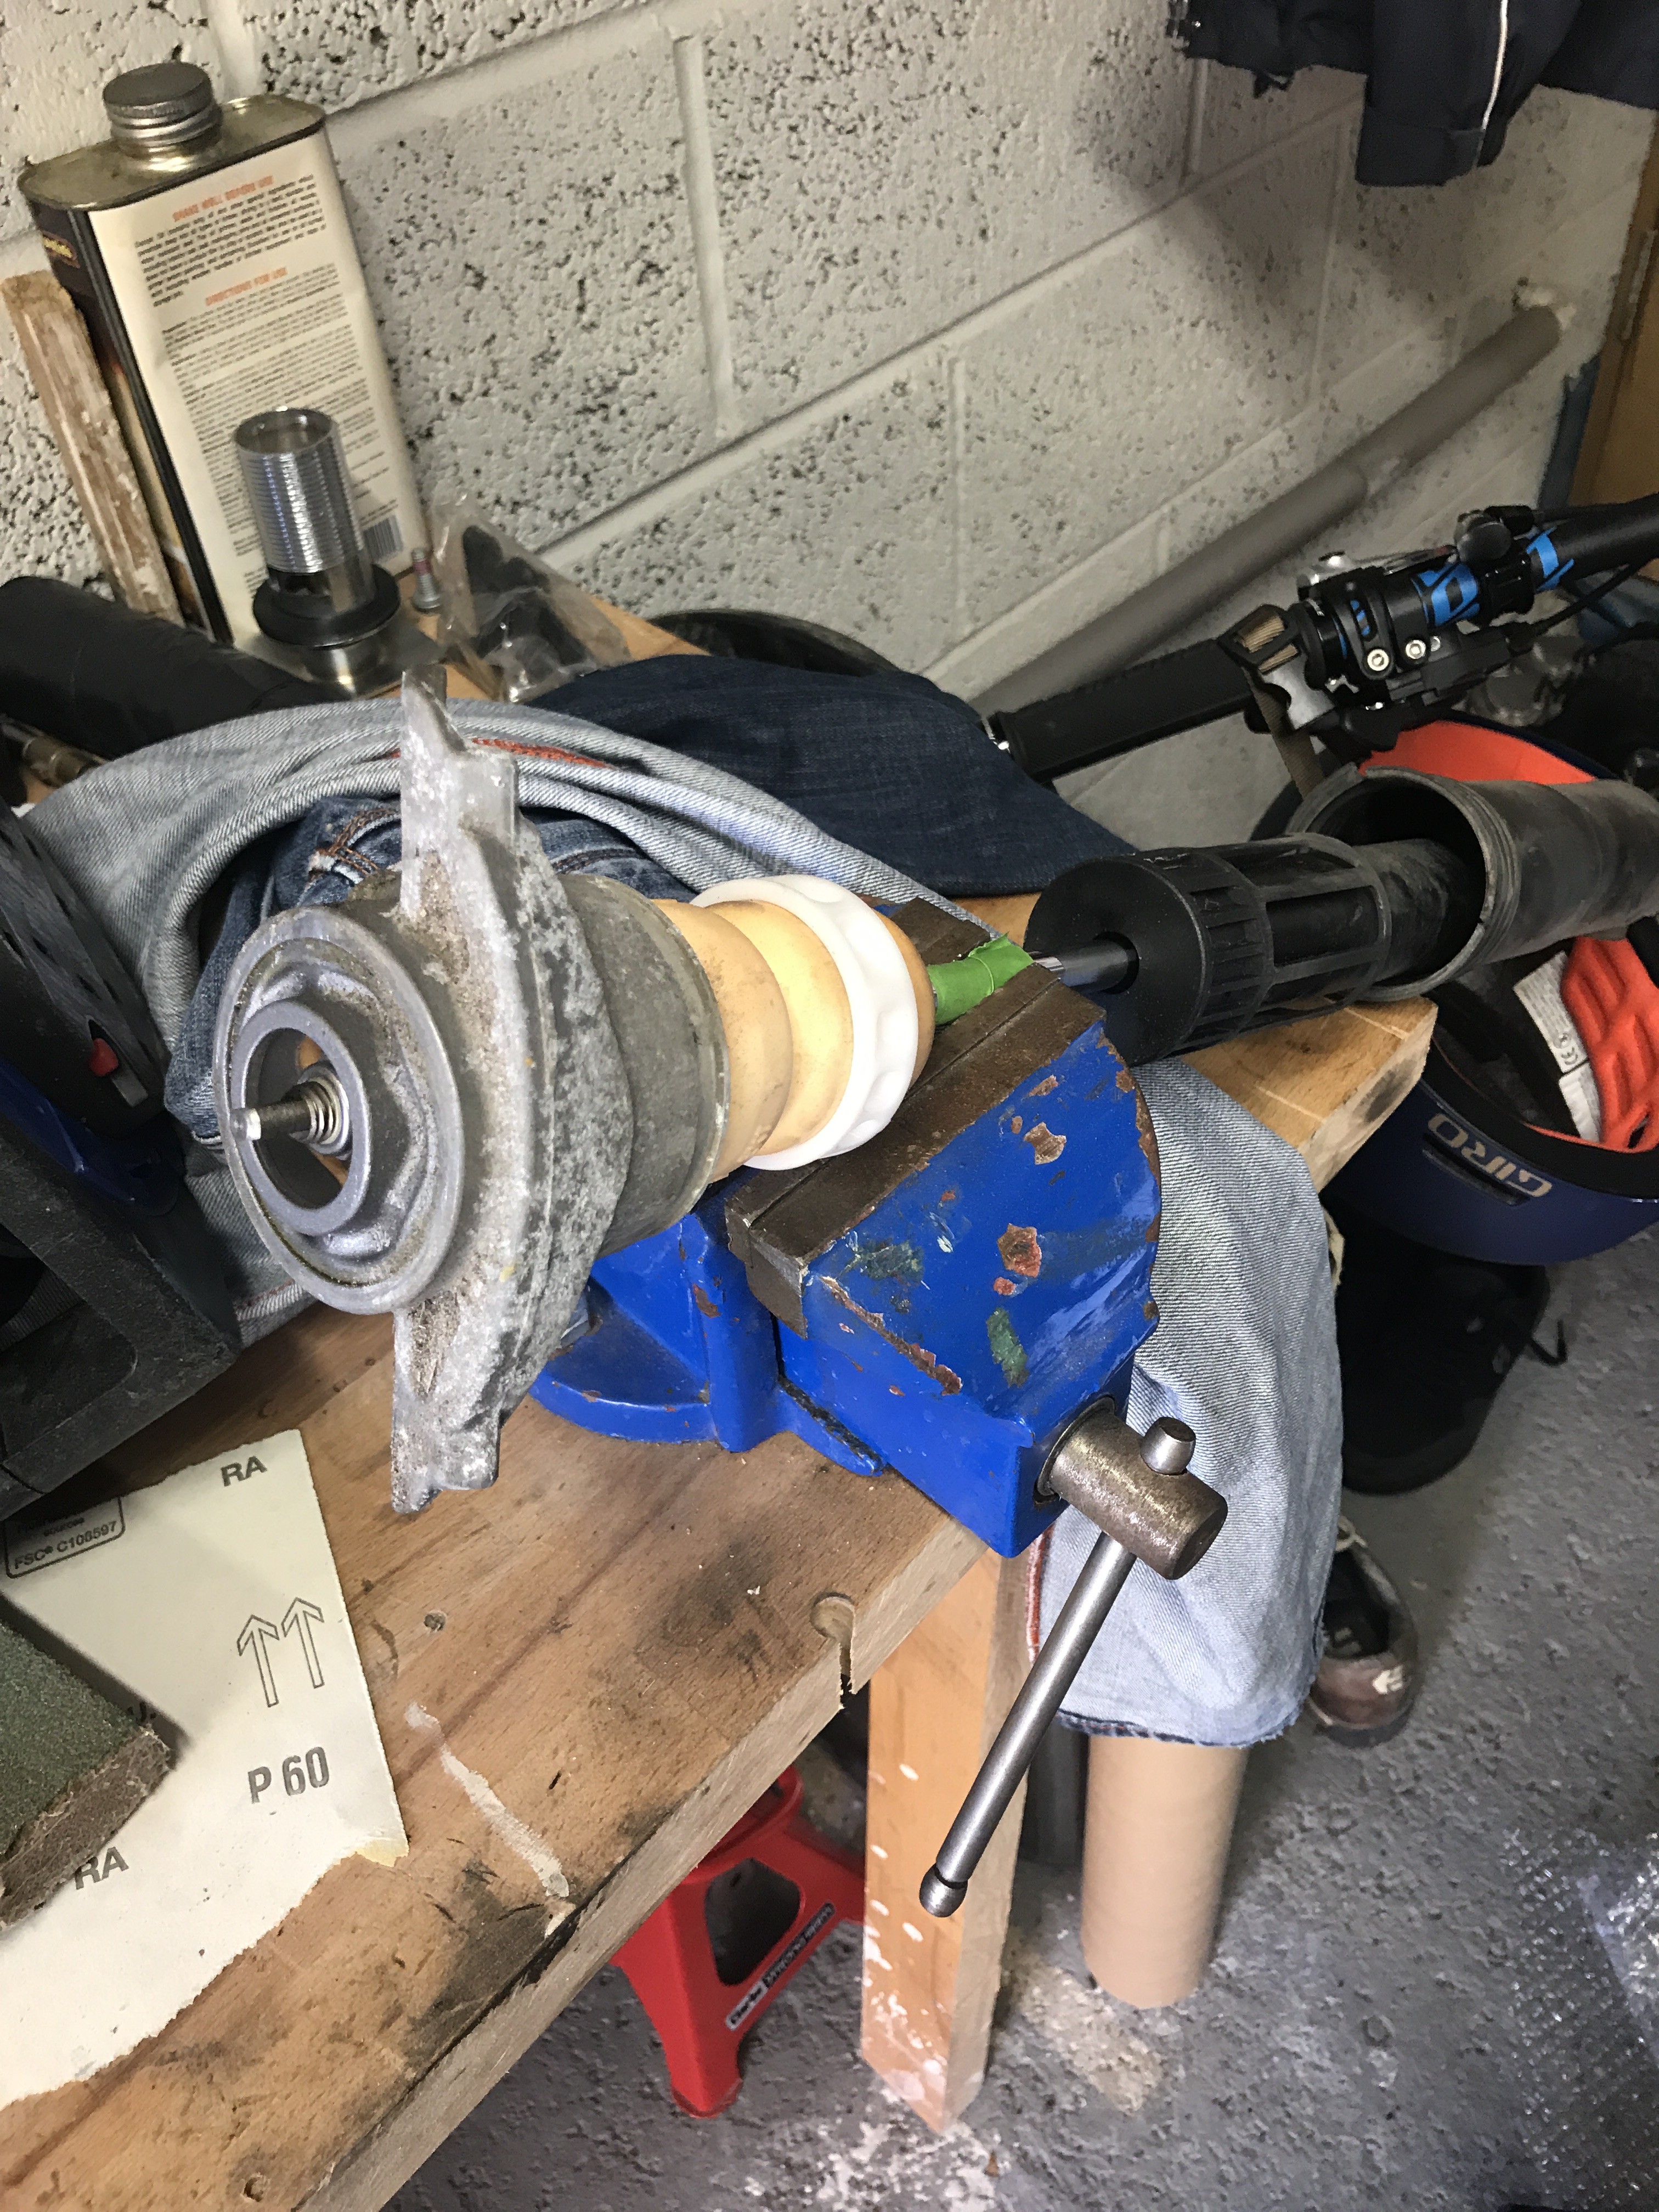
Next take your new KW rear shock out of the box, remove the top nut, keeping the black rubber washer in place. Refit the top mount from your shock you've just removed from the car - so the order is . . . . .
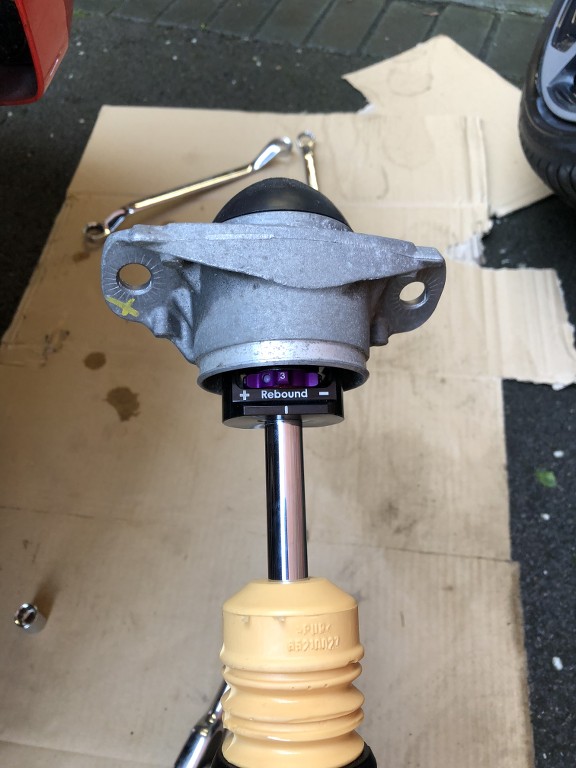
Top nut, upper shock mount, black rubber washer, KW bump stop, KW shock - remeber to ensure that the rebound adjuster is facing you when you re-assemble the shock like the picture below.
Great - all done on this part and now on to the spring and platform adjuster
Part 2 - Disassembly & Reassembly - The Spring
Take the platform adjuster and set you spring perch platform in place (as a rough guide - 35mm from the top of the threaded section to the bottom of the lower spring perch lock ring will give you a final arch to top of tyre gap of around 15mm)
Next add the spring ensuring you place the adjustable platform to the end of the yellow spring which is flat.
Place the spring in the spring mount of the lower arm being sure to use the rubber spring mount that should still be in fixed into the lower arm - if it came out with the original spring, go and get it and put it back in place - note, you do not need the upper rubber spring mount that was attached to the top of your original OEM spring.
Line the new spring up making sure the lower end of the spring meets with the rubber stop in the lower spring mount that's still in the lower arm.
Right, time to bolt it all back up again - you may want to use jack to raise the lower arm up so all the bolt holes line up perfectly.
Now do the same for the other side, refit your wheels, remove the jack stands and you're ready to start on the fronts . . . . want some good news? . . . . . . the fronts are way less hassle than the rears.
Part 3 - The Fronts
Right, this is the easier part of the job.
Undo the wheel bolts on the driver�s side, jack up the front of the car (just one side) place an axle stand in a safe place and remove the wheel.
Now look at the top of the brake caliper and you�ll see your brake line is held in place with a small metal tab/spring clip, slip your flat head screw driver under the spring clip and prize it up.
(NOW BE REALLY CAREFUL)
(ONLY ON THE DRIVERS SIDE) You'll see another cable, right next to the brake line, this is the brake pad wear sensor cable and you'll need to very carefully, AND I MEAN very gently prize this apart with a flat head screwdriver, take your time because if you break this you'll need a new one wired in and that is going to be a nightmare.
Now you've got your brake line free and separated the brake pad wear sensor cable coupling, you'll need to undo the 18mm bolt which clamps the lower hub assembly to the bottom of the shock using the M14 splined drive and an 18mm ring or ratchet spanner or an 18mm socket.
Next undo the droplink which runs from the end of the anti roll bar up to the tab on the side of the shock leg (this is the same as the rear, M6 splinned and 18MM nut) - just like the rear, if you cannot pull it apart just yet, not to worry you will be able to do so in a minute.
OK - this bit is a bit more tricky! To release the the shock from the lower hub assembly you can either undo the lower arm which takes a ton of work or you can do the following . . . .
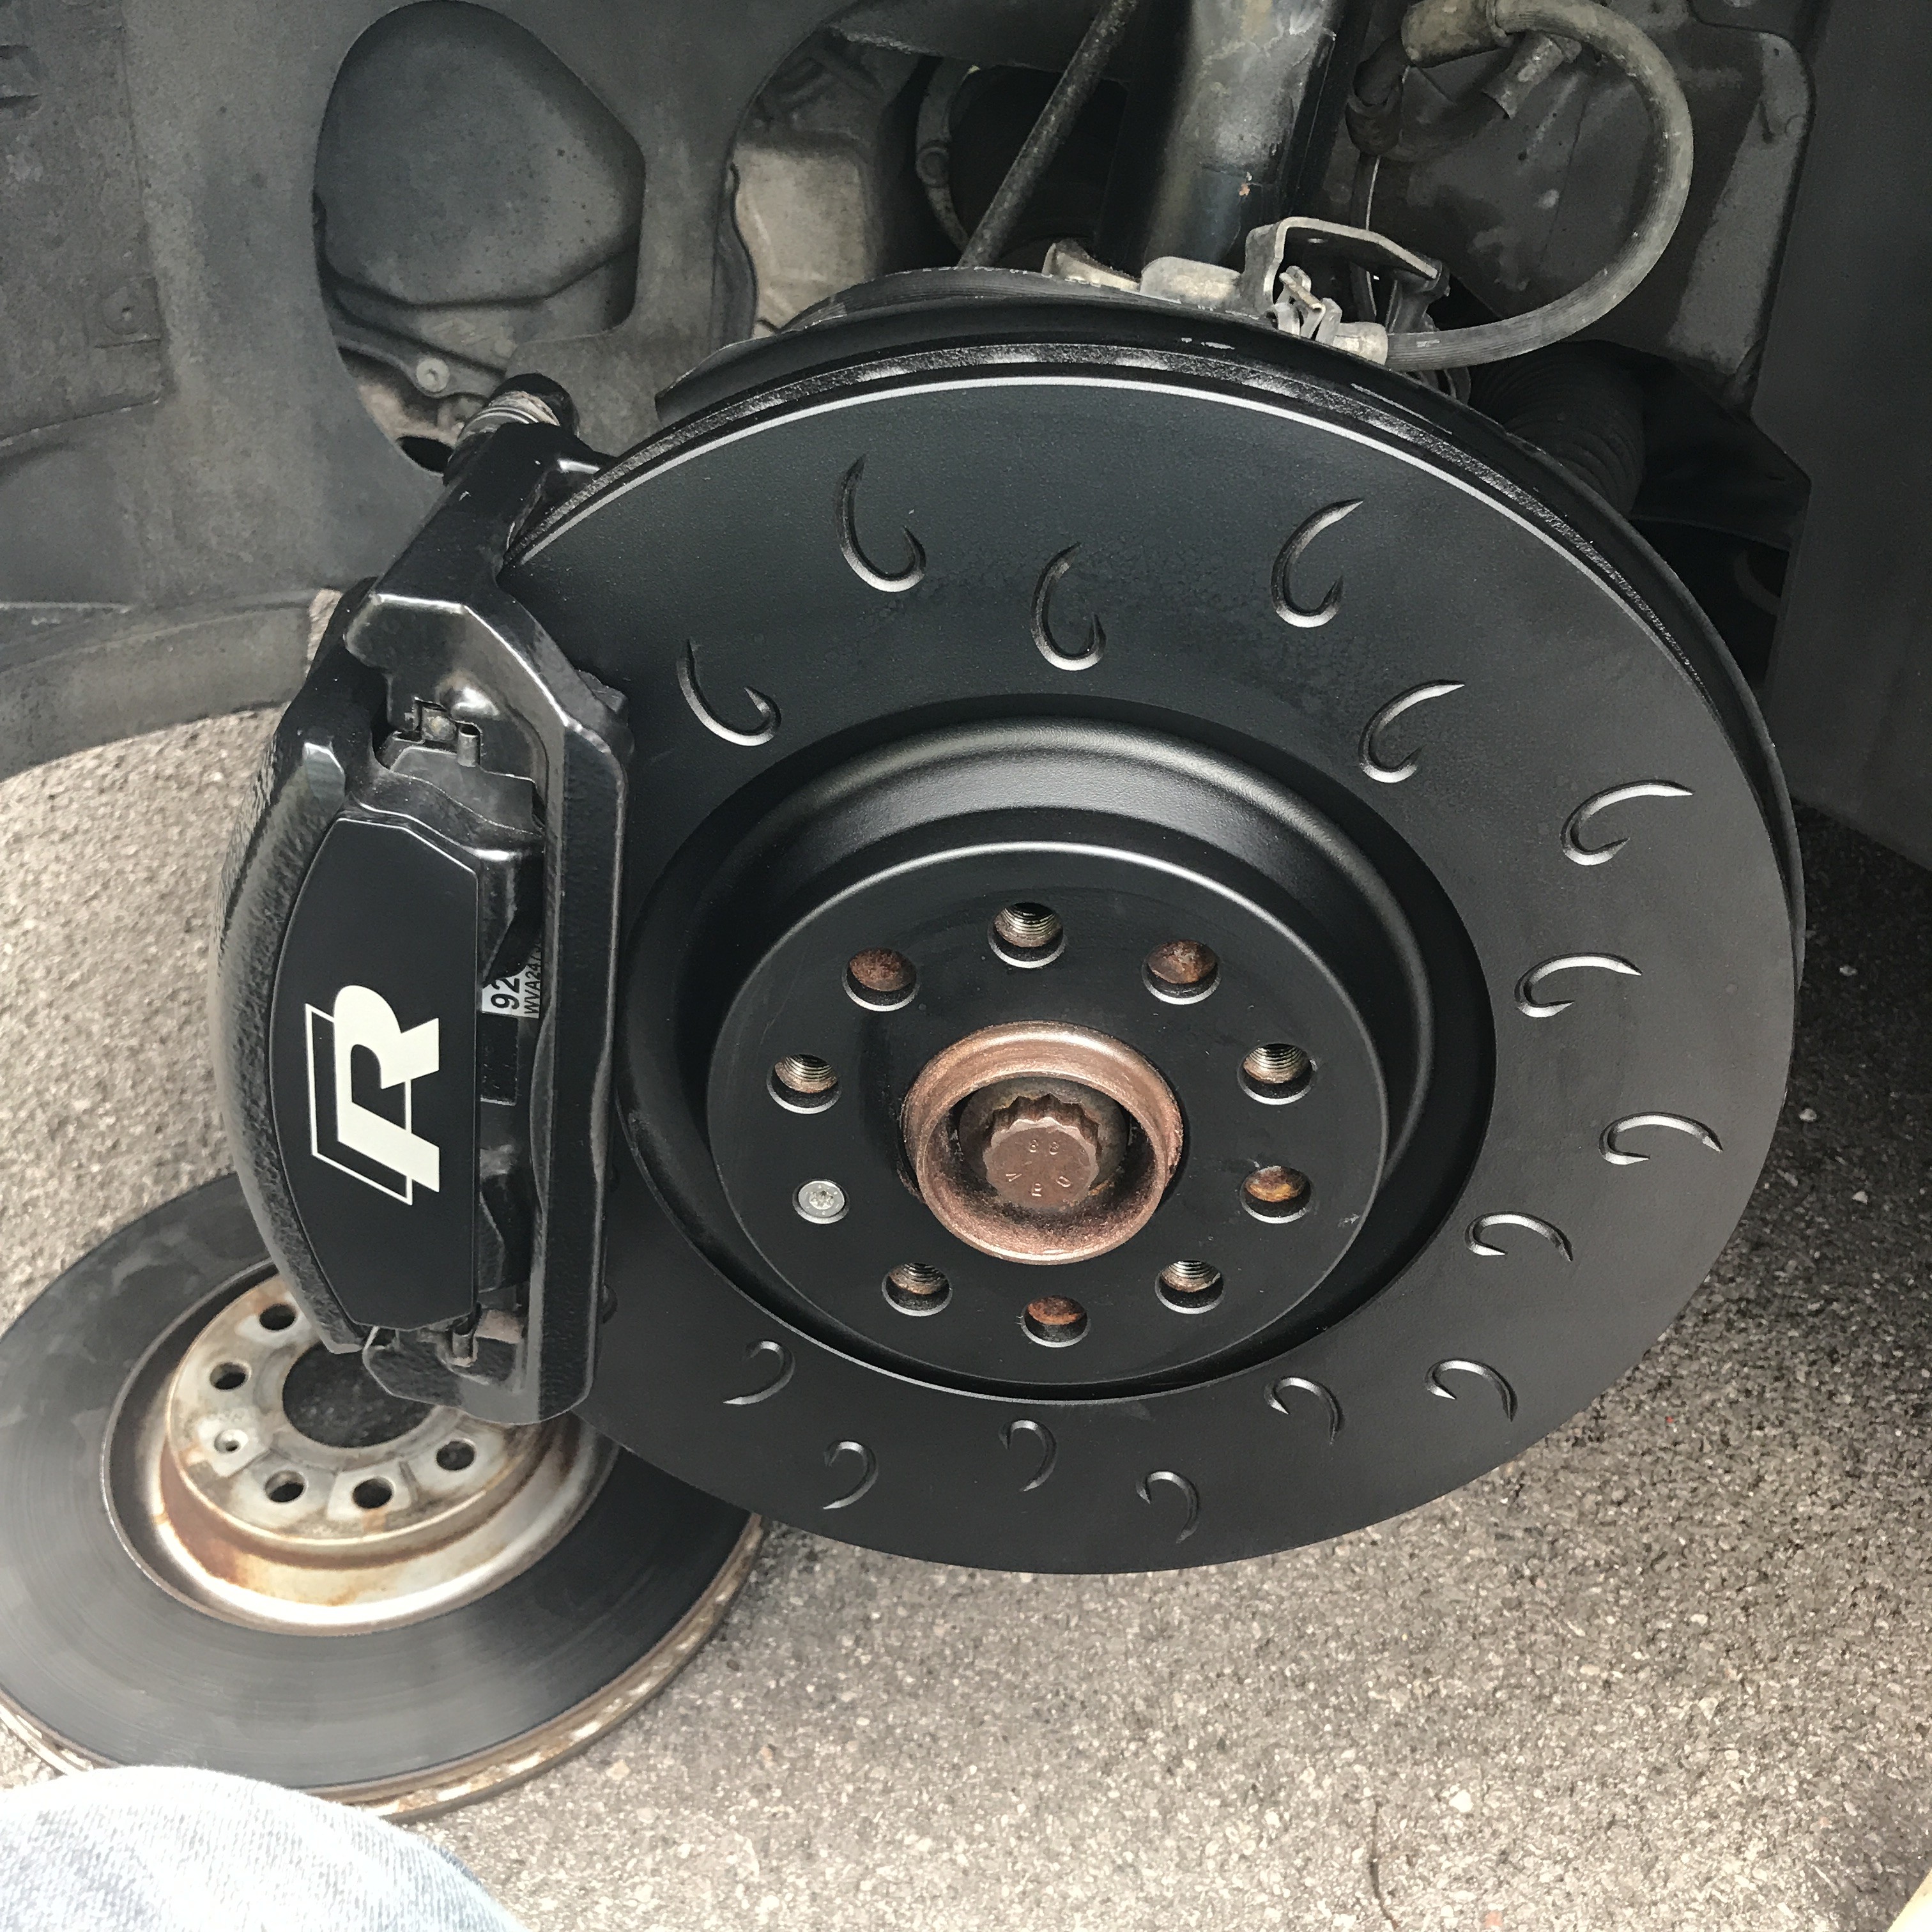
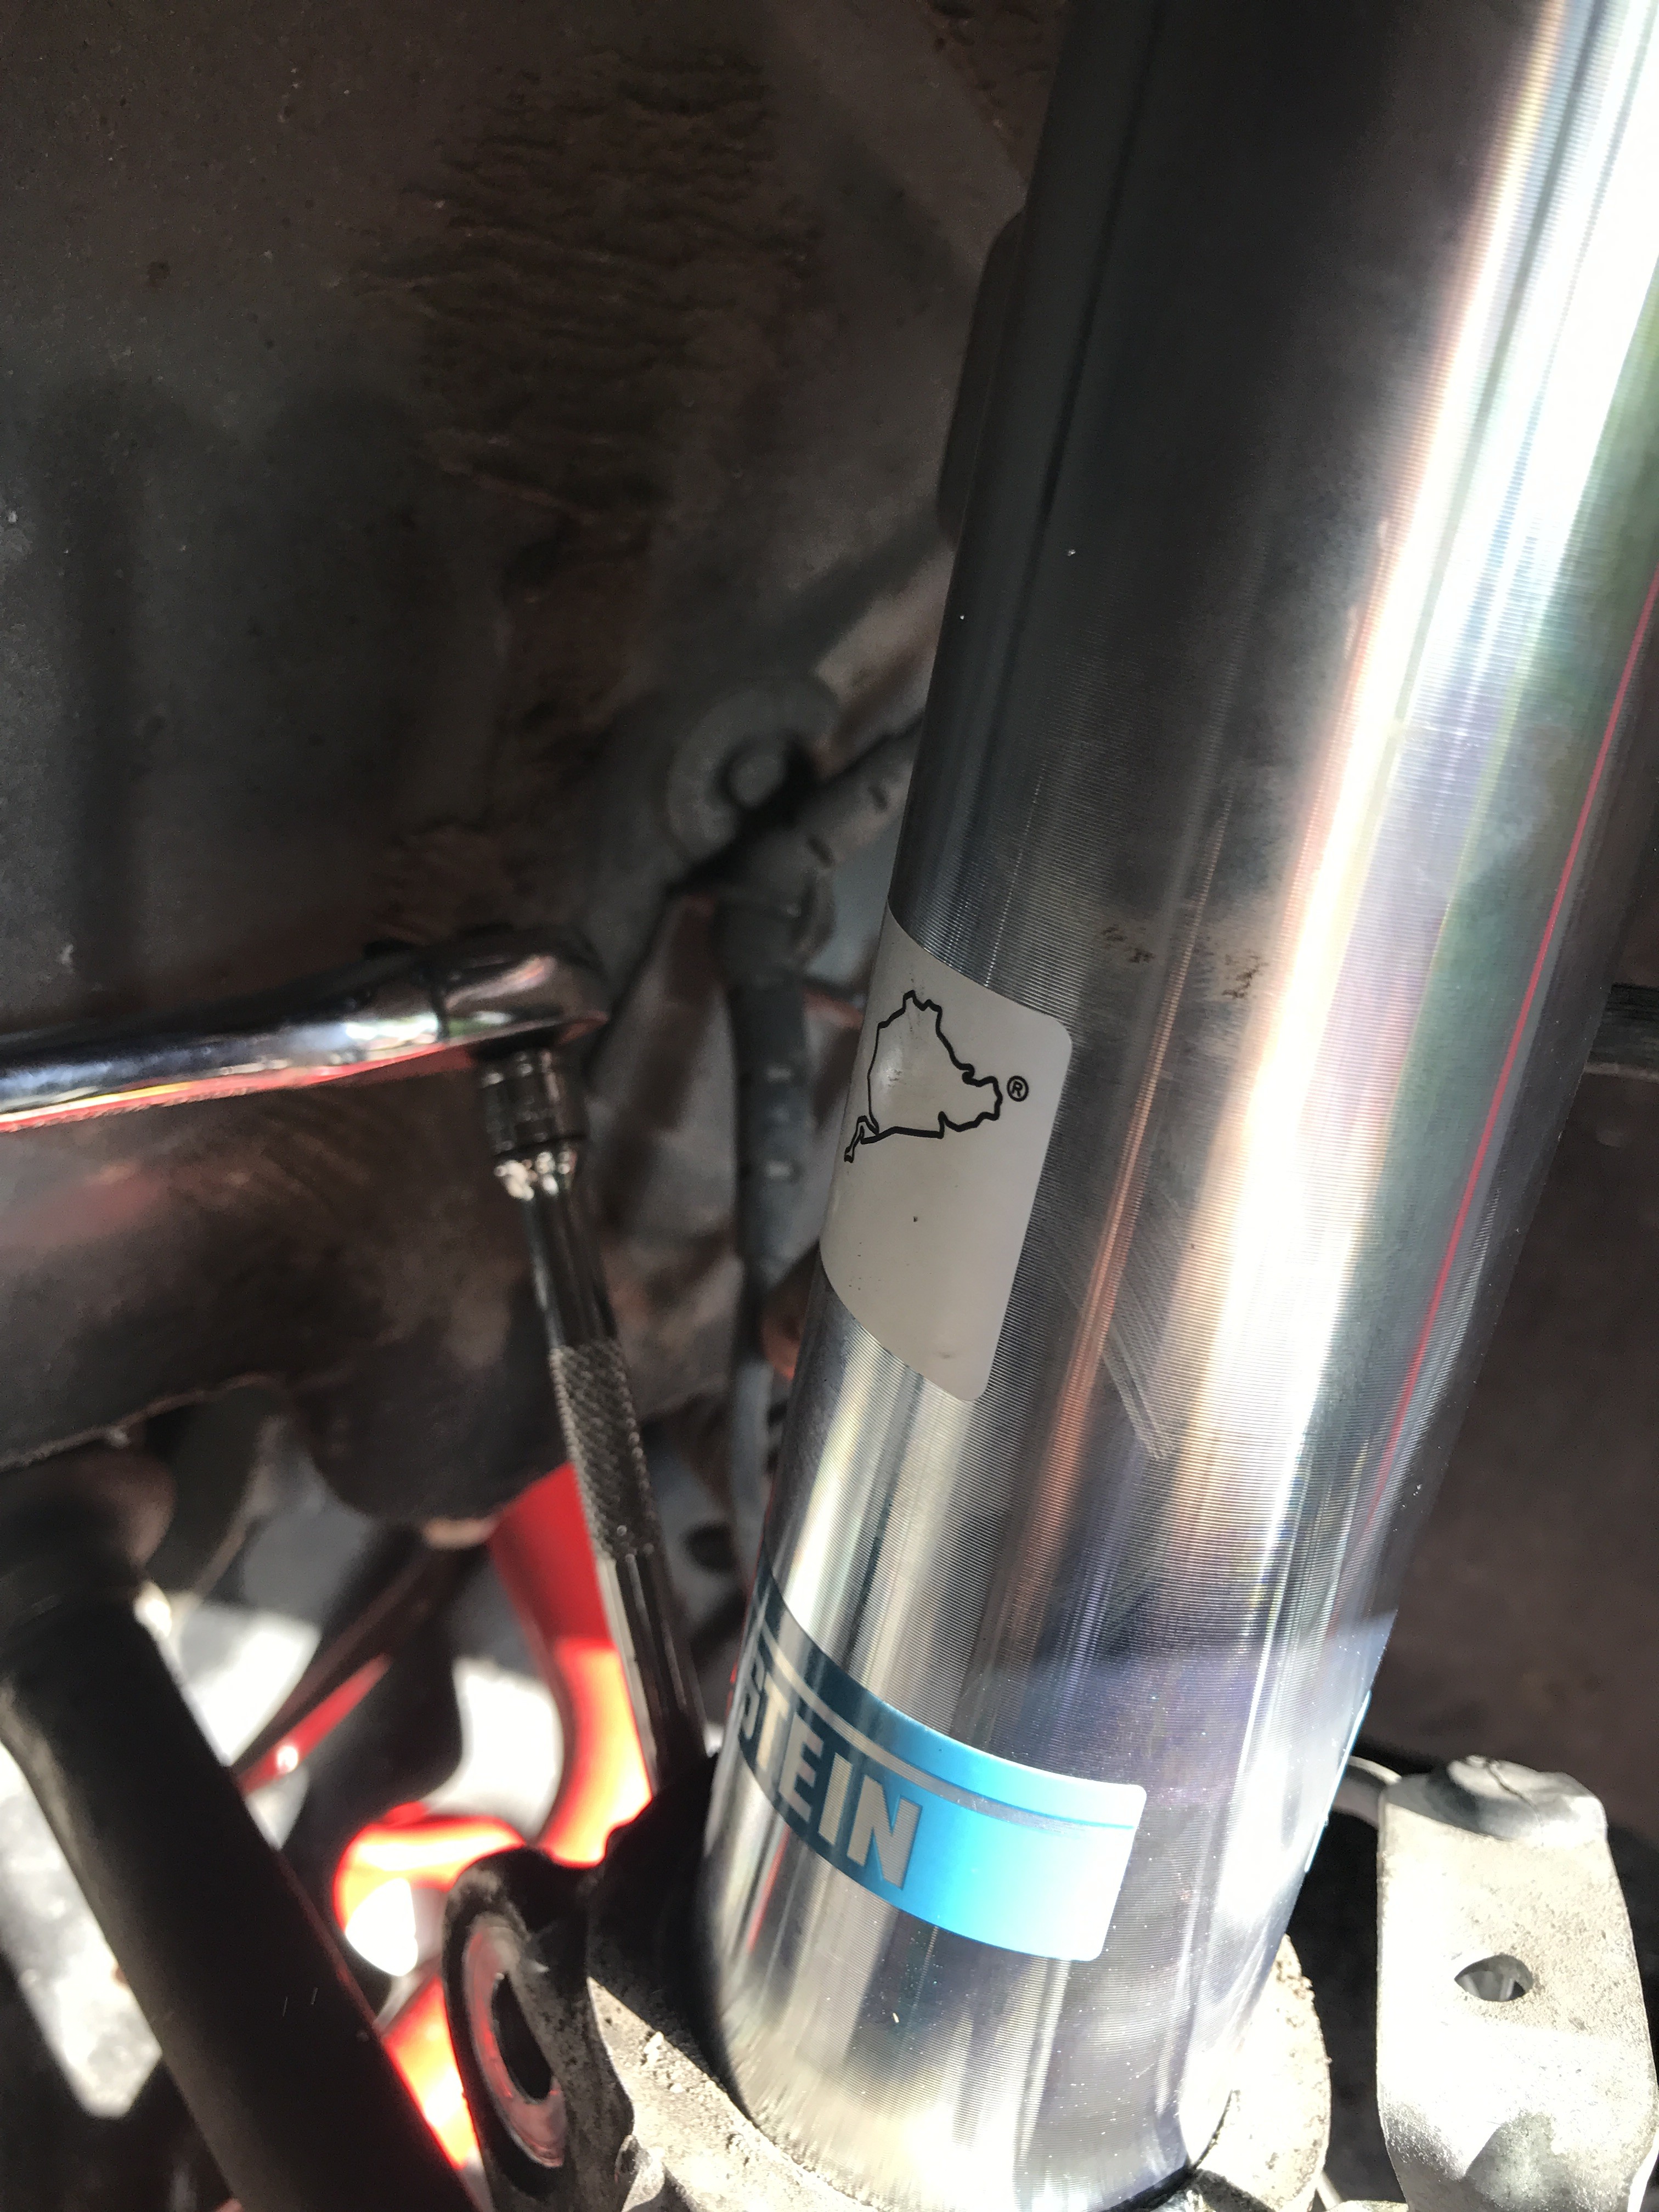
Take your 1/4" ratchet and 1/4" extension and feel around to the back of the where the shock goes into the lower hub assembly, now push it into the gap as pictured below, rotate the ratchet an a eighth of a turn to open the jaws of the lower hub assembly - imagine turning it from a square that sits in the jaws to a diamond that just opens them up - I forgot to take a picture of me removing the original shock but you can see what I mean from the picture of the new shock in place below.
Now grab the top of the brake disc with one hand and the bottom of the brake disc with the other hand holding the bottom of the brake disc and wiggle - you'll see the lower hub assembly now comes part of the way down the shock leg and stops - this because there's a metal tab on the shock that's now hit your 1/4" ratchet extension. All you have to do is give the ratchet another eighth of a turn, pull it out, push it back in jaws but under the metal tab and give it the eighth of a turn like you did before, again grab the brake disc and wiggle - you'll notice that whilst everything is lose, you can pull more of the shock out but you cannot get the hub assembly low enough to get the shock free completely but fear not . . .
Get your jack and piece of wood, place the piece of wood on the jack, placing one end of the wood on the jack platform and position the other end of the wood against the lip of the shock that the shock's coil spring sits on and jack the shock up about 2" - 3" and out pops the shock from the lower hub - it may need a little wiggle - doing this compared to striping down the lower arm is much, much quicker and easier.
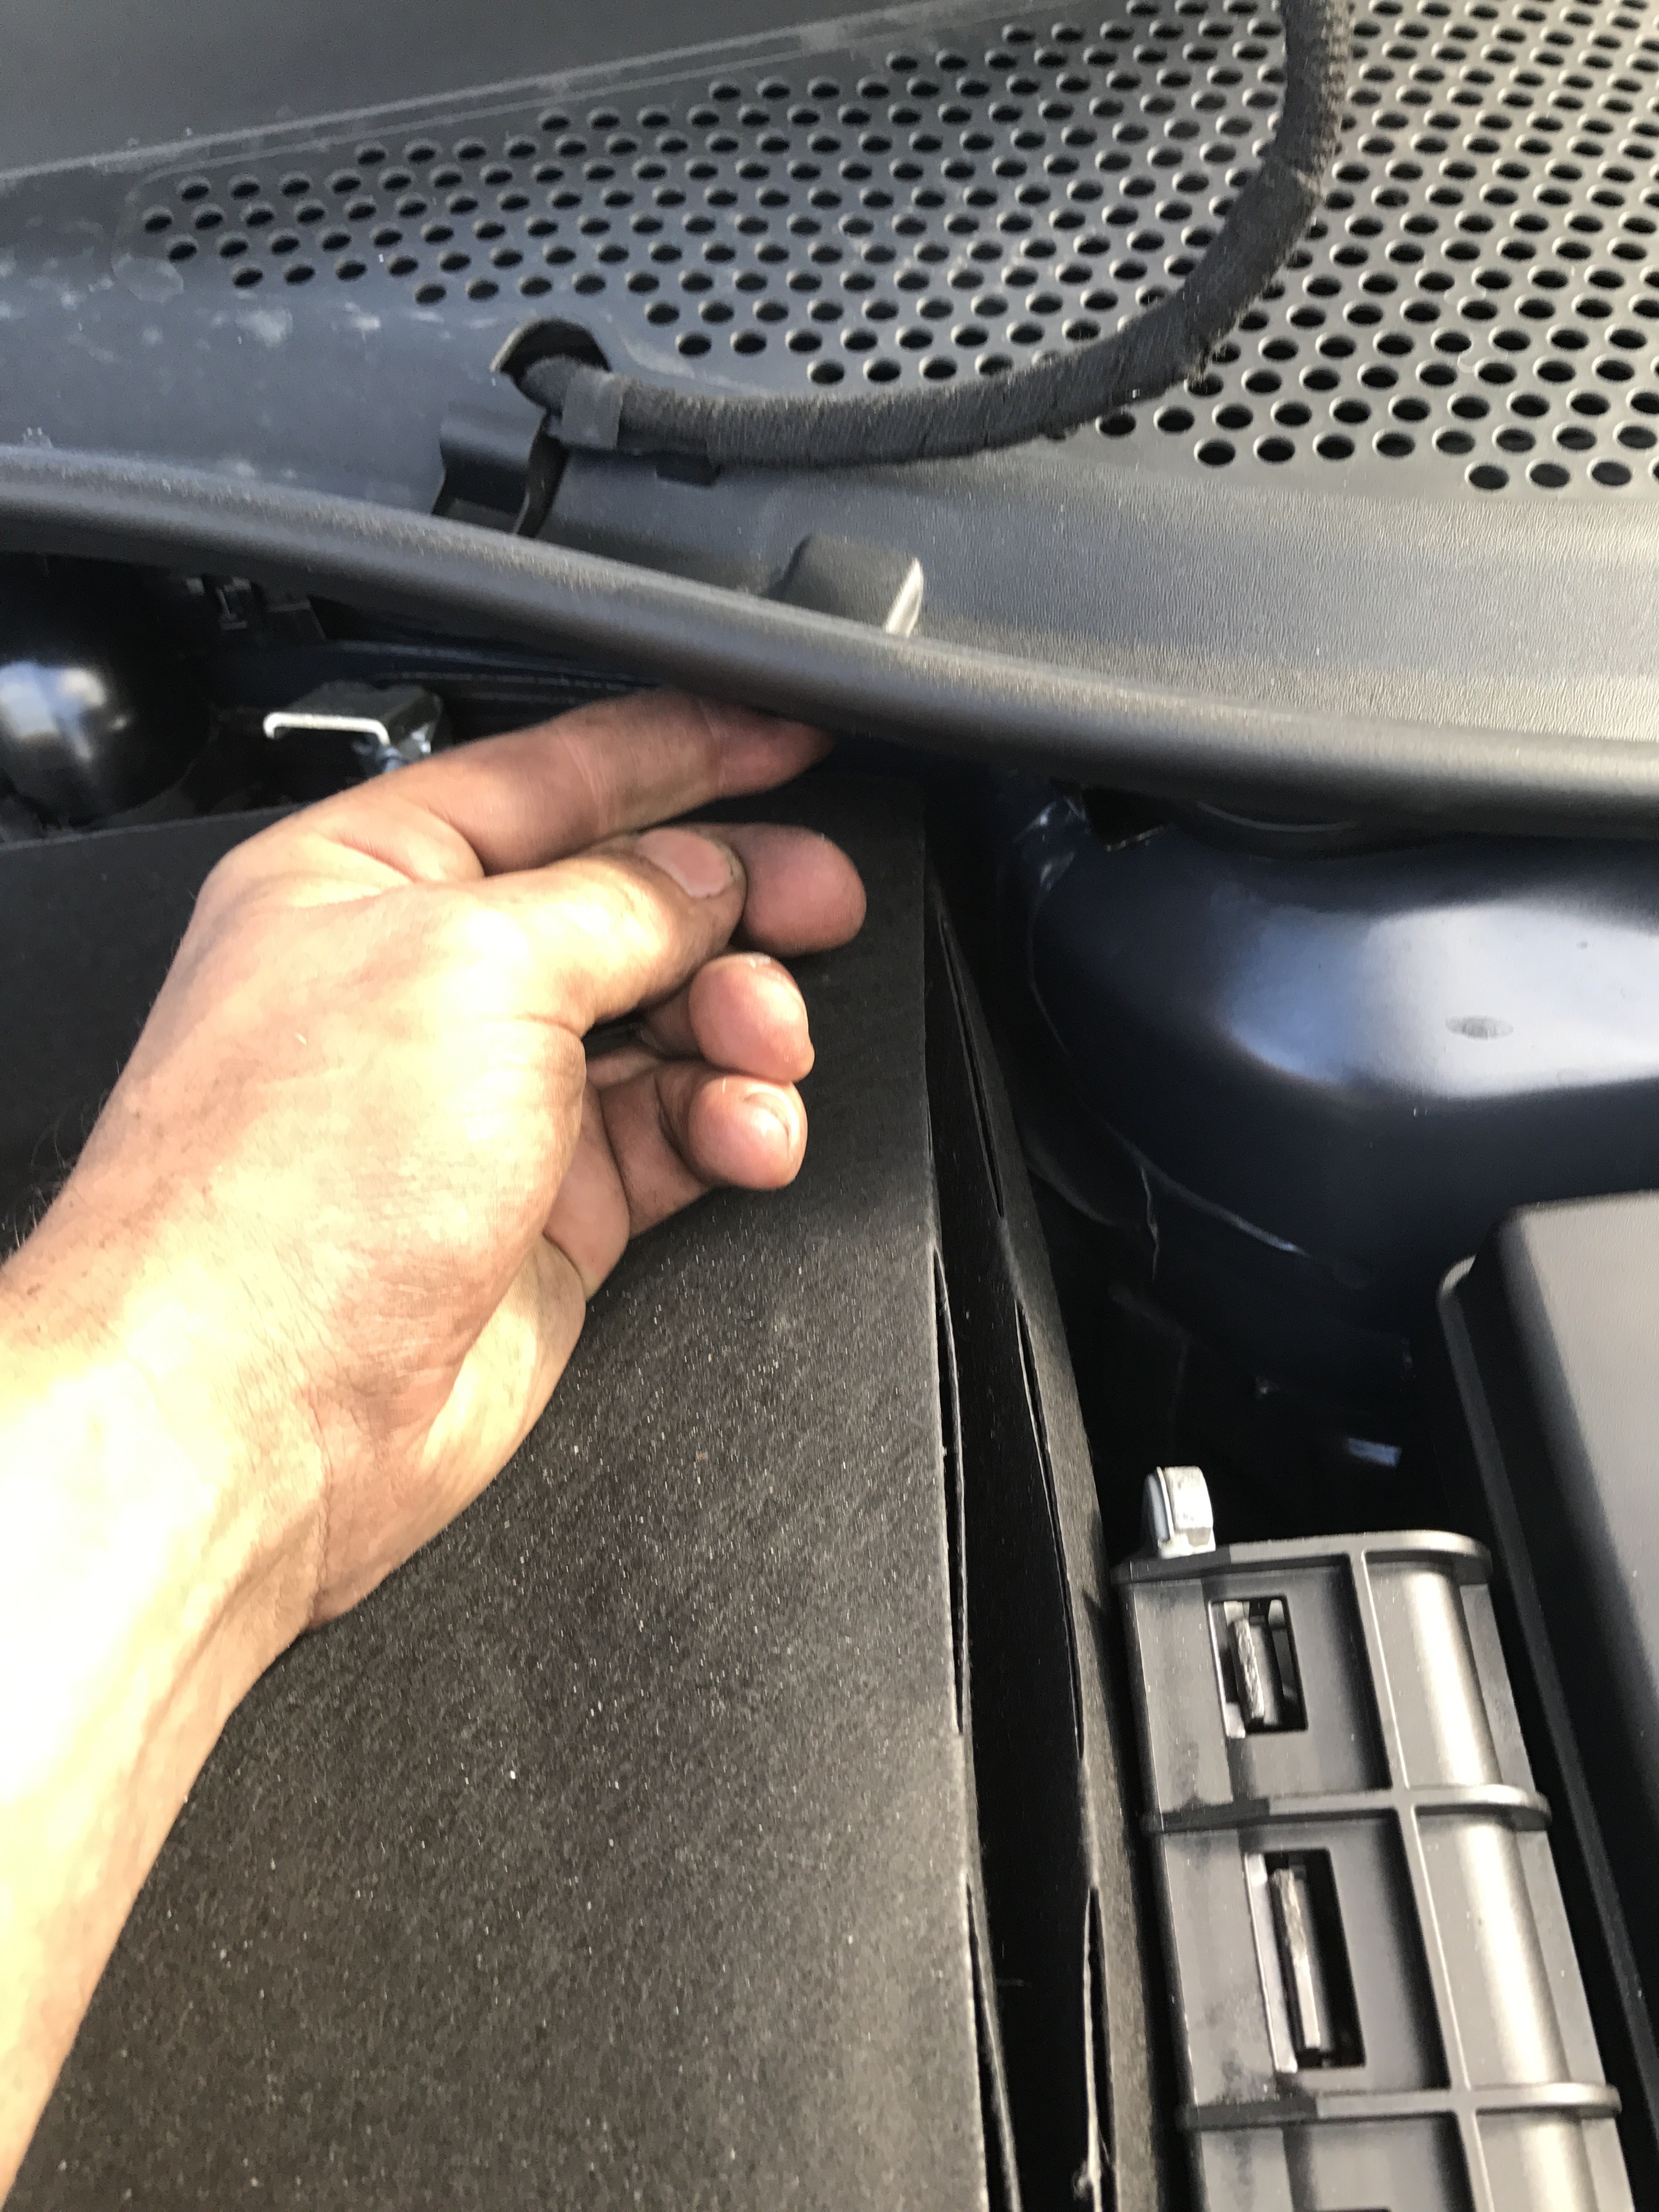
OK you're on the home straight, pop the bonnet open, find the three clips that hold the plastic trim below the windscreen in place - you're not going to remove it, you'll just need pull the clips out in order to to lift the trim up a little to reveal the three bolts that are now the only thing holding the original shock in place. There is one tab in the middle, and one either side - I've just taken a picture of one side and the one in the middle but you get the point.
Middle

One Side
OK, gently lift up the front, get your 13mm socket and remove the three bolts from the top of the suspension turret mount.
Great stuff, now move the shock clear of the car. The next job is to compress the spring with the spring compressors. Get your 21mm ring spanner on the top mount nut and your 7mm allen key to hold the shock's piston that the nut is screwed onto still whilst you undo the nut - do not undo this nut without spring compressors unless you know exactly how to fire a shock down the drive without taking your head off - THE SPRING IS UNDER A FAIR BIT OF TENSION AND THIS COULD BE VERY DANGEROUS WITHOUT SPRING COMPRESSORS.
OK if your still reading this, you've successfully removed the top mount from the shock without killing yourself
Now all you need to do is remove the bump stop from the top mount of the original shock. Next place the top mount from your original shock onto your new Bilstein shock, add the washer that came with the Bistein kit to the top of the top mount and do up the 22mm nut.
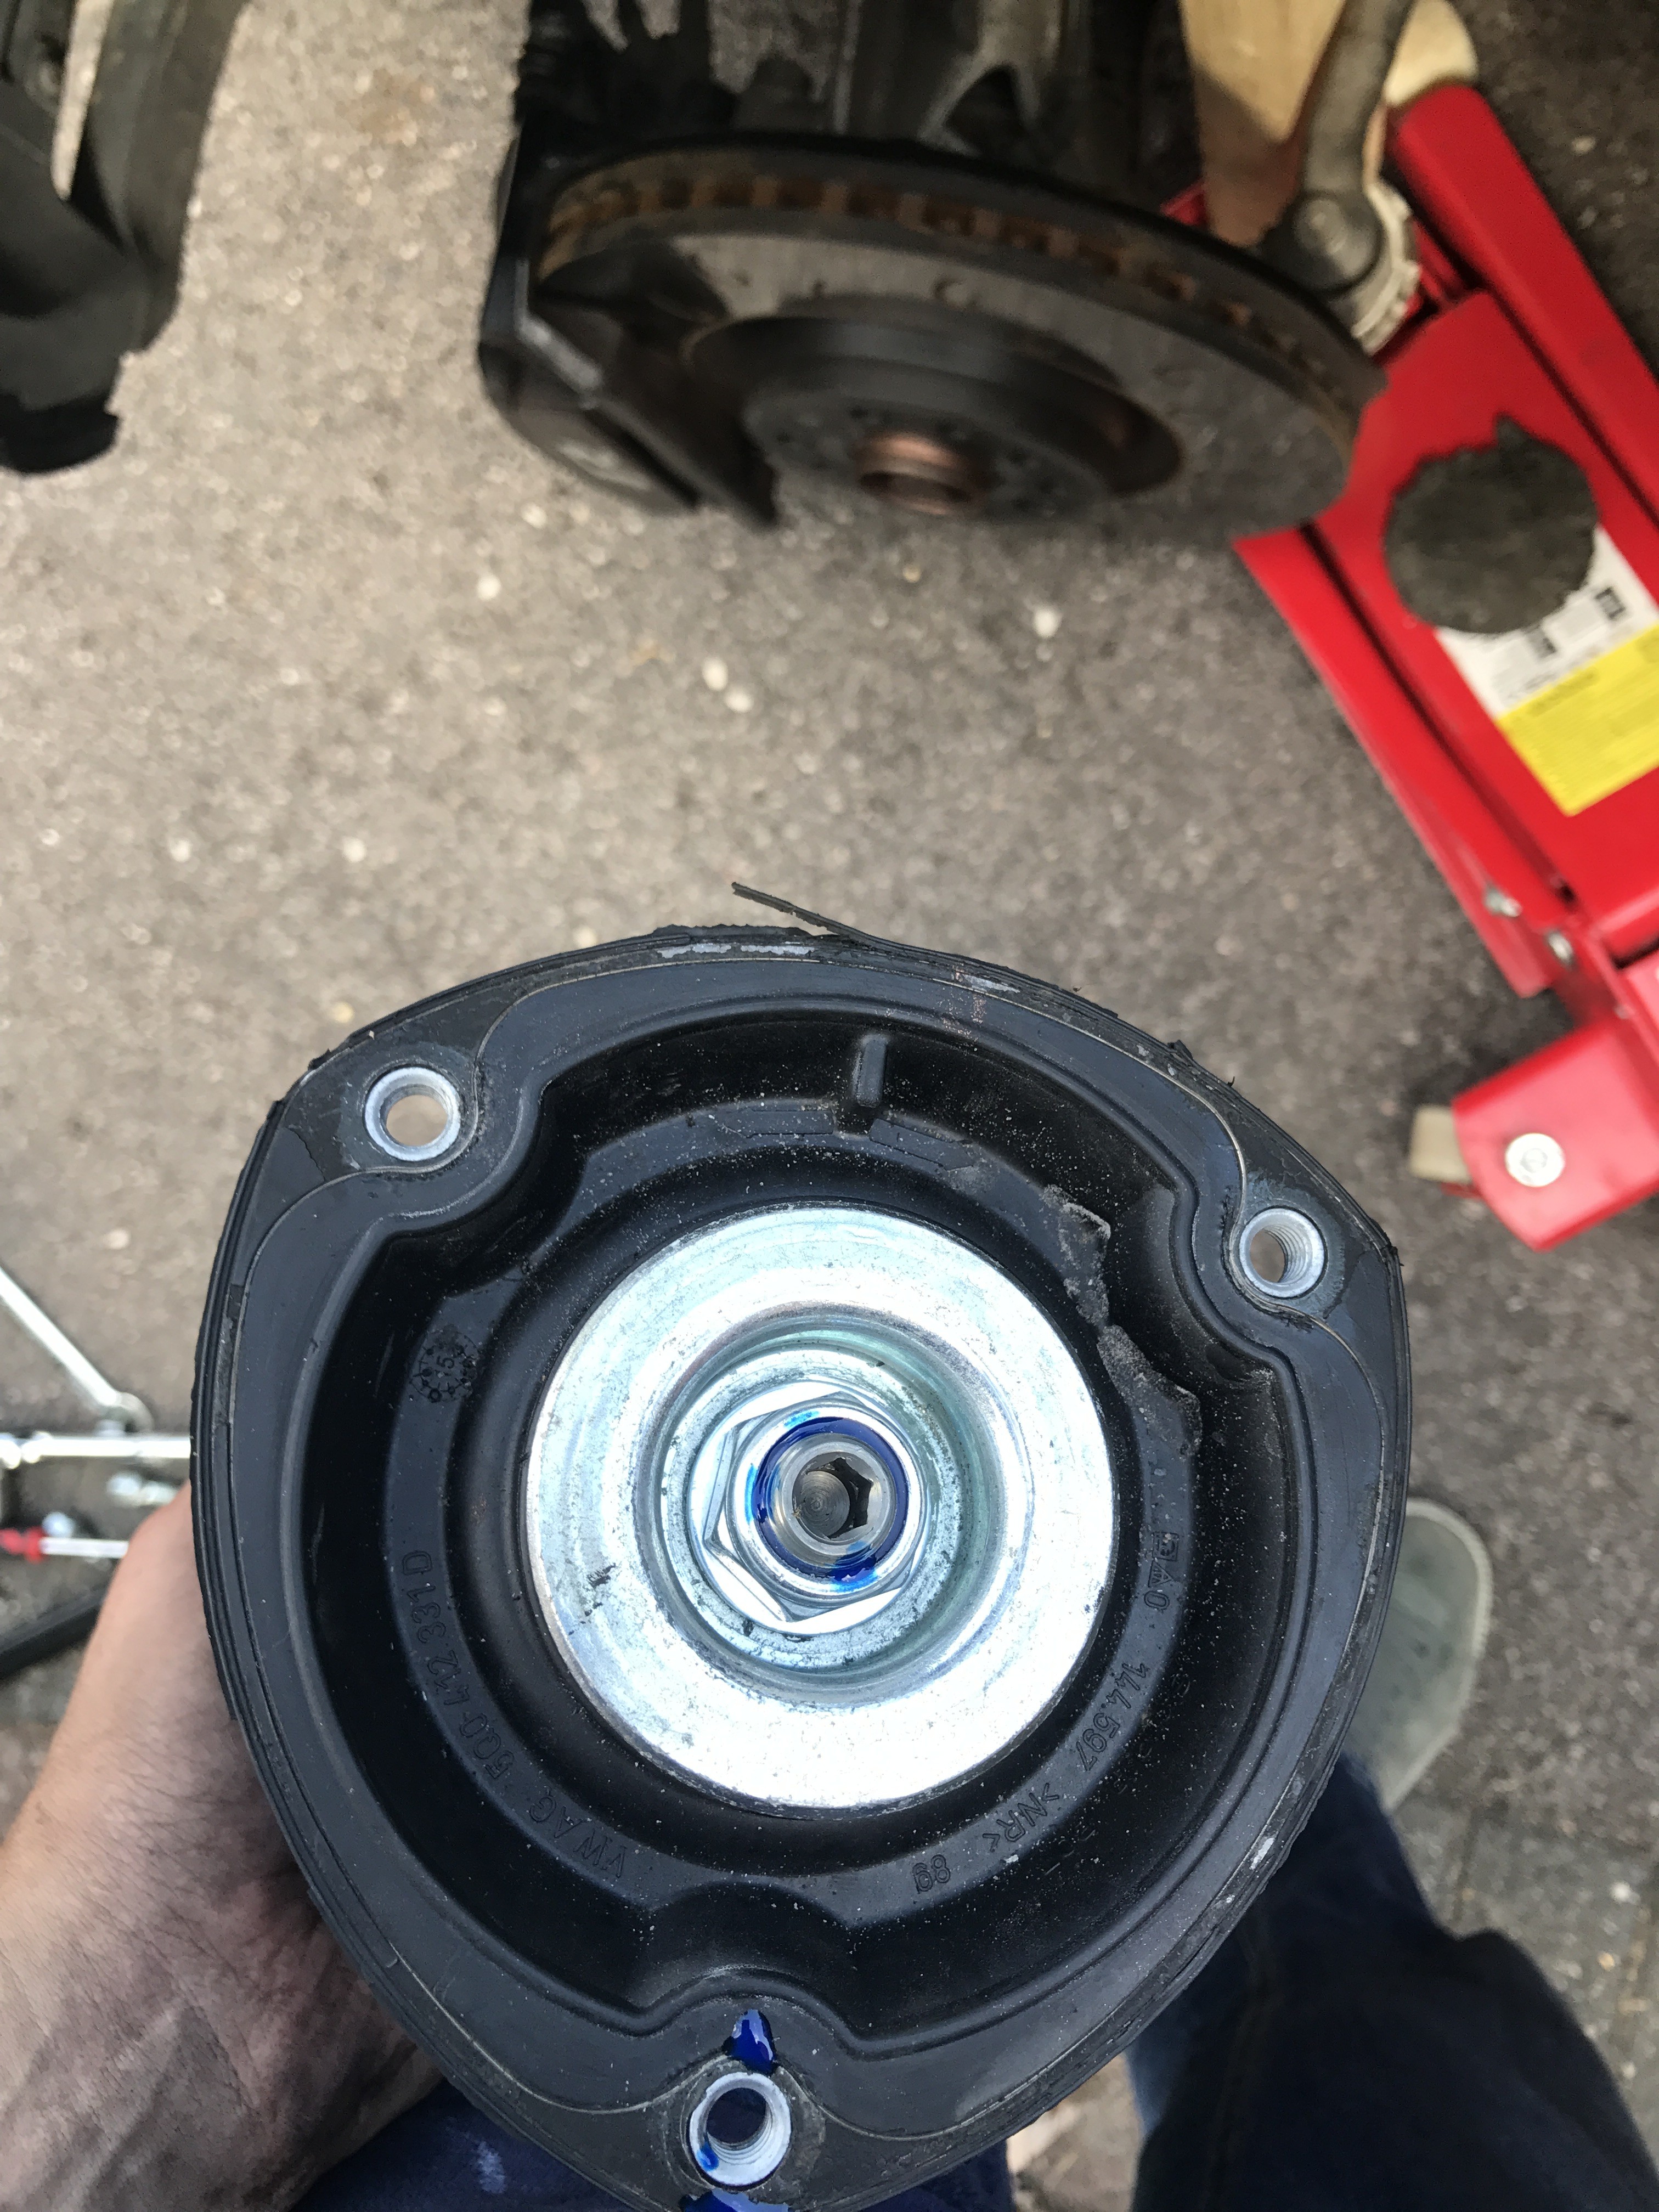
REALLY IMPORTANT - Now make sure you top mount set up correctly . . . .
1) If you look at the top mount you'll see two arrows, these need to point to the front and rear of the car when reinstalled.
2) The start of the new spring needs to line up with the locating tab that holds the wedge shaped part of the top mount in place with the other part of the top mount - this will make sense when you have the parts in front of you.
3) Now move your spring perches up like you did on the rear install (a 40mm gap from the bottom of the threaded section of the shock to the underside of the lower spring perch will give you roughly the same arch to tyre gap at the front as you have at the rear)
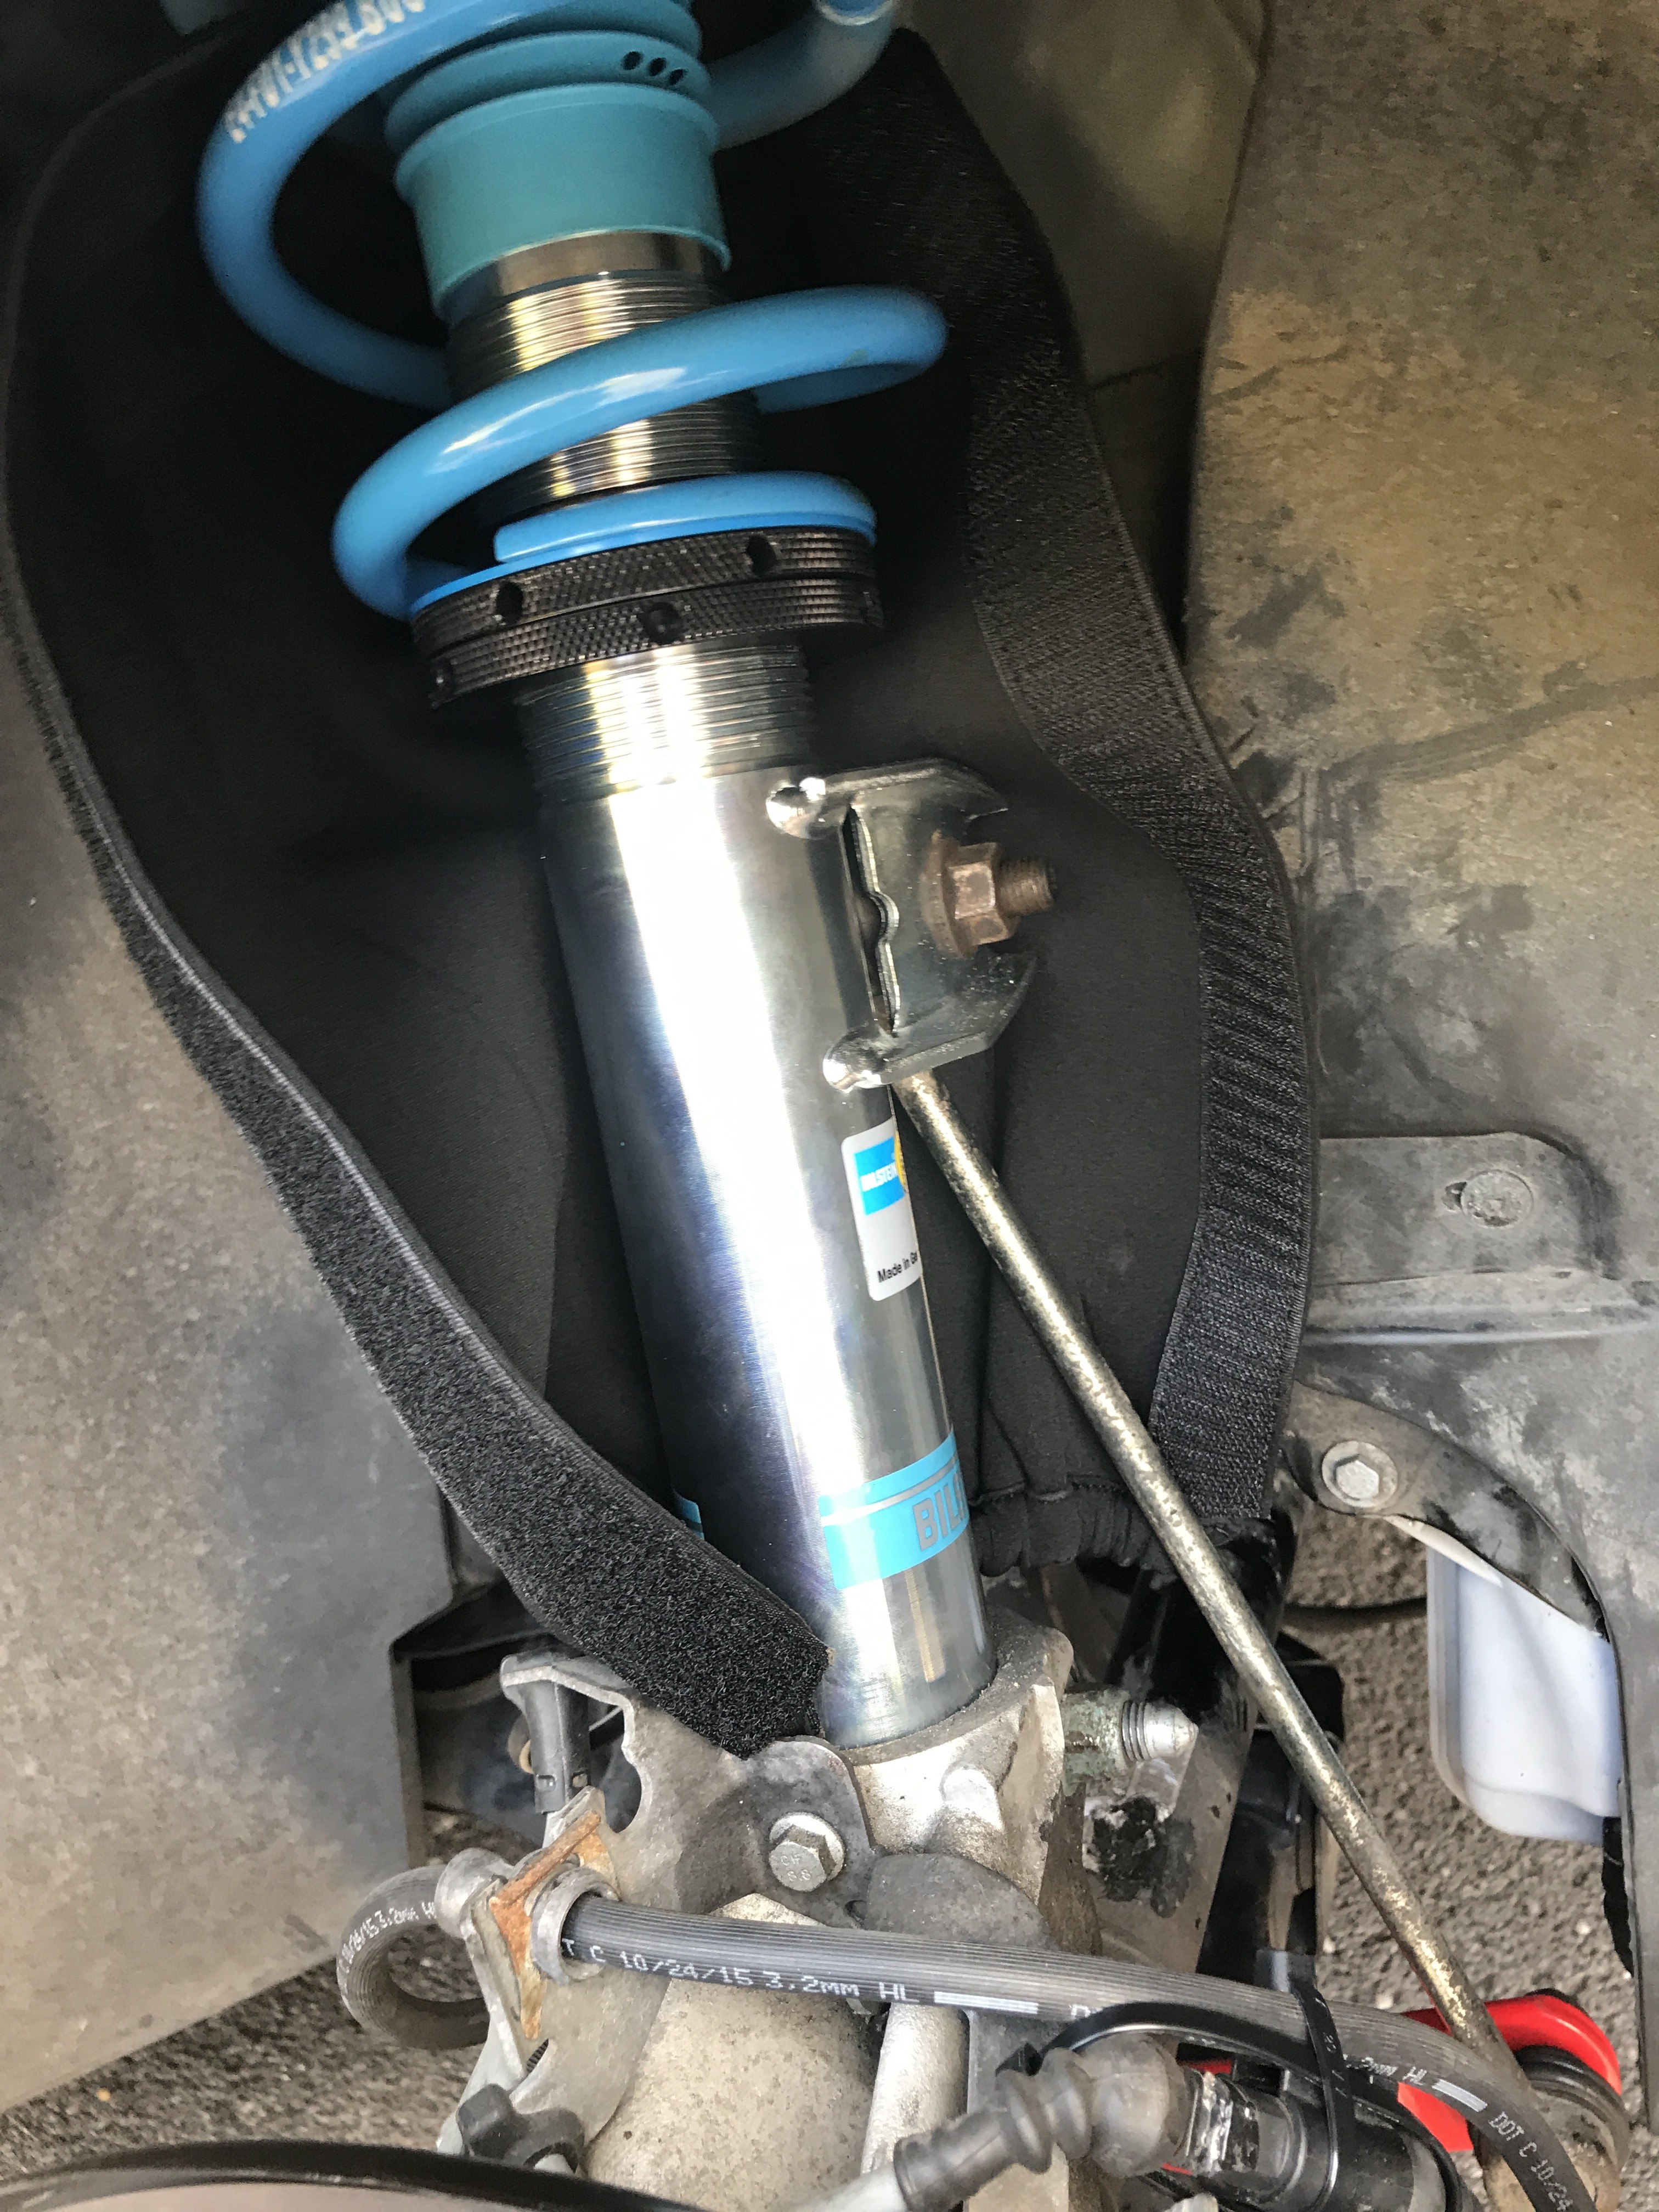
When the shock is lined up to the car it will look like the picture below - I put a little blue paint mark on the outer bolt hole of the top mount to make it easier to see when lining everything up. Start by doing up the three 16mm bolts that hold the shock in place to the top of mount but don't do them up fully as you need some wiggle room to get everything in place and then when everything is bolt up at the bottom of the shock . . . . YOU SHOULD STILL NOT DO THE TOP BOLTS BACK UP JUST YET.
With everything bolted back up at the bottom of the shock you should have something that looks like this . . . .
OK nice work, put the wheel back on, remove the axle stand and lower the car to the floor - NOW AND ONLY NOW SHOULD YOU DO THE THREE TOP MOUNT BOLTS UP - THIS ENSURES THE SHOCK IS IN THE CORRECT POSITION.
Now do the other side - its exactly the same but there's not pad wear sensor wire to worry about. Once finished, put the three tabs back in that hold the trim below the windscreen in place , close the bonnet and skip around your drive at your pure awesomeness.
Right, that's it - hope this helps.
If you've got any smart tips or questions, just let me know.
Please do not use the guide just yet, whilst the process for the rears is the same as the Golf I do not know about the fronts yet - when this guide is finished I'll publish it in main forum.
************************************************** *****
Hi All,
Fitted my KW Variant 3 Coilovers today, not much info around on how to do it and half of what I found online was wrong plus the instructions are not the best. Due to the lack of info, I thought I'd write a quick how to.
Tools
For this job I used.
Spring compressors
13mm scocket
16mm socket
18mm ratchet spanner or 18mm ring spanner
21mm ring spanner or 21mm swan neck spanner
22mm ring spanner or 22mm swan neck spanner
7mm allen key - DO NOT START THIS JOB WITHOUT A 7MM ALLEN KEY - THIS DOES NOT COME IN MOST ALLEN KEY KITS
Socket set with 18mm sockets
1/4" ratchet with 1/4" extension
Vice or Mole grips
Flat head screwdriver
Masking tape
2 jacks (you only need one) but two is easier
18" piece of 2 x 4 wood or similar timber
2 x axle stands
M6CR-V splined drive
M14CR-V splined drive
Set of star bit screw driver bits
2 x 20mm long cable ties
Torque wrench and wheel sockets
Ruler
Let's start with the rear, break loose your wheel bolts, jack the car up, put your two axle stands where the rear arms bolt up to the center of the car, make sure you're careful to place the car gently on the stands when lowering the jack.
Remove you wheels and put them somewhere safe along with you wheel bolts and wheel nut caps.
Next move to the drivers side rear shock mount assembly and locate the three fasteners that hold the inner arch cover (you don't need to remove the cover just undo the two fastners that are closest to the shock as it's easier to get to the nuts that way)
Now pull the guard back around the top of the shock tower to reveal the upper shock mount, undo the two 16mm bolts to loosen them off but don't remove totally just yet.
Next look at the rear ARB (anti roll bar), get your 13mm ratchet or ring spanner on the nut that secures the drop link to the lower arm and undo (don't try to pull it out yet as it's under tension)
Now unclip the little plastic arm which is your headlight leveler (green bit in the picture below), just pry it away from the lowest connecting point.
OK now there are two bolts between you and finishing the first part of this part, both require an 18mm ring or ratchet spanner along with a second 18mm spanner or 18mm socket. One holds the rear arm to the rear hub assembly and the other holds the bottom of the shock to the lower arm, remove them both.
Undo this bolt (I didn't picture this bit but I've did the same on my Golf R and the parts are identical)
And this bolt
Now pull the rear hub assembly to the side to release the lower arm, now you can remove the two 16MM bolts at the top of the shock mount and remove the shock, if it wont come out, grab the top section of the shock in one and and the bottom section of the shock in the other and compress to shrink it down, now pull you can it out.
Finally, you can now push the lower arm up to take the tension off the ARB and pull the rear drop link out the way - you might have to use both hands to pull it away.
Part 2 - Disassembly & Reassembly - The Shock
Right, grab the black plastic dome on the top of the shock you've just removed and pop it off to reveal the top nut, I found this nut really hard to get to without a top nut box socket so I cheated.
Pull the bump stop down, wrap some masking tape around the very top of the piston, grab it with your mole grips or vice and just undo the top nut with a 16mm socket, they're not done up tight and undo with ease.
Now pull off the top assembly, put the 16mm nut back on the old shock for safe keeping. Next pull the bump stop out of the top mount of the shock assembly and put it to the side - you don't need this but keep it in case you ever have to put the original suspension back on.
Next take your new KW rear shock out of the box, remove the top nut, keeping the black rubber washer in place. Refit the top mount from your shock you've just removed from the car - so the order is . . . . .
Top nut, upper shock mount, black rubber washer, KW bump stop, KW shock - remeber to ensure that the rebound adjuster is facing you when you re-assemble the shock like the picture below.
Great - all done on this part and now on to the spring and platform adjuster
Part 2 - Disassembly & Reassembly - The Spring
Take the platform adjuster and set you spring perch platform in place (as a rough guide - 35mm from the top of the threaded section to the bottom of the lower spring perch lock ring will give you a final arch to top of tyre gap of around 15mm)
Next add the spring ensuring you place the adjustable platform to the end of the yellow spring which is flat.
Place the spring in the spring mount of the lower arm being sure to use the rubber spring mount that should still be in fixed into the lower arm - if it came out with the original spring, go and get it and put it back in place - note, you do not need the upper rubber spring mount that was attached to the top of your original OEM spring.
Line the new spring up making sure the lower end of the spring meets with the rubber stop in the lower spring mount that's still in the lower arm.
Right, time to bolt it all back up again - you may want to use jack to raise the lower arm up so all the bolt holes line up perfectly.
Now do the same for the other side, refit your wheels, remove the jack stands and you're ready to start on the fronts . . . . want some good news? . . . . . . the fronts are way less hassle than the rears.
Part 3 - The Fronts
Right, this is the easier part of the job.
Undo the wheel bolts on the driver�s side, jack up the front of the car (just one side) place an axle stand in a safe place and remove the wheel.
Now look at the top of the brake caliper and you�ll see your brake line is held in place with a small metal tab/spring clip, slip your flat head screw driver under the spring clip and prize it up.
(NOW BE REALLY CAREFUL)
(ONLY ON THE DRIVERS SIDE) You'll see another cable, right next to the brake line, this is the brake pad wear sensor cable and you'll need to very carefully, AND I MEAN very gently prize this apart with a flat head screwdriver, take your time because if you break this you'll need a new one wired in and that is going to be a nightmare.
Now you've got your brake line free and separated the brake pad wear sensor cable coupling, you'll need to undo the 18mm bolt which clamps the lower hub assembly to the bottom of the shock using the M14 splined drive and an 18mm ring or ratchet spanner or an 18mm socket.
Next undo the droplink which runs from the end of the anti roll bar up to the tab on the side of the shock leg (this is the same as the rear, M6 splinned and 18MM nut) - just like the rear, if you cannot pull it apart just yet, not to worry you will be able to do so in a minute.
OK - this bit is a bit more tricky! To release the the shock from the lower hub assembly you can either undo the lower arm which takes a ton of work or you can do the following . . . .
Take your 1/4" ratchet and 1/4" extension and feel around to the back of the where the shock goes into the lower hub assembly, now push it into the gap as pictured below, rotate the ratchet an a eighth of a turn to open the jaws of the lower hub assembly - imagine turning it from a square that sits in the jaws to a diamond that just opens them up - I forgot to take a picture of me removing the original shock but you can see what I mean from the picture of the new shock in place below.
Now grab the top of the brake disc with one hand and the bottom of the brake disc with the other hand holding the bottom of the brake disc and wiggle - you'll see the lower hub assembly now comes part of the way down the shock leg and stops - this because there's a metal tab on the shock that's now hit your 1/4" ratchet extension. All you have to do is give the ratchet another eighth of a turn, pull it out, push it back in jaws but under the metal tab and give it the eighth of a turn like you did before, again grab the brake disc and wiggle - you'll notice that whilst everything is lose, you can pull more of the shock out but you cannot get the hub assembly low enough to get the shock free completely but fear not . . .
Get your jack and piece of wood, place the piece of wood on the jack, placing one end of the wood on the jack platform and position the other end of the wood against the lip of the shock that the shock's coil spring sits on and jack the shock up about 2" - 3" and out pops the shock from the lower hub - it may need a little wiggle - doing this compared to striping down the lower arm is much, much quicker and easier.
OK you're on the home straight, pop the bonnet open, find the three clips that hold the plastic trim below the windscreen in place - you're not going to remove it, you'll just need pull the clips out in order to to lift the trim up a little to reveal the three bolts that are now the only thing holding the original shock in place. There is one tab in the middle, and one either side - I've just taken a picture of one side and the one in the middle but you get the point.
Middle
One Side
OK, gently lift up the front, get your 13mm socket and remove the three bolts from the top of the suspension turret mount.
Great stuff, now move the shock clear of the car. The next job is to compress the spring with the spring compressors. Get your 21mm ring spanner on the top mount nut and your 7mm allen key to hold the shock's piston that the nut is screwed onto still whilst you undo the nut - do not undo this nut without spring compressors unless you know exactly how to fire a shock down the drive without taking your head off - THE SPRING IS UNDER A FAIR BIT OF TENSION AND THIS COULD BE VERY DANGEROUS WITHOUT SPRING COMPRESSORS.
OK if your still reading this, you've successfully removed the top mount from the shock without killing yourself
Now all you need to do is remove the bump stop from the top mount of the original shock. Next place the top mount from your original shock onto your new Bilstein shock, add the washer that came with the Bistein kit to the top of the top mount and do up the 22mm nut.
REALLY IMPORTANT - Now make sure you top mount set up correctly . . . .
1) If you look at the top mount you'll see two arrows, these need to point to the front and rear of the car when reinstalled.
2) The start of the new spring needs to line up with the locating tab that holds the wedge shaped part of the top mount in place with the other part of the top mount - this will make sense when you have the parts in front of you.
3) Now move your spring perches up like you did on the rear install (a 40mm gap from the bottom of the threaded section of the shock to the underside of the lower spring perch will give you roughly the same arch to tyre gap at the front as you have at the rear)
When the shock is lined up to the car it will look like the picture below - I put a little blue paint mark on the outer bolt hole of the top mount to make it easier to see when lining everything up. Start by doing up the three 16mm bolts that hold the shock in place to the top of mount but don't do them up fully as you need some wiggle room to get everything in place and then when everything is bolt up at the bottom of the shock . . . . YOU SHOULD STILL NOT DO THE TOP BOLTS BACK UP JUST YET.
With everything bolted back up at the bottom of the shock you should have something that looks like this . . . .
OK nice work, put the wheel back on, remove the axle stand and lower the car to the floor - NOW AND ONLY NOW SHOULD YOU DO THE THREE TOP MOUNT BOLTS UP - THIS ENSURES THE SHOCK IS IN THE CORRECT POSITION.
Now do the other side - its exactly the same but there's not pad wear sensor wire to worry about. Once finished, put the three tabs back in that hold the trim below the windscreen in place , close the bonnet and skip around your drive at your pure awesomeness.
Right, that's it - hope this helps.
If you've got any smart tips or questions, just let me know.


Thread
Thread Starter
Forum
Replies
Last Post
S4_Obsessed
Test Forum
3
02-14-2004 09:46 PM
S4_Obsessed
Test Forum
2
05-30-2002 11:54 AM
S4_Obsessed
Test Forum
2
05-30-2002 11:54 AM
S4_Obsessed
Test Forum
2
05-30-2002 11:54 AM
S4_Obsessed
Test Forum
2
05-30-2002 11:54 AM