Audi A4 B7: How to Remove Front Bumper
Removing the bumper on your Audi A4 B7 is much easier than you may think; you don't need the dealership for this.
This article applies to the Audi A4 B7 (2004-2008).
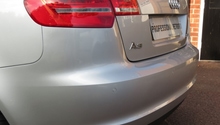
A broken bumper on the front of your Audi A4 B7 can ruin the whole look of it. The dealership will charge you literally a fortune to replace it for you, and that will hurt even more when you realize how simple it could've been to do it yourself. If you decide you want to remove your bumper, whether yours broke or you are looking at an aftermarket one, this guide will help you do just that. Just prepare yourself with a few basic tools, and let's get started.

Materials Needed
- Ratchet with extension (T30 and T25 bits)
- Socket
- Flat head screwdriver
Step 1 – Remove bottom bumper screws
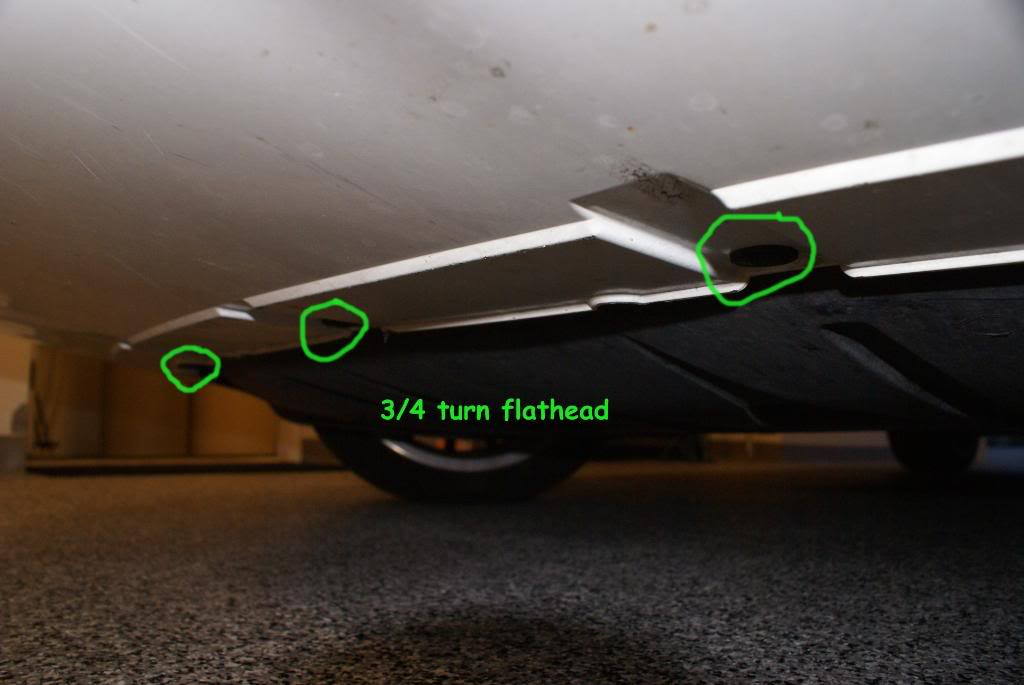
There are three screws on the bottom of your bumper. Go under the front of your car with your flat head screwdriver, then turn the three screws a quarter turn counter-clockwise, then they will come loose.
Step 2 – Move wheel well's liner away
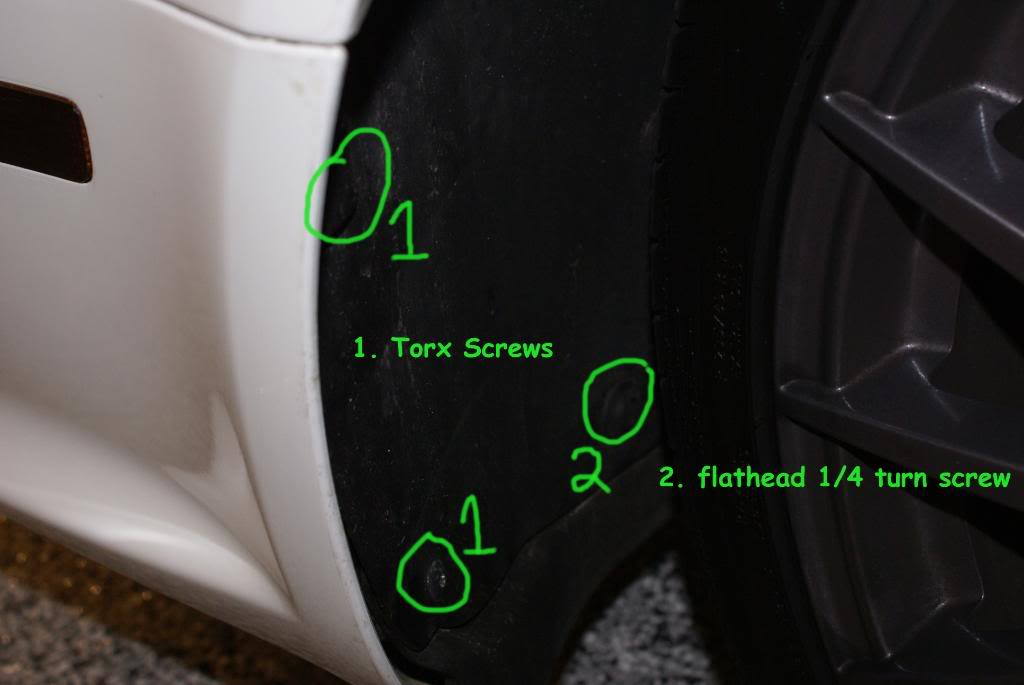
You don't need to remove the whole liner of the wheel well, you just need to remove the three screws facing the front of the car, then peel it out of the way to access the bumper screws. There are two Torx screws, and one flat head screw. Remove these screws on both sides of the car, then peel the liner away.
Step 3 – Remove two screws on each side
Once you move the liner out of the way, you will clearly see two screws, remove them from both the driver's side and the passenger's side of the bumper.

Step 4 – Remove two inner nuts one each side
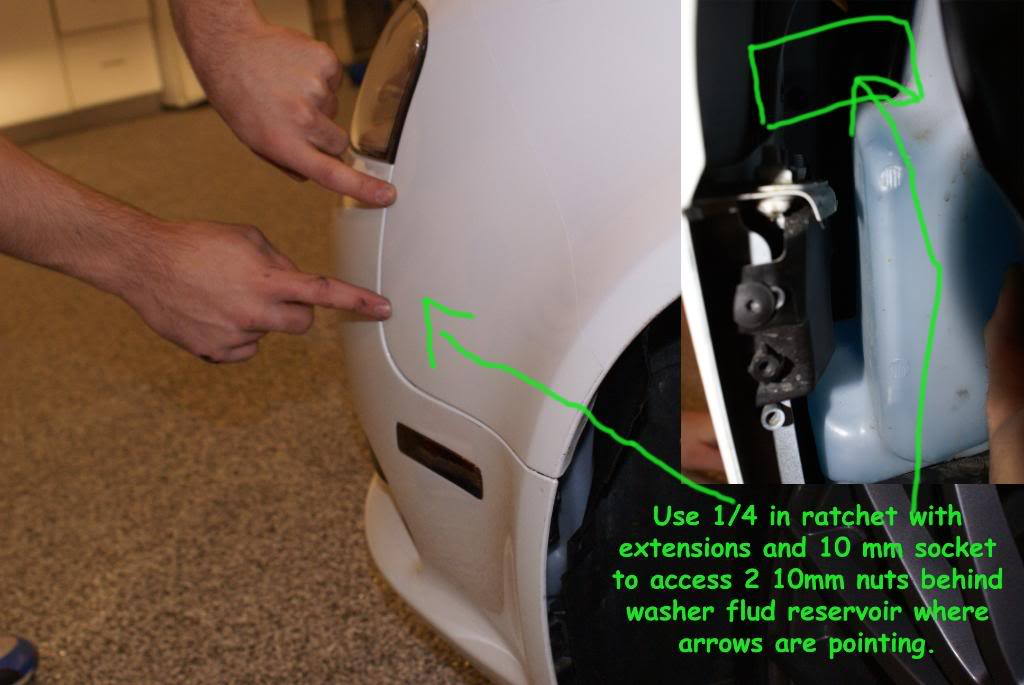
You will need an extension for the next two nuts. There are two 10mm nuts inside the fender. Remove these from both sides of the bumper.
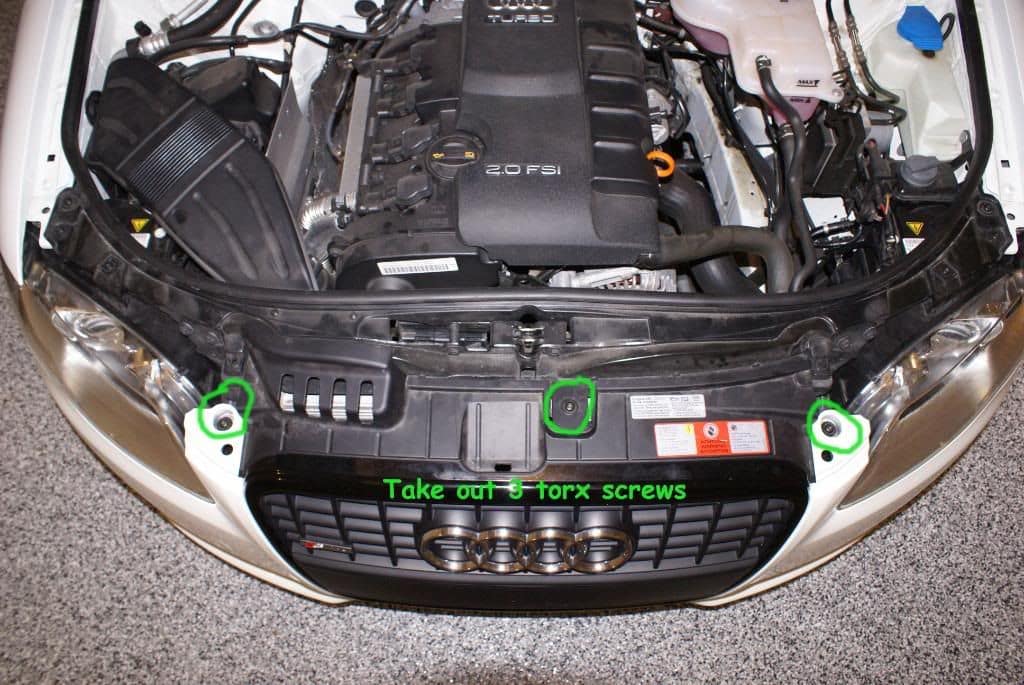
Step 5 – Remove three top screws
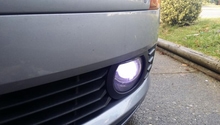
Finally, locate the three screws on the top of the bumper. You will need to have your hood open to access them. Remove them, then pull the bumper away from the car with the help of a friend. Make sure you unplug the two fog light connections before pulling the bumper too far away.
Step 6 – Install new bumper
Installation is the reverse of removal.
- Plug the two fog light connections.
- Align the bumper in place.
- Install three top screws.
- Install four inner nuts: two on each side.
- Install two screws on each side holding the bumper to the fender.
- Install three screws holding liner to fender on each side.
- Install three bottom screws.
Related Discussion
- Front Bumper Removal - AudiWorld.com