Audi A4 B7: How to Replace Low Pressure Fuel Pump (LPFP) on Non-Quattro
Replacing the low pressure fuel pump or in-tank fuel pump isn't necessarily a hard job, but it does take some work and some mechanical savvy. Read through and figure out if this is something you can do, or if it's best left for the professional.
This article applies to the Audi A4 B7 non-Quattro (2005-2008).
As with any fix for your Audi, the big reason to attempt this job yourself is due to the cost you pay at the shop. If the low pressure fuel pump is not working right, the engine won't run correctly. It could be losing power or you may see codes pop up intermittently. If the pump completely quits working, it will leave you stranded at the most inopportune time. Overall, this job is not too difficult to accomplish, but it is much easier if there is little or no fuel left in the tank when you start.
These instructions are for the non-Quattro A4 B7, so while very similar, there are other instructions for the Quattro.
(Related Article: How to Replace Low Pressure Fuel Pump (LPFP) on Quattro - AudiWorld)

Materials Needed
- Phillips head screwdriver
- Nitrile gloves
- Eye protection
- Special fuel line pliers
- Small bucket
- Fuel tank wrench (VW/Audi PN: T10202 or KTC Auto Tools PN: AG2113)
Before you go to change the fuel pump, ensure the fuel tank is well below a 1/4 tank. It's good to have as little fuel as possible to prevent spillage while removing the pump. Also, to prevent any sparks or ignition sources, disconnect the battery. It is highly suggested you change out the fuel filter whenever the pump is changed.
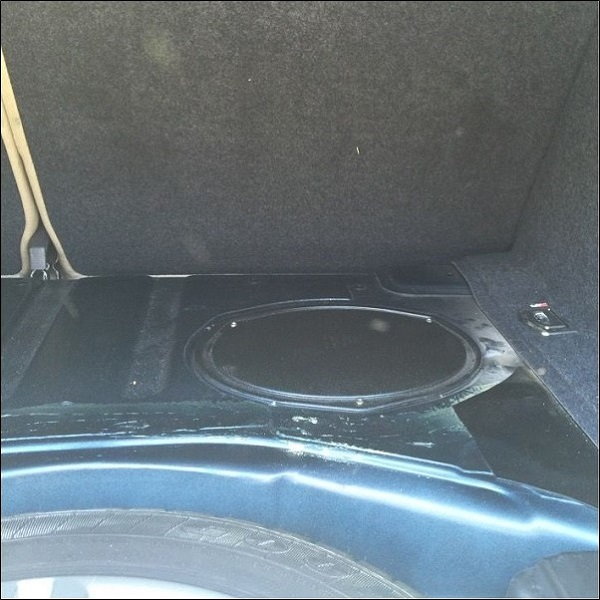
Step 1 – Remove spare tire cover
Open the trunk and pull back the carpet to expose the floor underneath. On the passenger side of the vehicle you'll find a cover (Figure 1), which is attached to the body via three Phillips head screws. Remove the three screws to allow cover to be removed.
Step 2 – Disconnect the pump
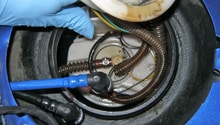
Directly under the plate is the pump mounted into the fuel tank. Before you remove the pump, ensure the entire area is clean and free of debris, dirt, and dust, otherwise this stuff will end up in your fuel tank, which will spell disaster for your new pump (Figure 2). Use whatever means is at your disposal to clean it up; this includes carb cleaner, compressed air, and/or a shop vac.
Before disconnecting the fuel lines at the pump, disconnect the fuel line at the fuel filter (Figure 3) and relieve the pressure. Drain the excess fuel into a bucket and not onto the ground, which will eat away at your pavement and is flammable, not to mention poisonous. The fuel filter is located in the forward part of the rear wheel well on the passenger side of the vehicle.
Disconnect the electrical plug from the pump. Use the special pliers to disconnect the fuel lines. To do this, press straight down on the fuel line, then use the pliers to press in on the connectors (red arrows Figure 4). Then pull the line up and free. Both lines will have the same type of connection. If you do not have pliers, have a helper press down on the connection while you use two flat tip screwdrivers to press in on the connections at the same time.
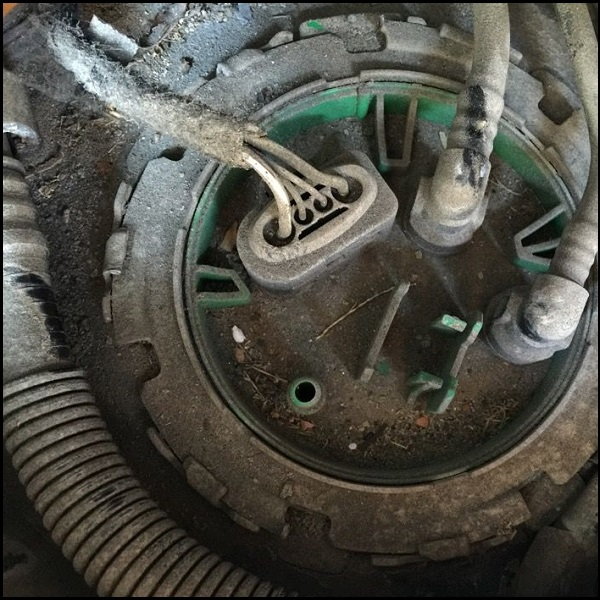
Figure 2. Dirty pump top. 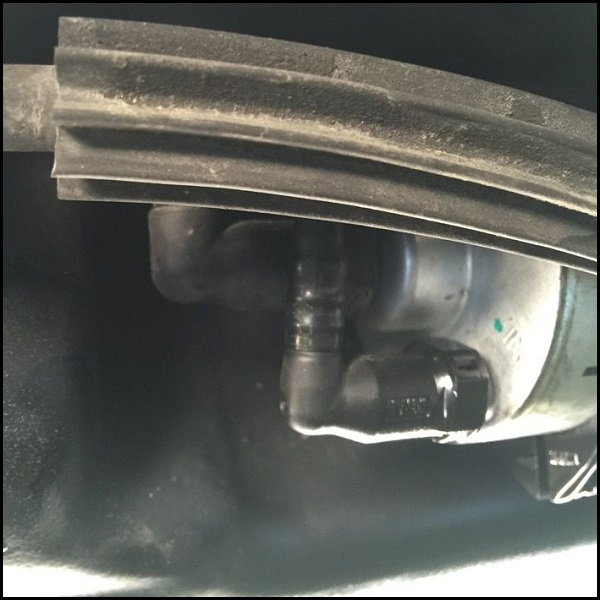
Figure 3. Fuel filter connection. 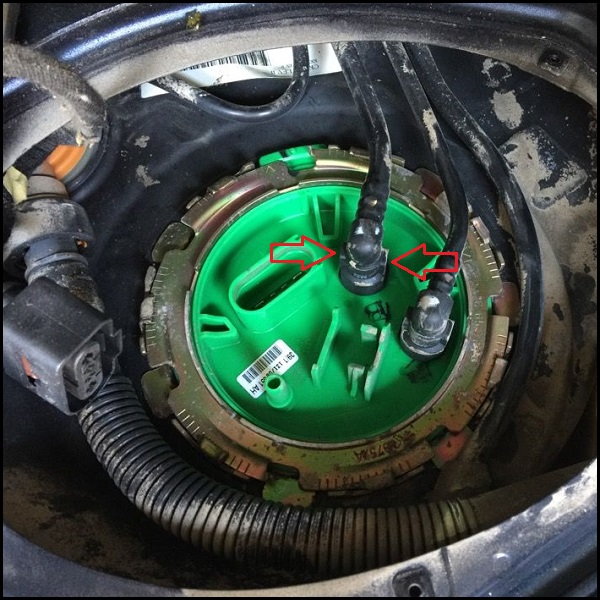
Figure 4. Connection removal.
Pro Tip
Be careful with the fuel lines and connections. If you break one, replacement is a much longer, more involved job than just changing the fuel pump.
Step 3 – Remove pump
Using the pump removal tool (which is like a giant socket that fits the outer edge of the pump), place it upon the ring containing the pump (Figure 5). Turn it counterclockwise to release the ring. If you do not have the tool, you can use a flat tip screwdriver and a hammer to release the ring. Use the notches one at a time and work your way around the ring, only moving it a little bit at a time at each notch. You only have to turn in a small amount to free it.
Once the retaining ring is removed, pull the top (green) portion of the pump free from the fuel tank. This is the cover or cap for the fuel pump hole, but also contains the hoses and wiring for the pump. You'll need to release the white fuel line connector (Figure 6). Press on the two side tabs to release. Once the white connector is removed, you should be able to carefully lift the pump free of the tank. There is also a hard line that is attached directly from the top down to the pump inside the tank.
Make sure to note how the top part of the pump is clocked (which connection is at which position). This will help tremendously when you install the new pump. Ensure you have your bucket close by, as there is a basket around the pump which will still have fuel in it as you pull it out. The orange rubber seal should come out as part of the unit, as it will be replaced with the new one which came with the new pump. Remove the white connector and the long black plastic line attached to it.
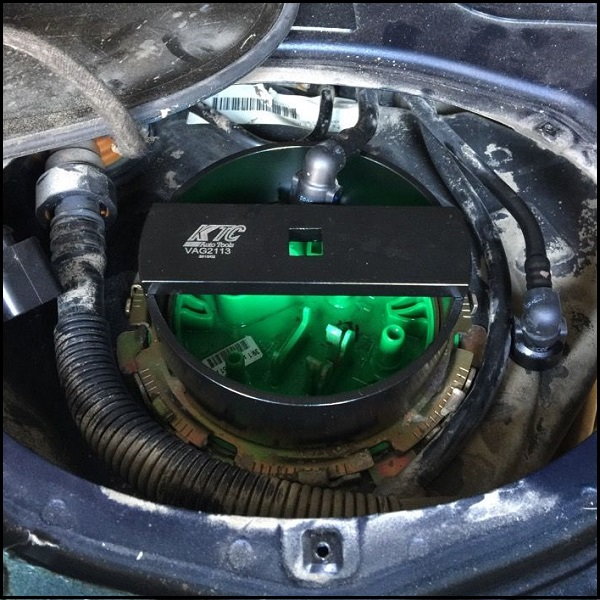
Figure 5. Fuel pump removal tool. 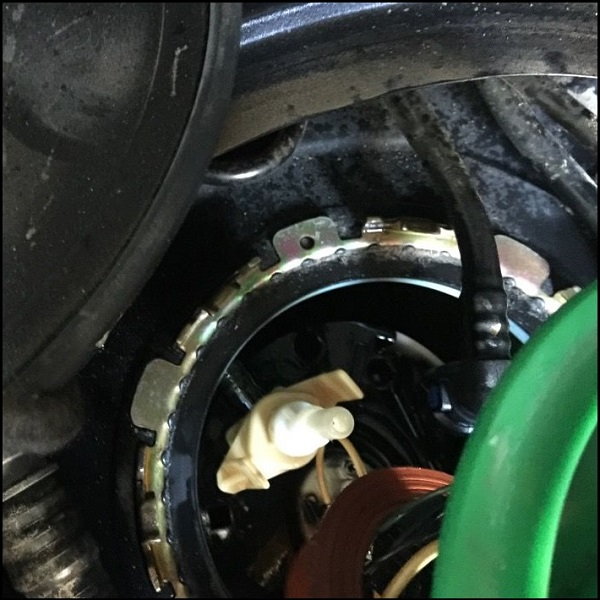
Figure 6. Disconnect the white connector.
Step 4 – Install new pump
Place the old pump next to your new pump. This will allow you to see if there are any differences between the two, especially with how everything fits together. Make sure the clocking of the top and the pump itself is the same, so as to ensure everything goes back together easily (Figure 7).
Before installing the new pump, be sure the sealing area is completely clean. Insert the hard black plastic line with the white clip into the tank, then insert the new fuel pump. Ensure the fuel level float swings free and is not in contact with anything. Place the pump all the way into position and then re-attach the white connector with the hard black plastic line. Install the new tank seal, which may not be orange, but should be the same shape as the old one. Place it over the top of the new pump with the ridges facing up (Figure 8).
Set the pump fully into the tank and on to the tank seal. Place the metal pump retaining ring back on top and twist it into position. Reconnect the fuel lines back to their proper places. Re-attach the electrical connector.
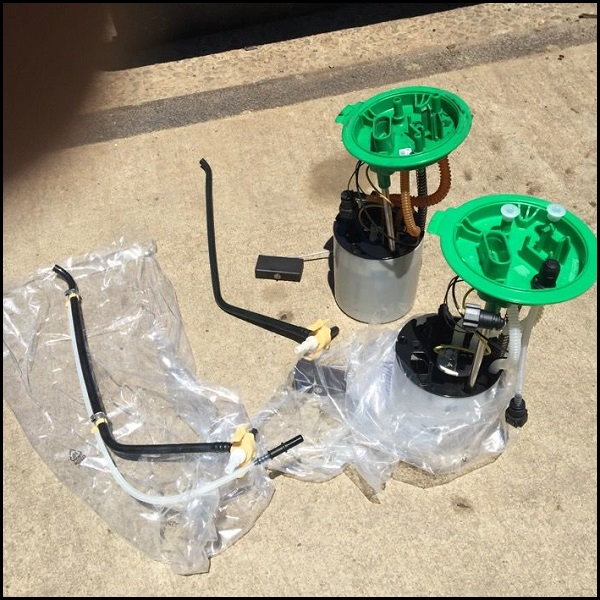
Figure 7. Pump comparison. 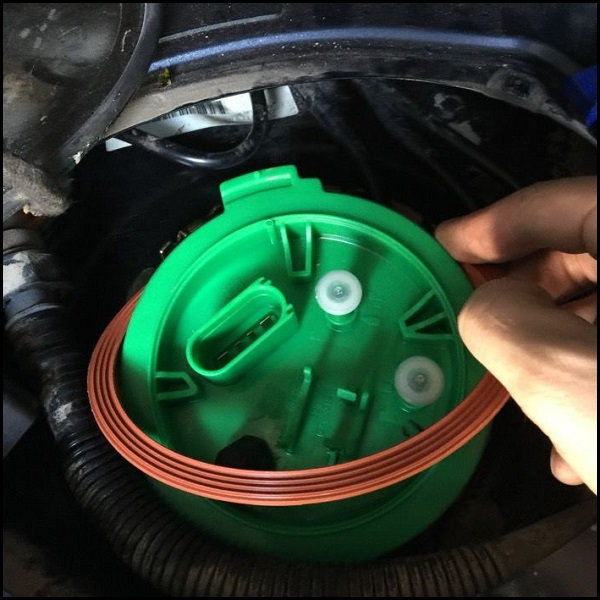
Figure 8. Pump tank seal.
Step 5 – Start the car
Reconnect the battery. Turn the ignition on to ensure the fuel level sensor is functioning properly. Listen for the sound of the new fuel pump kicking in. Bump the starter quickly, so as not to actually start the motor. Every time you bump the starter, the pump should run for a few seconds. This process should completely prime the fuel system. After bumping the starter four or five times, attempt to start the car. Give it several tires if needed, as the fuel system may still have some air in it. When the engine starts, and a test drive doesn't reveal the old problems again, reattach the body cover over the fuel pump and replace the carpet.
Related Discussions
- B7 Non-Quattro Tank Fuel Pump Replacement - AudiWorld
- 2005 A4 Won't Rev over 3000 RPM - AudiWorld
- Found Fuel Pump Location - AudiWorld
- Erratic Fuel Level Sensor - AudiWorld