Audi A4 B7: How to Replace Timing Belt and Water Pump
Replacing the timing belt is a necessary evil. It's not an easy job, but not the hardest you could do either. Having a shop replace the timing belt for you is going to cost you some decent coins. If you want to save some money, this is one job which can do that for you. If you don't do this job right, it could end up costing you plenty, namely getting the top end of your engine rebuilt. If you decide to take on this task, make sure you understand the entire process, follow the directions, and get it right the first time.
This article applies to the Audi A4 B7 2.0T (2005-2008).
While the timing belt may not be the hardest job on a vehicle, it is definitely one you don't want to mess up. The main reason why you may want to tackle this job, though, is due to the cost of a shop doing it. You can expect labor on this to run you some serious money, especially if you take it to the dealership to have it done. The reason why you want to get the timing belt changed on time is due to engine design and a condition called interference. If the belt should slip or break due to being worn out, great havoc can be reaped upon the upper engine components. Interference means the pistons and valves share the same space, but due to timing events kept in time by the timing belt, they do not occupy the same space at the same time. The main reason you change the water pump is because it usually comes in the kit, and since you have the timing belt off already, it's easy to get to.
If you do not feel adequate to do this job, take it to a shop. It's better to pay the shop a few hundred dollars to get it done right the first time, than it is to pay the shop a few thousand dollars because you messed it up and caused permanent engine damage. Again, this is nowhere near an impossible task. You just want to ensure you've done it right. Follow these directions very closely, understanding what needs to be done, get the timing right, and you should be just fine.

Materials Needed
- Complete basic tool set
- Torx socket assortment
- Allen head sockets
- Two pry bars (or long flat tip screwdrivers)
- Red Loctite
- Carburetor cleaner
- Shop rags
- Nitrile gloves
- Drain Pan
- Jack, jack stands, and wheel chocks
It is highly recommended to get the OEM water pump with the plastic impeller, as the aftermarket ones with the metal impeller will tend to leak in the first few thousand miles. Also, all directions (left/right) are from the point of view from the driver's seat. In the US, that would be left side driver, right side passenger. Please realize this as you read through, or you may become very confused.
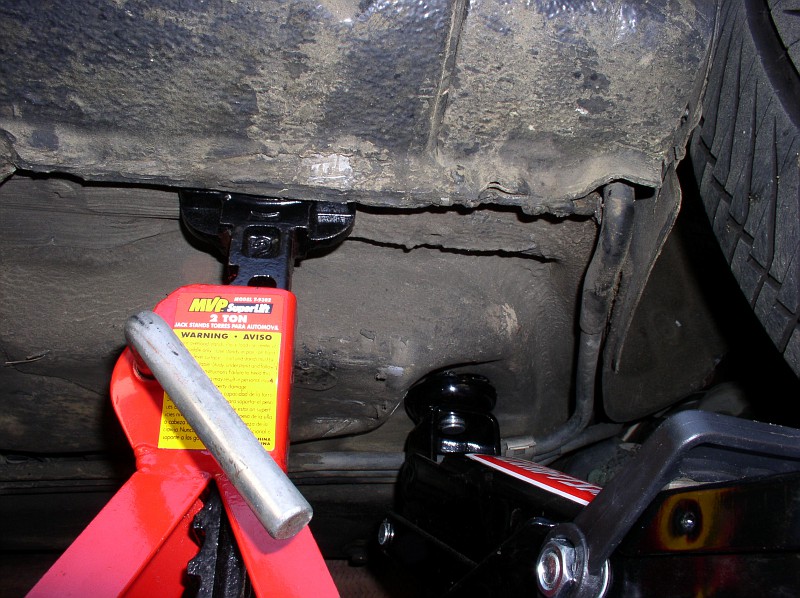
Step 1 – Jack up and support front end of car
Break loose the lug nuts on both front wheels. Place wheel chocks at the front and rear of one back tire. Ensure the parking brake is firmly engaged. Jack up the front of the car and put it on jack stands. Use the jack stands on the lowest level, high enough to get the front wheels off the ground, but not so high you cannot access the front of the car. After jack stands are placed and the front end is secure, remove the front front tires. NOTE: It is not necessary to remove the front wheels, but it makes it easier to complete Step 2.
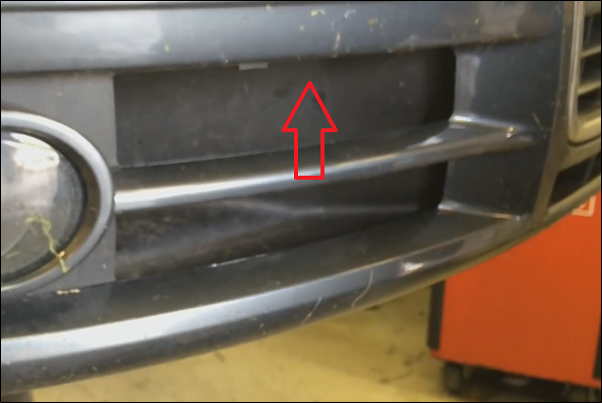
Step 2 – Remove the front bumper
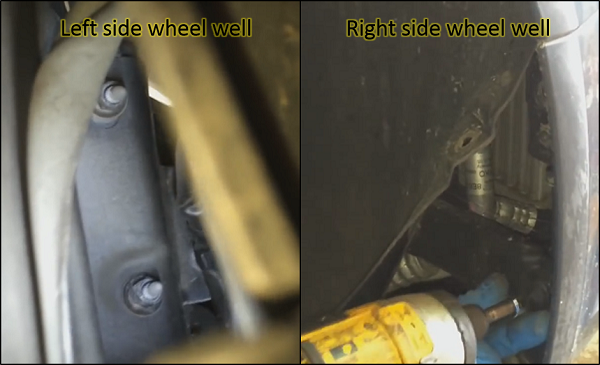
At the front of the wheel arch, remove the two screws attaching the back of the bumper and the wheel wells. Once removed, carefully pull the wheel well back to expose two more screws (Figure 2, right side). Once those are removed, carefully pull apart the wheel well and bumper side to expose two nuts, which holds the bumper on (Figure 2, left side). Remove the two nuts and washers behind them. Using a long extension and swivel can help here tremendously. Perform this on both sides of the car.
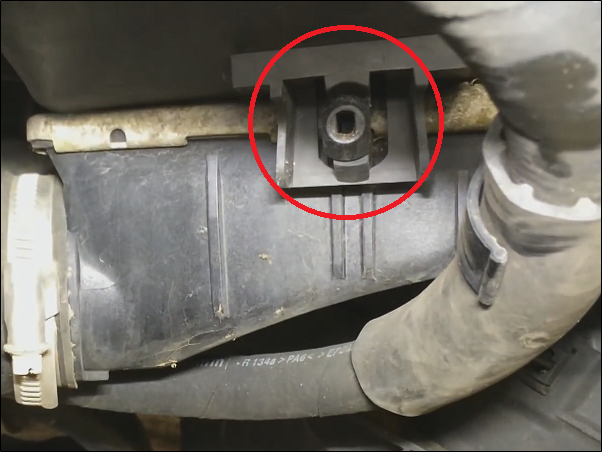
Once the nuts are removed, remove the belly pan from the vehicle. Find the two triple-square headed bolts under the front lip of the bumper (Figure 3). There is one bolt on each side of the bumper. Loosen them, but don't remove them.
From the top of the car, remove three T30 screws, one on each side and one in the middle (Figure 4). Once these bolts are out, the bumper is ready to come off. There are electrical connections you'll need to remove as it comes off, so be careful.
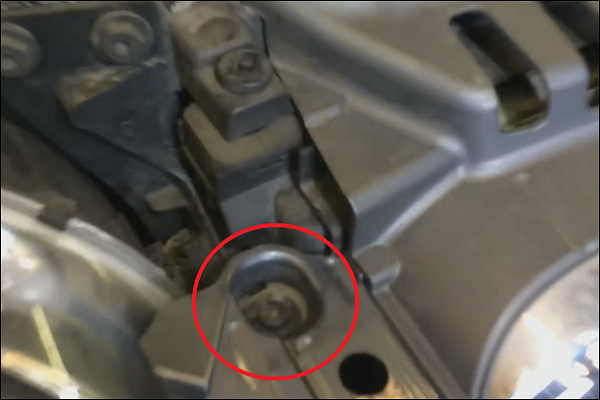
Figure 4. A4 front bumper T30 torx right side location. 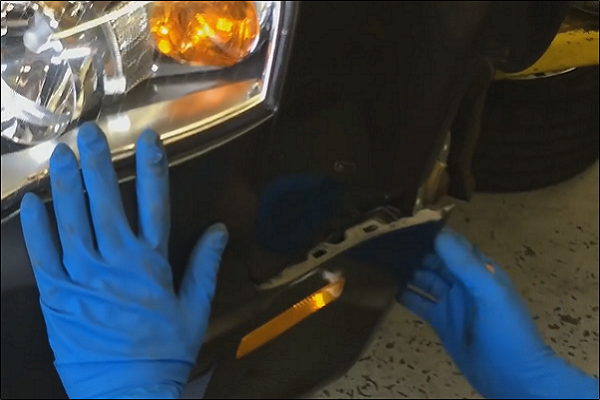
Figure 5. Front bumper separation.
You'll also need to pull the sides out gently, as they are attached to the fenders via a snap in interface (Figure 5). All of the electrical connections you'll need to remove will be located on the left side of the vehicle. You should be able to pull the bumper off. Having someone help you while removing the bumper will help ensure it doesn't get damaged. Set it aside out of the way so it will not become damaged while working on the car.
Step 3 – Disconnect the core support
Remove the right side intercooler shroud by sliding the top slightly to the left and down. Clean out any debris found in the ducting.
Remove the left intercooler shroud by disconnecting the bottom connector as seen in Figure 7.
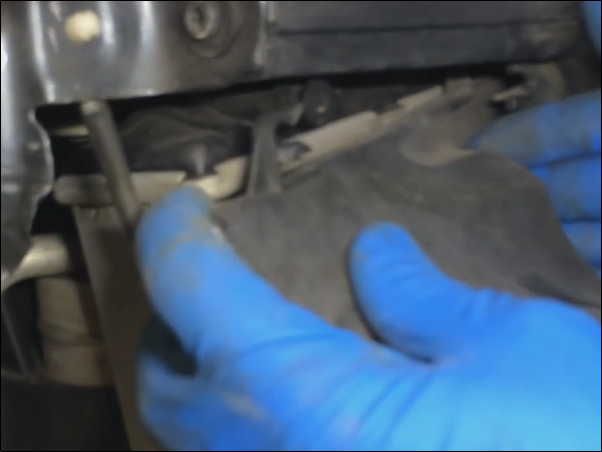
Take the two screws out, which connect the intake air duct to the core support. Remove the air duct. Remove the engine cover to get it out of the way. Remove the two T30 Torx bolts from each side of the core support (Figure 8).
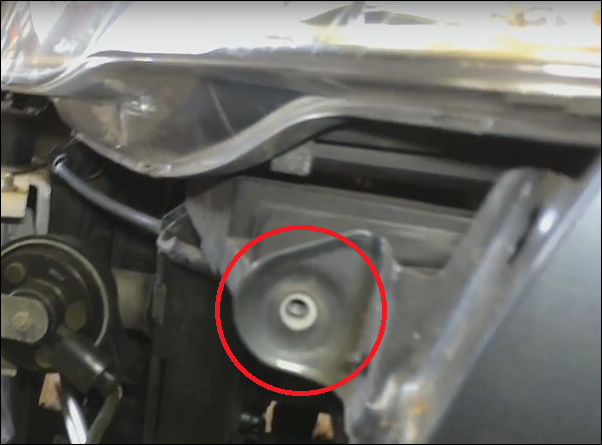
Remove the two T30 bolts that attaches each fender to the core support (Figure 9).
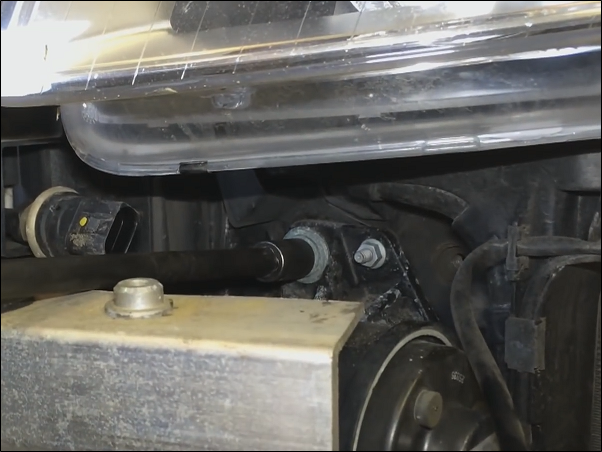
Disconnect the high pressure switch for the A/C, which is located on the left side of the A/C condenser above the bumper support. Remove three 13mm bolts, which are located to either side of the radiator, one above and two below the bumper support on each side (Figure 10). Pull the weather stripping off and set it aside. You can now lean the core support forward so you can gain access to the front of the engine.
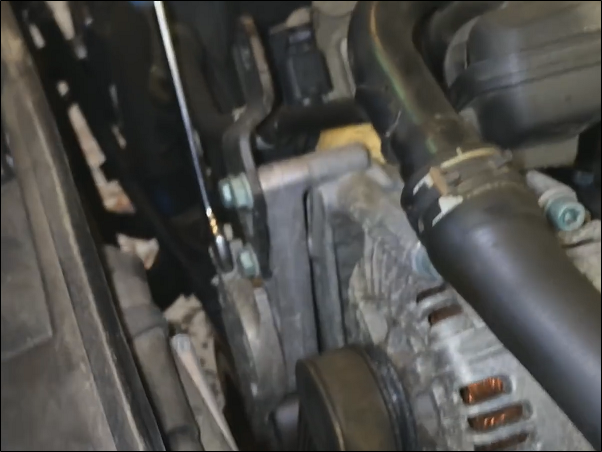
Step 4 – Remove the belt tensioner
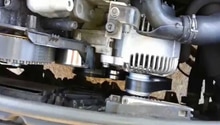
With a 17mm wrench, turn the tensioner pulley clockwise until you can slip the serpentine belt from the pulleys (Figure 11). Remove the three bolts in the tensioner to remove it.
Step 5 – Drain the radiator fluid
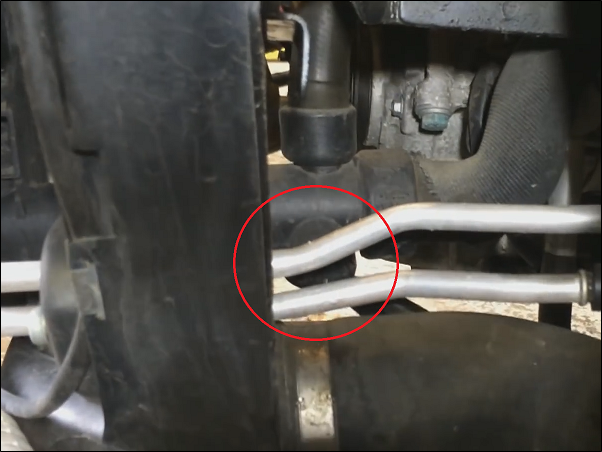
Disconnect the hose clamp to the crossover hose (Figure 12).
Warning
Be careful with this hose and pipe. It is easily damaged and will cost you $100 or more to replace.
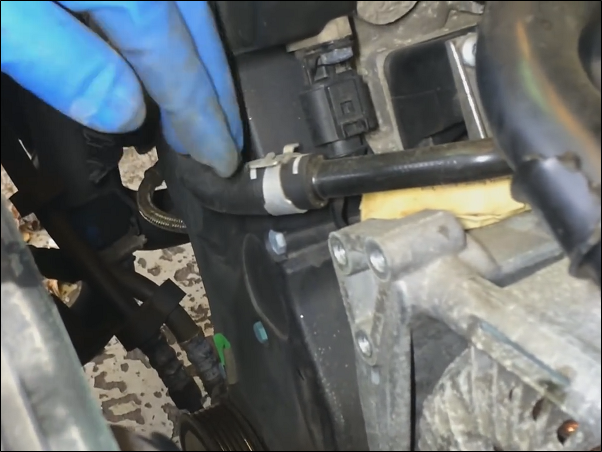
Loosen the connection of the crossover hose to the pipe. Be careful with this if it has never been removed before, as the hose is very fragile and can easily be damaged. Replacement will set you back at least $100. You don't have to take it off yet, as you'll want to drain the radiator first. Remove the expansion reservoir cap, or the coolant system will not drain. Be careful if the coolant system is hot/warm, as there may be residual pressure. Removing the cap when it's hot can cause hot coolant to spray on you, causing burns. Place your drain pan under the vehicle at the left side of the radiator. At the bottom left of the radiator, find the radiator drain valve and open it to drain the coolant (Figure 13). Finish disconnecting the crossover hose from the pipe.
Step 6 – Remove the timing belt and pump
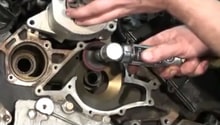
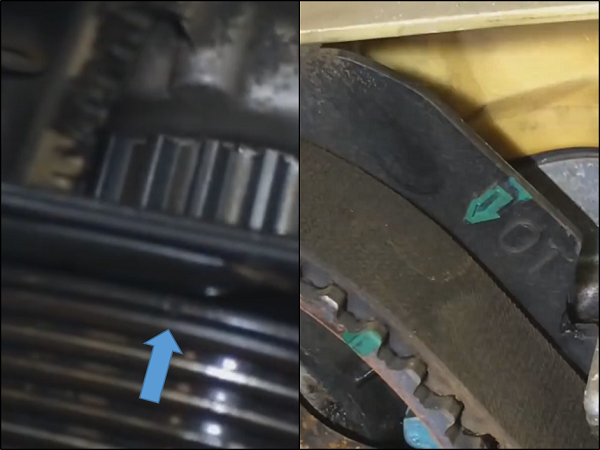
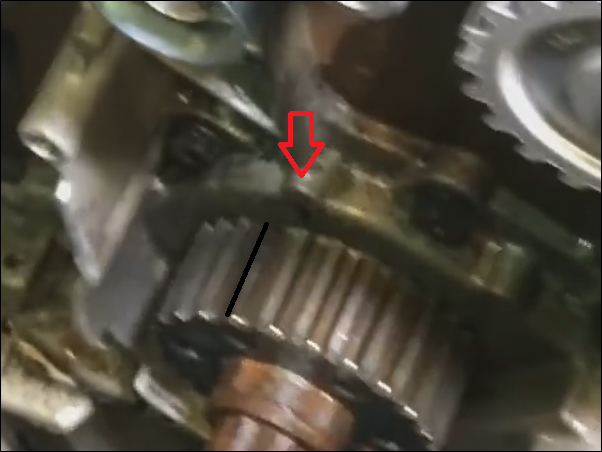
Remove the two Torx head bolts at the top and four 10mm bolts in the body of the timing belt cover. Remove the timing belt cover. Using carb cleaner, spray down the cam sprocket and crank pulley so you can see the timing marks clearly. Bring the engine up to top dead center (TDC) by placing a 19mm 12-point socket onto the bolt at the front of the crankshaft. Turn the engine clockwise until the indent on the crankshaft pulley aligns with the mark on the cover (left side of Figure 14). At the same time, the mark on the cam sprocket should align with the arrow on the cover (right side of Figure 14). If the two do not line up at the same time, your engine needs to be turned over another 360°.
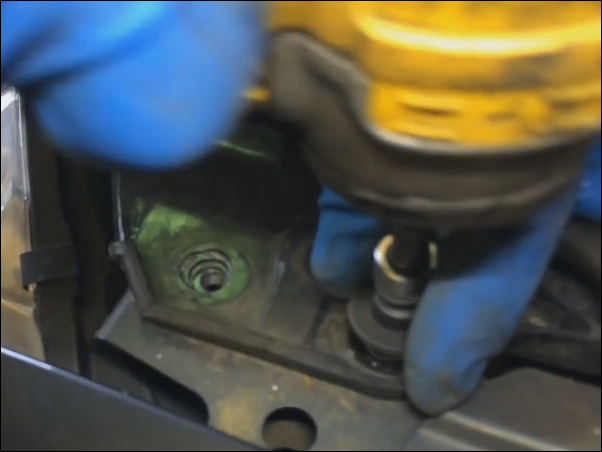
Break loose the six 6mm hex head bolts from the crankshaft pulley, but don't remove. These bolts like to strip out from the socket, so ensure the Allen head socket is in good shape, then is completely engaged into the bolt head before loosening them. These bolts may be tight enough you'll need to hold the 19mm crankshaft bolt to get them broke loose. Once all six bolts are broke loose, double check the engine is at TDC. If you have to turn it back, take it counterclockwise past TDC and the back clockwise to align the marks again. Remove the loosened bolts. Then take your two pry bars (or long flat tip screwdrivers), placing one on each side of the pulley, between the pulley and any of the available mounting areas. Don't pry against the timing gear cover. Gently wiggle each back and forth the remove the pulley. You are just trying to walk the pulley off of the crankshaft. Do not damage or bend anything during this process. Ensure your engine stays at TDC during this procedure. Remove the 10mm bolts and remove the timing gear cover. Totally clean the entire area with carb cleaner. This includes dirt, grease, grime, dust and debris. Dry it dry with a blow gun if you have compressed air available. Reference the crankshaft gear to the front cover using a permanent marker (Figure 15). The reasoning for this will become self evident in the near future.
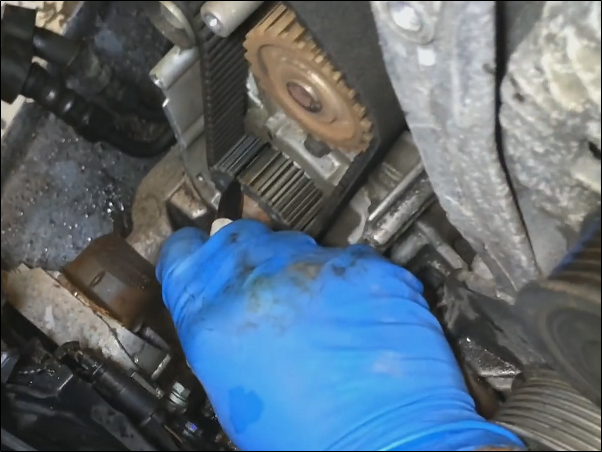
Remove the two rollers. The top one will have a 13mm bolt and the bottom a 12mm. Remove the 13mm nut on the tensioner pulley. Do not lose the washer. Slide the belt off of the water pump, then take the belt off of the rest of the components. Remove the tensioner. Remove the three 10mm bolts from the water pump. These bolts have a weird thread to them, so do not lose them. Remove the water pump. Clean up the water pump hole with a shop rag. If there is any excessive rust around the hole, clean this out before trying to install the water pump, as this may damage the pump's O-ring on installation.
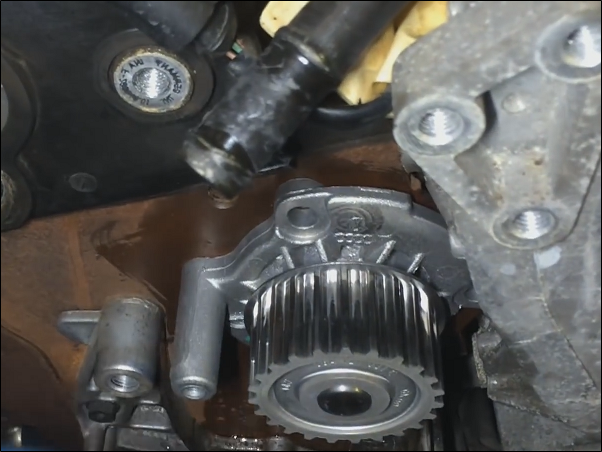
Step 7 – Install the water pump
Using some grease, lube the O-ring of the water pump. This will make water pump insertion much easier and will help it seal. Twist the water pump as you insert it into the hole. Do not put in the bolts until it is sitting flush to the block all the way around. If the pump is not completely flush with the block, you'll damage the O-ring. Once it is completely flush, install the three 10mm bolts into the water pump, securing it to the block.
Step 8 – Install timing belt
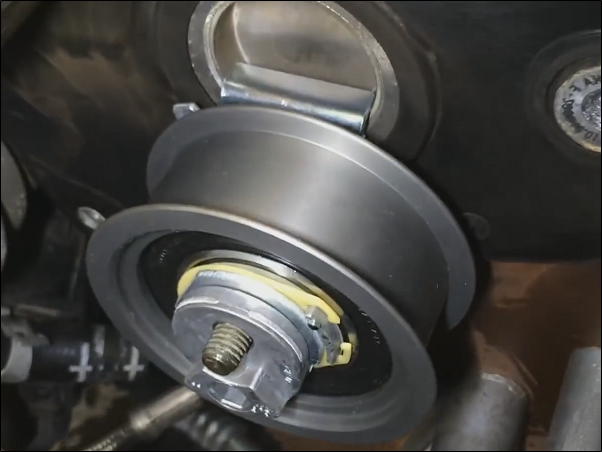
Install the tensioner pulley onto its stud. The tab on the back of the pulley will fit into the freeze plug with it rotated to the top (Figure 17). Install the washer and nut onto the stud, but only finger-tight.
Using the red Loctite sparingly, install the two timing belt rollers (13mm top/12mm bottom) and tighten the bolts. Before installing the belt, roll the engine back exactly one tooth at the crankshaft sprocket (Figure 18).
Install the belt onto the pulleys, starting at the crankshaft gear, then over the bottom roller, then to the tensioner pulley (which should be loose), then around the camshaft gear, under the top roller, and finally onto the water pump pulley. The idea is to have tension over the loose tensioner pulley and a little bit of slack on top by the water pump (if you do not understand this, watch the video). Using a hex head socket and ratchet, turn the tensioner over until the small notch and the tooth on the tensioner align (Figure 19). When you turned the tensioner pulley, the crankshaft should have turned back the single tooth you moved it before belt installation. Double check that it and the camshaft gear are both aligned correctly. If not, start the belt install process over. When everything is aligned and you're happy, tighten the tensioner nut to 17 lb-ft.

From the crankshaft pulley, turn the engine over 720° (two full rotations), lining the timing marks back up as you complete this. If the timing marks do not line up, you'll need to take the belt back off and start over again with the belt install process. Reinstall the timing gear cover. Reinstall the crankshaft pulley. Use Loctite on the six Allen head bolts to ensure they do not walk out over time. Double check both timing marks to ensure the engine is still in time.
Step 9 – Re-installation
Reinstall all parts in the reverse order you took them off. Reassembly should be very straightforward from this point.
- Refit the coolant hoses.
- Reassemble the serpentine belt setup.
- Reconnect the A/C sensor.
- Reassemble the radiator core support.
- Reassemble the bumper assembly.
- Refill the radiator coolant and bleed the cooling system of any air.
Check to ensure there are no leaks after filling the coolant system, then again after you start the car.
Featured Video: Audi A4 Timing Belt Replacement
Related Discussions
- Motor Locked Up Cold After Cold Start - AudiWorld.com
- A4 B7 Timing Belt Change - AudiWorld.com
- Horrible Idle After Timing Belt Valve Cover Gasket Changes - AudiWorld.com
- TFSi Power Loss - AudiWorld.com
- Engine Died While Driving - AudiWorld.com
- 2.0t Timing Belt Years vs Miles - AudiWorld.com