Audi A6 C5: How to Install Tiptronic Paddle Shift Steering Wheel
Do you want the fun that comes with paddle shifters without having to buy a new car? This article will walk you through the process of installing a Tiptronic paddle shift steering wheel on your A6.
This article applies to the Audi A6 C5 (1998-2005).
Paddle shifters are an ingenious idea that allow you to change gears up and down without taking your hands off the steering wheel. This comes in handy, obviously, when you are taking corners at speed. But while many Audi models have come equipped with paddle shifters over the years (like the RS6), many owners of basic A6 models don't have this luxury. Installing a Tiptronic paddle shift steering wheel, like the one in the RS6, is possible on non-equipped models, but it is a time consuming, expensive, and difficult task. If you aren't scared of such terrifying words, keep reading and we'll walk you through the process.

Materials Needed
- VAG-COM cable
- Radio removal keys
- 8mm, 10mm, and 13mm sockets and ratchet
- T-30 Torx key and driver
- T-25 Torx driver
- M-12 triple square bit
- Phillips and flat head screwdriver
- Wire cutters
- Plastic putty knife
- Steering wheel (part #8D0 419 091
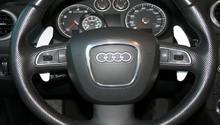
Step 1 – Remove airbag and steering wheel
Login to VAG-COM and record the codes for ESP if your car is so equipped. Write down your radio security codes, as you will be disconnecting the battery. Park the car so that the front wheels are straight and the steering wheel is centered, then disconnect the battery using a 10mm socket. Remove the two T-30 Torx screws from the back side of the steering wheel to remove the airbag. Disconnect the wiring harness for the airbag using a small flat head screwdriver and flipping up the yellow clip. Also, remove the black connector for the multi-function steering wheel if your car is so equipped. Remove the bolt holding the steering wheel in place using the M12 tool. Remove the wiring connector from the steering wheel and pull the wheel off.
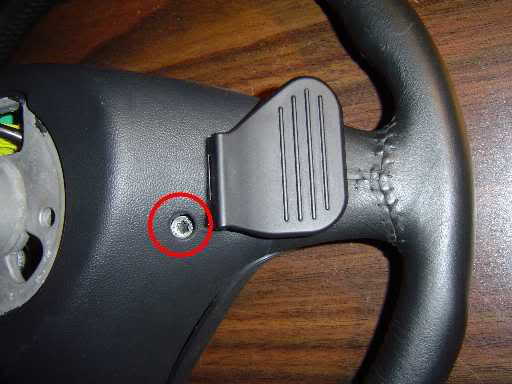
Figure 1. Remove the Torx screws from the back of the steering wheel. 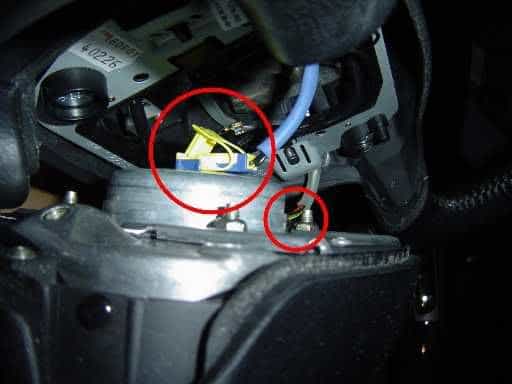
Figure 2. Remove the wiring harness connectors from the airbag. 
Figure 3. Remove the steering wheel bolt. 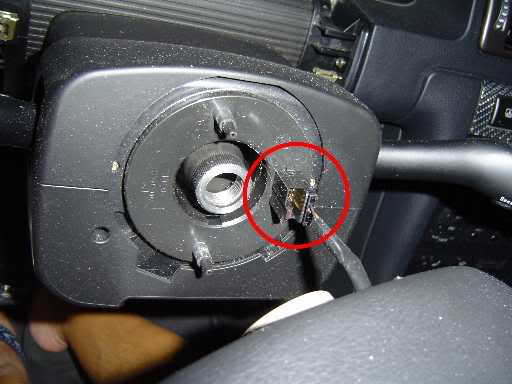
Figure 4. Remove the steering wheel wiring harness.
Step 2 – Remove self cancelling ring and interior trim
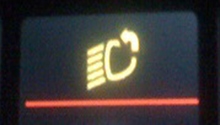
Remove the plastic steering column shell by removing the two Phillips screws in the front and two on the underside. Then remove the T-25 Torx bolt on the bottom. Lift the upper half of the column trim closest to you and pull outward, then remove the lower piece. Remove the self cancelling ring by releasing the four tabs that hold it in place and disconnecting the harnesses. Remove the lower dash panel by removing the five 8mm bolts holding it in place, then disconnect the the ODBC connector (purple) and footwell light. Unclip the trim panel from the two catches near the pedals and remove it.
Set the emergency brake and place the shifter in 4th gear. Lift up on the shifter trim from the rear to release it and remove the trim. Pull outward on the shifter button with one hand while pulling the gear knob upward with the other hand. Remove the aluminum shifter bezel by releasing the four tabs, then use a plastic putty knife to pry the black tabs and release the bezel. Remove the circuit board underneath and disconnect the wire connector.
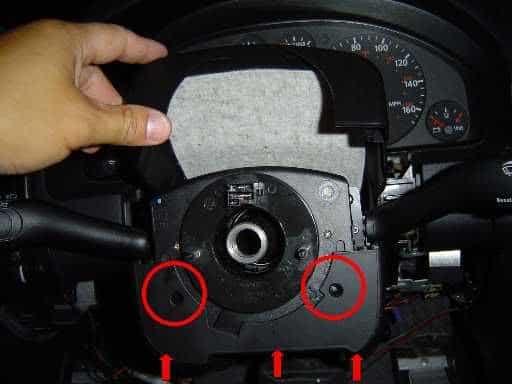
Figure 5. Remove the screws holding the steering column trim in place. 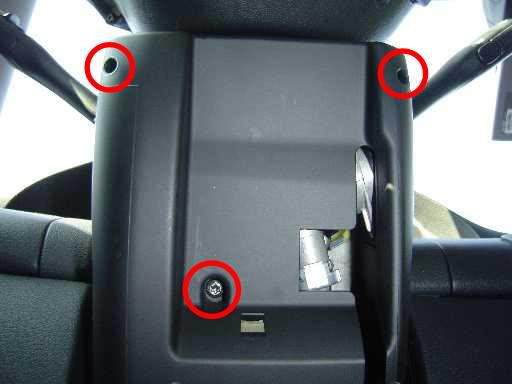
Figure 6. Remove the screws on the bottom of the steering wheel column. 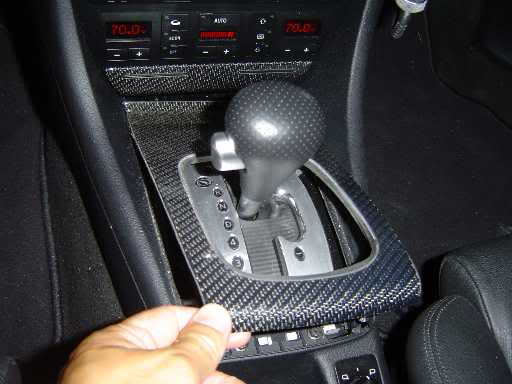
Figure 7. Remove the shifter bezel trim. 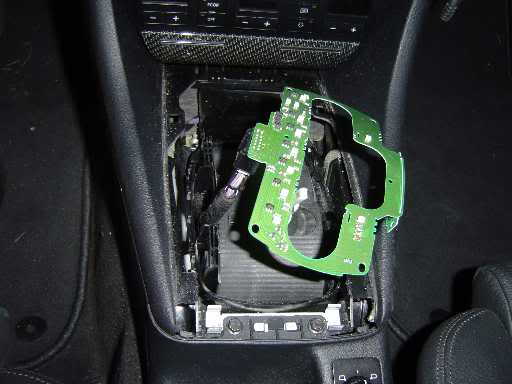
Figure 8. Remove and disconnect the circuit board.
Step 3 – Remove the radio and climate control
Use the radio keys to remove the radio, then unplug the harnesses from the back. Remove the two bolts in the top of the climate control and pull the unit out, then disconnect the harnesses from the back. Push down on the two tabs on top of the ash tray to release it, then pull it out and disconnect the harness.
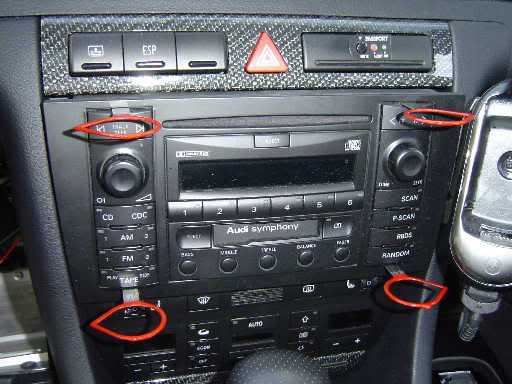
Figure 9. Remove the radio using radio keys. 
Figure 10. Remove the climate control. 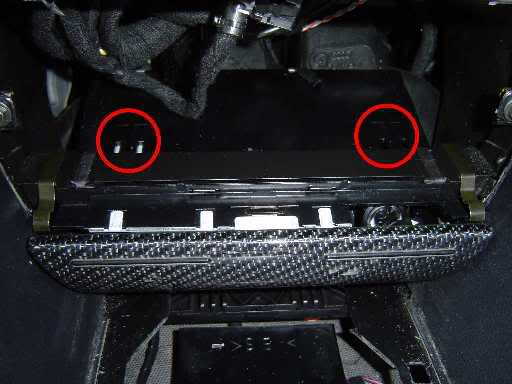
Figure 11. Remove the ash tray.
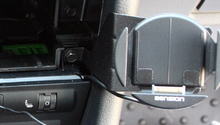
Step 4 – Run wires for Tiptronic selector
Feed the wires for the Tiptronic selector up through the steering column and down to the shifter area. Strip the wire ends and feed them into the connector, making note of which wire is in which numbered position. Secure the connector to the other connectors using a zip tie. Pull the wiring for the selector out as far as possible and peel back the cloth tape to reveal the plastic tube. Pull out the purple/red, purple/blue, and the purple/yellow wires.
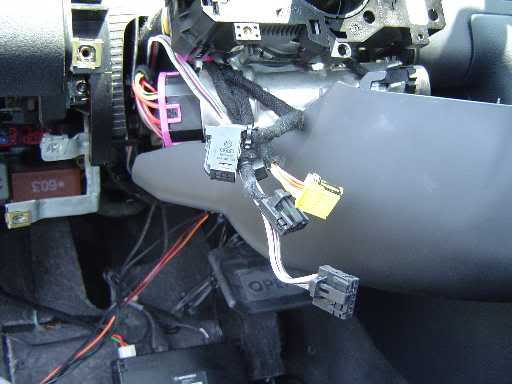
Figure 12. Install the wiring and secure it using a zip tie. 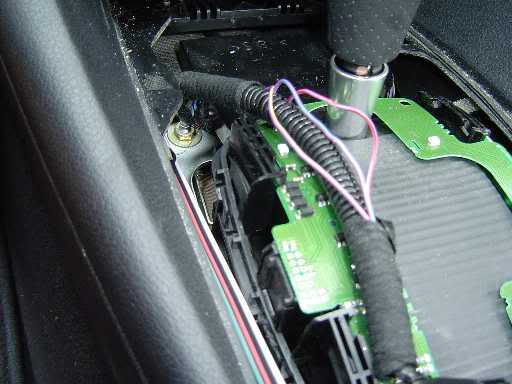
Figure 13. Connect the Tiptronic wiring. 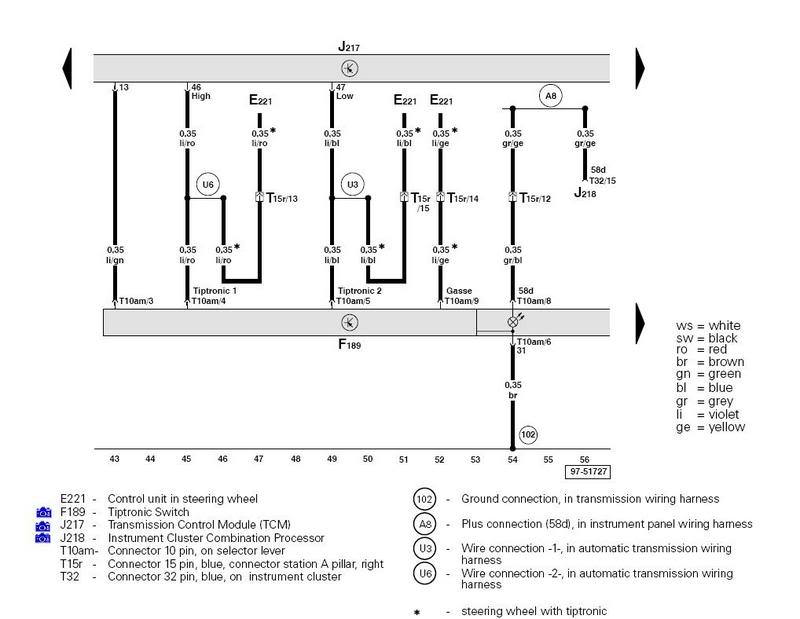
Figure 14. Wiring diagram.
Step 5 – Install the new steering wheel
Plug the wire connectors into the self canceling ring and reinstall it on the steering column. Reinstall the steering column trim (lower first, then upper). Install the new steering wheel and reinstall the bolt. Install the new airbag and reinstall the two Torx bolts. Reinstall the dash panel, shifter trim, ashtray, climate control, and radio. Reconnect the battery and wait three minutes, then start the car. Check to see if you have any VAG-COM codes and you're all set!
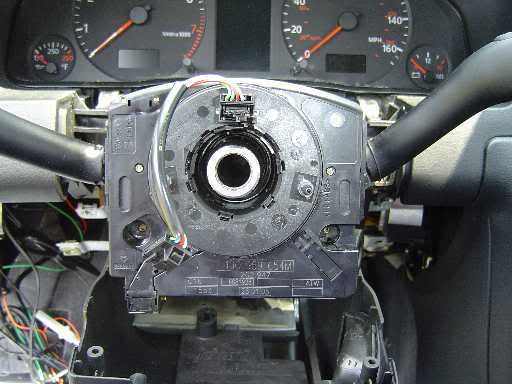
Figure 15. Install the self cancelling ring. 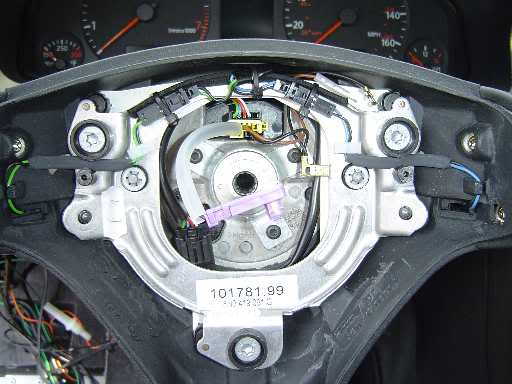
Figure 16. Install the new airbag and steering wheel.