Audi A6 C6: How to Replace Brake Line
Stock rubber brakes lines are cheap, last for years, and are fairly durable, but many people like to upgrade them to something with higher performance, like braided stainless steel. If it's time for new brake lines, read on and we'll help you do it.
This article applies to the Audi A6 (2005-2016).
There are several different reasons for changing out the brake lines on any vehicle. The main reason is typically safety if there are bulges or cracks in one of the original rubber lines. Rubber lines, even when they are brand new, have some give in them which means not all of your force on the brake pedal actually gets to the calipers. Braided stainless steel brakes lines are a cheap and popular upgrade which increases the feel and gives you slightly better braking than stock rubber pieces. Changing them is relatively straightforward and easy, but bleeding the brake system to remove any air afterwards can be a bit of a hassle if you don't have an assistant handy.

Materials Needed
- Jack, jack stands, and wheel chocks
- Set of metric line wrenches
- Shop rags
- Nitrile gloves
- Replacement brake fluid (DOT3, DOT4, or DOT5.1)
- Clear tubing and reclosable container
- Vacuum bleeder or pressure bleeder
- Assistant
Step 1 – Jack up and support vehicle
Place wheel chocks to the front and rear of a single rear tire. If you are just changing a bad line on one corner, you only need to raise and remove that one wheel. Otherwise, break loose the lug nuts on all four wheels. Jack up the car and support it on jack stands so you can safely work under it. Remove the lug nuts, then the wheels on both sides of the vehicle.
Step 2 – Replace brake line
The soft line connects the hard steel lines on the chassis to the calipers so the suspension can move and the wheels can steer. The A6 is slightly different, as there is a hard line on the caliper side, too. While this is slightly different, it makes very little difference in changing the line.
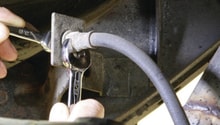
- Use a pair of wrenches, one on the metal head of the rubber line, and a special line wrench on the brake line flair nut where it connects at the bracket.
- Twist the flare nut counterclockwise while holding the rubber brake line still.
- There should be enough spring in the hard line to allow pulling it off of the spring clip to remove the rubber line from the soft line.
- Pry the spring clip off of the soft line end, allowing it to travel back along the hard line.
- The soft line should now pull free from the bracket.
- Follow the soft line back to the body of the vehicle where a small bracket holds the hose in place to the body.
- Go through the same steps to remove the line fully from that side as well.
- Compare the old line to the new brake line to ensure it correctly matches in both size and shape.
- Place the new line into the bracket at the body and ensure the flare nut is threaded correctly into the brake line. A cross threaded line will never seal correctly no matter how tight the connection is made.
- Connect both ends, ensuring they are secure in the mounting brackets.
- Complete these actions for every brake line which needs to be replaced.
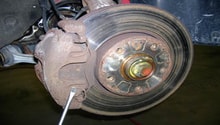
Figure 2. Caliper diagram: #10 is the rubber line, and #13 is the hard line to the caliper 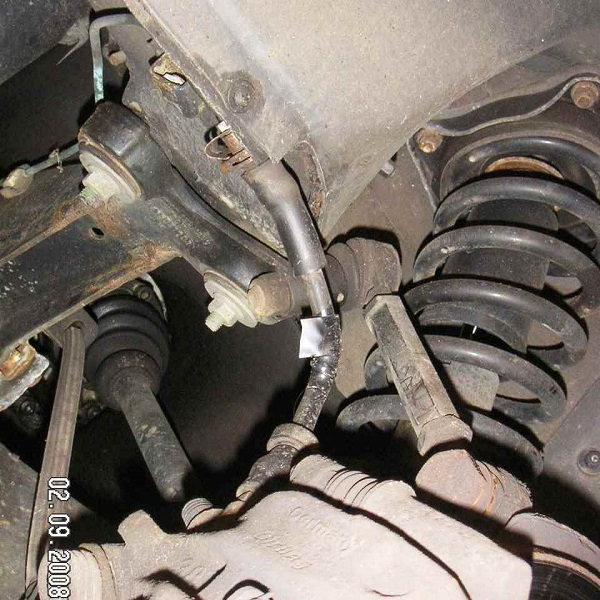
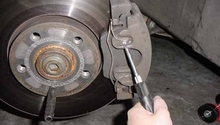
Figure 3. Rubber line where it meets the hard line on the chassis. 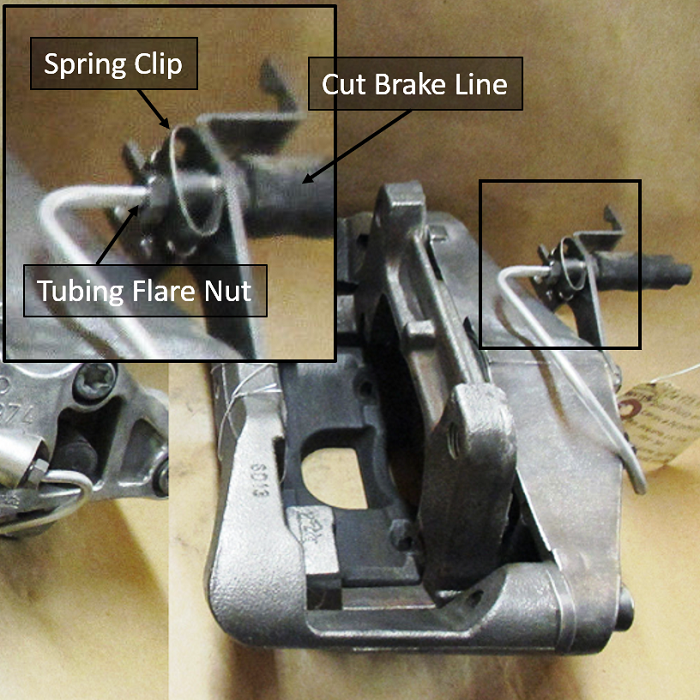
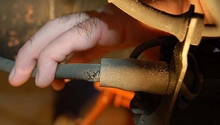
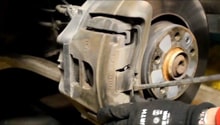
Figure 4. Caliper off the car showing hard line connection to rubber line.
Step 3 – Bleed the brake system
A much more detailed explanation of bleeding the brakes is provided in the How-To article: Audi A6: How to Flush the Brake Fluid.
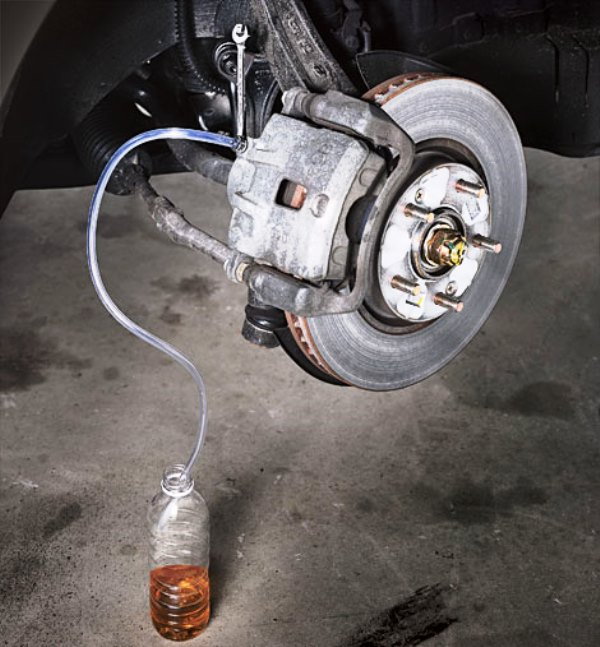
- Place a clear line over the bleeder screw on the wheel with the new brake line, and the other end in a resealable container.
- Have an assistant pump the brake pedal three to five times and hold it down.
- Loosen the bleeder screw and let the brake fluid and air bubbles out.
- Tighten the screw and have your assistant pump the brakes again.
- Continue until there are no bubbles in the clear line.
- Bleed the other brake calipers if needed.
- Place wheels and tires back onto the car, lower the vehicle off of the jack stands, and tighten the lug nuts.
Related Discussions
- Stainless steel brake lines - AudiWorld.com
- C4 A6 Flexible Brake Hoses - AudiWorld.com
- Tips for changing brakes lines - AudiWorld.com
- Installing steel braided brake lines, anything I need to know - AudiWorld.com