Audi A6 C6: How to Replace Valve Cover Gasket
A leaking valve cover gasket in the Audi A6 C6 can cause burning smell or an oily mess around the engine, so learn how to replace the valve cover gasket here.
This article applies to the Audi A6 C6 (2005-2011).
The valve cover gaskets in the Audi A6 C6 seal up the valve covers to the head cylinders of the engine. When they fail, due to age or heat, they can start leaking oil on top of the engine, inside the combustion chamber and all around it. Your first clue will most likely be a burning smell, which is your engine oil leaking on top of your engine, and as the engine gets hot, it burns the oil.
The most common way to check for a bad valve cover gasket is to pull the spark plugs and inspect them. If they are covered in oil, your valve cover gasket has gone. Replacing a valve cover gasket sounds a lot more intimidating than it really is, and unfortunately, the dealership will also make it out to be intimidating, which will bring your bill in the hundreds, if not thousands, if you drive a newer Audi. Replacing the valve cover gasket can be done at home, and the challenge is not in the gasket replacement, however, it is in removing the parts to get to the gasket. This guide will help you replace the valve cover gasket on your Audi A6.

Materials Needed
- Socket
- Phillips screwdriver
- Flat head screwdriver
- Silicone valve cover sealant
- Valve cover gasket
Step 1 – Get Audi into "service position"
This generation of Audi has an easily removable front clip and can be put into what is called the "service position," which, as the name implies, makes servicing the engine easier. First, to remove the bumper, remove the top cover by just pulling it out, then remove three bolts on top, then move the wheel well liner out of the way, and remove one nut on each side of the bumper. Pull the bumper straight out.
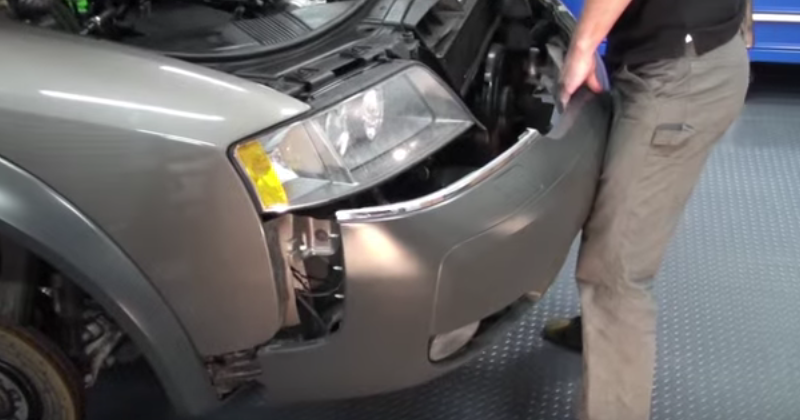
You can put your car in service mode, which allows you to remove the radiator, fan, and other parts on the front; however, it's not necessary to get the job done. To swivel the whole front out, remove two bolts on top, and two nuts on the inner fender on each side.
With the bumper cover removed, you have full access to the modular plastic radiator support. Unbolt the core support and wiggle it free; from there, it should be able to be slid off the car like the bumper cover.
Step 2 – Remove belts
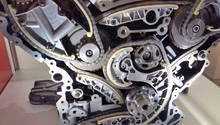
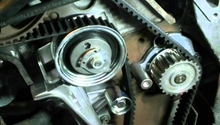
Remove both the serpentine belt an the timing belt. With your bumper off, use your socket to push down on the tensioner pulley, this will cause the belt to be loose, then pull it off. With the serpentine belt removed, you have access to the timing/cam covers. Remove the covers to expose the timing belt and timing gear. To remove the timing belt, you will need to turn the timing belt tensioner until the timing belt is loose, then remove the belt. With the belt off, unbolt and remove the cam gears, and then remove the back/rest of the plastic timing covers.

Figure 2. Remove serpentine belt. 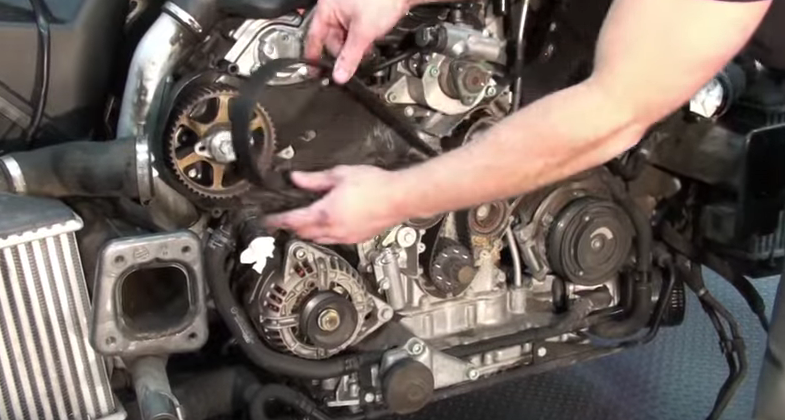
Figure 3. Remove timing belt.
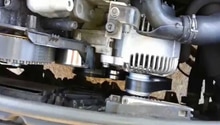
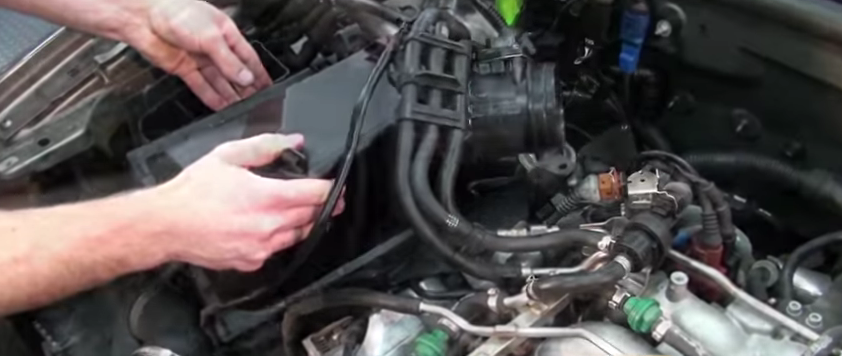
Step 3 – Remove the air box
Loosen both clamps on the intake tube, on both side, then disconnect it and place it somewhere. Unclip the two clips on the side of the air box, towards the engine, then pull the top of the air box off.
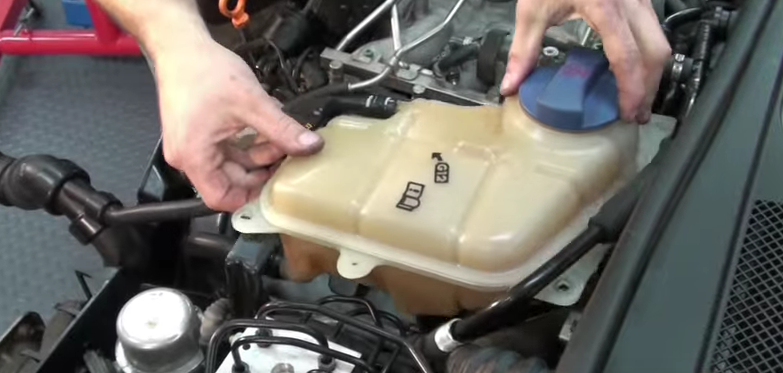
Step 4 – Remove expansion tank
Remove the screws holding the expansion tank in place. You don't need to remove the hoses connected to it or drain it, you just need to carefully set it aside somewhere a little farther from the valve cover.
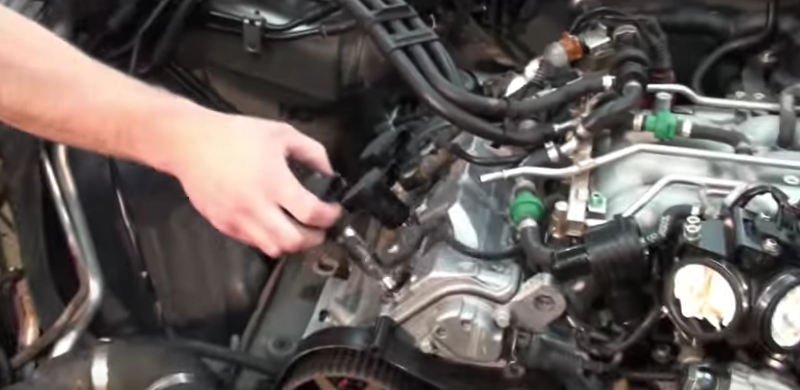
Step 5 – Remove coils
Pop off all the ignition coils and the vacuum lines connected around the valve covers. You will need to disconnect the harness from each coil pack, then set them aside.
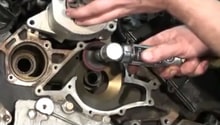
Step 6 – Remove cam gears
Remove the cam gear; this should come straight out after you remove the one nut in the center of it. After you remove it, take out the cover behind it by removing the bolts holding it. Make sure to mark all the bolts and covers, so you don't lose track of what goes where.
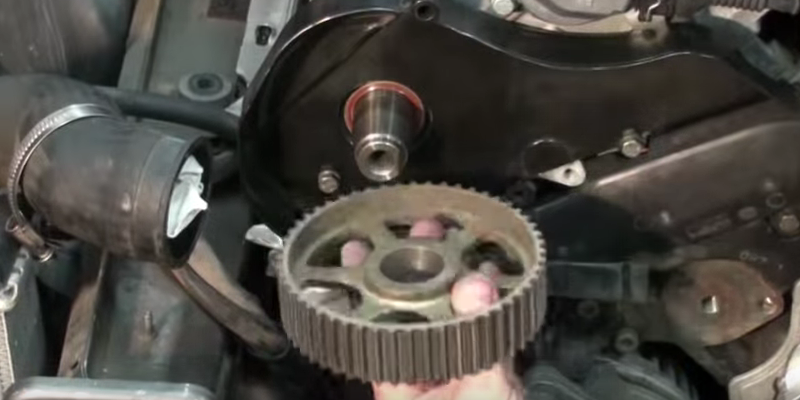
Figure 7. Remove cam shaft. 
Figure 8. Remove cam shaft cover.
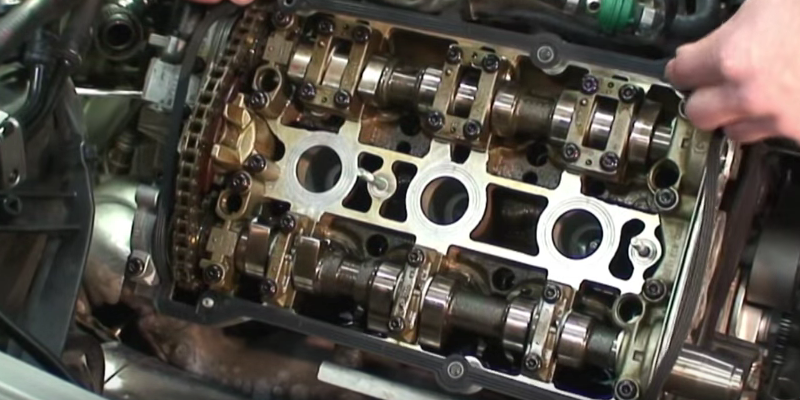
Step 7 — Remove valve cover
Remove the six nuts on top of the valve cover, then pull it straight out of its studs. Remove the leaking gasket, and clean the area if some of it gets stuck. Be very careful that you don't let dirt or grime go into your engine. Clean the valve cover surface carefully.

Figure 9. Remove valve cover. 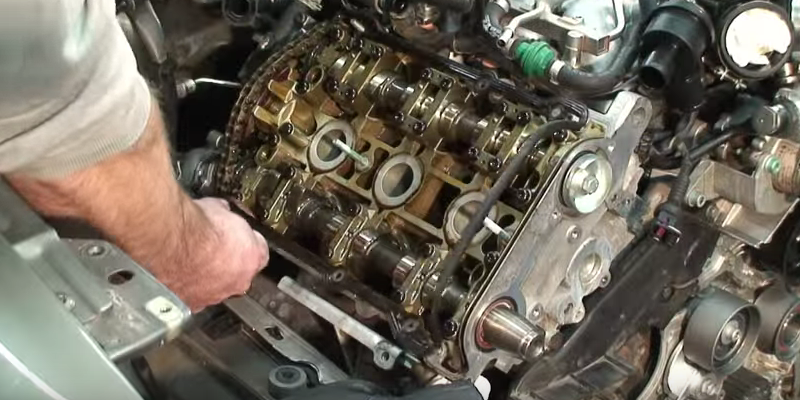
Figure 10. Remove gasket.
Step 8 – Install new gasket
Put a straight bead of silicone sealer designed specifically for valve covers, then put the gasket in place. Make sure there is no silicone that will fall into the engine. Then install the valve cover. Use a torque wrench and torque the nuts to 7 lb/ft. Start with the two middle nuts, then top left, bottom right, bottom left, top right, and do the same top/bottom for the remaining nuts. With all fasteners installed, double check the torque spec on all of the bolts.
Step 9 – Install components
Installation is the reverse of removal.
- Install timing cover and cam gears
- Install coils and their connections
- Install expansion tank
- Install air box and intake tube
- Install timing belt and serpentine belt
- Install bumper and front clip
Featured Video: How to Replace a Leaking Valve Cover Gasket
Related Discussions
- Valve Cover Gasket Replacement - AudiWorld
- Valve Cover DIY - AudiWorld
- Engine Oil Leak - AudiWorld