Audi A6: How to Replace Upper Control Arm Bushings A6 Quattro
Audi uses an advanced control arm front suspension design, which provided phenomenal handling and ride characteristics, but it is hard on the bushings and ball joints. If you have noise, vague handling and harshness, it's time to replace one or all of these rubber bushings.
This article applies to the Audi A6 C5 (1997-2003) and A6 C6 (2004-2011).
Like any other piece of rubber (especially ones taking a lot of abuse as these are), control arm bushings wear out and degrade over time and miles. Once bushings start to tear, dry out, and crack, ride quality and handling suffers, you'll start hearing loud noises over bumps, as well as notice more play in the steering. The dealership will surely try to get you to replace your control arms as well as the bushings (which is a $1,400-$1,600 job), but you can replace the bushings yourself for around $110. Keep reading and we'll walk you through the process.

Materials Needed
- Replacement parts and hardware
- Anti-seizing compound
- 16mm and 18mm sockets and open end wrench
- Torque wrench
- Jack and jack stands
- Ramps
- Bearing puller tool
- Bushing remover and installer tool (can be rented from auto parts stores)
- Black pipe bushing and coupling
- Air hammer
- Bench vise
- Bushing tool
Step 1 – Make room and jack the car
Set the parking brake and place chocks behind the rear wheels, then open the hood. Remove the cowl cover, seal, and the strut covers. Loosen up the front wheel lug nuts but don't remove them yet. Lift the car up and place it on jack stands, then remove the lugs and front wheels.
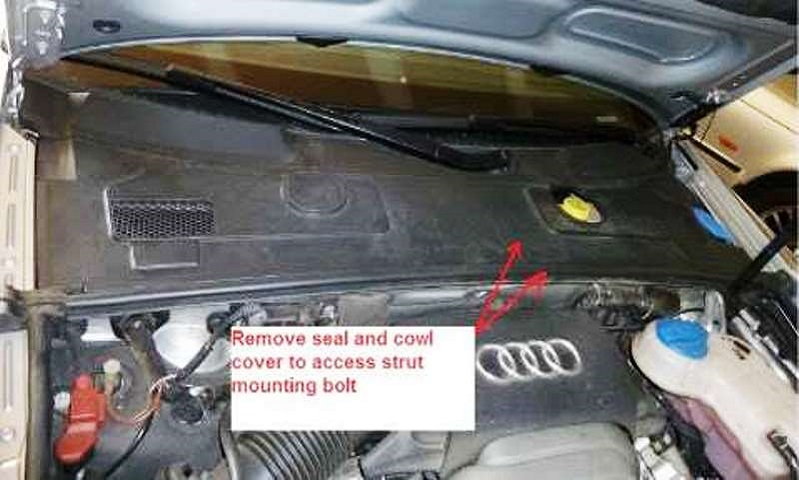
Figure 1. Remove the cowl cover and seal. 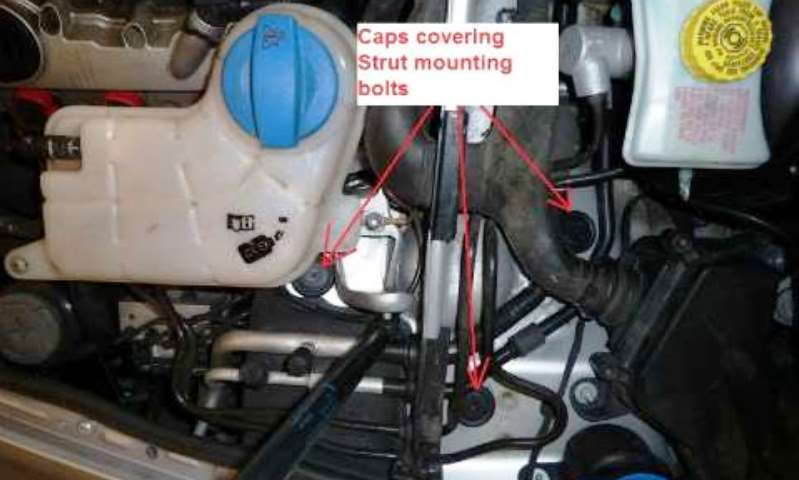
Figure 2. Remove the caps that cover the strut bolts.
Step 2 – Remove the strut and spring assemblies
Remove the holding nut on the upper control arm holding pin. Remove the upper control arm pinch bolt and nut. These can be very difficult to remove, so it helps to have an air impact driver if possible.
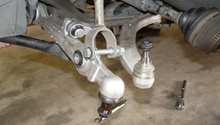
Remove the upper ball joint from the knuckle using a ball joint separator or bearing puller, as shown. Remove the pinch bolt and nut for the strut to the lower control arm, then remove the three bolts that hold the strut tower to the chassis. Remove the strut and spring assembly.
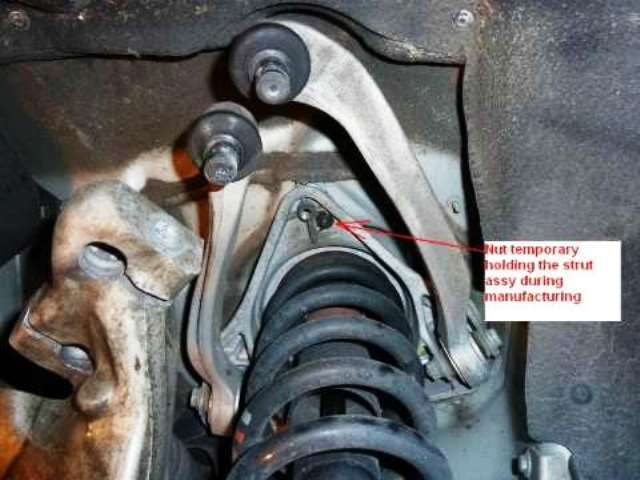
Figure 3. Remove the holding nut. 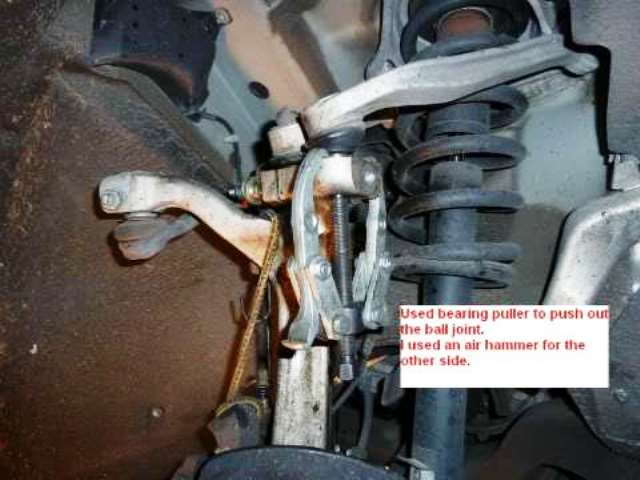
Figure 4. Remove the ball joint. 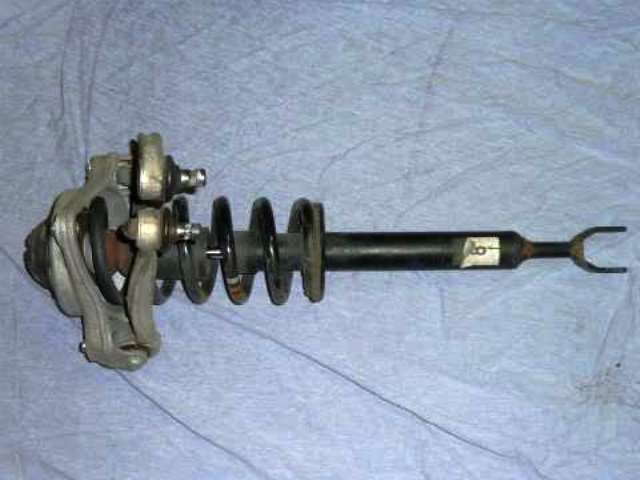
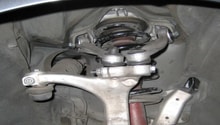
Figure 5. Remove the strut/spring assembly (C5 models don't use a pinck bolt setup).
Step 3 – Replace the upper control arm bushings
Remove the upper control arm from the strut assembly. Removing and installing the bushings is easiest if you own a hydraulic press, but you don't need one to accomplish the job. You could take the easy way out and take the control arms to your local shop to have the bushings pressed in, or you could borrow or rent the C-clamp type press from your local auto parts store. If you don't have those tools, read on, because we will outline how to do it with more common tools.
The best way to remove the bushing, with common tools, is to place the control arm in a vise. Find a socket, or pipe from your local hardware store that fits just inside the bushing, and another that allows the bushing to slide inside, then press out the bushing. Once removed, install the new bushing using the same tools, making sure it is installed the same direction the old bushing was removed. Make sure that the holes in the center of the bushings are perpendicular to the control arm per spec, which is 90 +/- 5 degrees. Once finished, install the control arm back on the strut assembly and torque to spec.
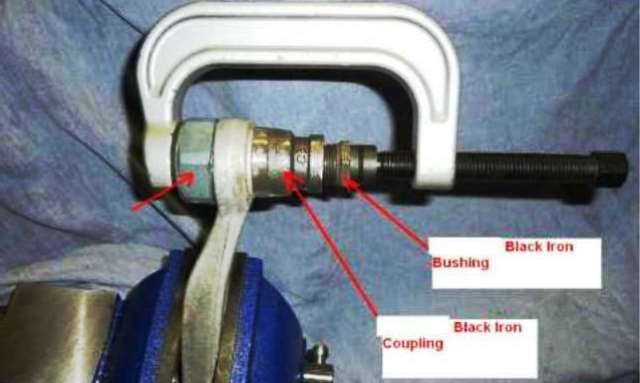
Figure 6. Remove the old bushings. 
Figure 7. Install the new bushings. 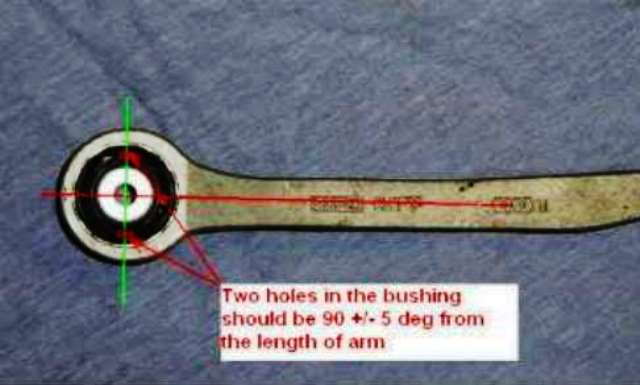
Figure 8. Make sure the bushings are perpendicular to the control arm.
Step 4 – Reinstall the strut assembly
Guide the strut assembly back into place and reinstall the three bolts, but just hand-tighten them for now. Install the ball joints on the upper control arm to the knuckle. Wipe off the ball joint and apply some anti-seizing compound to it. Lift up the knuckle and hub assembly so that the ball joints are close, then push the ball joint into the knuckle. Apply some anti-seizing compound to the body of the pinch bolt, then install it and torque to spec. Push down on the knuckle and hub assembly to engage the lower part of the strut assembly to the lower control arm. Once the holes are aligned, hand-tighten the pinch bolt and nut. Tighten and torque the three strut bolts to spec and reinstall the plastic covers, then reinstall the wheel and tire.
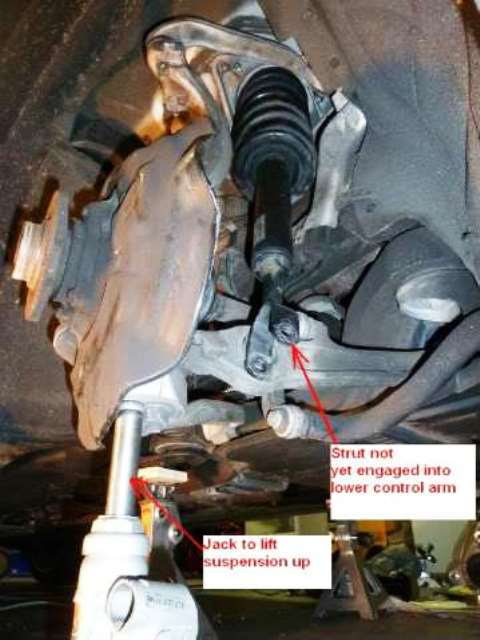
Figure 9. Reinstalling the strut assembly (C5 chassis). 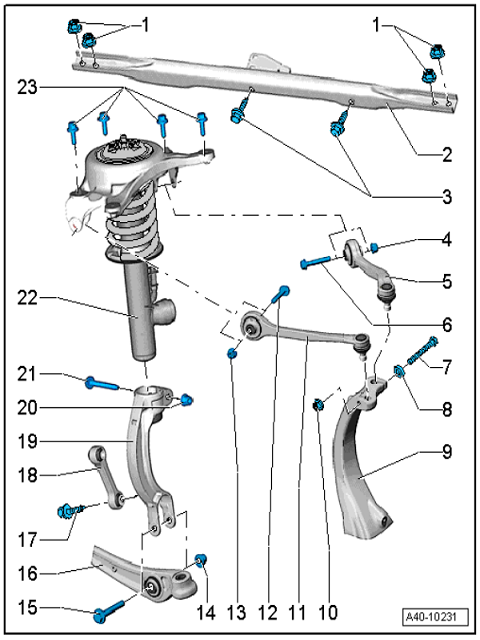
Figure 10. The C6 and later differ from earlier models, as seen here.
Step 5 – Tighten the lower control arm pinch bolt and nut
Jack the car up and remove the jack stands, then set ramps underneath and lower the car onto them. Give the front of the car a bounce to remove any binding, then torque the pinch bolt and nut to spec (items 20 and 21 in Figure 10). Lift the car off the ramps and you're done!
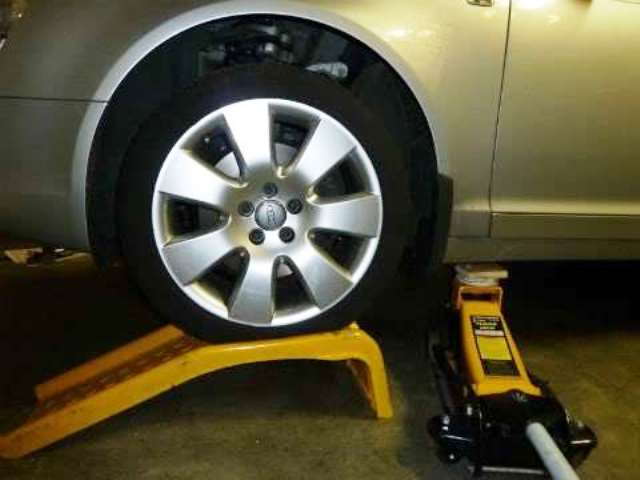
Figure 11. Lift the car off the jack stands and place it on ramps. 
Figure 12. Tighten the pinch bolt and nut.
Related Discussions
- 06 A6 Quattro Upper Control Arm Bushing Replacement - AudiWorld
- Upper Control Arm Replacement - AudiWorld