Audi: How to Repair Cracked Leather Seats
Don't let unsightly cracks in the leather seats of your Audi ruin the overall look of your interior.
This article applies to the Audi A3, A4 B7, A4 B8, A6 C5, A6 C6, Q5, Q7.
Let's face it. We don't simply admire a vehicle for its sparkly, polished exterior; we consider the interior as well. That's why it's important to care for the leather in your Audi before it becomes cracked or worn down from repeated use. If cracks and tears have already begun to appear in your leather seats, don't worry. There are DIY solutions you can make to remedy the problem on your own, without breaking the bank. As with any task in life, it's always best to start early and get ahead of any possible (or obvious) problems. So go ahead and grab the items listed in the Materials Needed list and let's get started

Materials Needed
- Microfiber cloth
- Leather cleaner (foaming solution)
- Scrubbing pad
- Masking tape
- Leather conditioner
- Leather repair kit (with patching material and palette knife)
- Heat gun
- Vinyl prepping compound
- Paint spray gun
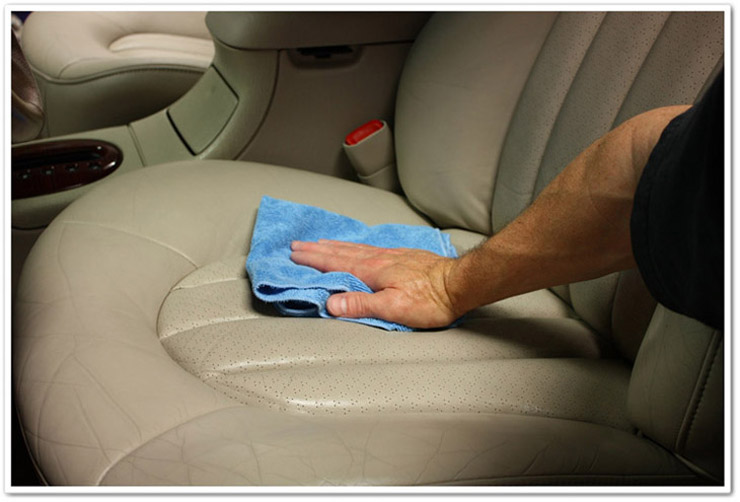
Step 1 – Scrub the leather seats
While you might be tempted to skip this step, we highly recommended that you don't. Not only will there be a buildup of dirt on your leather seats by now, but you'll need to remove the chemicals that might have been applied to the leather during previous treatments (or by the manufacturer).
Pro Tip
Petroleum and silicone-based treatments will need to be scrubbed from your leather before you can move on to Step 2.
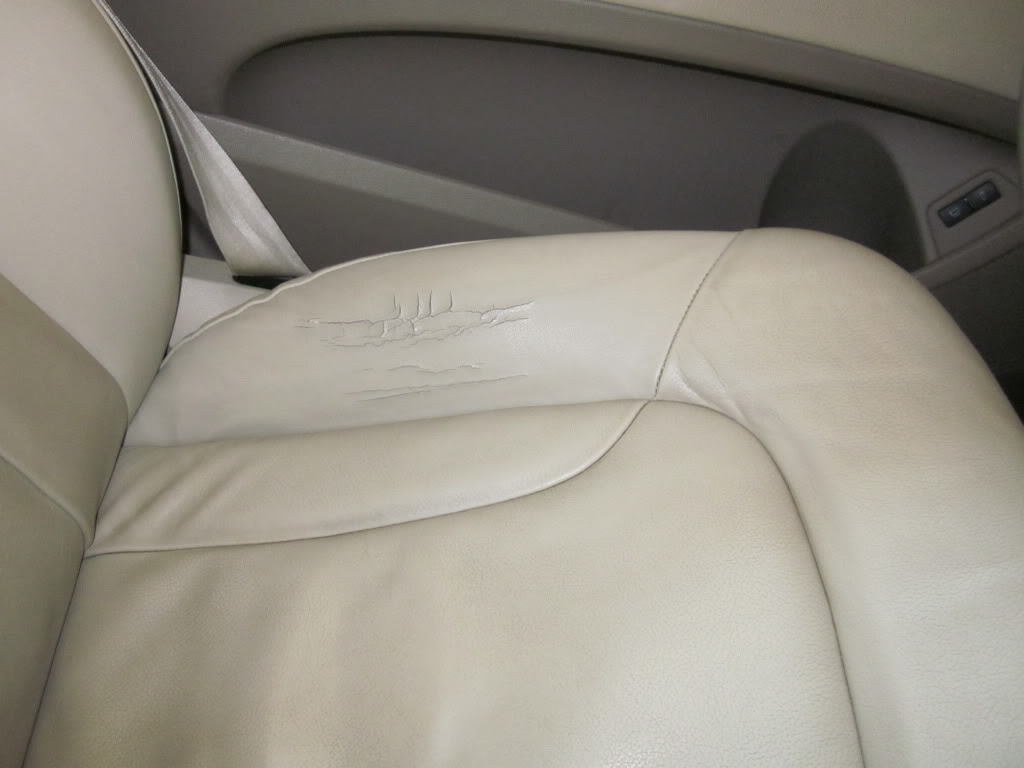
Step 2 – Begin the patching process
Let's start the patching process by first masking off the damaged area with strip(s) of masking tape. Then, apply several thin layers of the patching material using a palette knife. Move slowly, and apply the material only to the damaged area that has been masked off.
Use a heat gun to cure the area. Once this is done, go ahead and grab a piece of flexible material (it should have either a satin-smooth or grainy surface) and press it over the repaired area. This will allow it to match with the surrounding areas of your leather seat. Wait for the patch to dry naturally (no heat gun), and then clean the surface once more. To ensure the color coat you will apply in Step 3 adheres properly, it's highly recommended that you take a moment to apply a vinyl prepping compound, as recommended by the manufacturer.
Pro Tip
Adding a filler to the damaged areas of your seam, and then sanding the application down, will create a nice, smooth surface that matches the remaining (undamaged) parts of the seam.
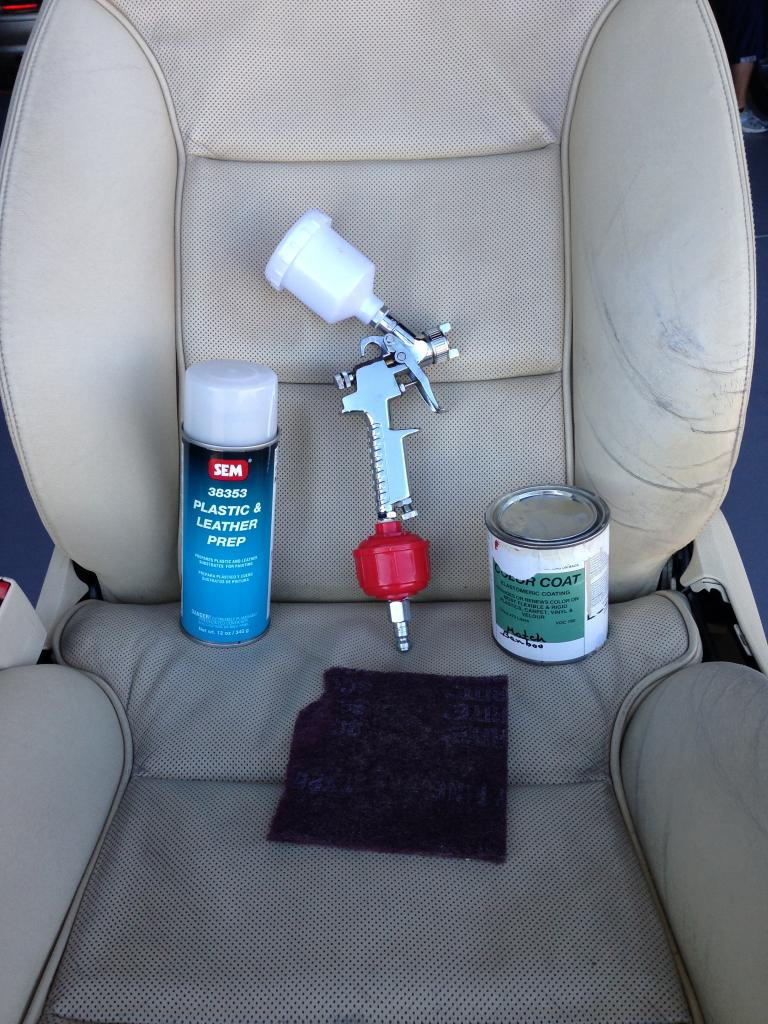
Step 3 – Apply a color coat
Using a spray gun, apply several even coats of color. Allow each coat to properly dry before moving on to the next. Apply a leather care conditioner to your entire leather seat, not just the area you repaired. That way, the entire seat is being treated at the same time. As a good rule of thumb, you should treat your leather seats with a premium quality leather conditioner every three months.
Pro Tip
Carry out several tests to be sure you complete an accurate color match of your leather seats and new color coat.
Related Discussion and Site
- Leather Care Tips - Audiworld.com
- DIY Torn Leather Repair - Mobiloil.com