Audi: How to Retrofit HomeLink
HomeLink is a feature that most every luxury car (and even some not-so-luxury cars) have these days. But quite a few Audi models don't. This article will show you how to retrofit it in your ride.
This article applies to Audi (all models).
HomeLink is a great, convenient feature that renders those big old garage door openers a thing of the past, much like huge brick-like cell phones and pagers. That is, if your car has it. Those nifty little buttons are integrated into the visor of most cars, giving you the option of programming not only one, but up to three garage door openers. Which is great if you have three homes, but it's also convenient if you own only one. Retrofitting HomeLink into an Audi that didn't come from the factory with it can be done relatively inexpensively if you don't try to go 100% OEM, in which case the transmitter alone runs around $400. Here's how to get it done for a lot less.

Materials Needed
- HomeLink transmitter (available on eBay)
- DigiKey pushbutton switch EG1932-ND
- Several strands of wire
- Soldering iron
- Flat head screwdriver
- Multimeter
Step 1 – Wire the transmitter
Pry the plastic bezel containing the switches off the transmitter, then open the black housing by releasing the plastic catch pieces on the sides. Solder the wires to the circuit board of the transmitter as shown in Figure 2. Since there is little space to work with, take your time and use a small soldering gun if possible. Once finished, test each connection for continuity using a multimeter. Be sure and write down which color wires go to which switches before you put the transmitter back together.
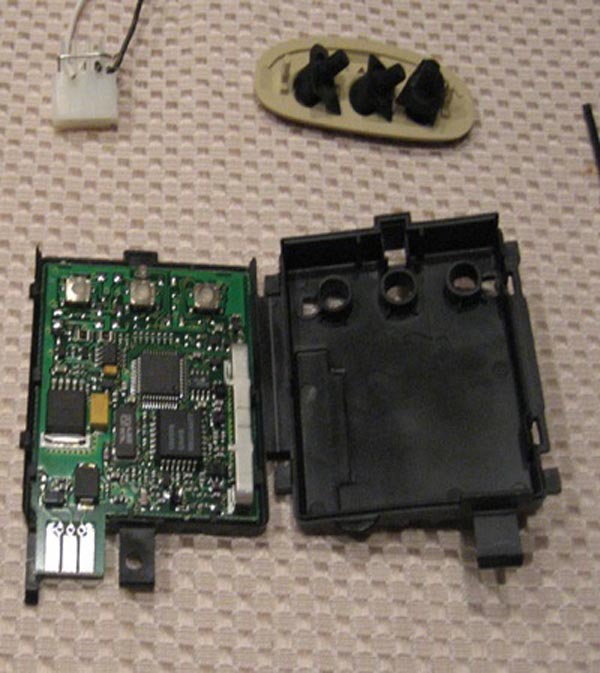
Figure 1. Open up the transmitter to access the circuit board. 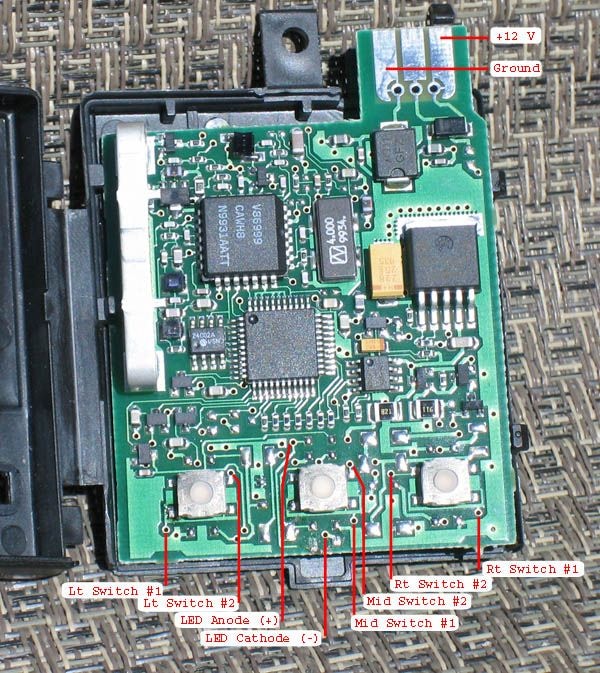
Figure 2. Solder a length of wire to each location as shown. 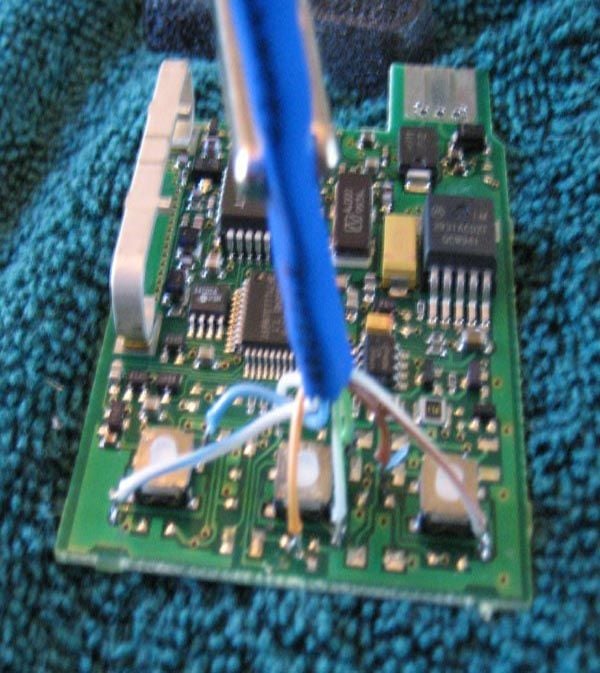
Figure 3. The finished product.
Step 2 – Install the switches
Remove the lower dashboard panel on the driver's side by removing the two bolts in the footwell and the single bolt in the fuse box. Pull the panel straight out and remove the three wiring harnesses connected to the headlight switch. Connect a ground wire to the one of the bolts in the firewall using a crimped connector and a length of wire.
Mount the transmitter right behind the bottom of the A-pillar, just to the left of the driver's side air vent. Make a template for the switches using a pencil and paper, being careful to measure exactly. Drill pilot holes in the center of each of the three button openings and the LED light opening, then drill out the holes and sand smooth.
Attach the wires to the three switches and the LED. It's a good idea to solder these connections and use heat shrink to protect the wiring from the elements. Insert the buttons through the pre-drilled holes and tighten the nuts from the backside, then install the LED light. Once everything is installed, it's a good idea to test the transmitter using a 12V power supply before moving on.
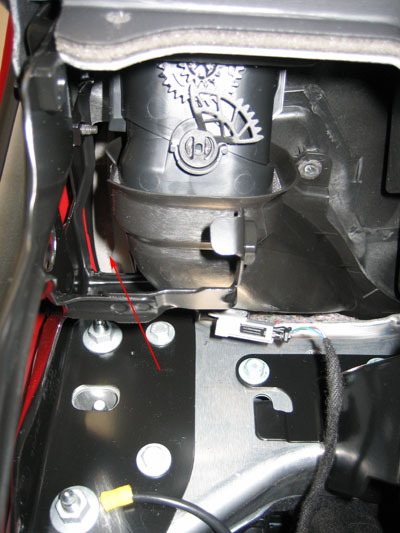
Figure 4. Mounting location for the transmitter. 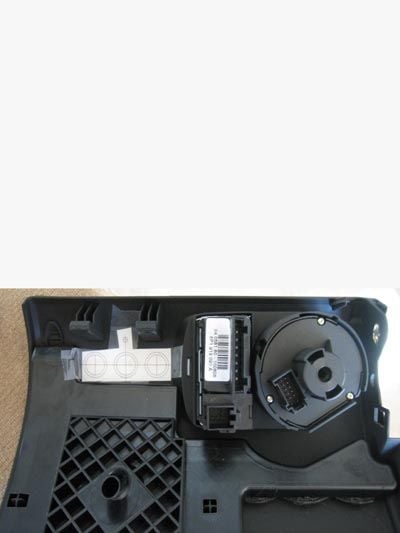
Figure 5. Use a template for drilling the button locations. 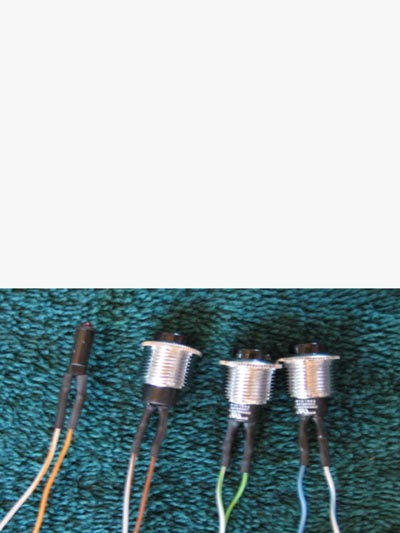
Figure 6. Wire up the buttons and LED. 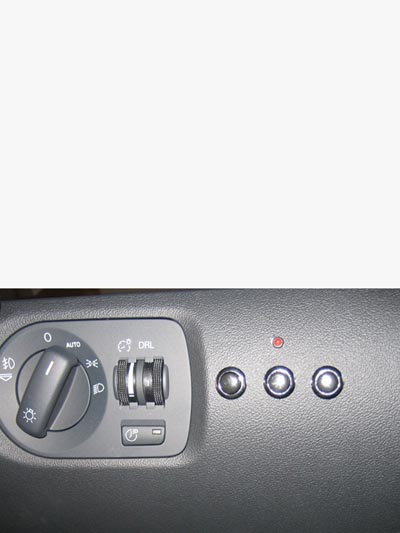
Figure 7. Install the buttons in the dash panel.
Step 3 – Connect the transmitter wiring
Use any bolt around the fuse box or in the firewall to ground the transmitter. There are a variety of locations in the fuse box you can use as a power source. The second row of full size fuses from the top are all constant 12V and the next row down are switched, but you will want to double check with a multimeter to be sure.
Cut a piece of wire for the open constant and/or the switched power source, then install the wiring and a 5 amp fuse in each. Use the unswitched source only if you aren't concerned about someone breaking into your car and opening the garage, as this will allow it to open without the car being turned on. Connect the power and ground wires to the transmitter, then reinstall the dash panel.
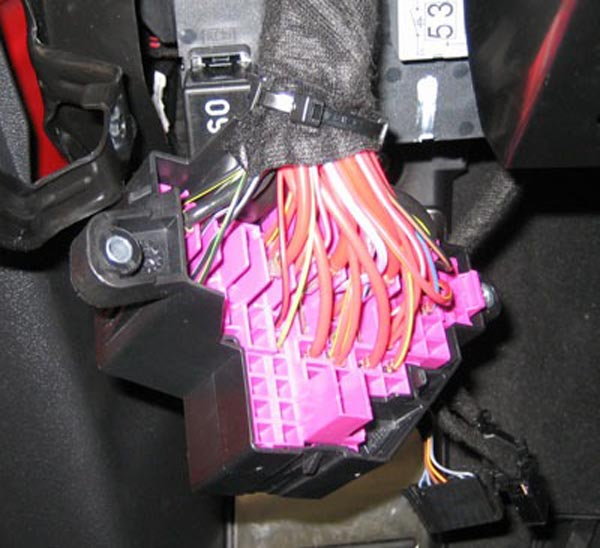
Figure 8. Locate an empty slot to use as a power source. 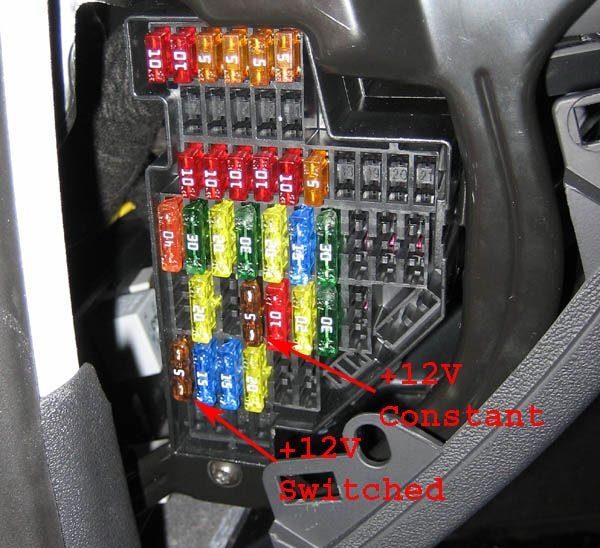
Figure 9. Connect the wires and fuses as shown.
Related Discussions
- Homelink Retrofit - AudiWorld
- Homelink Retrofit Issue - AudiWorld
- Homelink Retrofit Wiring - AudiWorld