Audi Q5/Q7: How to Install a Backup Camera
Audi chooses not to include a rear view camera on the Q5/Q7, or the full MMI system, unless you wanted the GPS navigation. Getting a factory quality backup camera takes a little work, but we'll show you how.
This article applies to the Audi Q5/Q7 (2009-2016).
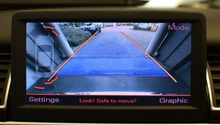
There's no denying that backup cameras are one of the most useful safety features to come along in years, which is why the government has mandated that all new cars have them standard by 2018. Not only do backup cameras save lives, but they make it easier to reverse in and out of driveways and parking spots, too. With the massive blind spot in most SUV's and trucks nowadays, this is a good thing for obvious reasons. If your Q5/Q7 didn't have a backup camera installed from the factory, here's how to install one and so that you too can reap these benefits.
Our example for this how-to is an Audi A4, but the Q5/Q7 is almost exactly the same; though, some screws may be in a slightly different place.

Materials Needed
- Plastic panel remover tool (or putty knife with tape on it)
- Phillips head screwdriver
- 8mm socket
- Ratchet
- Audi AMI removal tool or a piece of wire
Before working on any electrical system in your car, you should disconnect the negative (black) battery terminal. A simple short circuit or pinched wire can ruin a car's computer or infotainment system and cause hundred of dollars worth of damage.
Step 1 – Remove AMI from glove box
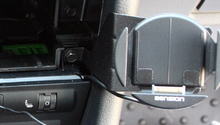
The Audi Music Interface (AMI) is that black box in the dash that stores all your favorite tunes. Begin removing it by removing the side panel on the passenger side of the dash. A panel removal tool is ideal, but you can also use a putty knife with some tape on the end (to prevent it from scratching the trim) in a pinch. Remove the 8mm bolt under the panel. Open the glove box and remove the five 8mm bolts along the top and one in the very back. Remove the two bolts from underneath the bottom of the glove box. Use an Audi AMI removal tool or piece of wire to remove the AMI from the glove box. Remove the 8mm bolt behind the AMI.
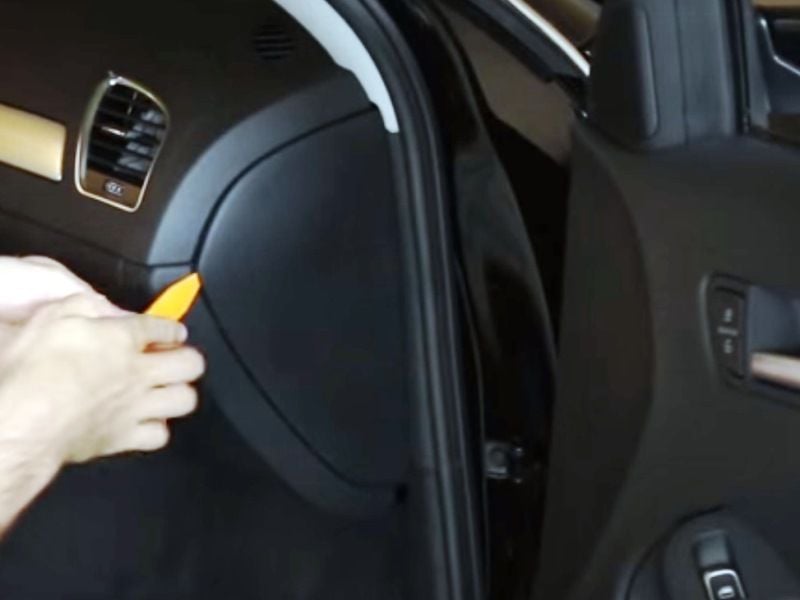
Figure 1. Remove the side panel from the passenger side of the dash. 
Figure 2. Remove the 8mm bolts inside and outside of the glove box. 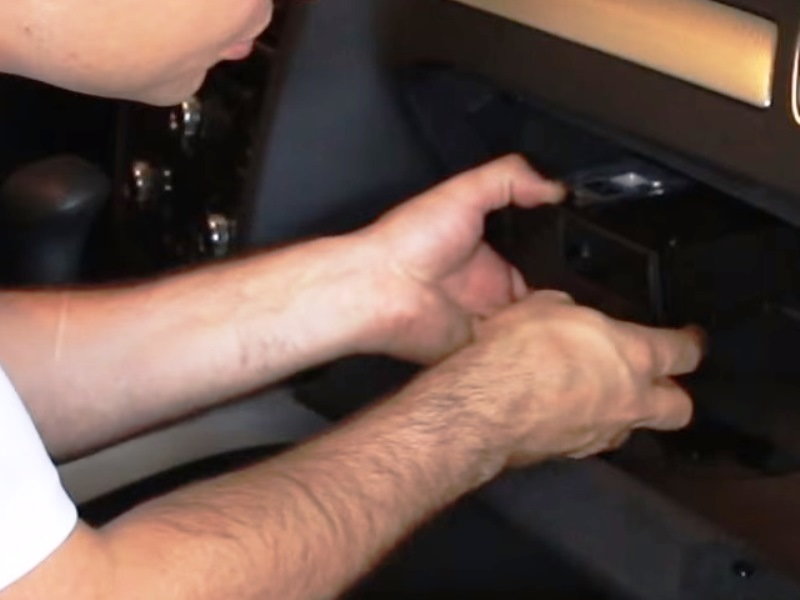
Figure 3. Remove the AMI from the glove box.
Step 2 – Remove the factory screen
Remove the plastic trim piece from around the screen by working your way all the way around it with a plastic prying tool. Set the panel on top of the dash to avoid having to disconnect the air bag. Remove the four bolts holding the screen in the dash. Pull the screen out and disconnect the harness from the back.
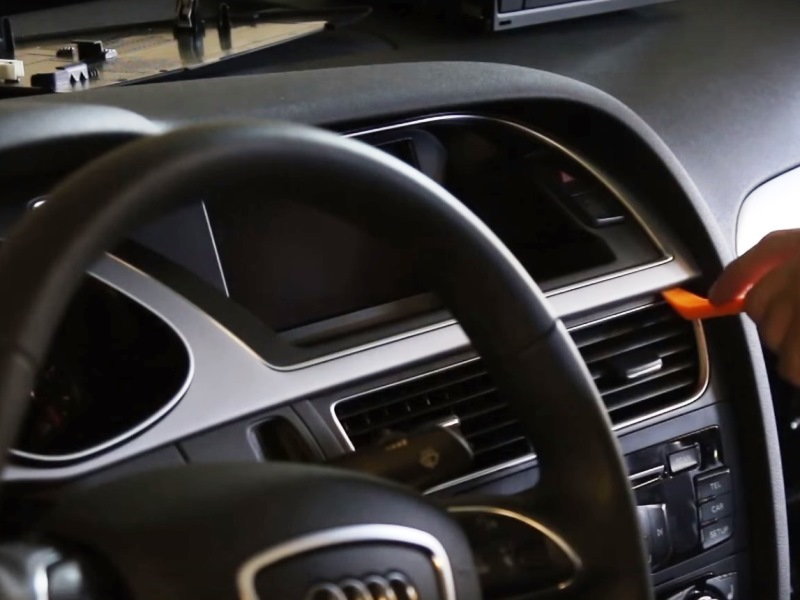
Figure 4. Pry off the trim surrounding the screen. 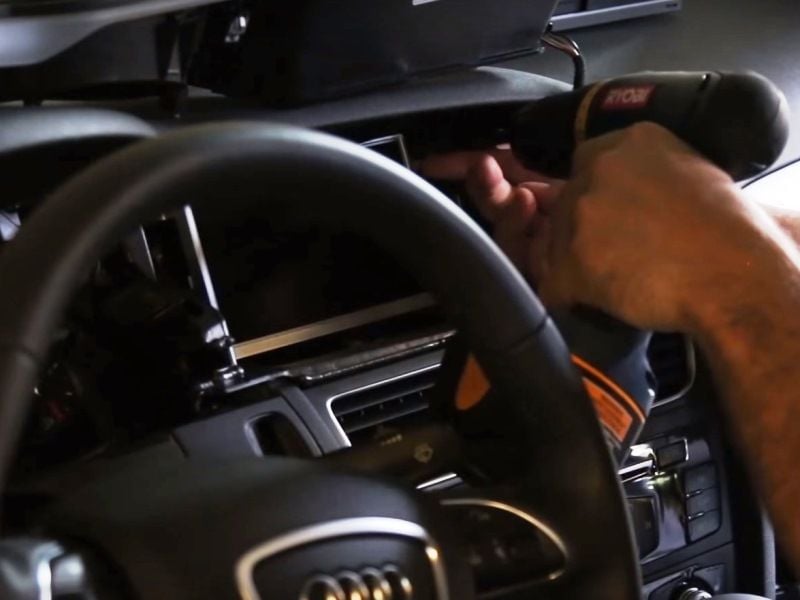
Figure 5. Remove the four bolts holding the screen in the dash.
Step 3 – Install rearview camera wiring
Connect the wire that you removed from the factory screen to the rear view camera kit's main harness. Connect the second wire on the harness to the screen. Run the third wire in behind the dash into the glove box. Reinstall the screen in the dash and replace the screws and trim panel. Connect the wire in the glove box to the camera interface module in the LVDS slot. Remove the yellow socket from the side dash panel and replace it with the socket and wiring included in the kit. Install the ground wire on the bolt next to the socket and connect the power wire to the fuse box in any empty slot. Plug the end of the wiring loom into the camera interface. Connect the camera wiring harness into the interface. Plug the camera into the "rear" plug and reconnect the AMI. Reconnect the negative battery terminal and check to make sure the camera is working.
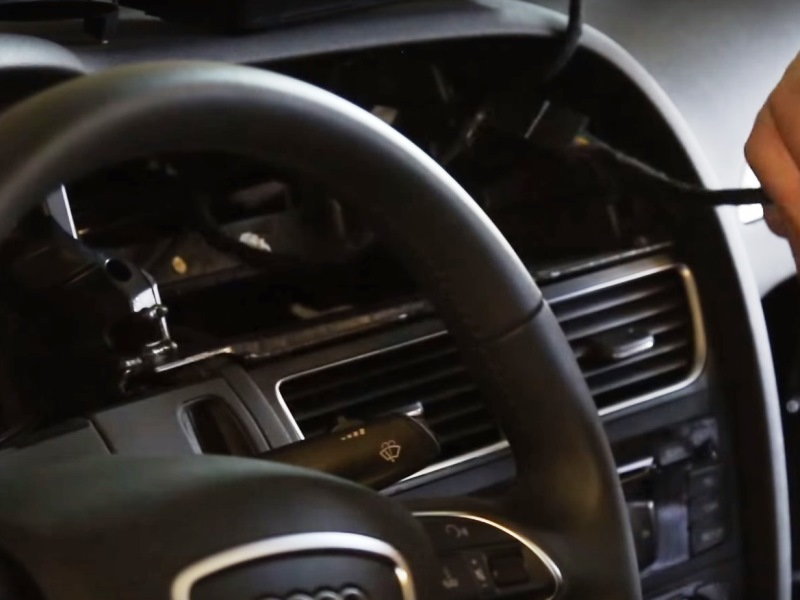
Figure 6. Connect the main harness to the screen plug. 
Figure 7. Connect the main harness to the screen. 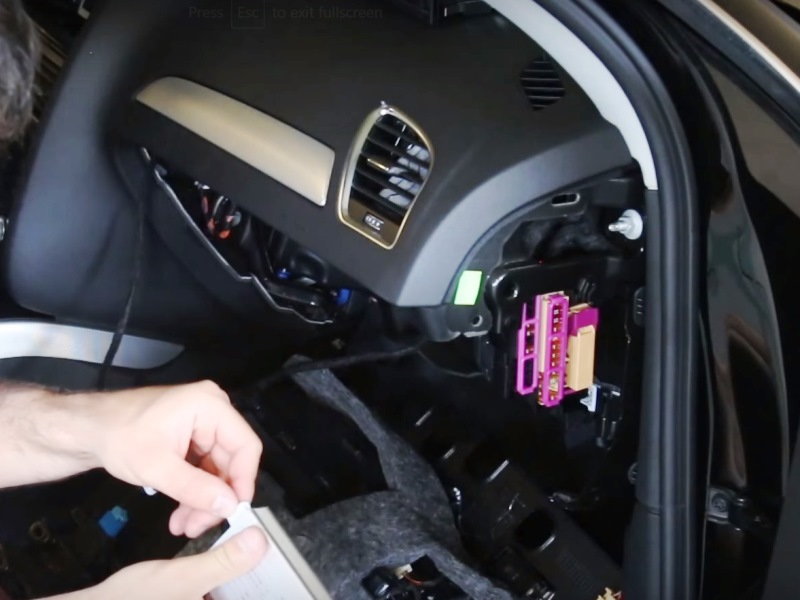
Figure 8. Connect the main harness to the interface. 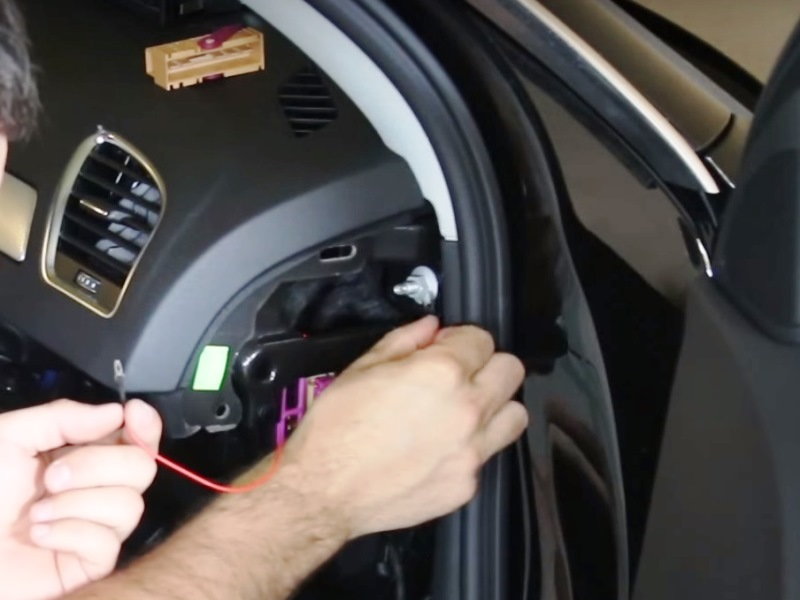
Figure 9. Install the ground wire for the new socket. 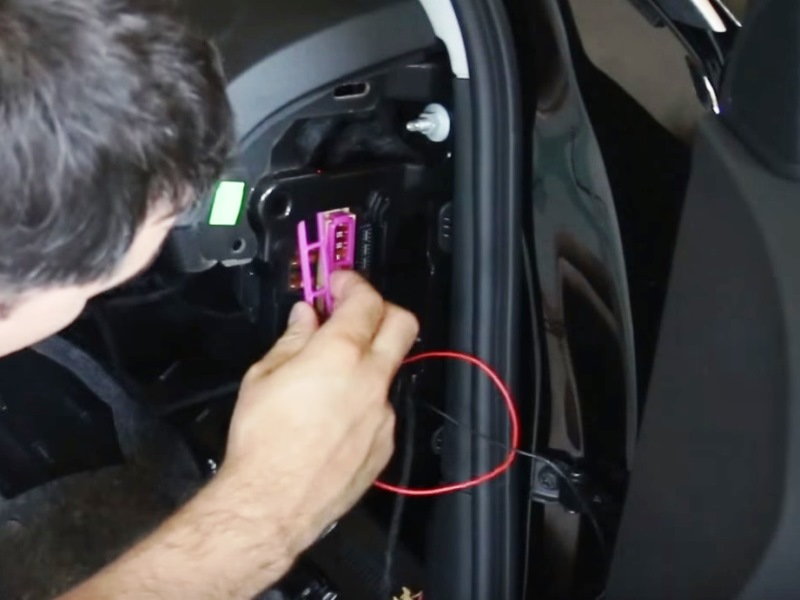
Figure 10. Install the power wire for the socket. 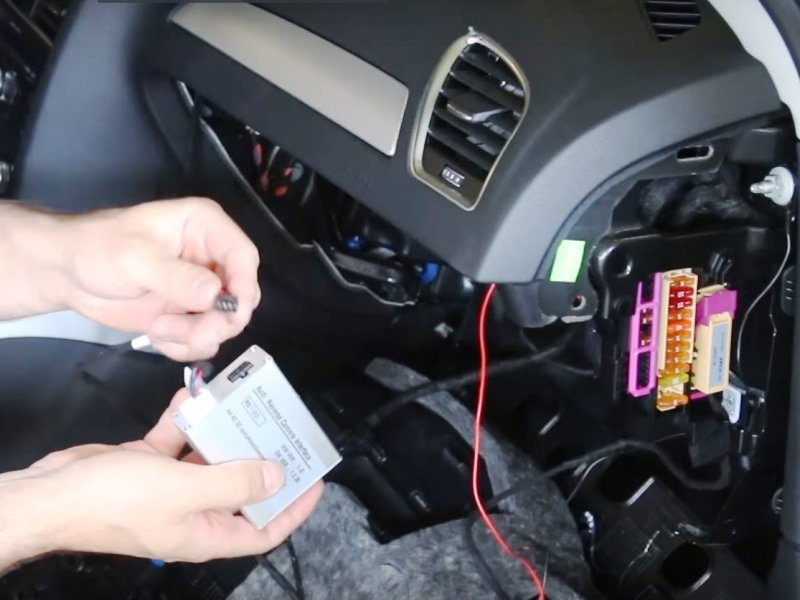
Figure 11. Connect the interface to the wiring.
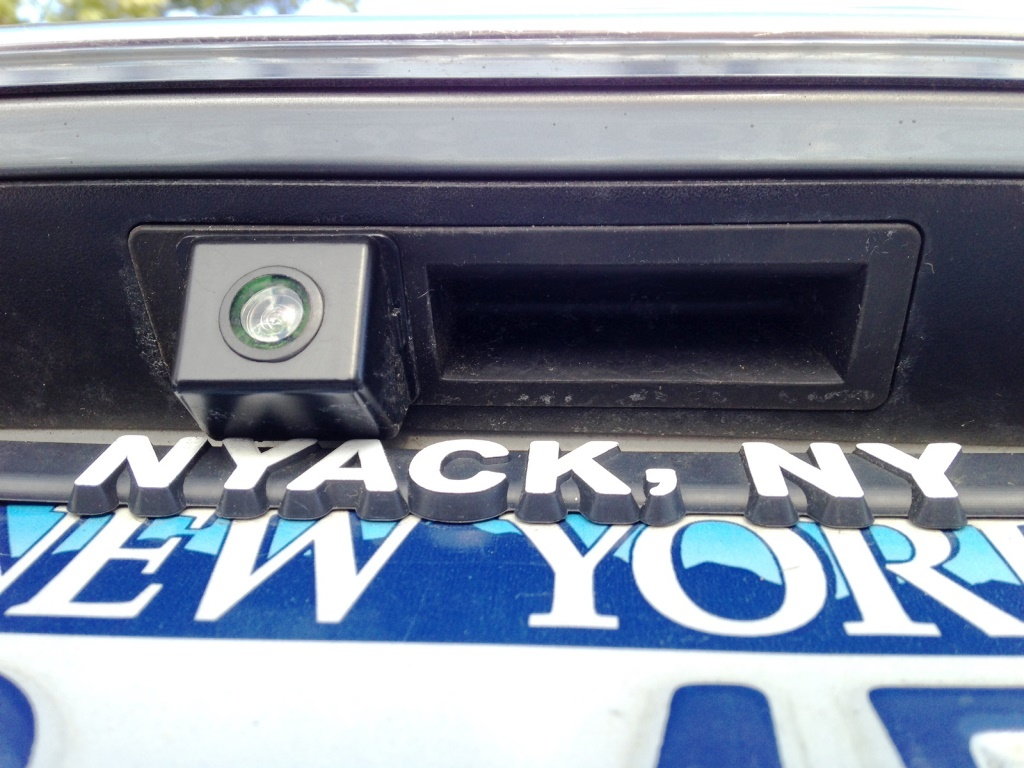
Step 4 – Install rear view camera
This kit included a camera built into a copy of the factory hatch handle; yours may require a little more fabrication. Lift the hatch and remove the two screws by the handles, then pull the trim piece out. Remove the license plate frame, but not the license plate base. Remove the bolts holding the liftgate handle in place. Remove the handle and replace it with the camera handle. Run the wire for the camera along the inside of the trim and through to the dash, tucking it underneath the sill plates to hide it. Reinstall the AMI and replace the glove box bolts. Replace the side dash trim panel and you're all set!
Featured Video: Installing Rear View Camera
Related Discussions
- Rear Camera Without NAV - AudiWorld
- Aftermarket Backup Camera Retrofit Advice - AudiWorld