Audi Q5/Q7: How to Replace Fog Lights with Aftermarket Bulbs
Fogs lights are a great feature when considering enhanced visibility during nighttime driving. Here's how to upgrade your fogs with aftermarket bulbs.
This article applies to the Audi Q5/Q7.
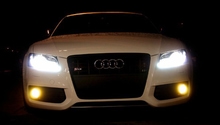
Fog lights used to be included on higher-end premium vehicles from many different manufacturers Today, you can find them on most vehicles as a standard option. Having this feature is an added bonus when it comes to the safety of you, your passengers, and the drivers around you. These lights aid in visibility for night time driving as well as inclimate weather conditions such as heavy fog. As the car enthusiast world evolved, several aftermarket auto parts companies found ways to improve the lighting in standard fog lamps by using higher output bulbs and even HID's. Some enthusiasts simply just want the fog light bulbs to match the output of the rest of the front end lighting. Audi's are considered luxury or premium vehicles, and having matching Xenon or HID lighting is highly desired. This article will discuss how to take on an upgrade like this and what's involved.

Materials Needed
- Flat tip screwdriver
- T20 Torx driver
- T25 Torx driver
- Aftermarket fog light bulbs
Step 1 – Remove Torx screws from liner
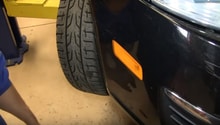
Although the fog lights are located on the front of the vehicle, you can access the bulbs and their housing from behind the wheel well.
- Turn either wheel to full lock position on either side.
- Remove two Torx screws (T25).
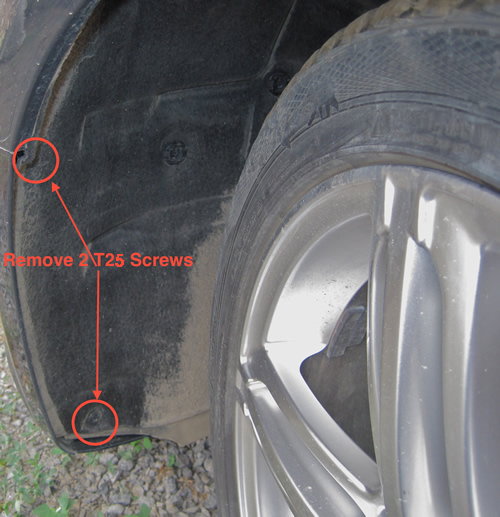
Pro Tip
You can usually turn the key to accessory mode in order to turn the wheel while in park.
Step 2 – Remove fog light
Once the liner is undone, you'll be able to get behind it and access the fog light and its housing.
- Pull back the liner.
- Disconnect the harness connected to the fog light.
- Turn the fog light bulb housing counter clock-wise and pull out.
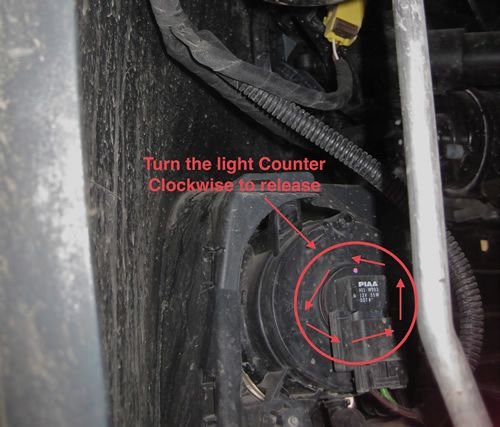
Pro Tip
It is not necessary to disconnect the harness from the bulb, but it can help to give you more clearance.
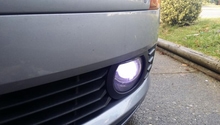
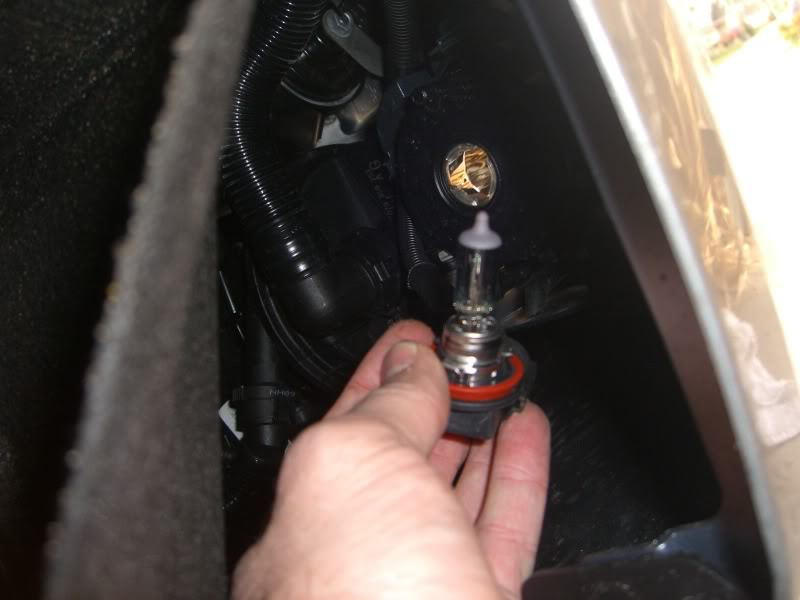
Step 3 – Change fog light bulb
With the bulb housing out and accessible, you can replace the bulb for the newer one.
- Pull the bulb out of the socket and discard.
- Install new H11 bulb and set into the socket.
- Insert the bulb back into the fog light housing.
- Repeat for other side.
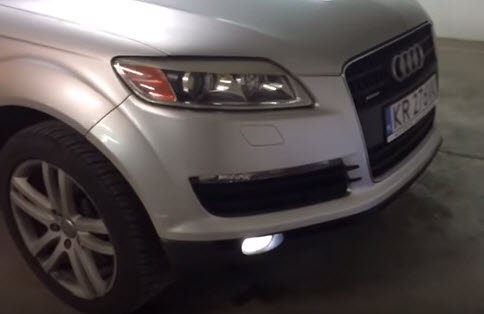
Step 4 – Test the new bulbs
Once the bulb has been replaced, it's time to put it back together and test.
- Insert new fog light bulb into housing and turn clock-wise.
- Reconnect harness (if disconnected previously).
- Reinstall liner and Torx bolts.
- Turn the key to "ACC on" position.
- Turn the headlight switch to fog light position.
Related Discussion, Site, and Video
- VIDEO: Audi Q7 Fog light removal - YouTube.com
- MyAudiQ5: Finding bulbs to match HID's - MyAudiQ5.com
- AudiWorld: Fog light replacement discussion - Audiworld.com