DIY 55k Service 2005 C6
[insert_php] if ( function_exists(‘yoast_breadcrumb’) ) {
yoast_breadcrumb(‘
‘);
} [/insert_php]
By: r1racer
Link to EVERYTHING required for the 55k service: http://www.bentleypublishers.com/ima…ance.sched.pdf.
Also, Audi just revised it’s maintenance schedule to include cleaning of the sunroof drains. One is located at the front right of the sunroof and the other at rear right (if you are sitting in the car). If clogged a small, sturdy but flexible material (like tubing) should be snaked through the length of the drain and then hit with compressed air. This should unclog it. If not clogged just hit it with some compressed air.
In this post, I cover the major items (oil/filter change, air filter, cabin filters, spark plugs, coil packs (optional), fuel filter (optional), brake fluid flush optional). Lubing, test driving, checking for leaks, inspecting boots…is self explanatory.
Oil/filter change: 45 minutes. Need jack, stand, light, flat head screwdriver, big adjustable wrench, needle nose pliers, rag, 18mm or 19mm socket/wrench, drain pan, 7 quarts of synthetic oil (mobile 1 0w-40), oil filter that should come with two rubber gaskets
1) Jack up the car on either side. Put a stand underneath for extra precaution as you will be under the car for a few seconds.
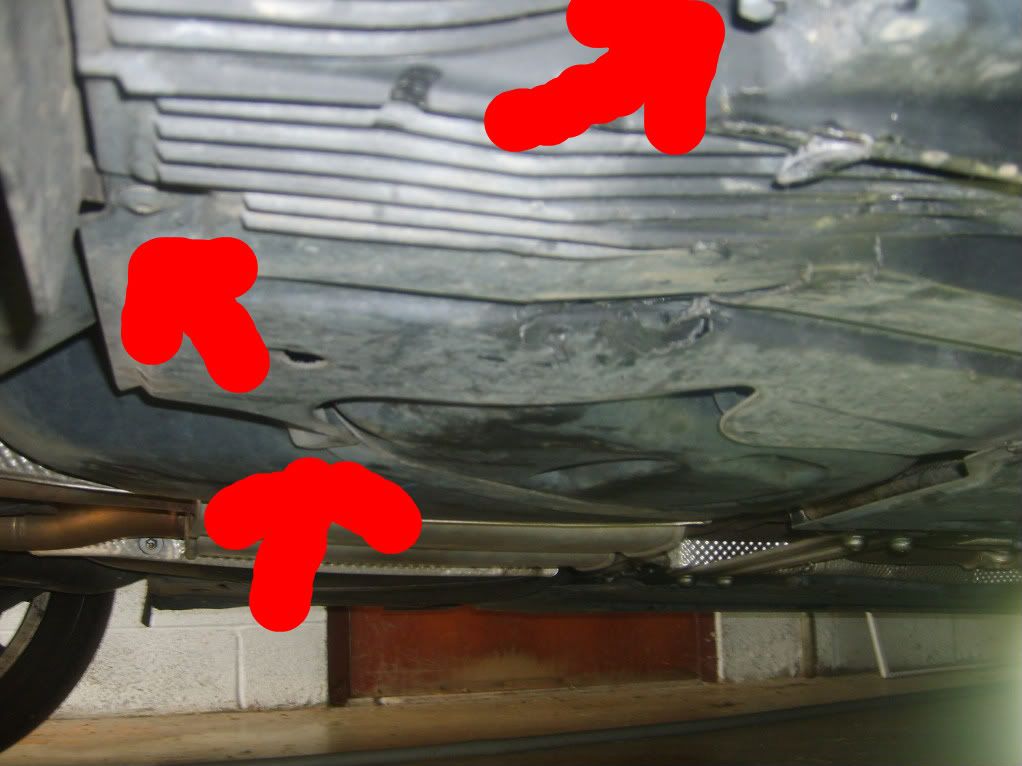
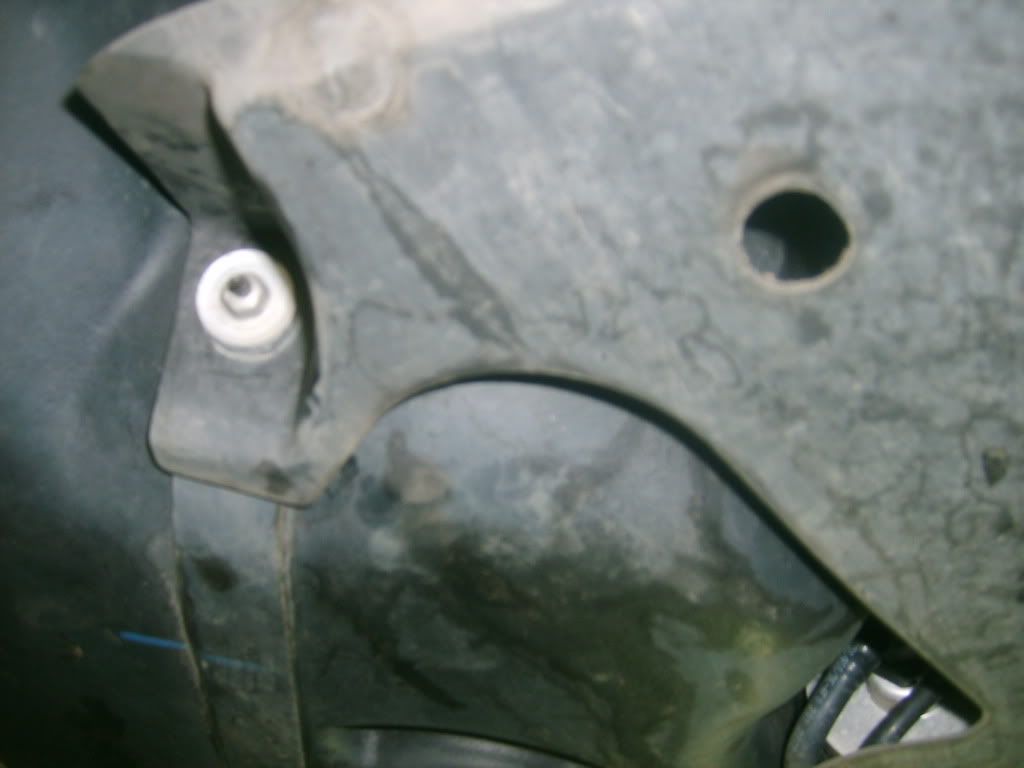
2) Remove the plastic belly pan by first unscrewing a couple plastic screws in the wheel hub area (right in front of the tires) if they are connected. Only the screws on one side of my car were there. You will have to turn the wheels to get to them. You need a fat flat head or phillips to get them off or some pliers.

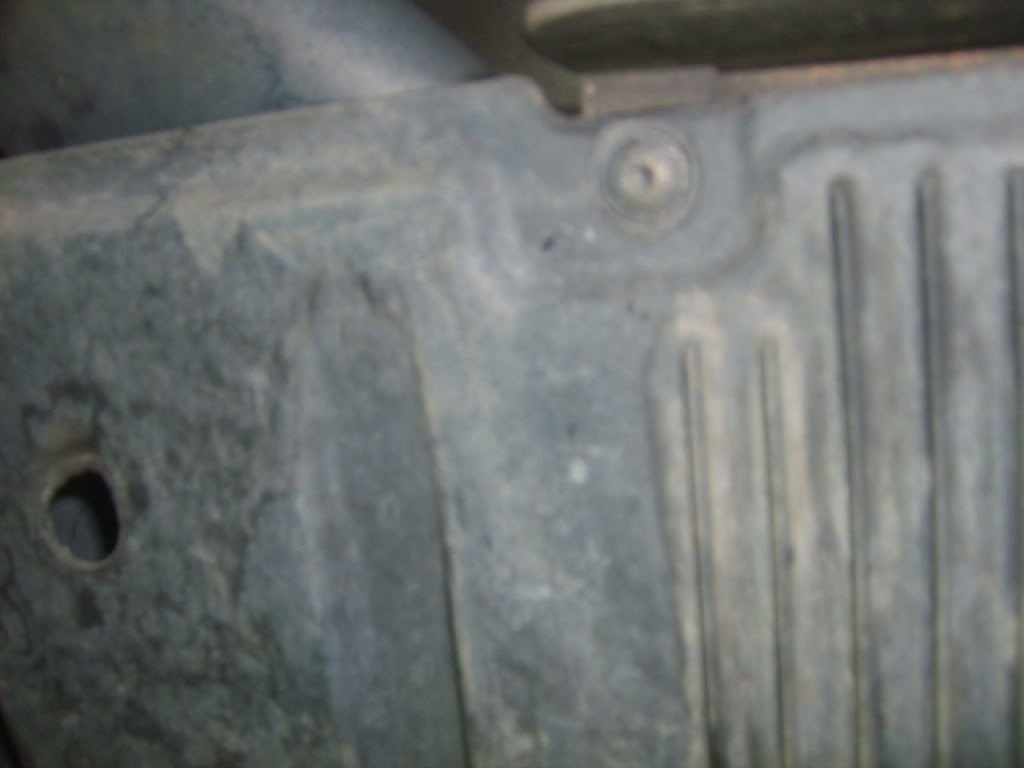
Next, remove about 9 locking screws on the underside of the pan with a flathead (assuming all are there). There are about 6 in the front one in the middle and two towards the back of the pan. Something like that. A couple of mine were missing so…anyway, very simple to figure out.
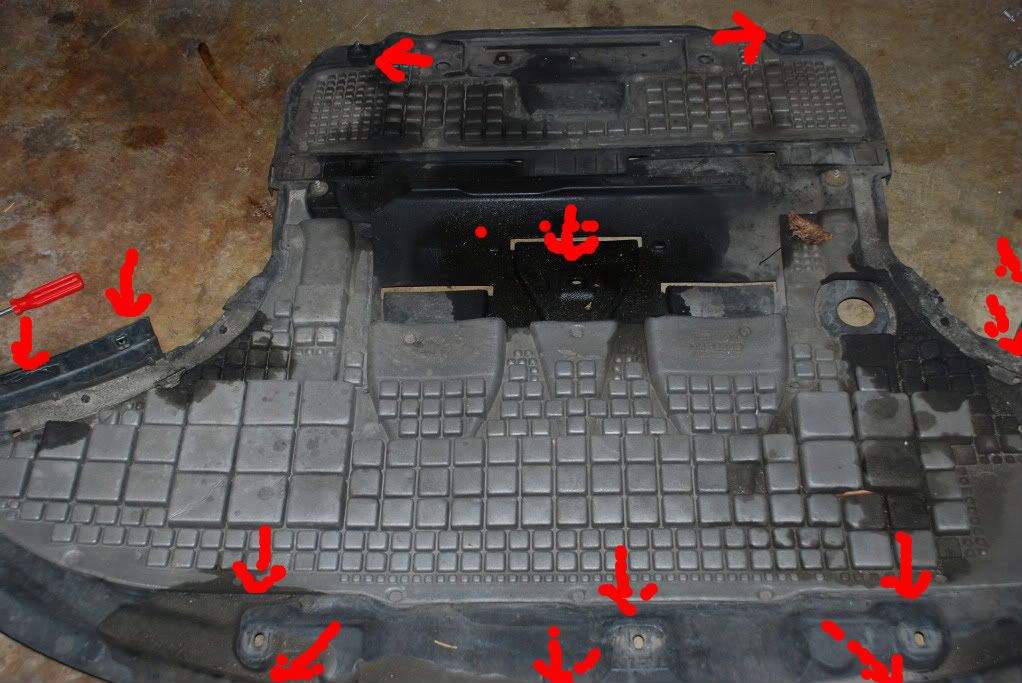
3) Slide the belly pan out.
4) Pop the hood and remove the oil cap.
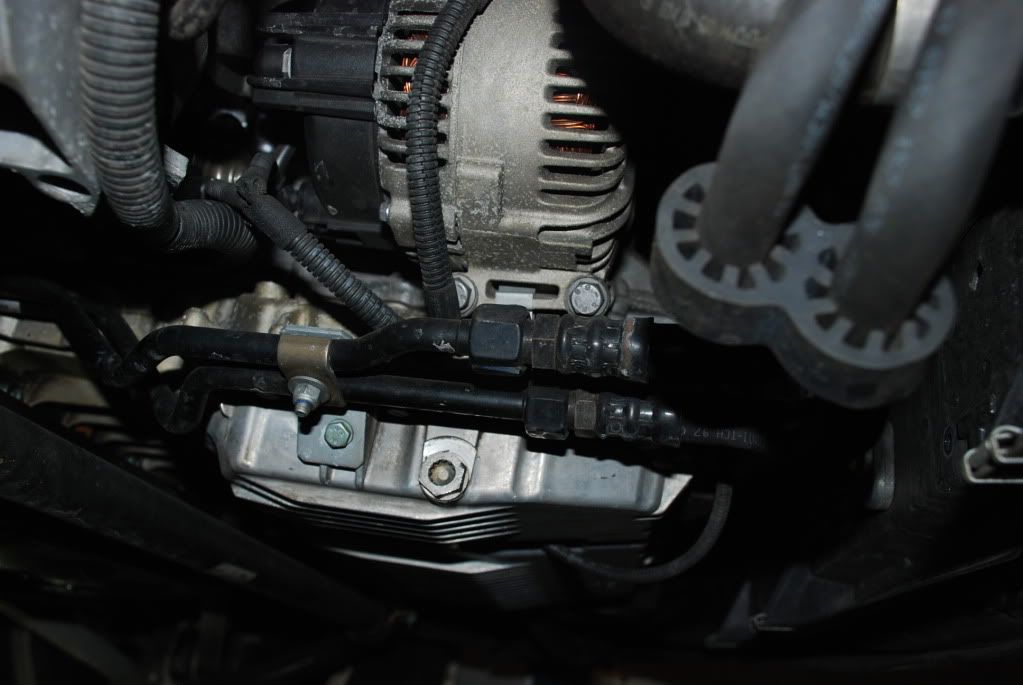
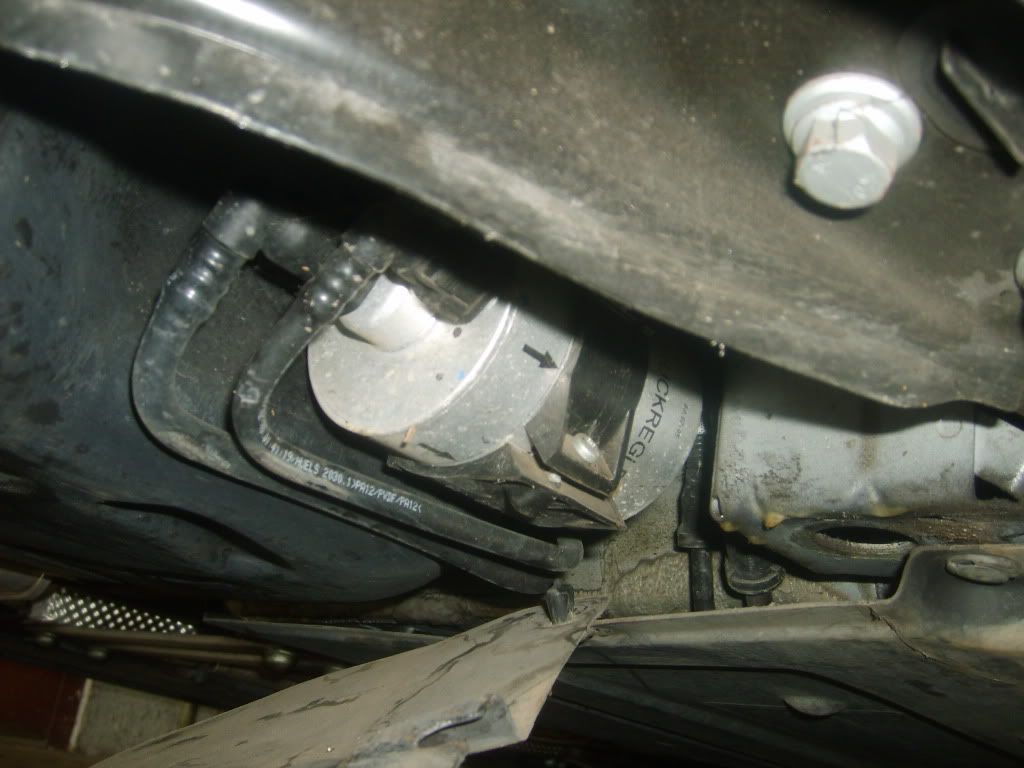
5) Drain the oil using an 18mm/19mm wrench/socket or a 10mm allen wrench for the 4.2. You don’t need to jack the car back up if your oil drainage pan can fit under the car like mine. The drain plug is right at the front of the car on the passenger’s side. You can’t miss it. Be sure not to lose the washer that is on the drain plug (bolt). Again the 4.2 engine is slightly different. The drain plug is removed using a 10mm allen wrench and can be seen in the photo below (the pic with the black oil pan).

rel=”Lightbox”
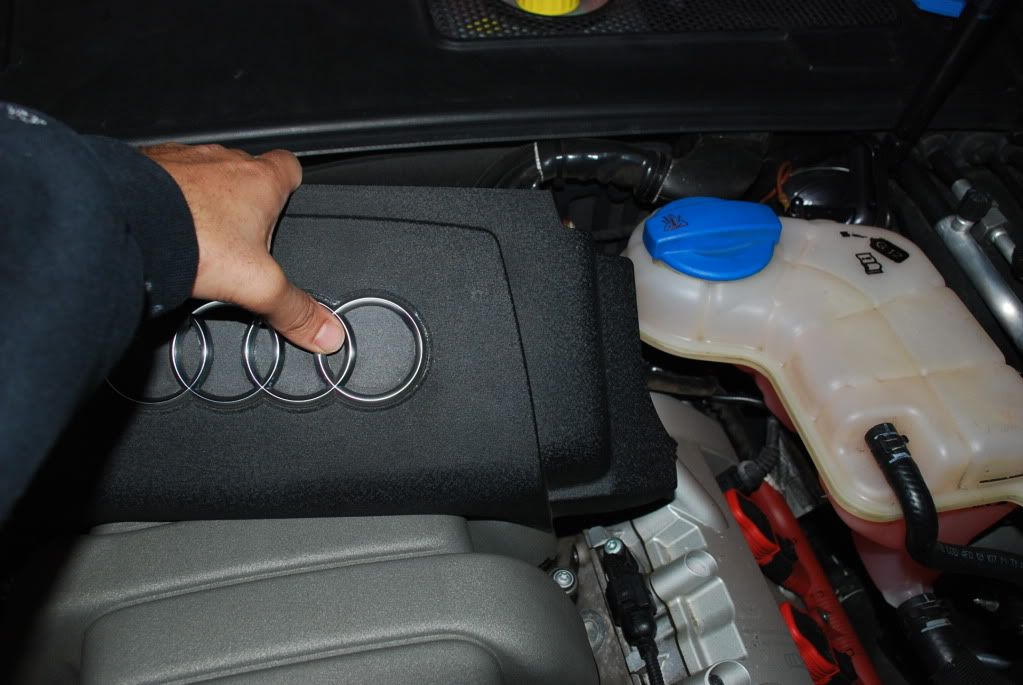
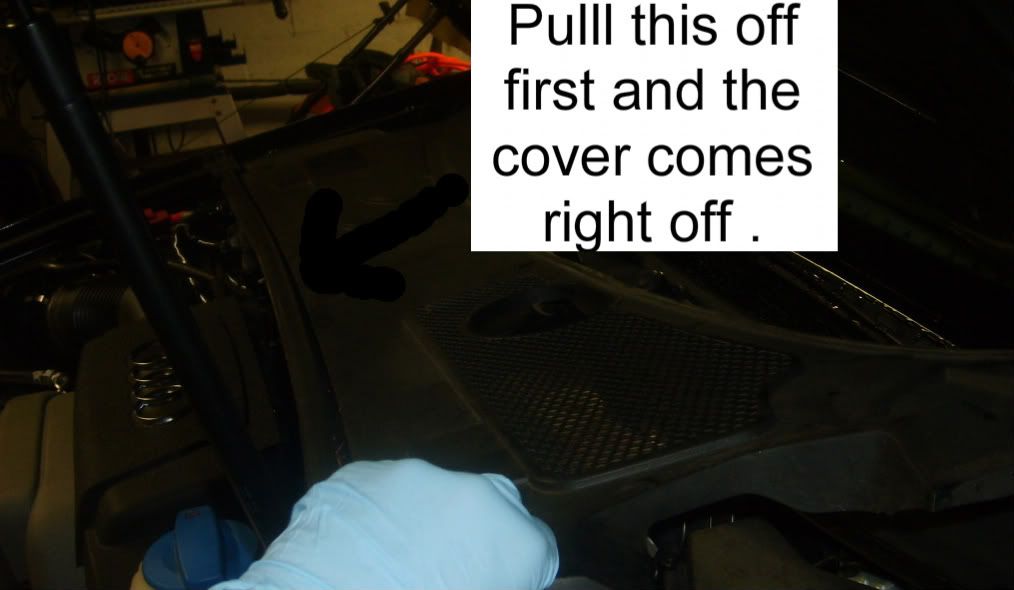
6) While it’s draining pull off the plastic cover that has the audi symbol on it located under the hood. Remove it by pulling it towards the front of the car. You will now see the oil filter sitting right in front of you, just right of the cylinder head.
7) Lay a towel down next to the oil filter housing. Get a big adjustable wrench or large pliers (wrench works a lot better though) and turn counter clockwise. Unscrew and pull the oil filter/oil filter cap which is all connected.

8) Once you remove it, make sure you turn it upside down so oil doesnt drip everywhere. What you are pulling off is the oil cap that has sort of like a plastic paper towel holder attached which slides through the middle of the oil filter.
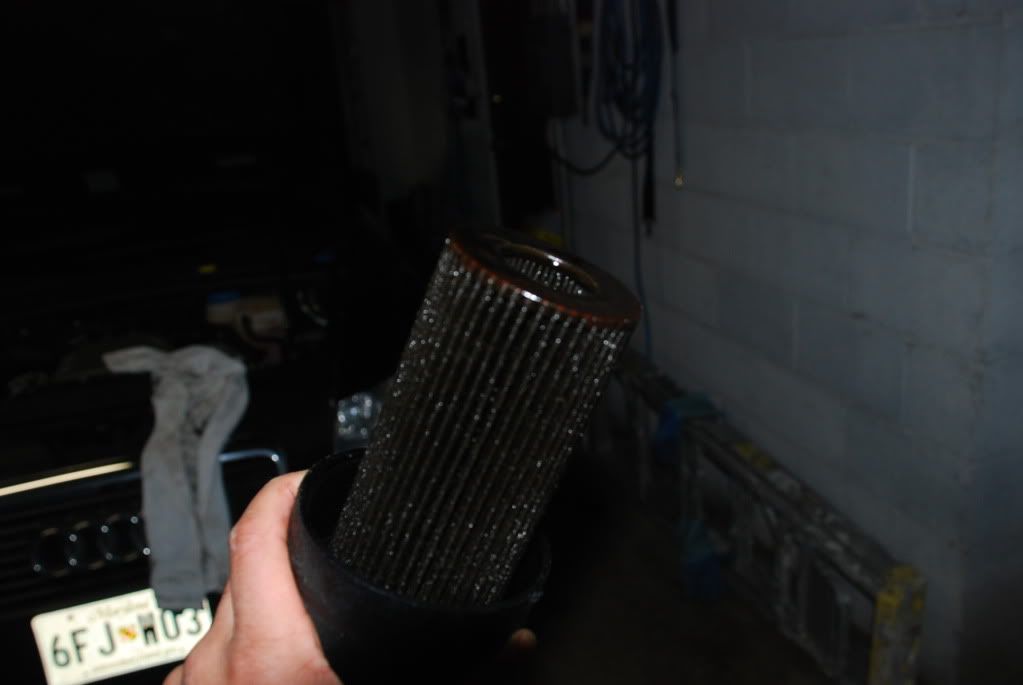
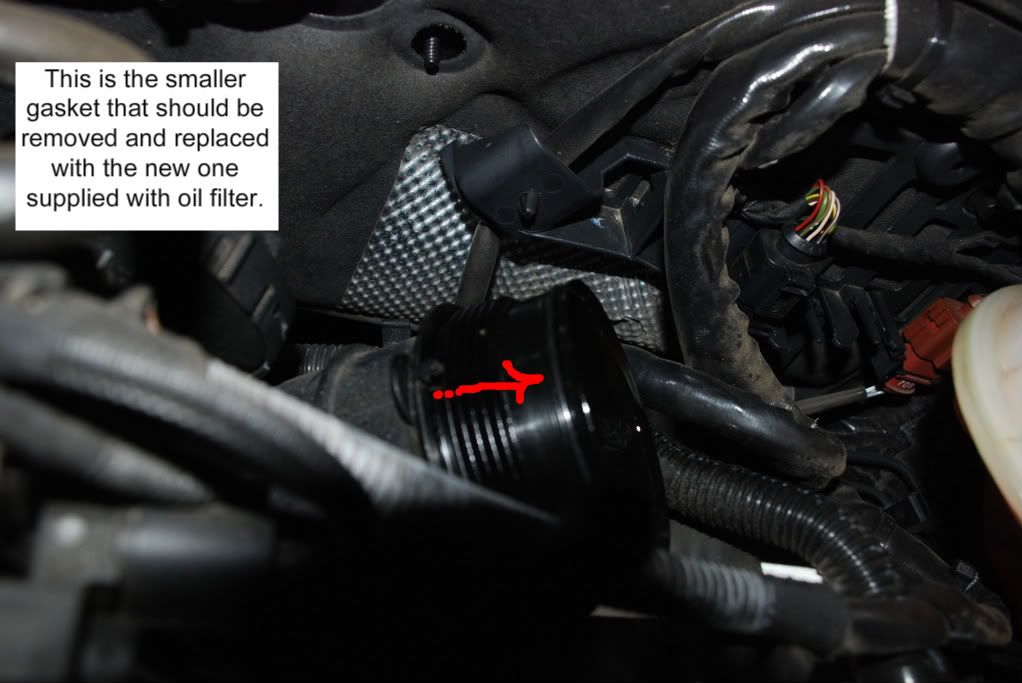
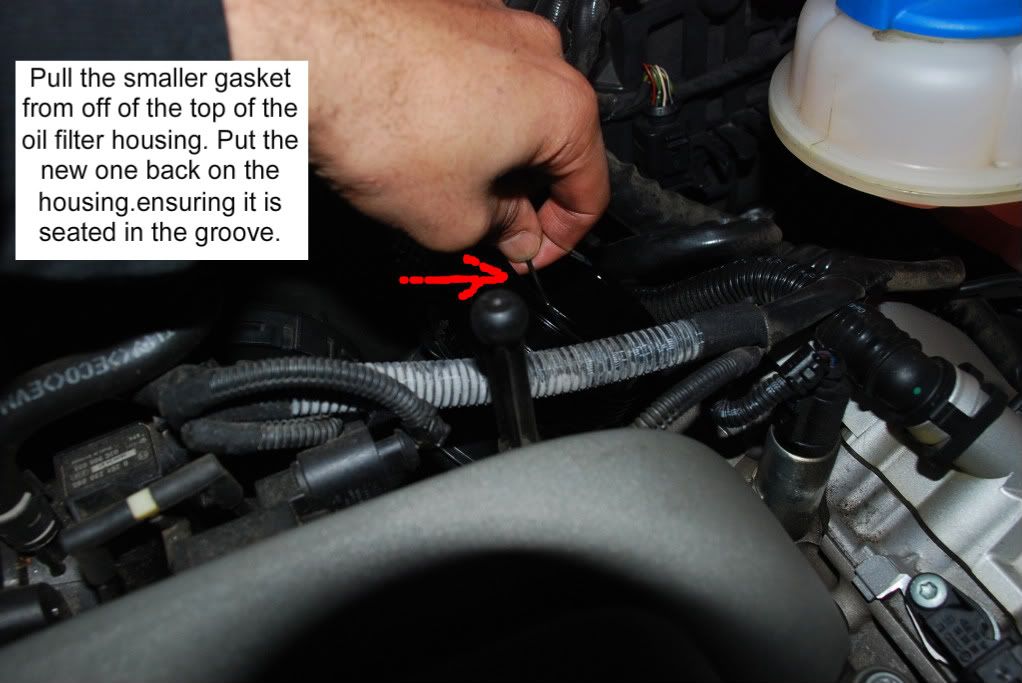
9) Remove the two old black rubber gaskets (one big with a tab and another smaller one). The bigger gasket will be in the cap that you just removed and are still holding upside down. Use needle nose pliers to take it out. The smaller gasket will be on the housing that is attached to the car above the male threads.
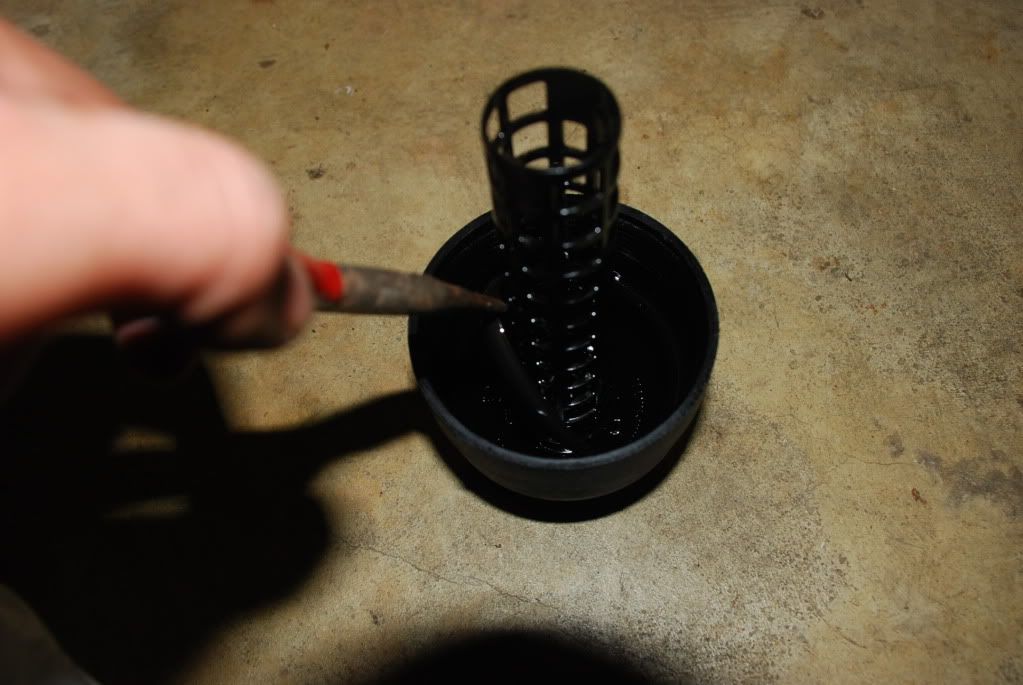
10) Now yank off the oil filter (sort of like taking a roll of paper towels and pulling them off the holder).
11) Slide the new filter on making sure it snaps in. Lube the large gasket with oil and put it back in the cap. Place the smaller gasket back on the oil filter housing. See line 12 for detailed instructions.
12)17 Engine oil service – filter cartridge replacement-2.pdf
13) Now take the oil cap/filter and screw it back on. You will have to press down and turn. Hand tighten and then get your wrench and tighten it back up if necessary (usually isn’t). There is a line on the oil filter cap that should line up with the line on the oil filter chamber.
14) Put the drain plug back on. Fill her up. The manual calls for 6.9 quarts. I would check the level at 6 quarts (on a flat surface) and put no ore than 6.5 quarts in. I used mobile 1 full synthetic 0w-40. Also, I noticed that the oil readings are lower after the car has run, so you may want to wait until the car has been sitting for several hours to check the true level.
15) Turn the car on. Check for leaks. Turn her off if all is good.
16) Jack her back up and put the plastic belly pan back on.
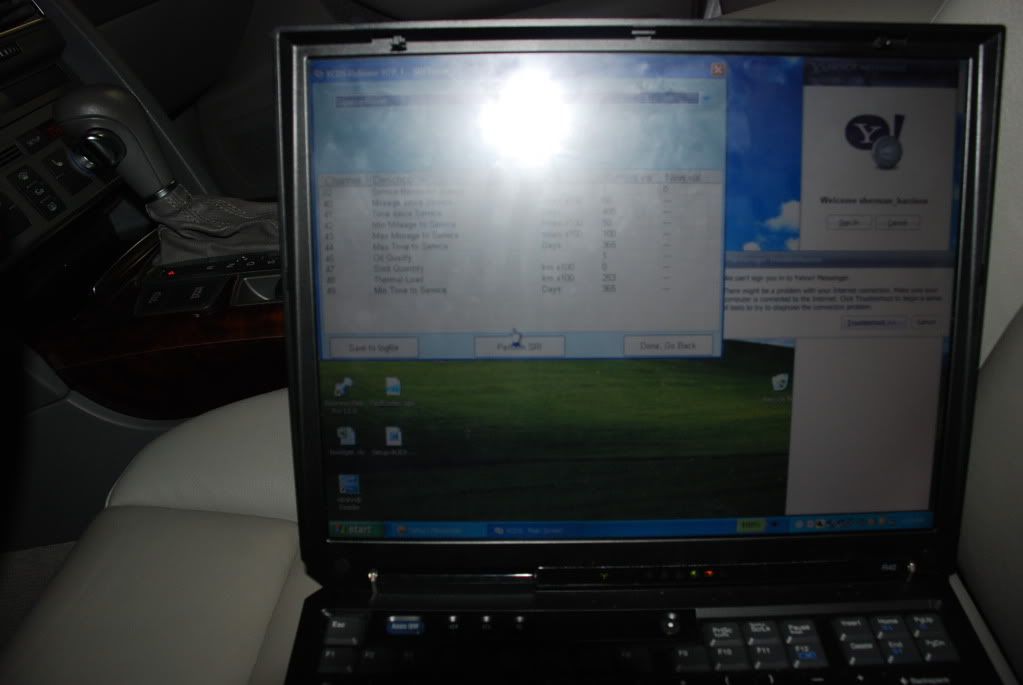
17) Reset service reminder with vag-com if available by going to “SRI Reset” on the main screen and then selecting reset from the top drop down menu. Then press “Perform SRI Reset” at the bottom of the page.
18) Check the oil one more time and your done.
Air filter: 30 minutes as it was my first time. Need light, phillips/flathead screw drivers, compressed air or damp towel, air filter and a little patience.
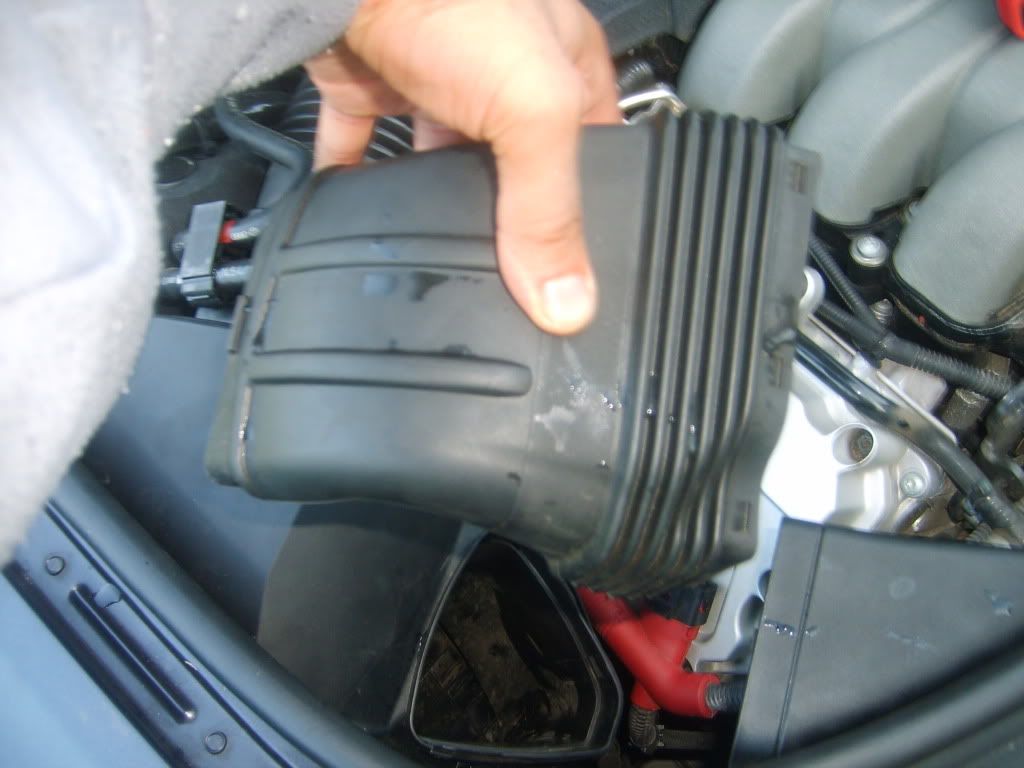
1) Pop the hood, remove the only two phillips screws from the black cover on the front left side of the hood left of the radiator and above the grill. The air intake/box comes in three sections. Underneath the black cover there is a small piece (snow screen) that should be cleaned.
http://photos-g.ak.fbcdn.net/hphotos…_5011008_n.jpg
2)Remove the front section of the air box by simply pulling it out now that the screws are off. Remove the second section that goes into the airbox. Clean both sections.
3) Remove wires from top of the air box. Just slide them off (u will see what I mean, no biggie).
4) Loosen O clamp and undo the two clips that connects air intake to airbox and pull out the air intake.
5)Leaving the airbox still in the car, undo the two clips at the top of the airbox.
6) Pull up and to the right on the airbox just enough where it pops out. There are rubber, cork like stops that pop in and out of holes in the frame (sort of like wine/champagne corks) that secure the airbox to the frame of the car.
7) Now just pull out and you will remove the air box with one half of the box still attached to the car. May have to do some wiggling.
8) Unscrew the air filter (two phillips screws) from the 1/2 of airbox you have pulled out of the car. Clean and replace with new filter.
9)Clean out the other half of the airbox still in the car.
10) Reassemble not forgetting to redo all clips and screws. Make sure the air box stops/corks pop back into the frame. Reattch wires.
Note: You can remove the entire air box, but it was easier to just take out 1/2 of it and this is the way the service manual recommeds that it be done.
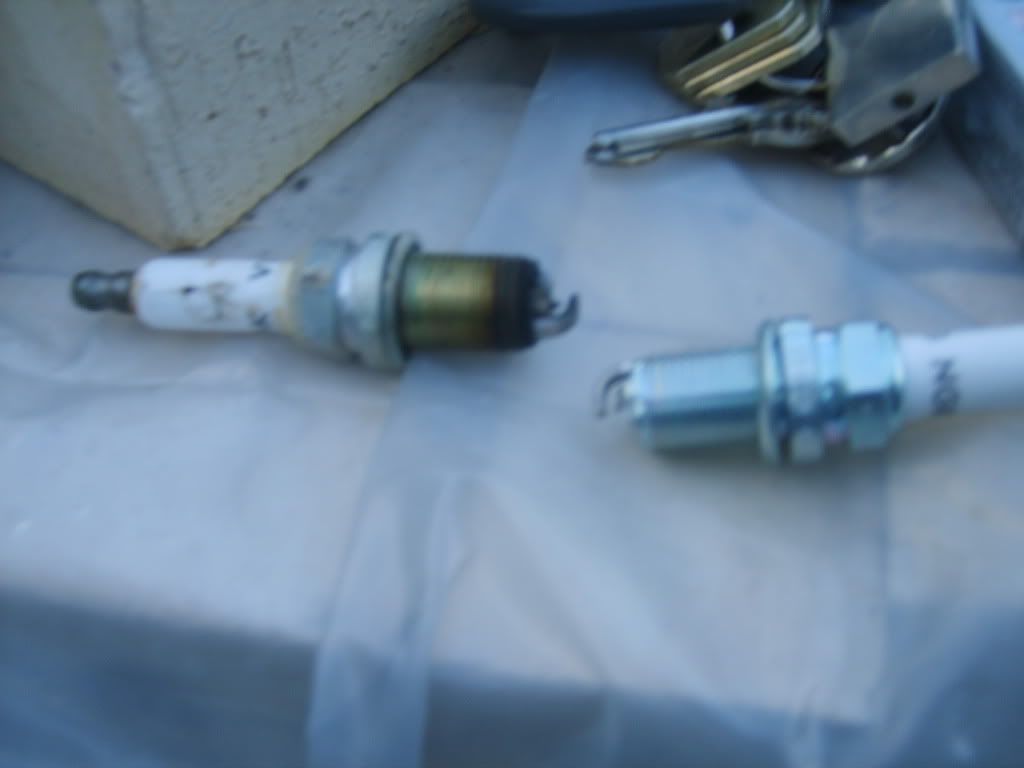
Spark plugs: 45 minutes. Let the car cool down, grab a couple of beers, a 10 mm wrench/socket, 16 mm spark plug socket, 16 mm long socket, pliers, flat head/phillips screwdrivers, awl, torx bit (optional) size T-17 or T-18, ngk plugs (I got mine from genuine audivwparts.com).
2) Pop the hood and locate the four torx screws (2 on each side). Remove them with a torx bit or with pliers. Once you loosen them a bit you can use your fingers to get them off. I ended up using pliers as there was not enough space to use a screwdriver with the torx bit attached.

3) Remove the one phillips screw holding the overflow tank in place and then lift up on the tank. This frees the tank. Lay it down on the right fender of the car. No need to disconnect any hoses.
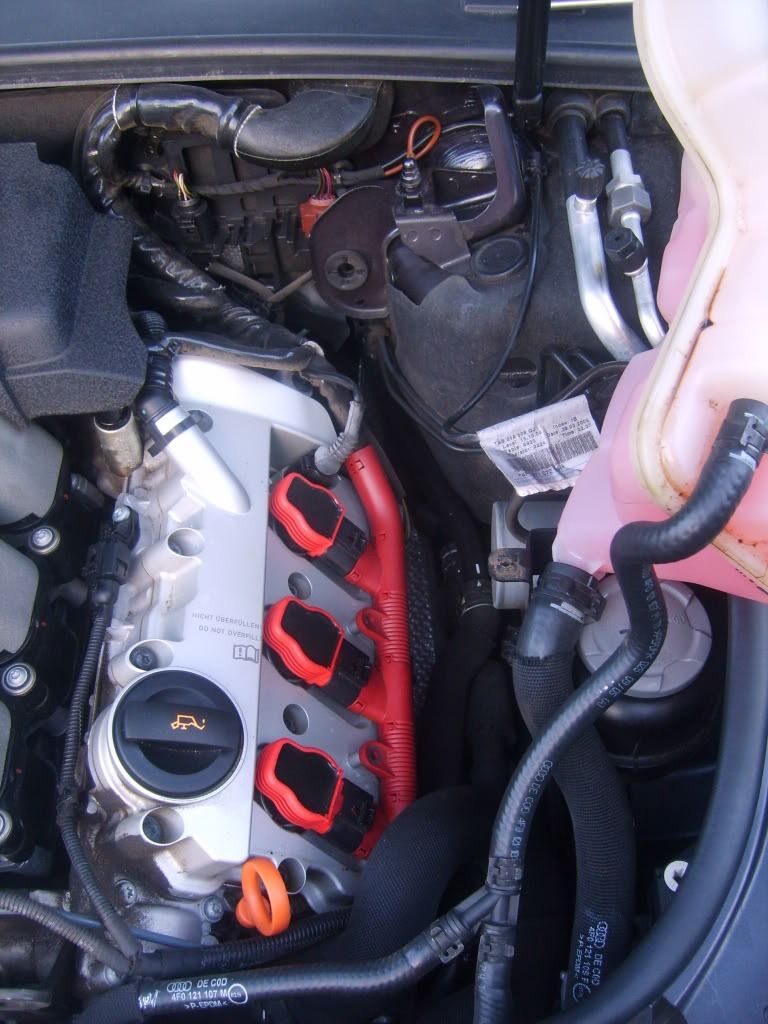
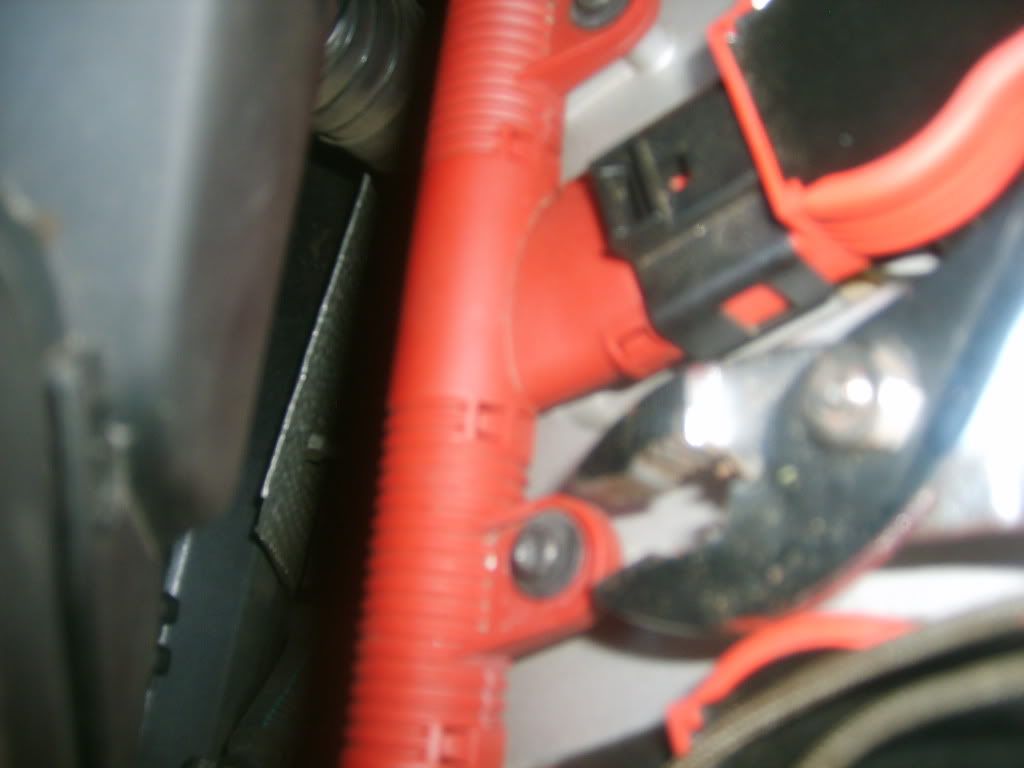
4) Remove the middle section of the air filter to get to the first coil pack on the left side of the car. All you do is pull it out.
5) Unsnap the two clips and loosen the O-ring on the accordian looking air intake at the top of the air box. Pull this section out of the top of the air box so the third coil pack and spark plug on the left side can be removed.

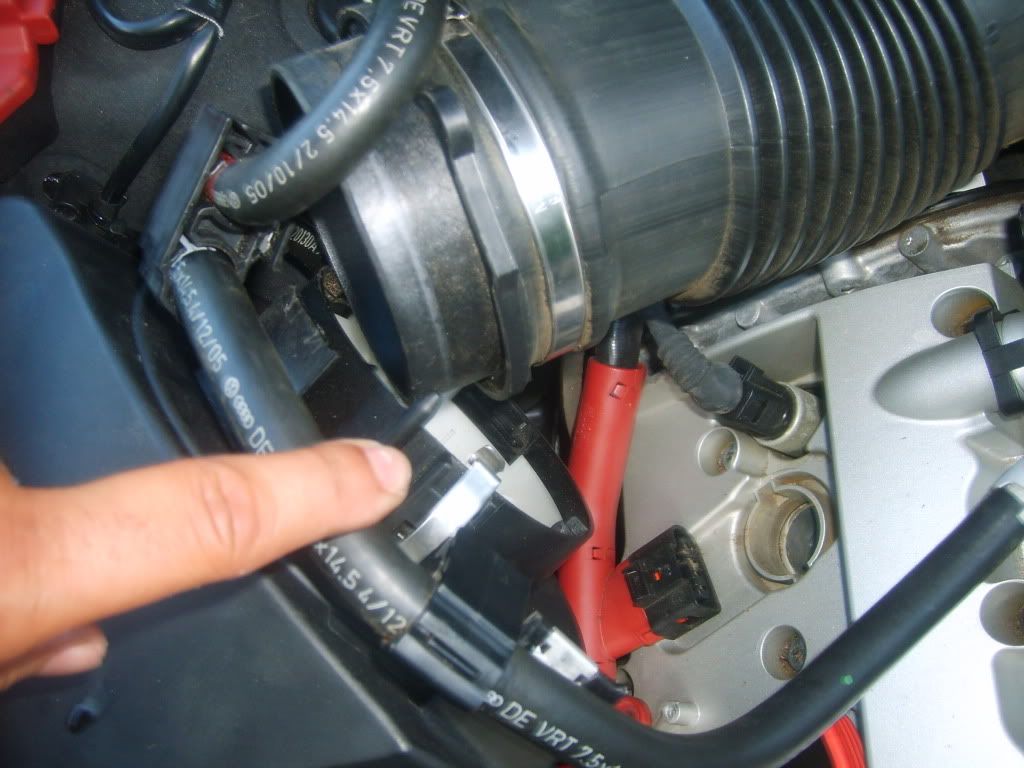
6) Push the tab down on the harness and it should disengage from the coil pack.
7) If you don’t have a coil pack puller or can’t pull the coil pack out with your hands use a screwdriver, position it underneath the coil pack and press down while pulling up the oil pack with your hand. They will slide right out with ease.
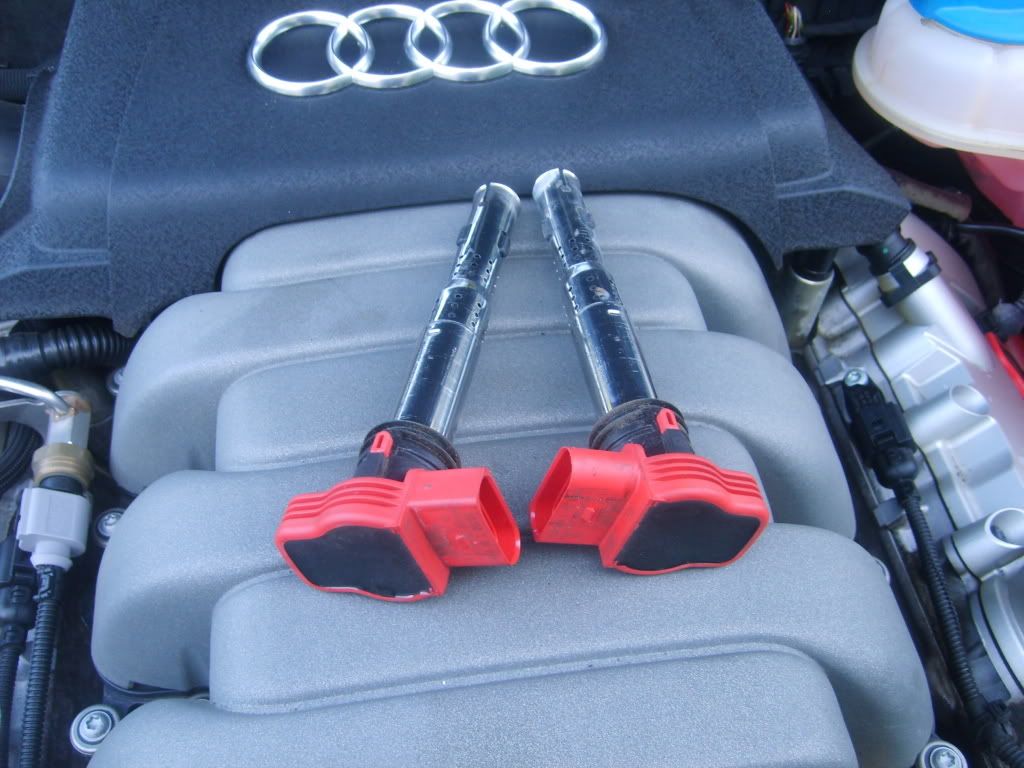
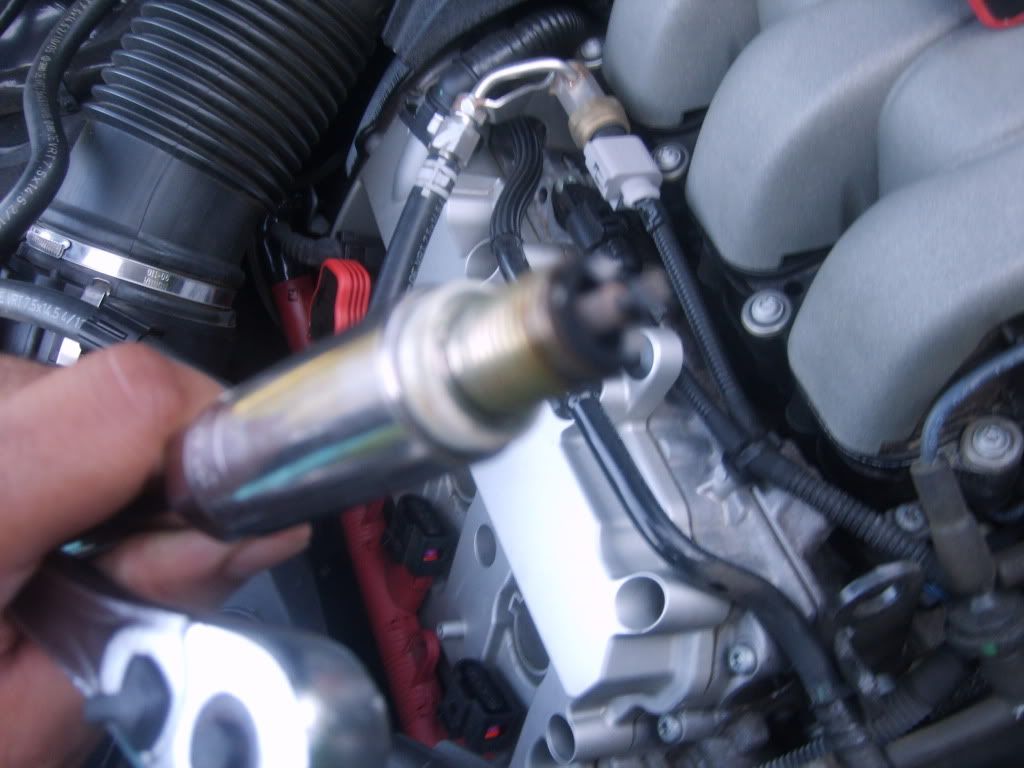
8) Get your 16 mm spark plug socket and unscrew one at a time. I like to replace each plug before moving onto the next one to prevent anything from falling into the chamber. Check the gap on each plug before installing. Mine were all pre-gapped and should measure .032 to .033. Use a standard long neck 16mm socket to tighten the plugs. If you use the plug socket you will probably have a hard time getting out of the chamber.
9) Put the coil packs back on, pressing them firmly into place. Reattach the harness and the torx screws, tightening with pliers or torx bit. Leave the overflow tank where it is for now.
10) Put the two pieces of the air intake back together remembering to lock the two clips into place and tighten the o-ring.
12) Turn the car on listening for any hesitation or misfiring. If all is good, turn the car off and reinstall overflow tank.
13) Take her for a test drive
Cabin Filter: 10 minutes max! Need a small flathead, two pollen filters and a light.
Ok, installing the cabin filter DOES NOT require removing the entire glove box as people have said. It’s a a very simple process. You do the following:
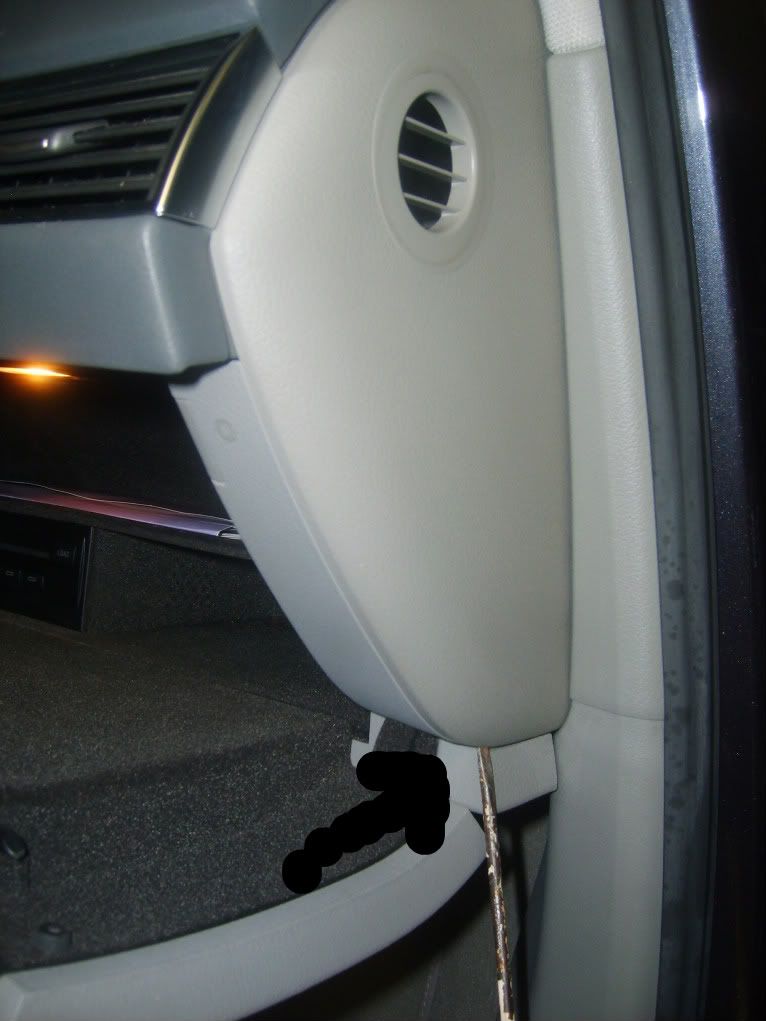
1) Remove the black section underneath the glovebox. All you do is take a small flathead and push up and toward the front of the car in the three small slots. This pops the tabs out. Do this for each of the three slots and the black piece will pop right out.
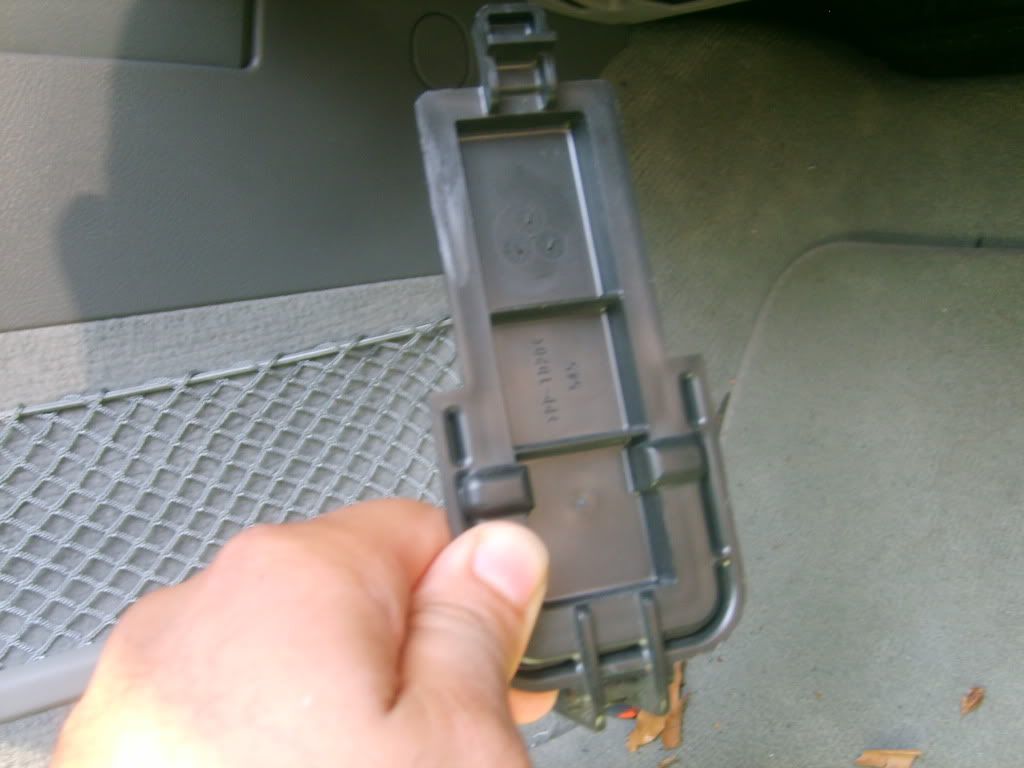
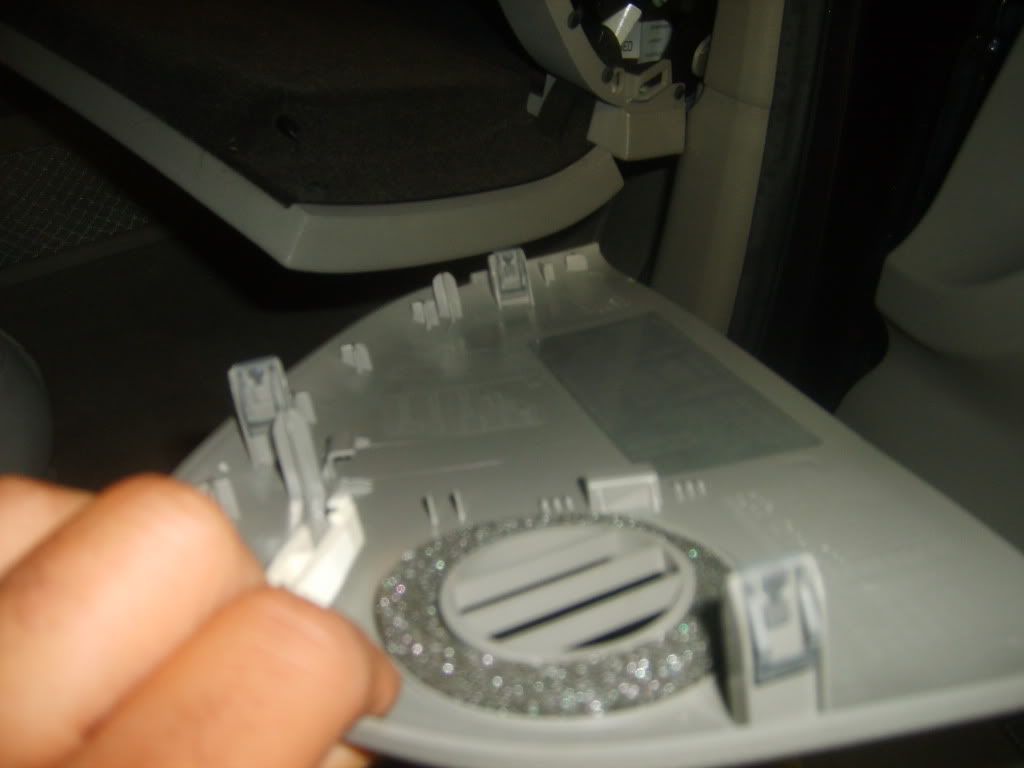
2) Take your light and look up and to the left (like you are looking behind the AC control unit) and you will see the black housing that holds the two cabin filters.

3) Take this cover off by pulling down on the bottom tab and it comes right off.
4) Pull the first cabin filter out (there will probably be leaves and dust/dirt that fall out).
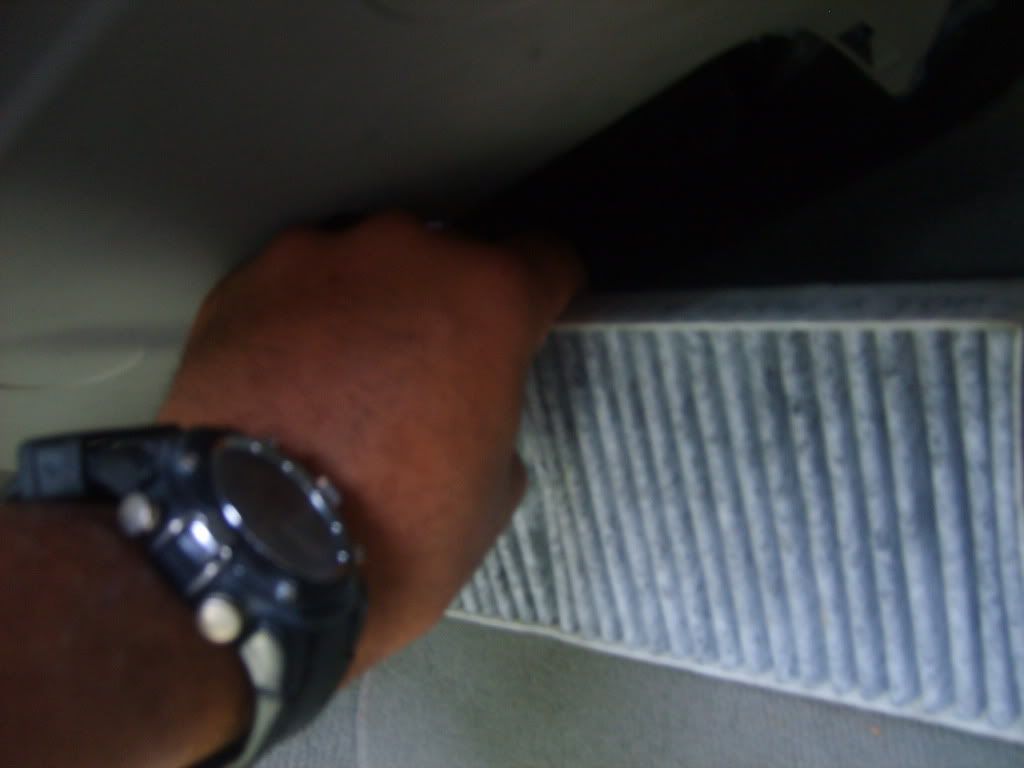
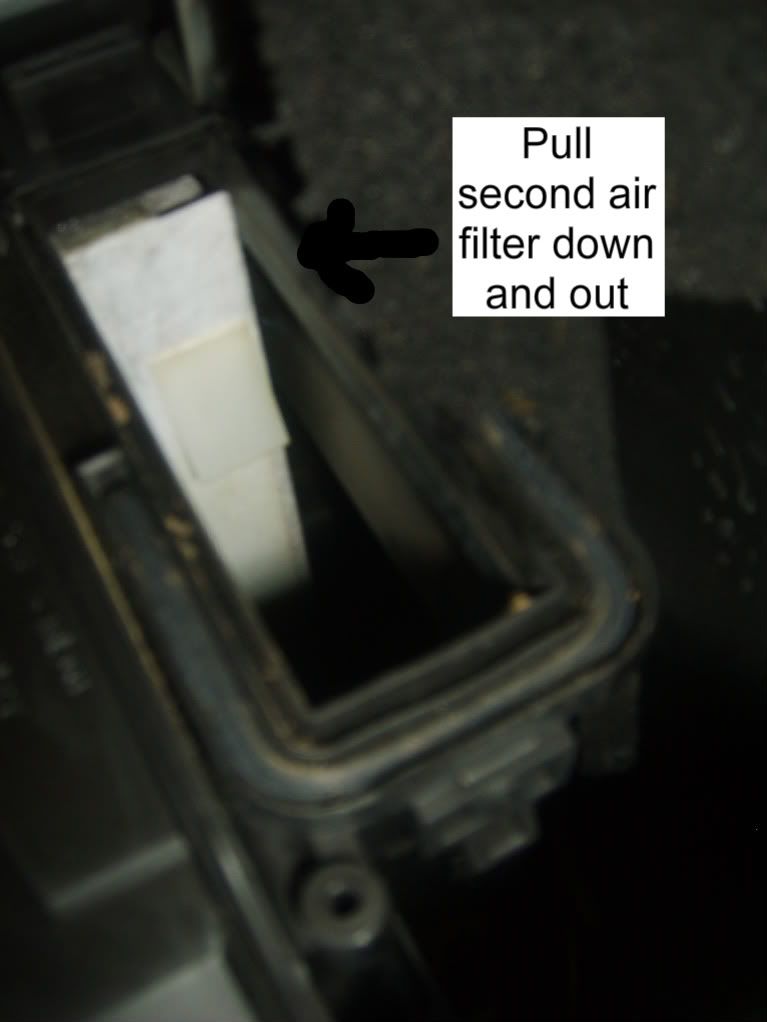
5) Pull the second filter out which sits on top of the second one. You’ll have to pull it down and then pull it out.
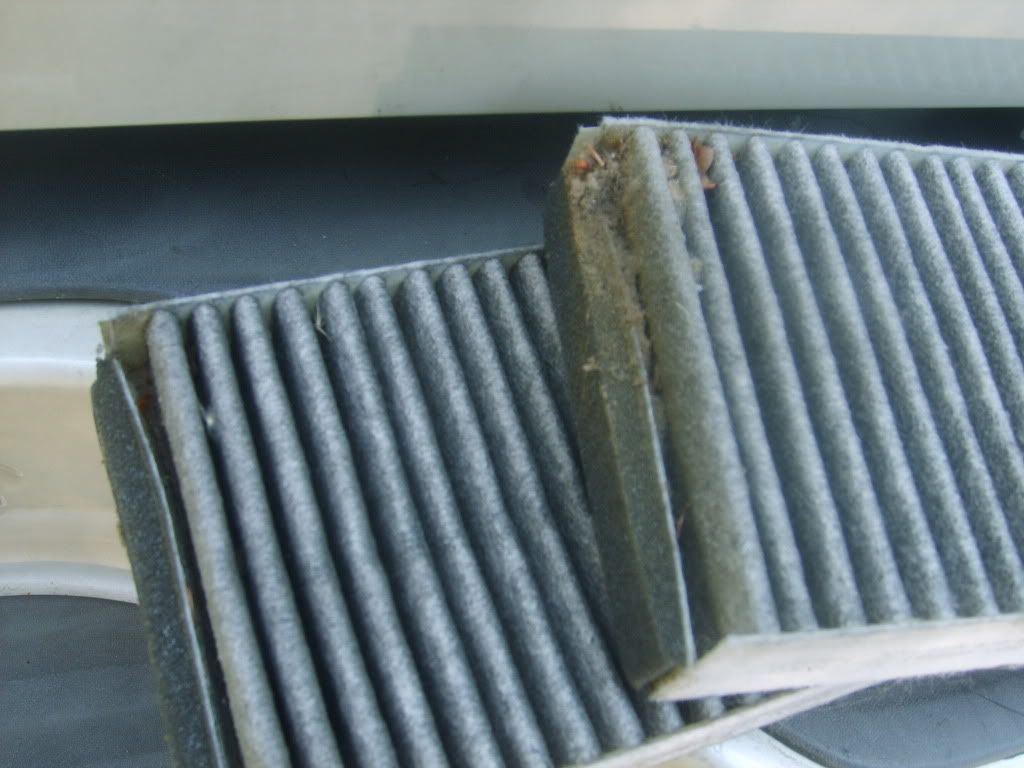
Old filters
6) If you have a small vacuum that you can fit inside, vacuum it out. If not, no biggie, stick your hand in there and pull out any leaves or dirt or hit it with some compressed air.
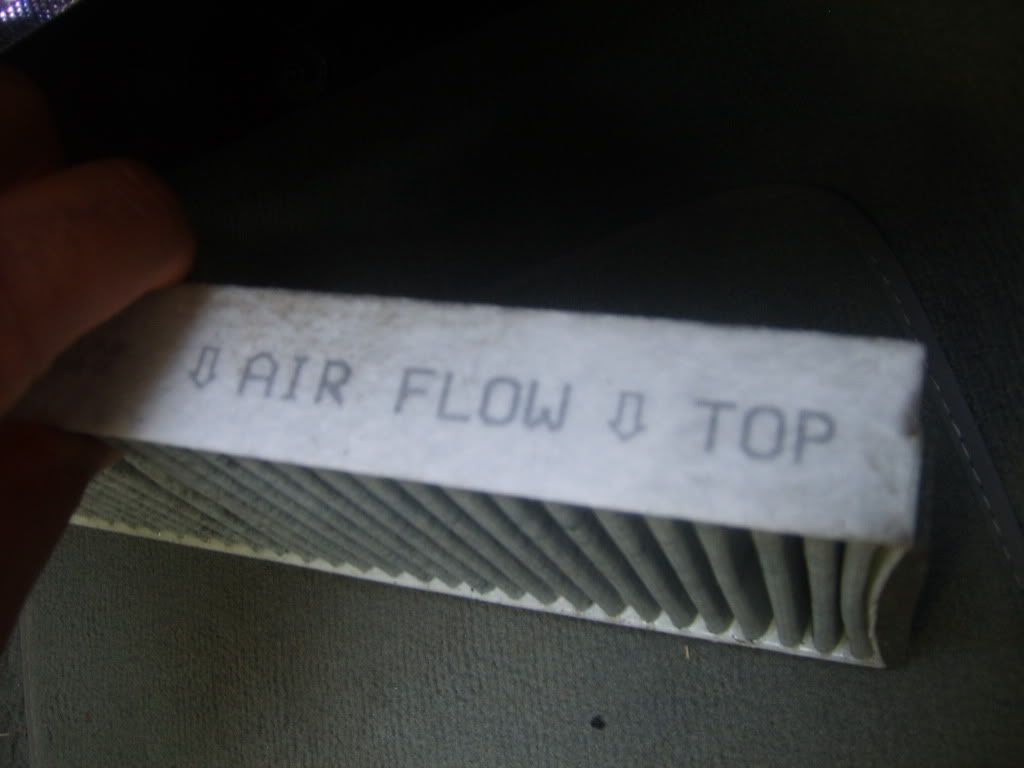
7) Put the first filter in with the arrow facing toward the inside of the car and push it up. Take the second filter with the arrow also pointing toward the inside of the car.
8) Put the filter cover back on and the underside of the glovebox and you are done. Very simple.
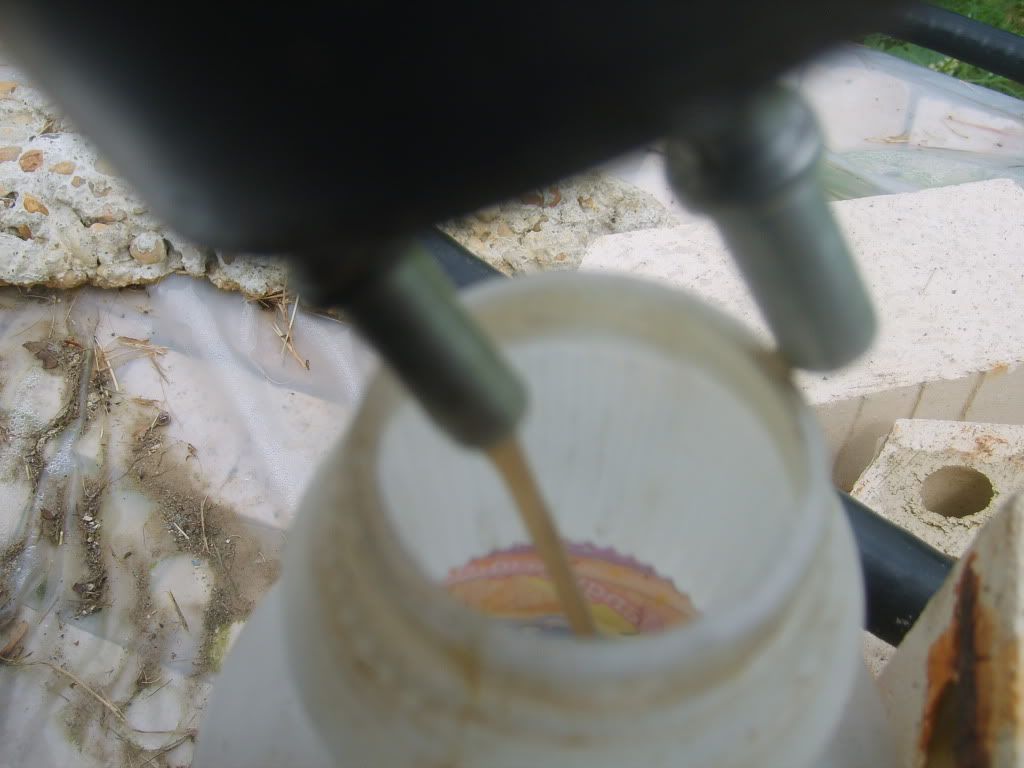
Fuel filter change: 30 minutes. Need jack, light, flathead, 10 mm wrench/socket, t-20 torx bit or screwdriver (the bit with a socket wrench is better),towel, plastic bowl/container, rubber gloves.
Ok, changing the fuel filter is a straightforward process that should have only taken me about 15/20 minutes. The filter is easily accessible. The hardest part was removing the fuel lines/clips that are attached to the fuel filter as I wasn’t sure how to remove them. Now that I have done it, it’s a simple process as follows:
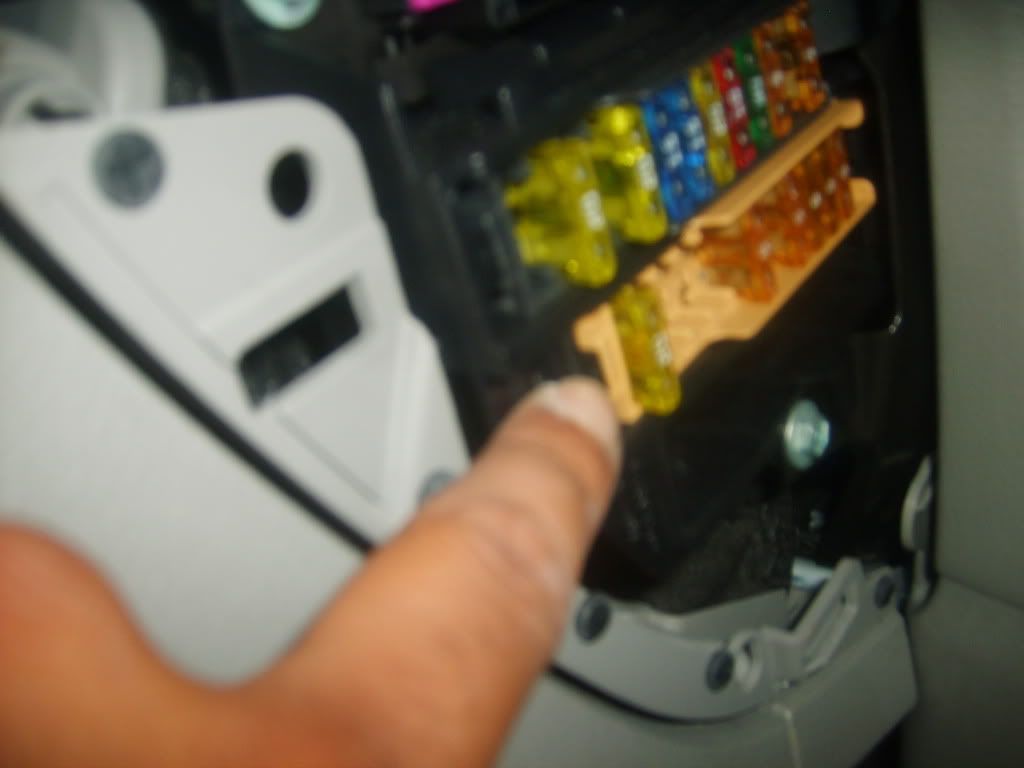
1) Remove the side cover on the passenger’s side to access the fuse panel. Do this by inserting a small flathead in the slot at the bottom of the panel. Pry it out.
2) Remove the first and only 20 amp fuse in the BROWN section of the panel. This is the fuel pump fuse. Make sure the car is OFF before removing otherwise the car will continue to run as the siphon has already been created.
3) Turn the car on and it will run out of gas in 10 to 15 seconds. The fuel system is now depressurized.
4) Turn ignition off.
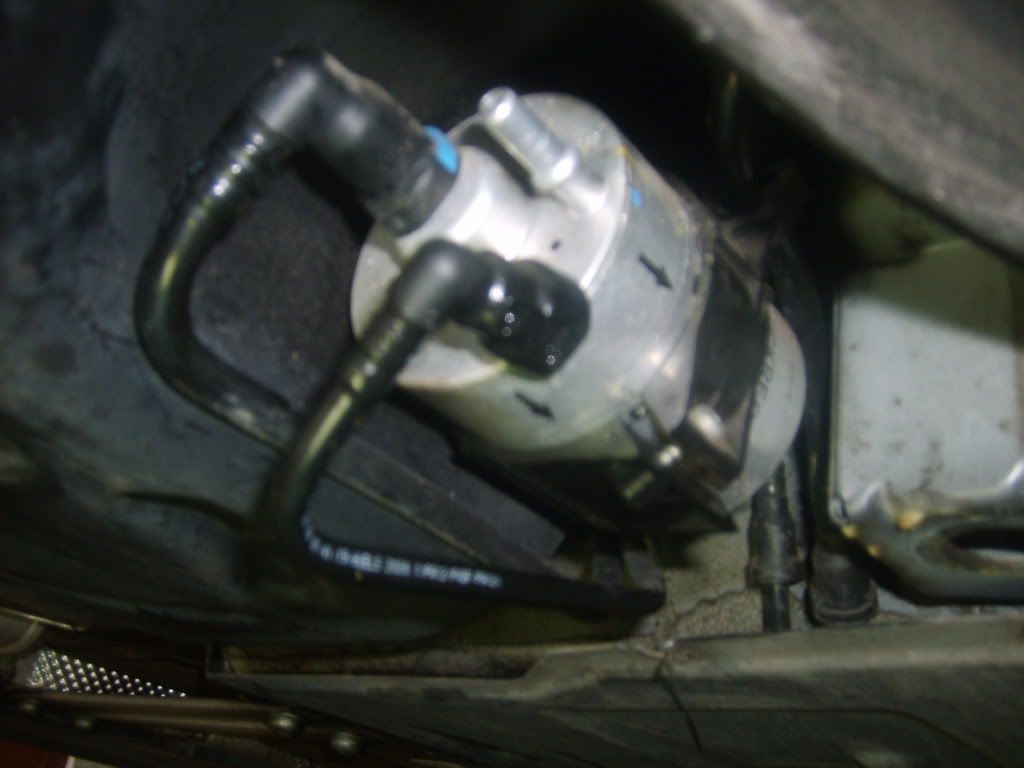
5) You will be working on the right side of the car, next to the rear tire. You will not be under the car (which is good). Jack the right rear of the car up and locate the small belly pan right in front of the rear tire. The fuel filter is right above it.

6) Remove the silver 10 mm bolt, black 10 mm bolt (part of the belly pan), and t-20 torx screw. Slide the pan off and you’ll see the fuel filter in front you. At this point you can choose to remove the jack. I left mine jacked up.
7) Note the position of the filter so the new one goes on the same. Lay your towel down and place your container under the filter.
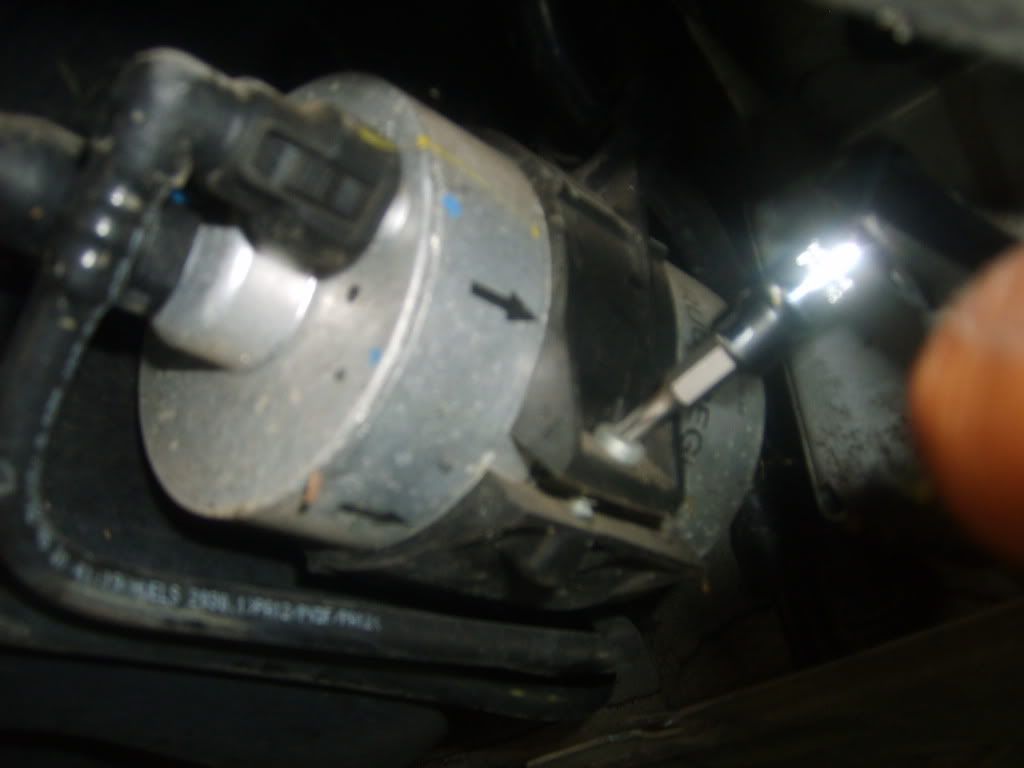
8) Remove either of the two clips facing you. The one with the blue tab on it is removed by pushing the fuel line towards the filter first. While still pushing the line towards the filter (as if you were putting the line on the filter instead of taking it off), squeeze the blue tab and then pull it off. If your fingers aren’t strong enough, use a screwdriver to push the blue tab in and then pull it off while keeping it pushed in.
For the other line, you do the same thing. This line does not have a blue tab, however. It is just a black tab that you push in and pull off. Remember to push it toward the filter first (as if you were putting it on) while squeezing the tab, then pull it off.
9) Fuel will spill out. Don’t panic just let your container/towel catch it until it is empty.
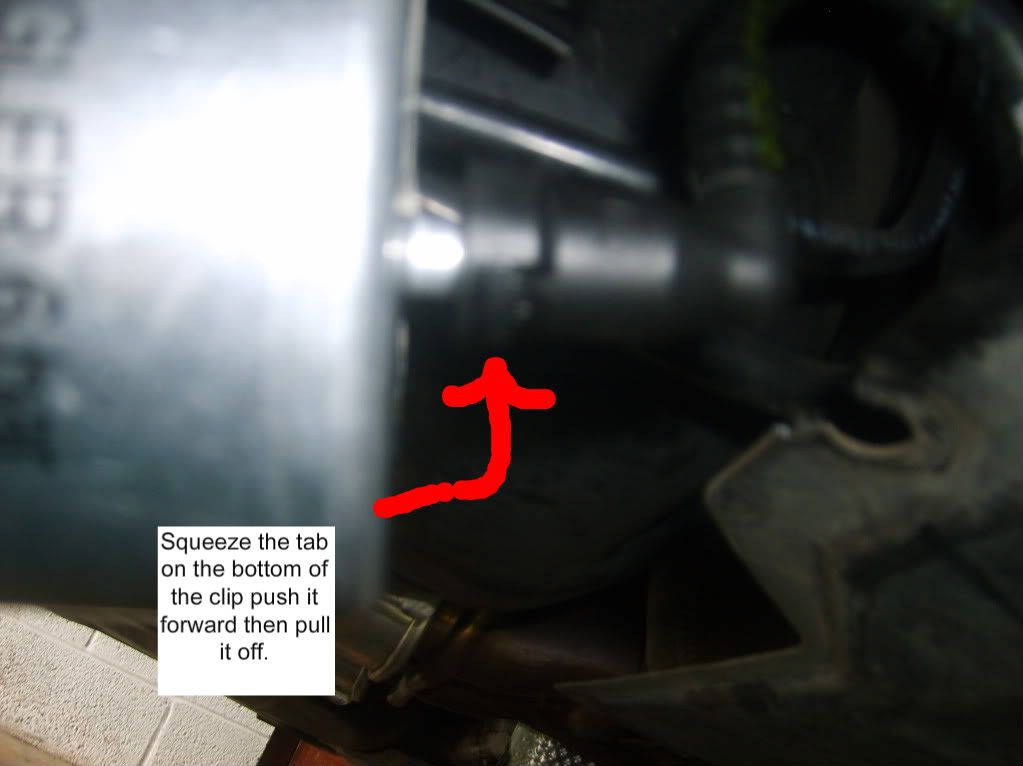
10) Remove the torx screw holding the filter on the bracket. Pull the filter CAREFULLY down and out of the bracket so you can remove the final line on the other side of the filter. I say carefully, because the bracket is plastic and you don’t want to break it.
11) Remove the last line on the other side of the filter by squeezing the bottom of the clip and it comes right off.
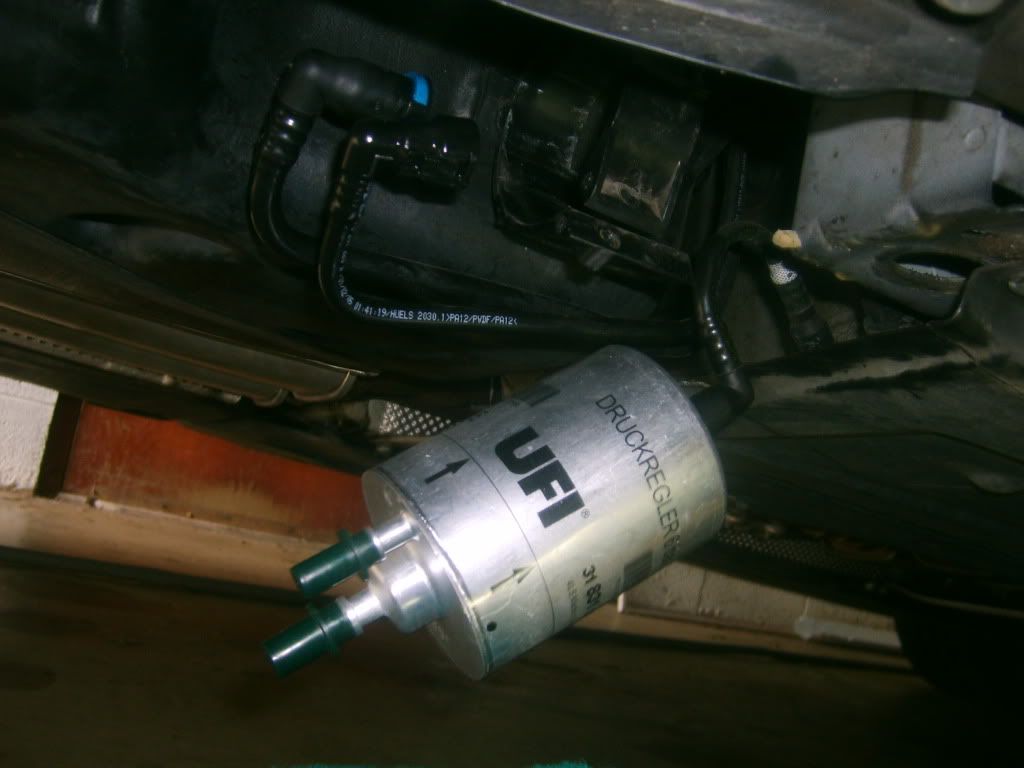
12) Hook the new filter up to the three lines and make sure they snap into place. Put it back in the bracket and position it as noted in line 7.
13) Put the torx screw back in and tighten.
14) Turn the car back on and then check for leaks. If all is good, put the pan back on and your done!!!
15) Pour the gas from the old filter into your container and dispose of properly.
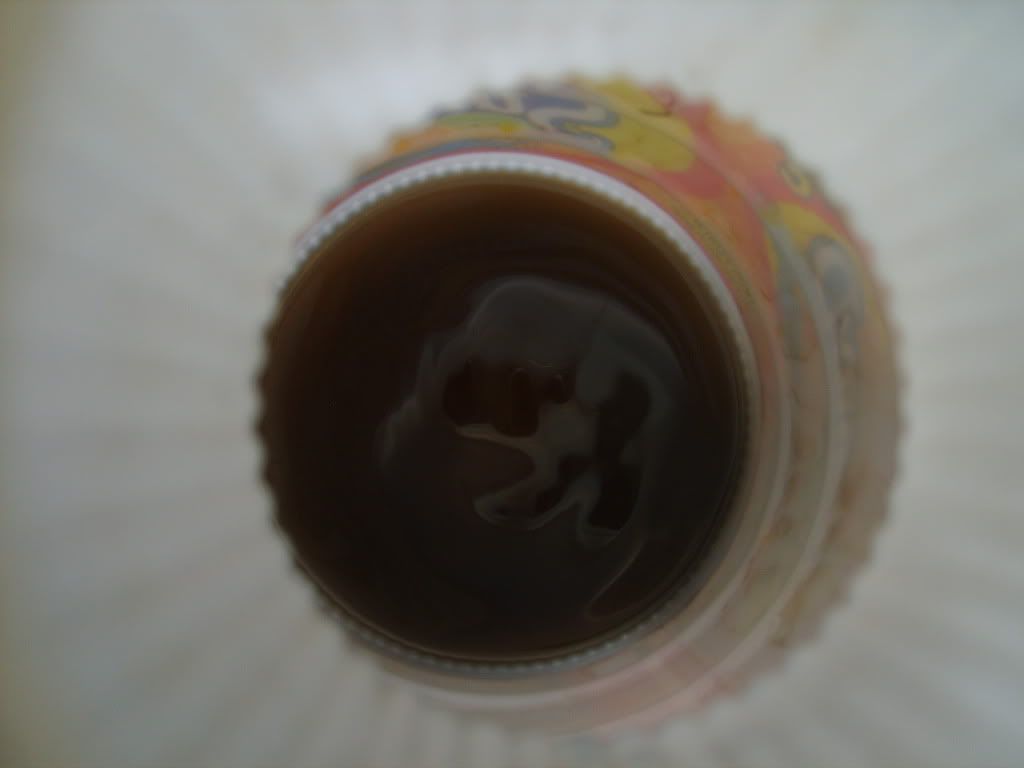
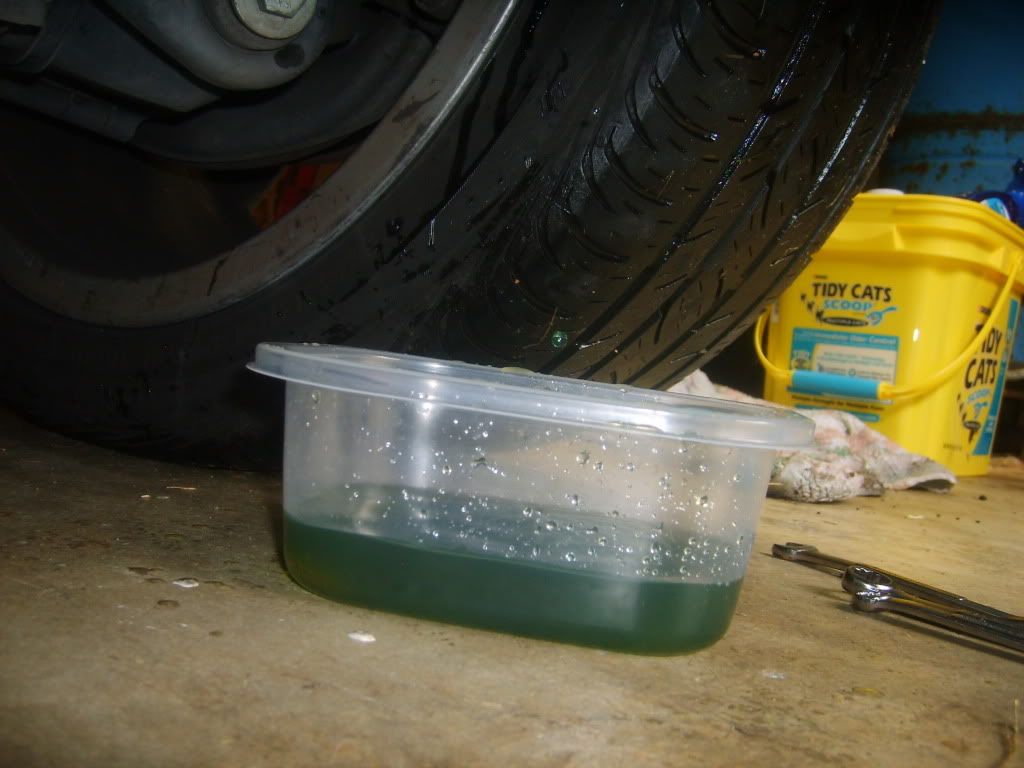
The color of the fuel that came out of the fuel filter was poop brown, so I think it’s definitely a good idea to replace your fuel filter at least once in its lifetime. I will be doing this once a year. I am surprised audi doesn’t recommend it.
16) Clear the fault code in your engine module.
Brake Fluid Flush (should be performed every 2 years)- 1 Hour. You will need 1 liter of recommended dot 4 brake fluid. I used ATE Super Blue so I could see when the gold fluid was flushed out of the lines. I will use the OEM gold on my next flush. You will also need a Motive pressure bleeder (recommended), about a ¼ inch bleed plastic tube (comes with Motive pressure bleeder), catch container of some sort, light, flathead screwdriver, funnel, rubber gloves, towel and an 11mm wrench.
So there are about 4 ways to do a brake fluid flush. These methods include gravity flushing/bleeding, pressure flushing/bleeding, vacuum flushing, brake pedal bleeding. I cover the pressure flush/bleed method as it’s the best overall way to do the flush for the DIY. However, if you don’t want to spend 50 bucks (trust me it’s worth it) on a pressure bleeder, then the gravity method is the safest, but most time consuming method as all you have to do is open all the bleeder nipples and let gravity drain the fluid out as long as the car is jacked up and that the bleed line and catch container are below the caliper (not recommended though). Also make sure that the reservoir NEVER runs empty. The other two methods, using the brake pedal (can damage the seals in the master cylinder if the brake pedal is depressed too far) and vacumming (requires expensive tools) are not recommended for the DIY.
So first things first, DO NOT LET THE BRAKE FLUID RESERVOIR GO EMPTY!!! I cannot stress this enough. If you do, then you have to use vag-com to bleed your ABS pump. I will post instructions at the end in the event this happens. If you don’t have vag-com then your car will have to be towed to your mechanic / dealer as the car will not be drivable. Also, be careful not to get any brake fluid on your paint, clothes, hands…as brake fluid will ruin just about anything it touches.
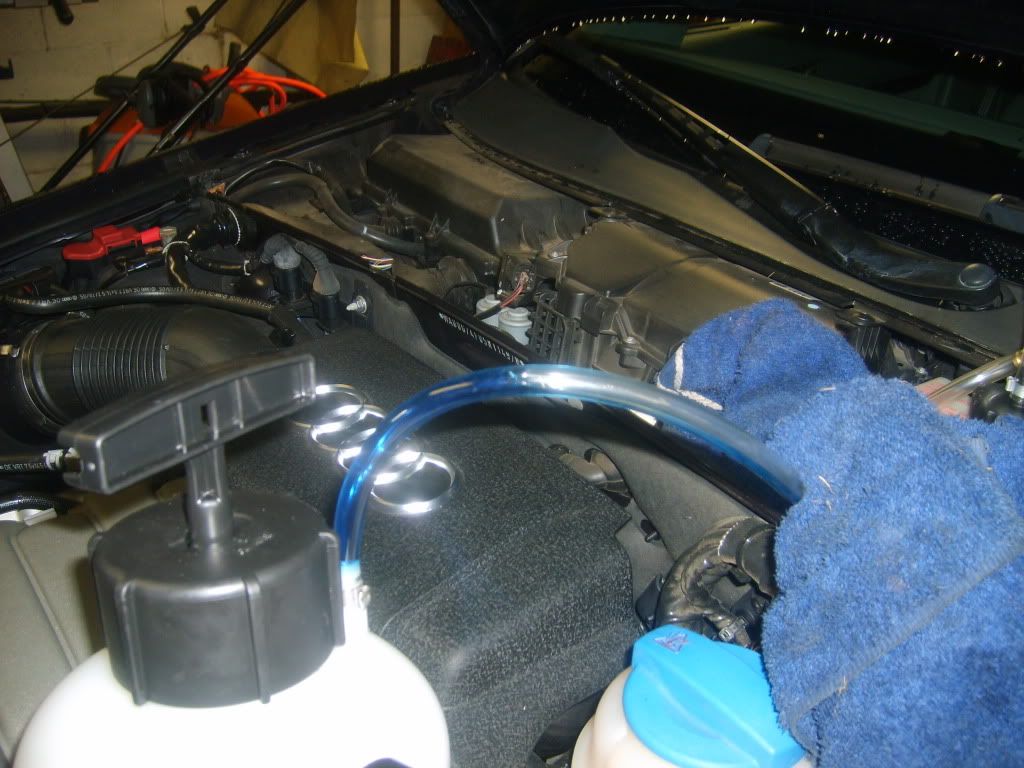
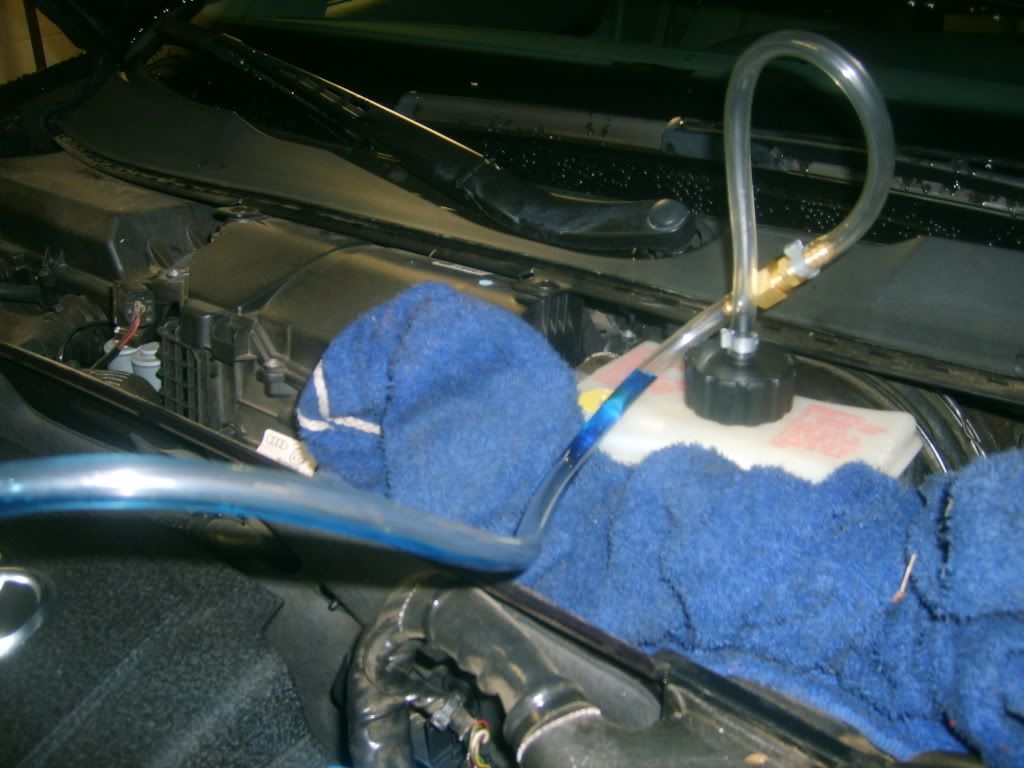
1) Throw on some rubber gloves, pop the hood and remove the black cover over the brake fluid reservoir by pulling off the rubber gasket that is holding it in place and the simply pullit off.
2) Next, pop the hood, rap some towels around the brake fluid reservoir, takeoff the brake reservoir cap. I popped out plastic screen for no reason as you don’t have too. Again make sure brake fluid doesn’t get on your paint.
3) Remove most of the brake fluid using a turkey baster, syringe, a baby snot sucker thing (I used one of my daughters, lol). DO NOT SUCK IT ALL OUT, leave some as you do not want air entering the system. Also, obviously DO NOT REUSE the turkey baster in the house. If you don’t have one you can just bleed it out. Sucking it out just saves a little time.
4) Fill the reservoir with your new fluid and leave the cap off.
5) Attach your EMPTY pressure bleeder to the reservoir and pressurize to 10-15 psi. Check the pressure for about 30 seconds to make sure the pressure remains constant. If the pressure drops, then there is a leak somewhere. Tighten all connections and make sure the pressure remains constant.
6) Next depressurize the bleeder by removing the cap to the BLEEDER, not the cap connected to the reservoir. ALWAYS depressurize by opening the cap on the bleeder, not on the reservoir!
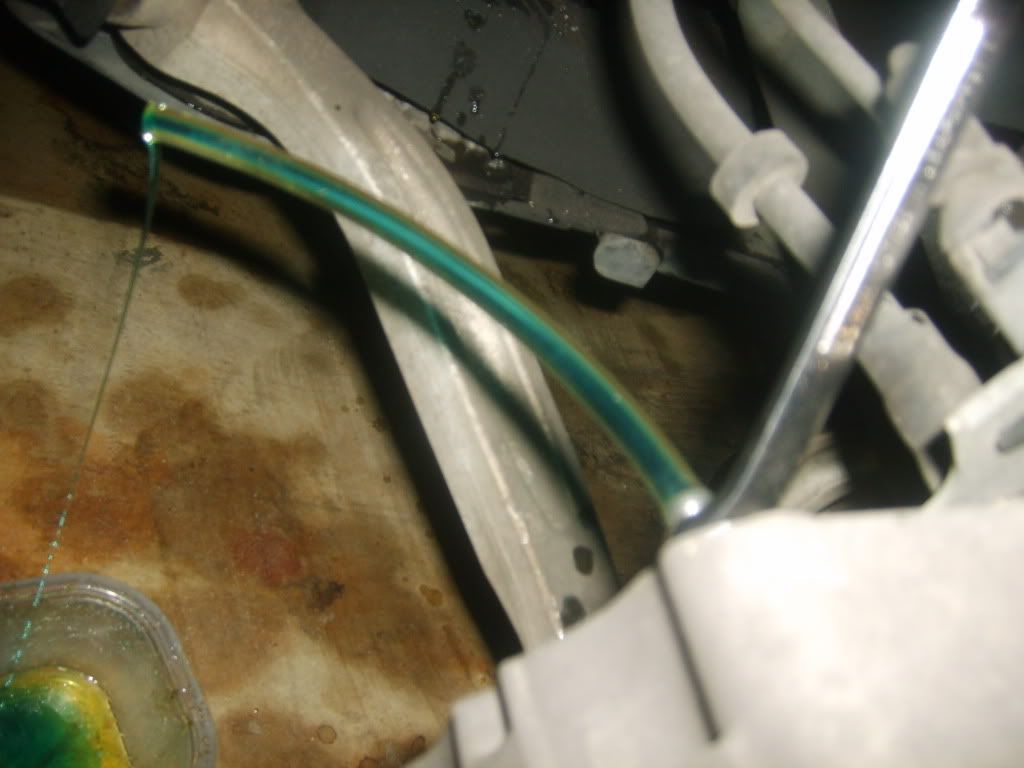
7) At this point you have the option of filling your pressure bleeder with brake fluid or leaving it empty and just using the pressure to push the fluid through (you should fill the bleeder thoough unless you want to make it harder on yourself). Placing 1 liter of fluid in the bleeder ensures that the reservoir will not run dry. Connect to the reservoir and pressurize to 10-15psi. Do not go over or you could bust some **** up.
8 ) Jack up the rear of the car if you want more space when getting under the car. I didn’t bother to jack up the rear of the car. I just slid underneath the car. I really didn’t even have to do this as you can work next to the wheel and reach behind the wheel and access the nipple. That’s how I later did the fronts.
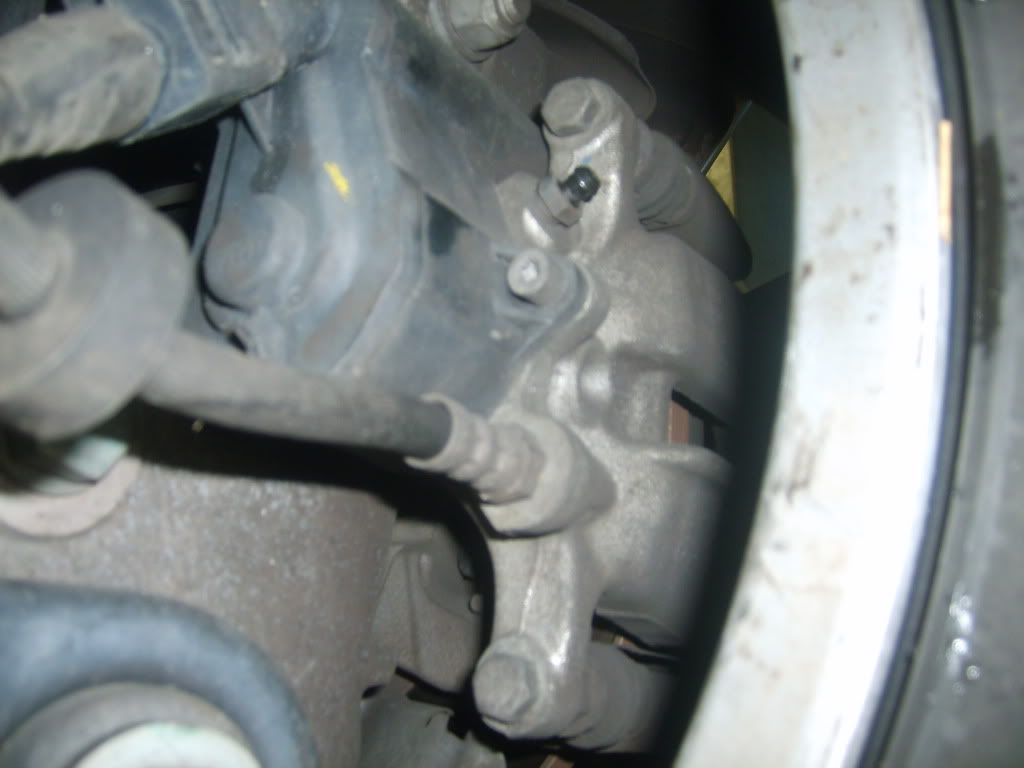
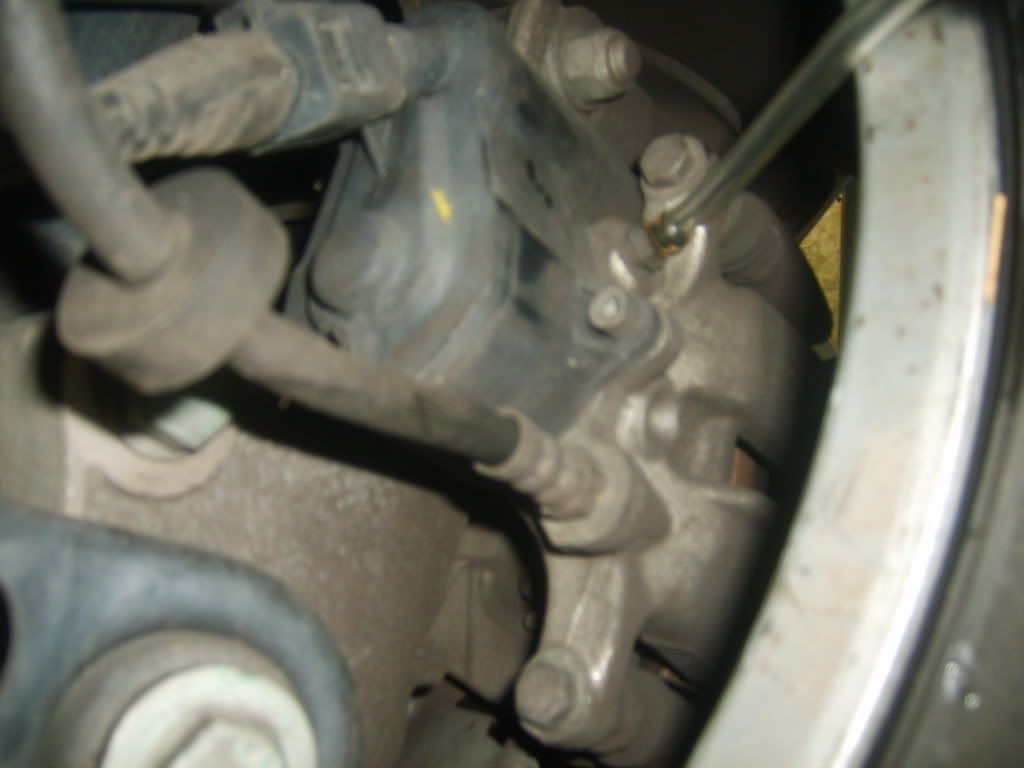
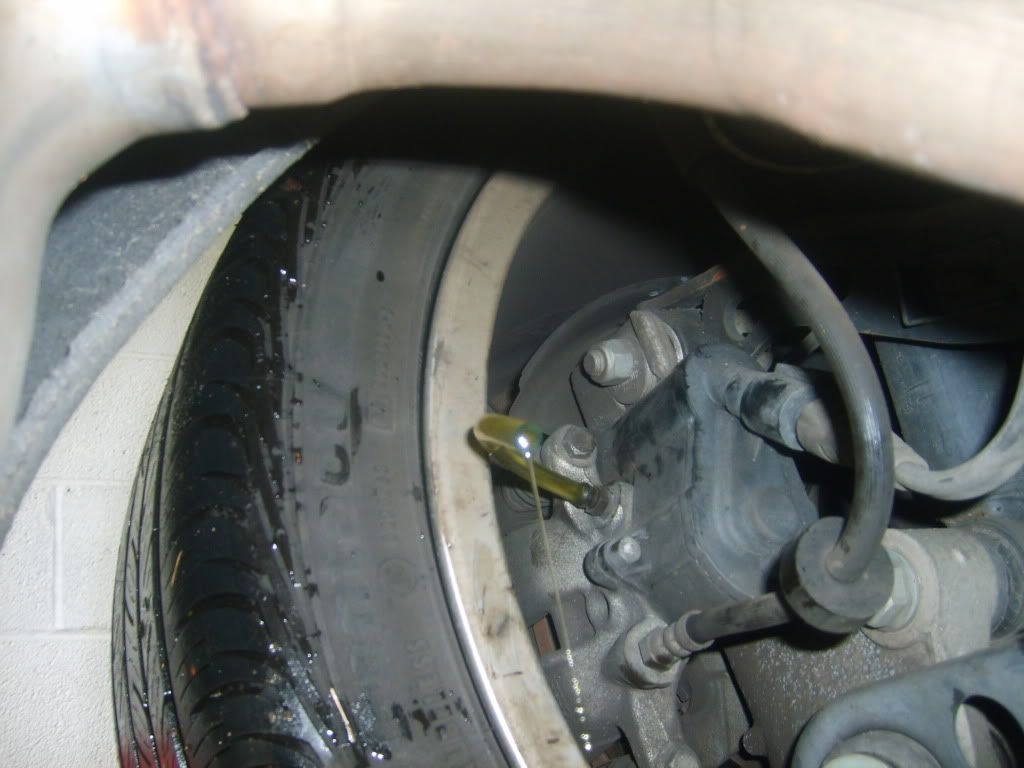
9) If you choose not to fill the bleeder (not recommeded) be sure to check and refill your reservoir at least once or twice when doing each of the rear lines. This ensures your reservoir does not run dry. Starting with the right rear of the car (if you are sitting in the driver seat), locate the bleed screw on the caliper.
10) Remove the nipple cover. Place your 11mm wrench on the screw. Connect your bleed tube, then loosen the screw. Again, for the rears, if u r opting not to put fluid in the bleeder, allow some of the old fluid to drain out (about 20 to 30 seconds) then close the nipple and add more fluid. If you are putting fluid in the pressure bleeder just allow it to drain until you see the new fluid being flushed. Again I used the blue fluid to see when all of the old fluid was flushed out. Without it, it will be difficult to determine when the new all of the old fluid is flushed out unless you know how much should be drained, Once I saw the blue fluid draining out, I continued to let it drain for an additional ten to twenty seconds to be sure all of the old fluid was out of the line.
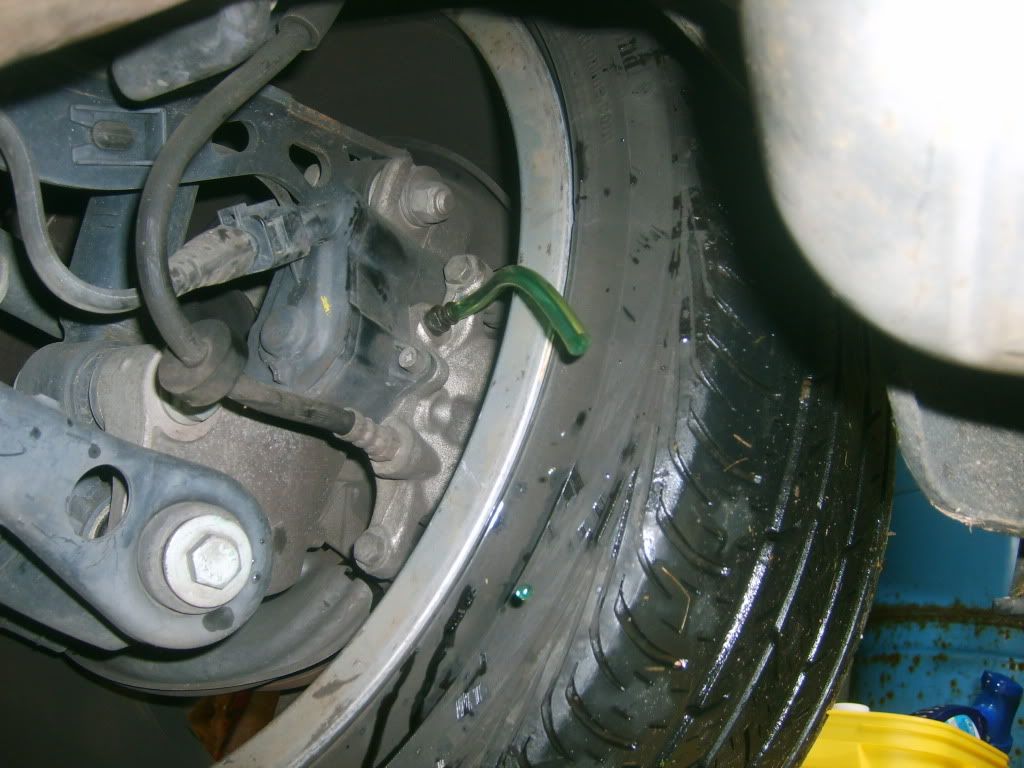
11) Repeat the process for the left rear, right front, left front, IN THIS ORDER. Next go to the front and jack up the car. No need to take the wheels off but you do have to jack the car. It gives you more room in the wheel well to just reach around the wheel and pull the nipple covers off, attach your wrench and tube and open the bleeder screw. The front will flush quickly so if you are not using fluid in the bleeder you don’t have to worry about the reservoir running out of fluid. Just make sure you add fluid after each line.
12) Now that all of the fluid has been flushed you need to check the level in the reservoir and either add or remove fluid so that it falls in between the min / max levels.
14) Check brake pedal pressure (should feel the same or better), check for leaks and dispose of unused / old brake fluid properly,
15) Vaccum out any leaves before you put the black cover back on, clean up, test drive and you are done!!!
Instructions from ross-tech for bleeding your ABS pump if you accidentally allow the reservoir to go dry:
This procedure details how to bleed the ABS pump when replacing brake fluid. This procedure is NOT necessary unless your ABS pump has gone completely dry. For normal brake work including fluid replacement, hose replacement, pad replacement, etc. this procedure is NOT necessary
There are certain test conditions that must be met before doing this procedure:
Vehicle must on a lift or safe jack stands with no wheels touching the ground
Ignition should be in the “On” position
Procedure for Bleeding the ABS Brake Pump on VW Passat and Audi A4/S4, A6/S6, and A8/S8:
[Select]
[03 – ABS Brakes]
[Basic Settings – 04]
Group 002
[Go!]
This will trigger the ABS pump to turn on for about 10 seconds. You should hear the fairly loud pump clicking during this time.
Click the [Done, Go Back] button and you’re all set