|
|
I am not an electrical engineer. What follows is a documentation of what worked for me on a 2006 A4 with Symphony II head unit. If your A4 has BOSE and/or Nav, what worked for me may not work for you. Proceed at your own risk. A special thanks goes out to Terry Wright at SIO Communications for answering my questions on the SIO Technical Support Forum. Tools: 4 Audi radio removal tools 8mm socket wrench #2 philips screw driver wire stripers utility knife soldering iron and solder lighter towel Optional tools: Drill and assorted drill bits up to .25" Dremel with small grinding tip Supplies: 22 gauge primary wire (4' long orange, red or yellow) 1 small female spade connector 1 bullet connector shrink tubing 1 fuse tap to add circuit zip ties 1) Remove fuse panel cover 2) Remove three 8mm bolts holding on driver's side knee bolster (two underneath, one behind fuse panel cover 3) Sitting in driver's seat, pull knee bolster toward you, it will unsnap along dash trim  4) Remove OBD II port by squeezing three clips retaining together and gently pulling plug from back of knee panel  5) Remove foot well light wires by prying white clips outward away from light and gently pulling on white connector 6) Set knee bolster aside 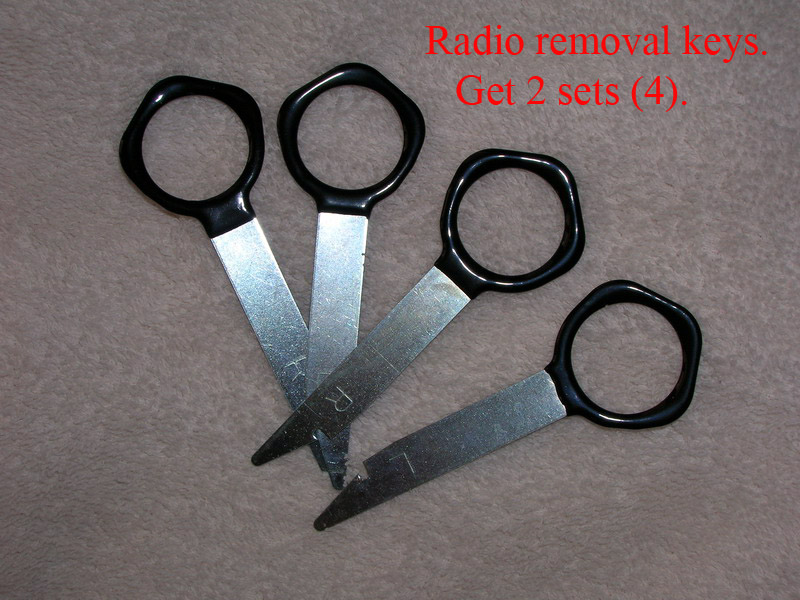 7) Insert 4 radio removal keys into radio slots (notch on each key should point to outside edge of radio) if inserted properly, keys will slide in easily until they click into place  8) DO NOT PULL on keys! 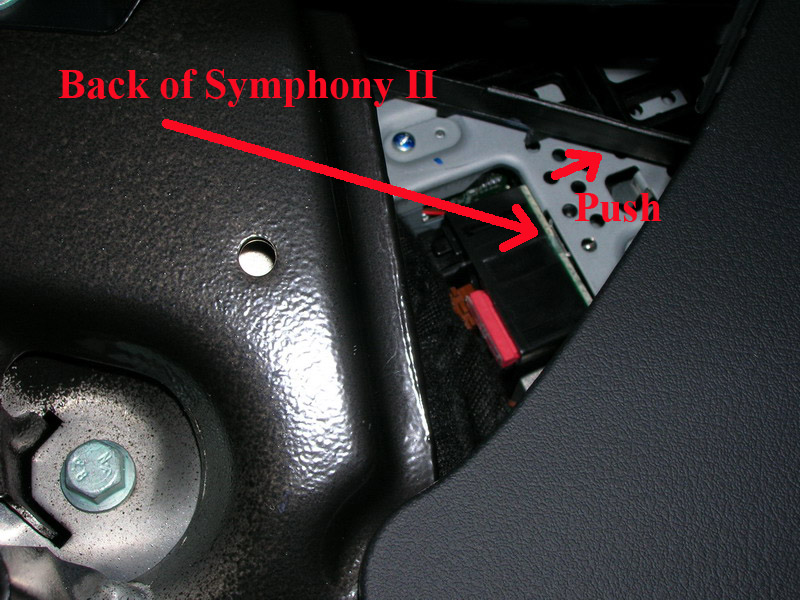 9) Reach under dash and gently push on back of radio until it is free 10) Move shift lever as far rearward as possible 11) Place towel over climate controls and over console to protect finish from sharp corners on back of stereo  12) Pull stereo forward until it frees dash opening and remove two antenna connectors (you will have to push down on clip on tan connector to remove it) 13) Remove top electrical connector (it has a clip on each side that must be pressed as you gently pull on connector 14) Remove two remaining connectors (these each have one clip only) 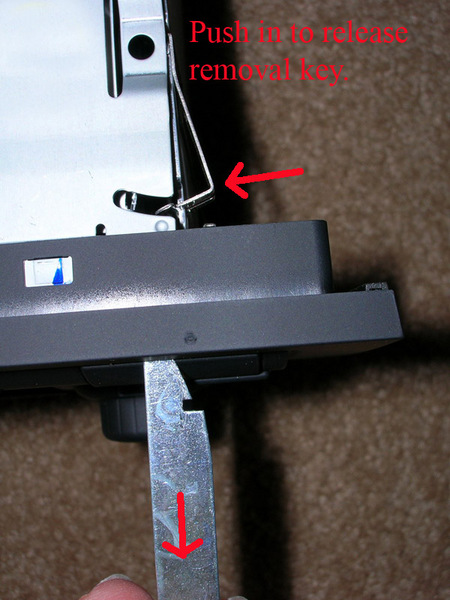 15) Push in on clips on sides of radio to release radio removal tools [page2] [page3]
|
|
Advertising |
Contact Us |
Cookie Policy |
Privacy Statement |
Terms of Service |
Do Not Sell My Personal Information
© 2020 MH Sub I, LLC dba Internet Brands |