| Tech Article Title |
Author |
Date
|
| Exhaust mod with switch control |
Marc3.2TT |
2006 |
First of all I would like to thank all the folks over at the VW Vortex R32 forum, since they found, designed and pioneered this method.
Background on the exhaust flap: in the Golf R32 and TT 3.2, the right tip of the exhaust has a "flap" that opens and closes depending on speed and RPM variation. The intent of the design was to have a quiet exhaust when gently driving around town, to abide by German noise pollution laws, but to also "free it up" and make it loud when driving aggressively.
What is the use of this mod: to have full control of when the exhaust flap is opened or closed! The ECU has a somewhat wacky way of controlling the flap depending of speed and RPM's:
1. Under 7 mph and no matter what RPM, the flap is OPEN
2. Above 7 mph, and:
a) above 3100 RPM (after increasing the rev's to above 3100), flap is OPEN
b) below 2700 RPM (assuming the rev's already went above 3100), flap is CLOSED
Which means that, from idle to 3100 RPM's (assuming the engine hasn't gone above 3100 yet) the flap is closed!
The valve that controls the flap is connected to a solenoid, which gets a signal from the ECU as to when to open and when to close the flap. When the ECU sends a +12V signal, the flap opens up, and when the ECU sends the signal to ground (0V), the flap closes.
To take control of the valve, we can simply re-wire the lead that goes to the solenoid by connecting it to a switch. Unfortunately this cannot be a simple on/off switch if you want to control the full 3 modes of the flap (always open, always closed, or stock), and even if you just want "always open" and "always closed" you have to find a way to ground the solenoid to keep the flap closed, and send it +12V to keep it opened.
In my mod, I chose a slightly different switch that the R32 guys. It is a DPDT (Dual-Post Dual-Throw) 3-way ON-ON-ON switch, which has 3 different combinations of connecting 6 posts.
Beyond the two leads that will come from cutting the control wire in half, we need a +12V lead and a Ground lead to make the valve close the flap. The sample diagram will look something like this:
The intent of the resistor connected to the +12V signal is to connect the ECU side of the control wire to some power source, in order to "fool" the ECU that it is still connected to the solenoid - otherwise it will throw an error code such as follows:
1 Fault Found:
19475 - Valve for Exhaust Flap 1 (N321): Open Circuit
P3019 - 004 - No Signal/Communications - Intermittent
Anyway, the switch connections will be explained further in details later, when it comes to actually connecting it.
But for now, the result of the switch is as follows:
1) In the top position, it will only connect the ECU to the solenoid, so you will be in stock mode (as described above)
2) In the middle position, it will connect the ECU to the resistor, and the solenoid will stay disconnected, so the flap will always stay opened and the exhaust will be LOUD :-)
3) In the bottom position, it will also connect the ECU to the resistor, but this time the solenoid is grounded, so the flap will always stay closed and the exhaust will be QUIET.
*I highly recommend
disconnecting the battery as you will be touching live terminals under
the dash, so please do yourself a favor and disconnect the battery to
avoid headaches later (and keep the trunk open since the battery is in
the back!)*
Step 1: Open up the dash
a) After opening the driver-side door, remove the panel which covers the fuse panel with a flat screwdriver, or if you have numbed climber's fingers...

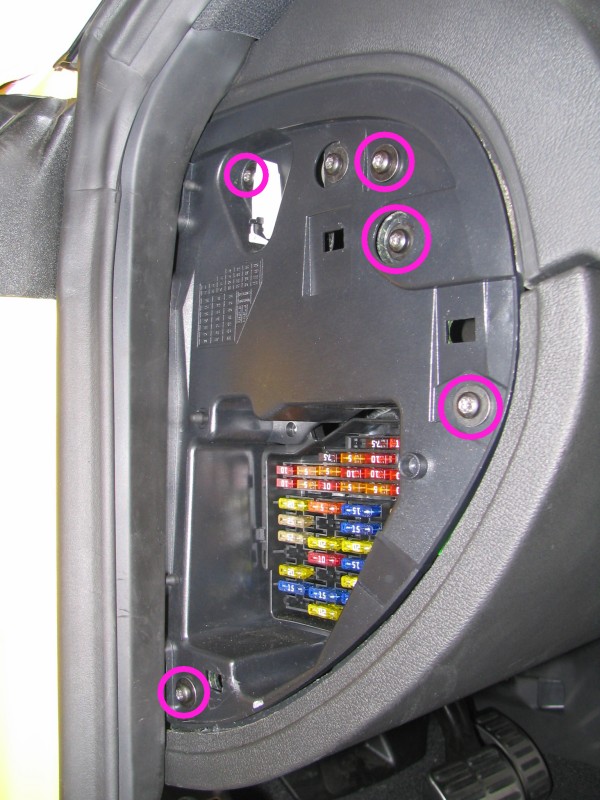
b) Remove these 5 screws shown below using a torx screwdriver:
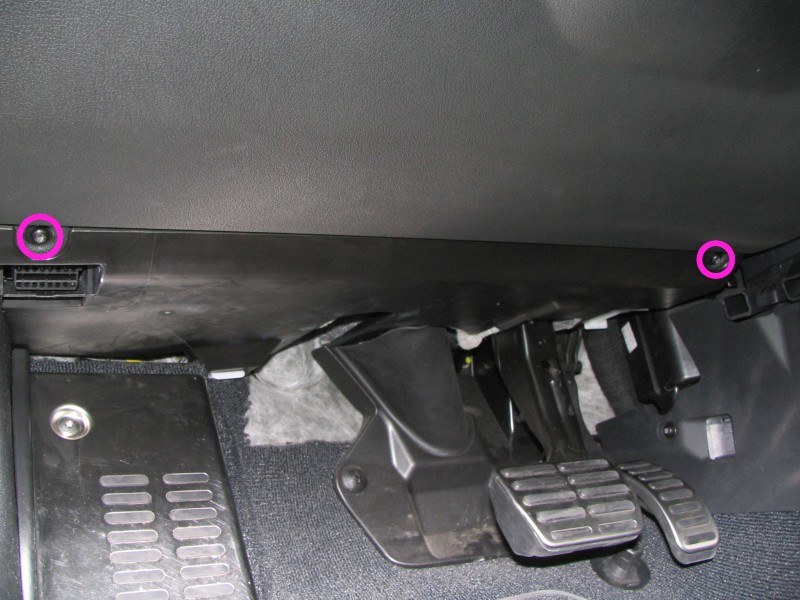
c) Remove the remaining two screws under the lower dash panel:
d) Carefully pull the lower dash panel to remove it while liberating its left side by pushing the fuse panel to the left
e) Unplug the two headlight housing connectors at the top of the panel, and the VAG connector at the bottom of the panel
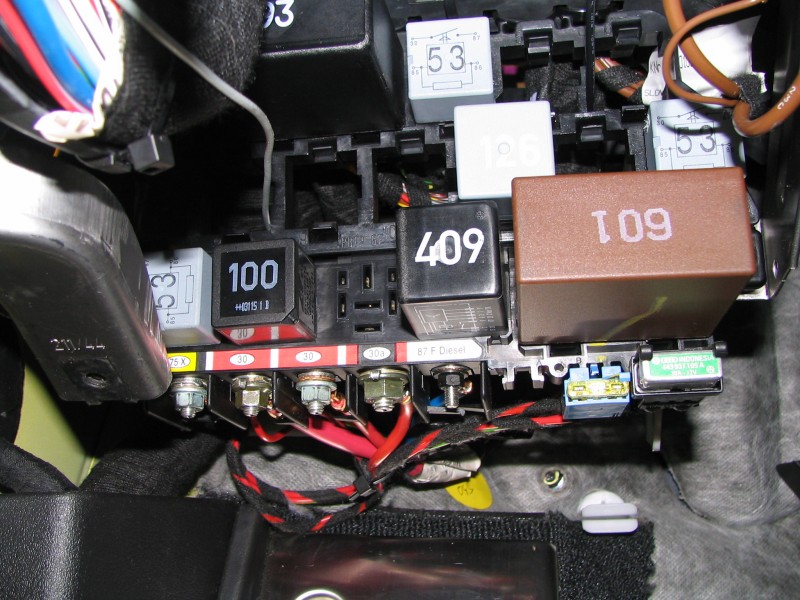
Now you have access to the relay panels shown below, behind which the wire harness you need to tap into is located:
[Page2][Page3][Page4][Page5]
|