| Tech Article Title |
Author |
Date
|
| Exhaust mod with switch control |
Marc3.2TT |
2006 |
Step 2: Find the gray w/ blue wire.
Warning: this can be a major PITA.
You have to first remove the relay panels then open up a wire harness (by cutting the tape that covers it), which is way the heck up there, so be ready for some back aches and finger cuts...
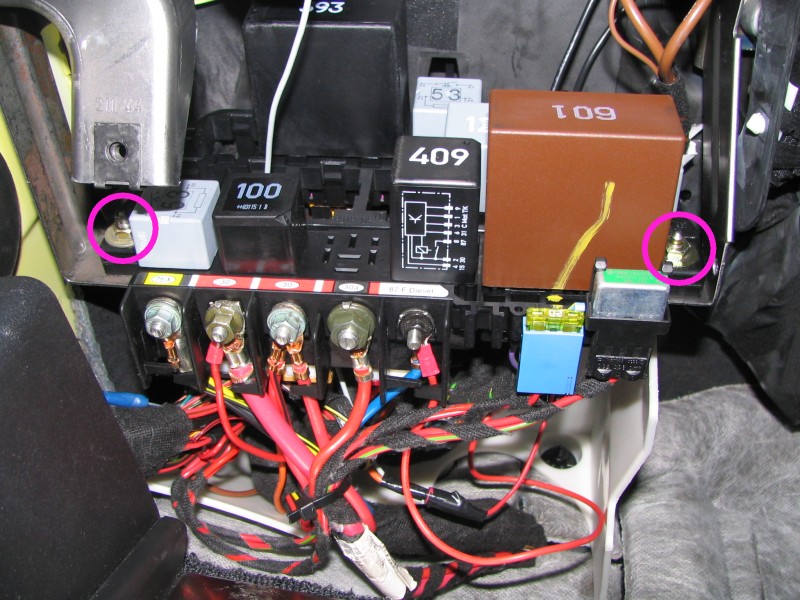
a) Remove the relay panels by unscrewing these two hex nuts:
b) I highly suggest removing the top panel's relays and connectors to completely free up the space required to do the dirty work. Remember which connector & relay goes where! Here are a couple of pics to help you a bit:
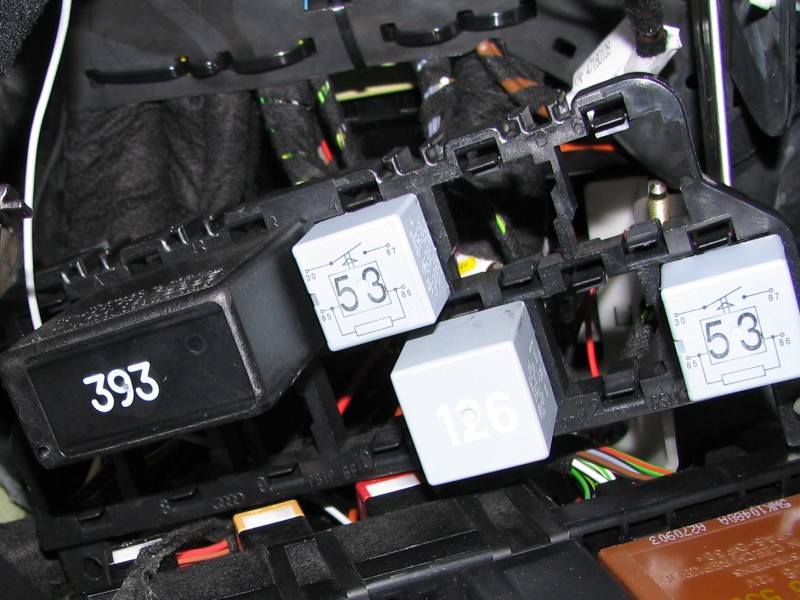

Note that the wide top-left relay uses two connectors that are actually one piece behind the panel (if that makes sense...)
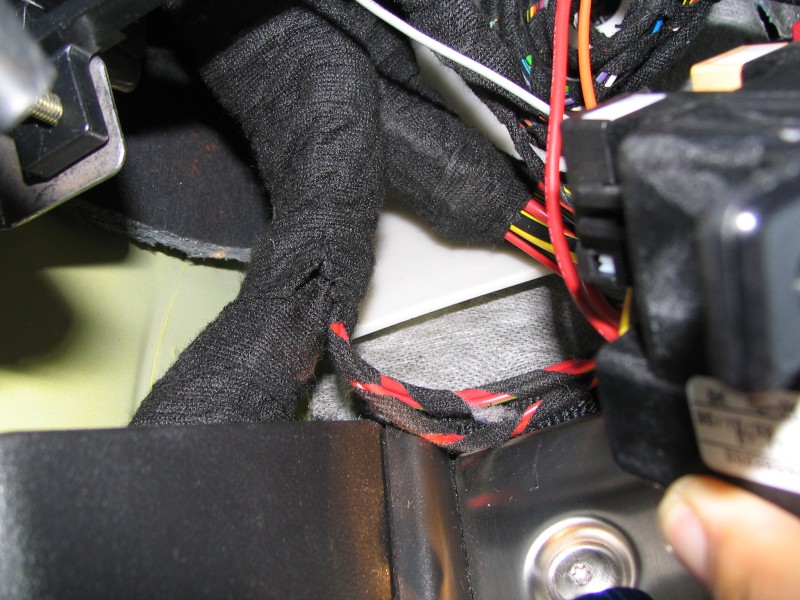
c) Now you can see the wire harness, above and to the left of the aluminum dead pedal. You'll need to start cutting the tape right around the point where the two red wire bundles join the harness:
d) Here's some progress after a few minutes of cutting the tape, but still not enough:
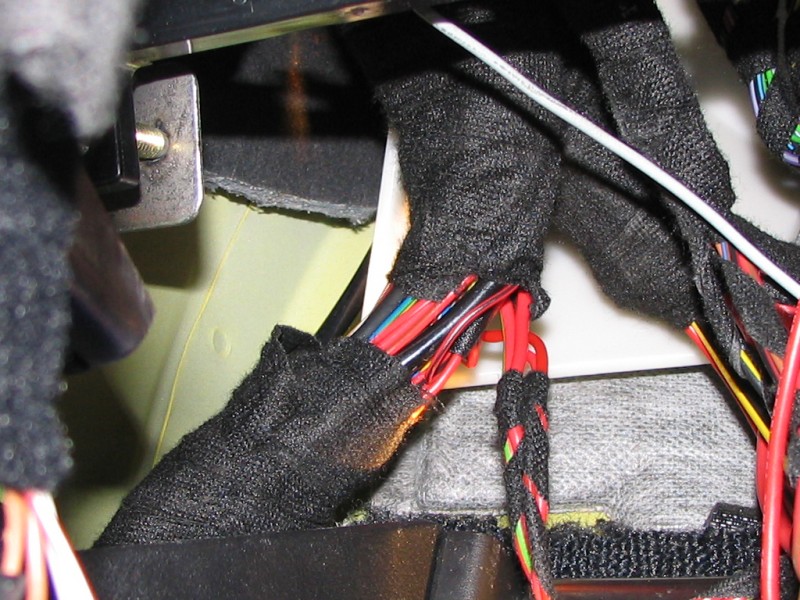
e) Finally after about 4 inches of tape removal, which seemed to be enough, this is what your harness now looks like:
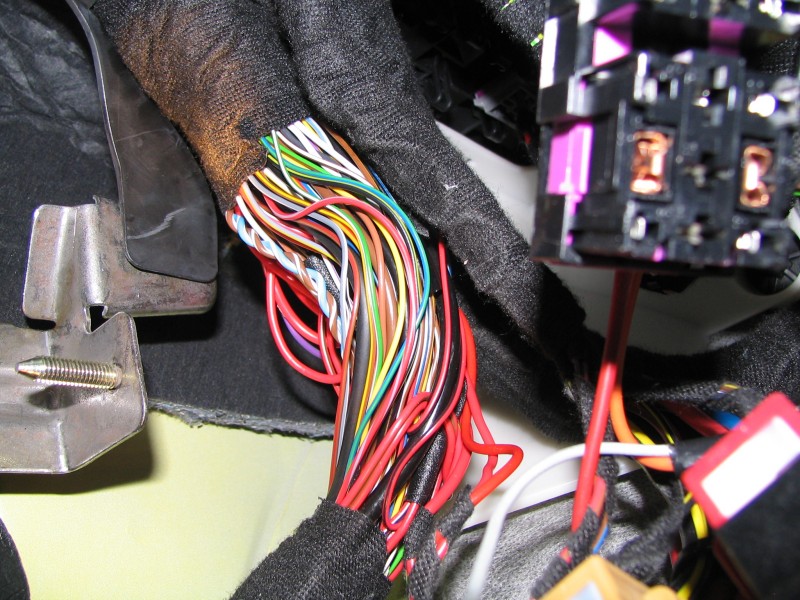
f) Now the major PITA is to find the CORRECT wire, which is a 0.5 mm square (~20 gauge) gray with blue stripe wire. The problem is that there were TWO such wires in my bundle, and I first cut the wrong one... here are the two wires I found:
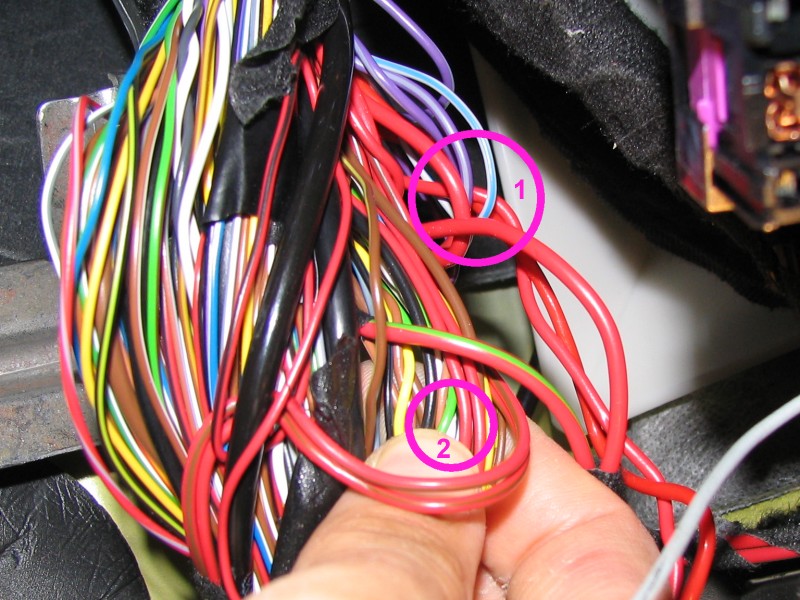
The #1 wire is a little thicker and actually loops back up the harness. This is the one you want to cut.
The #2 wire is a little thinner, but comes from the bottom of the harness to the top so beware not to cut this one.
[Page1][Page3][Page4][Page5]
|