| Tech Article Title |
Author |
Date
|
| Turn signal stalk replacement |
Boston Driver |
2007 |

Background
Jmacs4.2 (2002 A6 4.2) originally had turn signal issues that many of us attributed to the turn signal relay housed with the hazard relay in the center of the dash above the radio [The usual symptom is a random to complete lack of function of the indicatior flasher] However, after replacement at the dealership, the problem still existed.
So, the dealership then attributed the problem to the turn signal stalk. Apparently, the dealer wanted almost $300 for this work to be done, which I thought was outrageous. So he bought the part for about $90 and we decided to DIY. In the end, this took less than an hour, which included repeating a couple of steps for photo purposes and booting the laptop for a VAG COM scan once we were done.
Part: 8L0-953-513-N (check your dealer for the correct part number for your vehicle)
Tools needed
#2 Philips-head screwdriver
Small flat-head screwdriver
T25 Torx driver
T30 Torx driver
M12 triple-square driver
13mm socket
10mm socket
Allen key (cannot recall the size...sorry)
VAG COM cable
Disconnect the battery
This project requires removing the steering wheel airbag and the self-canceling ring, which is an integral part of the ESP (if the car is so equipped). Make sure you you're your radio security code (in the radio manual, probably in the booklet under the steering column). Using the 10mm socket, remove the negative terminal of the battery.
Steering column trim and steering wheel removal
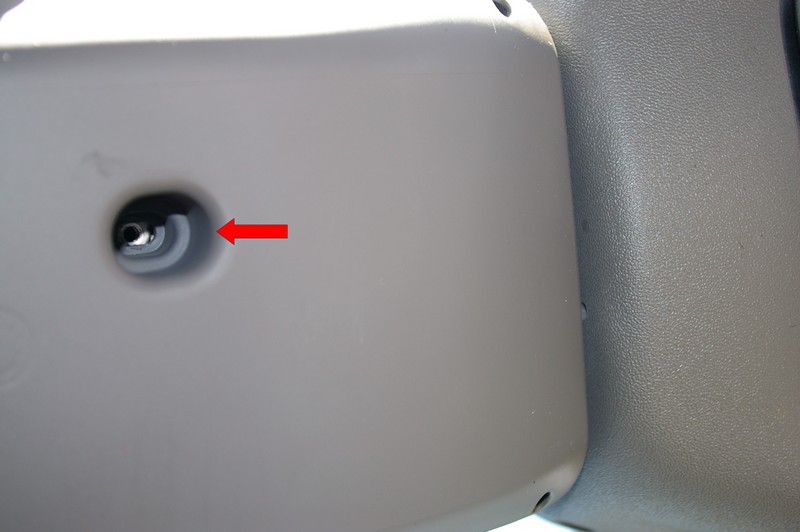
The first thing I did was to loosen the 2 screws and 1 torx bolt on the bottom of the steering column. The only reason I did this first was because I actually forgot my #2 Philips-head screwdriver at home, and we had to use a jeweler's-type screwdriver that was difficult to turn (no grip). So we improvised using a pair of pliers to turn the screwdriver. I made sure I could remove the screws before I did anything else, or else it would not be worth doing the project. Those holes are small as you can see in the picture:

Next, I removed the T-25 torx bolt located here:
With those column trim fasteners removed, I proceeded to remove the airbag on the steering wheel. There are two torx bolts that secure the airbag to the steering wheel. Here is a closeup of one of the torx bolts that must be loosened:

These bolts are on tight, so this step realty requires a right-angle torx driver. There really is no room for a straight torx driver to work properly. Here is the one I used:

Once the airbag is loose, there are a couple of connectors that have to be disconnected so we can set the airbag aside. One is for the airbag, one is for the buttons on the multi-function steering wheel.

The airbag has a connector right at the back of the airbag, but it is not that easy to remove. I found it easier to disconnect the airbag wire where it plugs into the self-canceling ring. The airbag is the yellow connector, which is removed by squeezing the two tabs inward toward the center of the connector:
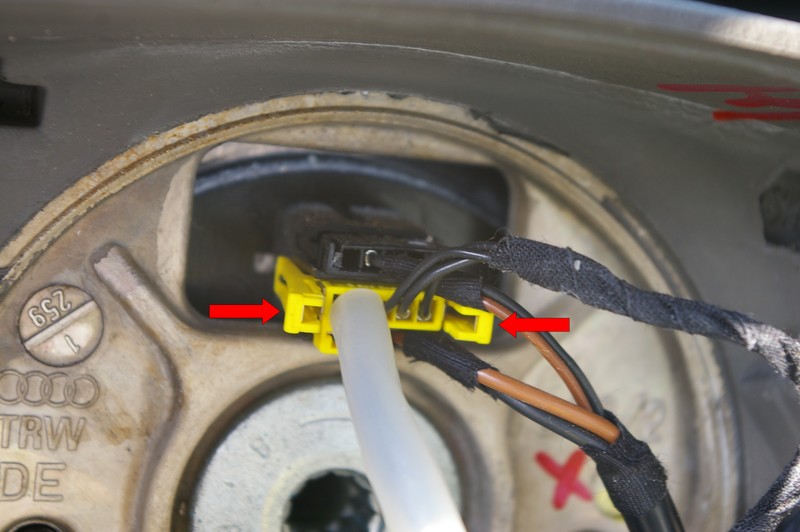
The multi-function connector is white, and is removed by gently pulling out the tab shown here:

The airbag is now loose, so set is aside in a safe place [with the pad facing UP, which is safer in the event of a spontaneous discharge].
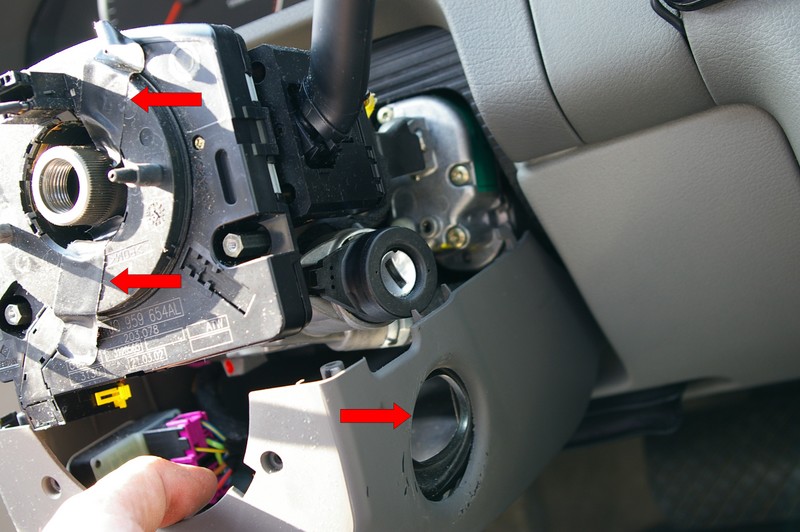
Now we must remove the connectors between the self-canceling ring and the steering wheel. There are three connectors that must be removed:

The connector to the far left is easy to remove as it simply pulls right out. The one in the middle (for the heated steering wheel) has the little tab on the top that you need to depress to release it. The one on the right is a PITA, but it can be released by sliding in a very small flat-head screwdriver on the right side of the connector here:

Now, we are ready to remove the steering wheel itself. Here is the steering wheel bolt, which requires a M-12 triple-square driver/bit. I got a set of them at my local AutoZone, came as a set of 4 (M-6, M-8, M-10 and M-12) for $12. The M-12 bit that I have requires a 13mm socket to turn it (sorry no picture of that).

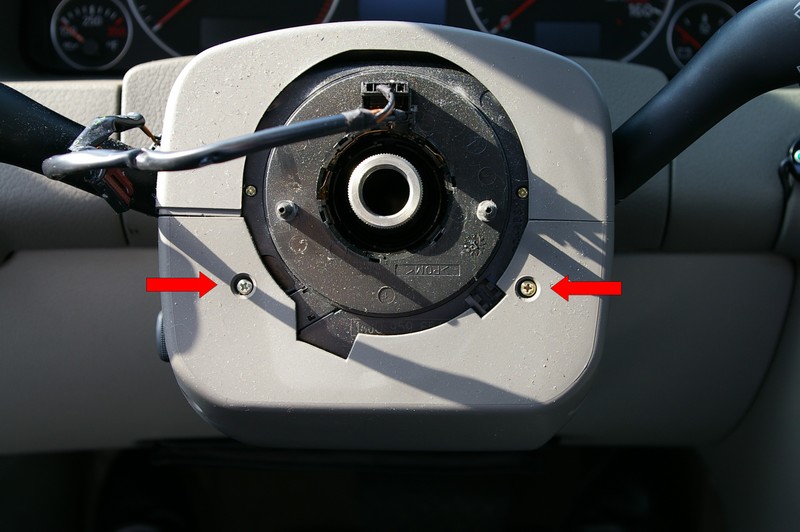
With the steering wheel removed, set it aside. Now we proceed to remove the column trim. Remove these two screws:
Important note about the self-canceling ring.
The self-canceling ring basically enables the steering wheel controls to continue to communicate with the car even if the wheel is turned. It also is an essential part of the car's ESP (if so equipped). It is also called a clock-spring because it contains exactly that...a clock-spring, which is a very long and thin wire wound up in a spiral. It is imperative that this spring NOT be rotated from its original position. It comes from the factory with a locking tab, and once installed, the tab is pulled to release the spring. However, since the part is already installed on the car, it must not move. I use a couple of small pieces of electrical tape to secure the clock-spring so I know that it is not going to move.
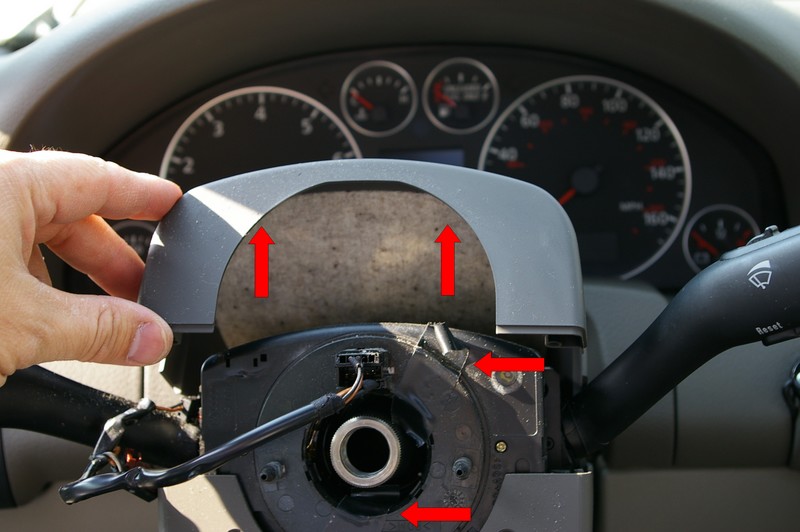
Lift up the upper half of the column trim and pull toward the rear of the car (note the two pieces of electrical tape in the picture to freeze the self-canceling ring):
To remove the lower half of the steering column trim, first pull the trim slightly outward from the ignition so the gasket can clear the ignition cylinder (note again the electrical tape securing the clock-spring):
The V8 model comes with the power/memory tilt/telescoping steering wheel. Just remove this connector:
The pins of this connector are LONG, so you have to pull pretty hard:

Removal of the self-canceling ring
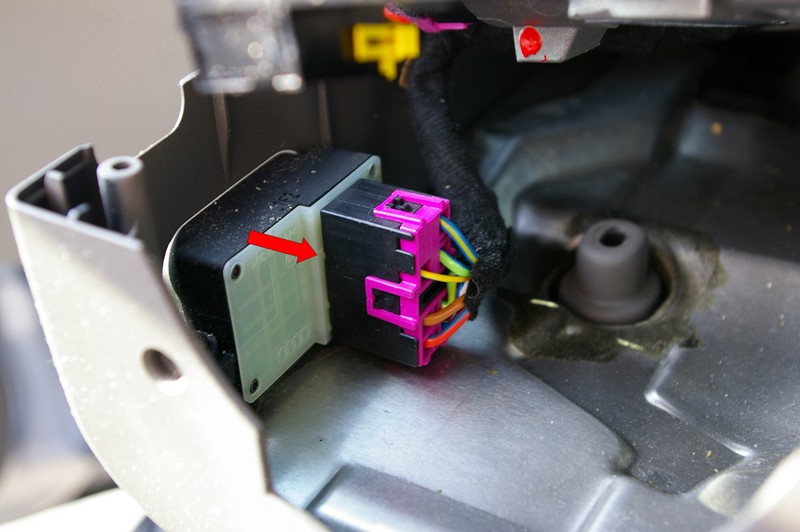
Now that all the trim is off, we can remove the self-canceling ring. Before it can be removed, we have to disconnect 4 wire harnesses. The first is the airbag wire (yellow connector). As we did in the connector for the airbag into the self-canceling ring, squeeze the tabs inward to release the connector:

The next two connectors are just above the airbag wire, and the red arrows are pointing to the tabs that must be pressed to release the connector:

The last connector is on the top of the self-canceling ring here:

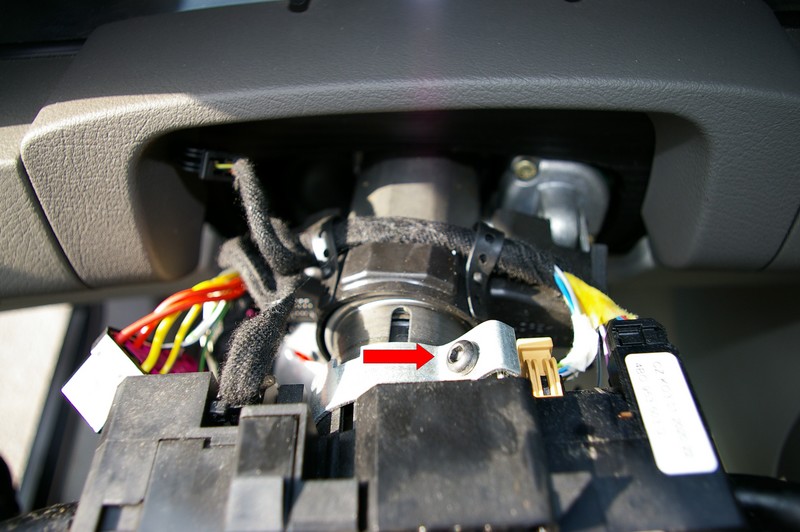
Now that all the wire connector are removed, we can now release the tabs that snap the self-canceling ring into place. There are four of them, but only three were effectively securing the part to the steering column. Here is the one on the top that you can see:

Here are all four so you can see them. One of the ones on the bottom was nto really connected to anything, but I cannot remember which one:

Removal of turn signal and wiper stalks
The signal and wiper stalks are held in by only one Allen bolt on the top of the column. In the picture below, the connector for the turn signal stalk has already bee removed from the connection on the back of the part:
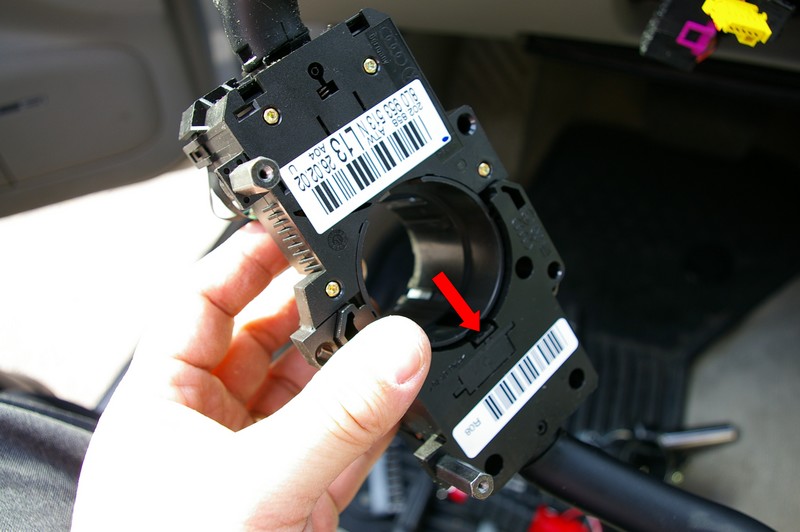
Once the part is removed, the wiper stalk must be separated from the turn signal half. Release the tab here:
Once the tab is released, slide the two halves apart as such (kind of tricky...it would be easier if I had three hands to press the tab and slide the two halves, but once it moved a tiny bit, I was all set):

Here is the new part (left) and the old part we just removed (right). I had to move the metal pin that receives the Philips-head screw the is hidden behind the steering wheel. Finger tight is sufficient here.

Join the new part to the wiper stalk:
Installation
This is pretty much the reverse of removing things, but a few tricks here. First, make sure the new stalk assembly is level on your steering column:

Other than that, when reinstalling the steering column trim, make sure the gasket is properly sealed around the ignition cylinder. The only other tricky part was reinstalling the upper half of the steering column trim. You need to lift up on the black "bread-box" dust shield and insert the trim under the dust shield. It then can properly lined up with and seated into the lower half.
Once everything is back together, re-attach the battery lead, check your radio to make sure it works (if not enter the security code), and reset your clock on the instrument cluster. Hook up the VAG COM and see if any error codes come up. I ran a full scan of Jmacs4.2's car, and nothing came up. I think this was because the car did not know that the self-canceling ring was removed (as the battery was disconnected). If an error came up saying that the steering angle sensor needs to be calibrated, I would have followed these steps from Ross Tech.
In the end, Jmacs4.2 saved about $200 in labor, and it gave me the opportunity to share this process!
|