| Tech Article Title
|
Author
|
Date
|
| Installing a CD Changer Under Rear Deck
|
Christopher Burke
|
1999
|
This installation should work on sedans up through 99.5 models. It is a fairly easy job, and doesn't
require any wire cutting or drilling. Total install time = 30-45 minutes.
The reason I installed the CD-changer underneath the rear deck was because I didn't want to take up
any valuable storage space, and I wanted to keep it out of harms way from items moving around in
the trunk.
The CD-changer I used was the Panasonic model DP-801. However, these installation instructions
should work with the DP-601 or the Audi changer.
The Panasonic DP-801 is an 8 CD changer which I ordered from autotoys.com. Total was $235
which included the adapter that fits into the factory connector in the trunk. I went with this
model because it is cheaper that the Audi changer, and it holds 8 CD's instead of 6. To
access the 7th and 8th CDs, you can use the left and right arrow keys to
scroll through the CDs. Two drawbacks to using the this changer are that you lose the random
function, and it is not covered under the three-year warranty like the Audi changer is.
Please read disclaimer before you perform this installation.
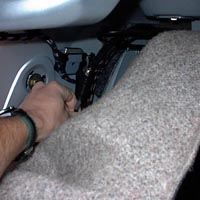
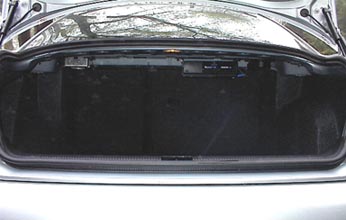
| First you need to find the connector
located in the trunk, on the left hand side behind the trunk liner.
Use a flat-head screwdriver to pop off the the two plastic connectors behind the rear-left tail light.
Carefully work the top of the trunk liner out enough that you can get your arm behind there.
Feel around until you find the round connector. The top of it should be covered with a piece of foam.
When you find it, it may be fastened with wire-ties to another bundle of wires. You will need to clip
these ties with scissors or wire-cutters to let out enough slack. BE CAREFUL not to cut any other
wires! As you can see from the picture, you will find the 25 pin connector back there also, which
is used for the cellular phone transceiver. |
 |
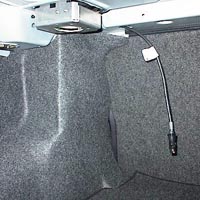
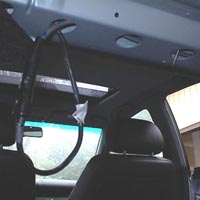
| Bring the wire to the front of the liner
close to the rear seats. As you can see from the picture, the front of the rear deck has a large
hollow support with circular holes underneath. Feed the connector through the first hole, and let
it dangle out one of the next ones (you'll see why later). Then push the liner back in place,
and re-attach the plastic fasteners. |
 |
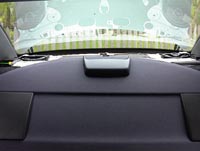
| Next, you need to remove the rear deck.
First pull out the connector to the rear brake light. |
 |
| Now you need to get on your back inside
the trunk. The rear deck is held in by three white fasteners at the front of the deck. There is one in the
middle and one on each side. You can see them through the circular holes. I pushed them in using a flat-head
screwdriver and a little persuasion, but you can also use a nail set and a hammer (or something like that).
The fastener in the middle isn't exposed, so I had to pry it up from the side with the flat-head. |
 |
| Once they are all popped up, from the back
seat you should be able to lift the deck up can carefully pull it towards you. The seat belts pass
through the rear deck, so they will be let out. |
 |
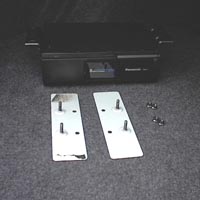
| You need to set your changer to be installed
in the horizontal position. On the Panasonic changer, I believe there is a small adjustment on the side.
The mounting hardware included with the changer has two silver brackets with threaded screws attached, and two black brackets
which attach to the changer. The silver brackets are placed upside-down with the screws going through the
deck, and the changer is bolted on to those screws from underneath. |
 |
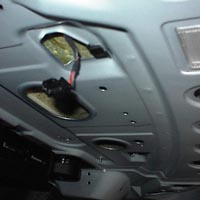
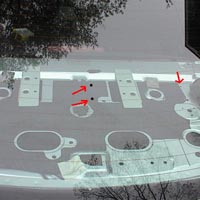
| Here is a picture taken through the rear window.
There are two large openings in center of the deck which are perfect for putting the brackets through. I have placed the brackets
in those holes for this photo. However, I didn't want the changer to be in the center of the deck. I thought
it would look better and be more out of the way if it was offset to the side. This required some new holes, so
I drilled three holes indicated by the red arrows. The fourth hole was already there. (no drilling is required
if you use the openings in the center.) Also, there is no specific reason why I chose the right side. The left
should work just as easily. I put the double-sided tape underneath the brackets so they don't slide.
You probably don't need it, but it gave me a better piece of mind. |
 |
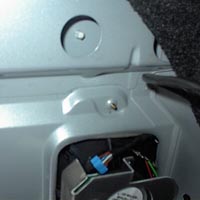
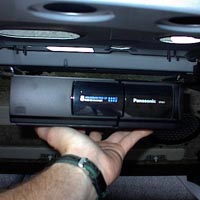
| This picture is an example of how the changer attaches
to the brackets from underneath. You really need to get on your back in the trunk to screw it in. Tighten the nuts,
but not too much. The silver brackets on the top of the deck form sort of a bridge over the holes, so if you keep
tightening them they will keep bending. You can sort of see this from the previous picture. I tightened the
nuts just enough to make a slight bend so I knew it was taught. |
 |
| Now attach the supplied adapter to the connector.
The two connectors didn't click together. It felt like they could come apart easily, so I wrapped them up
in electrical tape to hold them together. Then you can feed the wire down the hollow track, and out the hole
closest to your changer. |
 |
| For the last step, I drilled a small hole for the
ground wire and attached it to a sheet metal screw. I think there was a couple screws I could have used on
the speaker, but I wanted the install to be as clean as possible. |
 |
Now put the rear deck back in place. When the white fasteners
are lined up with the holes, give the front of each a good whack with your fist to pop them back in place
(you can hear them pop back in, so you'll know when). Don't forget to re-connect the brake light!
Throw in a few CD's and go for a cruise! |
 |
Disclaimer:
This installation has been proven to work with the owner's vehicle. He cannot be held
responsible for any damage to the vehicle or CD changer, or any personal injury. Do not perform this
installation if you are not totally confident that you can perform it without any damage.
|