| Tech Article Title |
Author |
Date
|
| Tiptronic MultiFunction Switch Replacement |
Nate |
2007 |
Standard disclaimer: This article is for informational purposes only. Use at your own risk.
My problem started when I noticed my car failed to engage reverse or show R selected on the instrument cluster, even though the reverse lights came on. Other oddities included slow gear selection display and incorrect gear display on the IC, e.g. R = N, 2 = N, and 4 not working at all. What also made this problem difficult to diagnose was the lack of limp mode or even fault codes being stored by the TCU or ECU.
Following this guide will help you fix this problem and save hundreds, if not thousands of dollars in repair work.
Length of procedure: 3-5 hours depending on skill and problems encountered.
Difficulty: 5 of 10, but prior transmission mount replacement knowledge helps with this procedure.
Parts, supplies, and tools needed:
01V-919-821-D (fits all B5A4, C5A6, and '97-99 A8 years), $470 list, ~$300 if you shop around
10, 13, and 15mm ¼" sockets
¼" T-27 Torx socket driver
8mm Hex-head ¼" socket driver (purchase new for this job!)
17mm crescent wrench
¼" Ratchet driver
¼" Socket swivel joint
10-12" ¼" Socket extension bar
Channel lock pliers
Small pry bar (optional)
2 x M6x10mm Hex bolts
PB Blaster
CRC Electrical contact cleaner
Dremel rotary tool with cutoff wheel (optional if bolts strip)
Zip ties
-----------------------------------------------------------------------
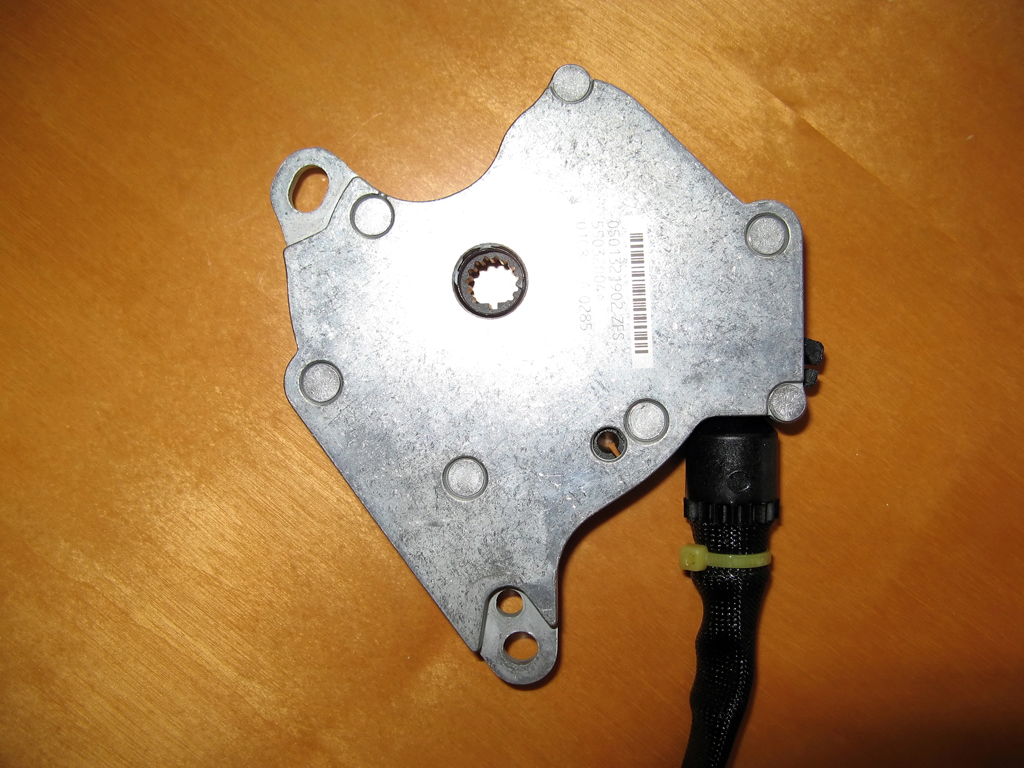
The new MFS:


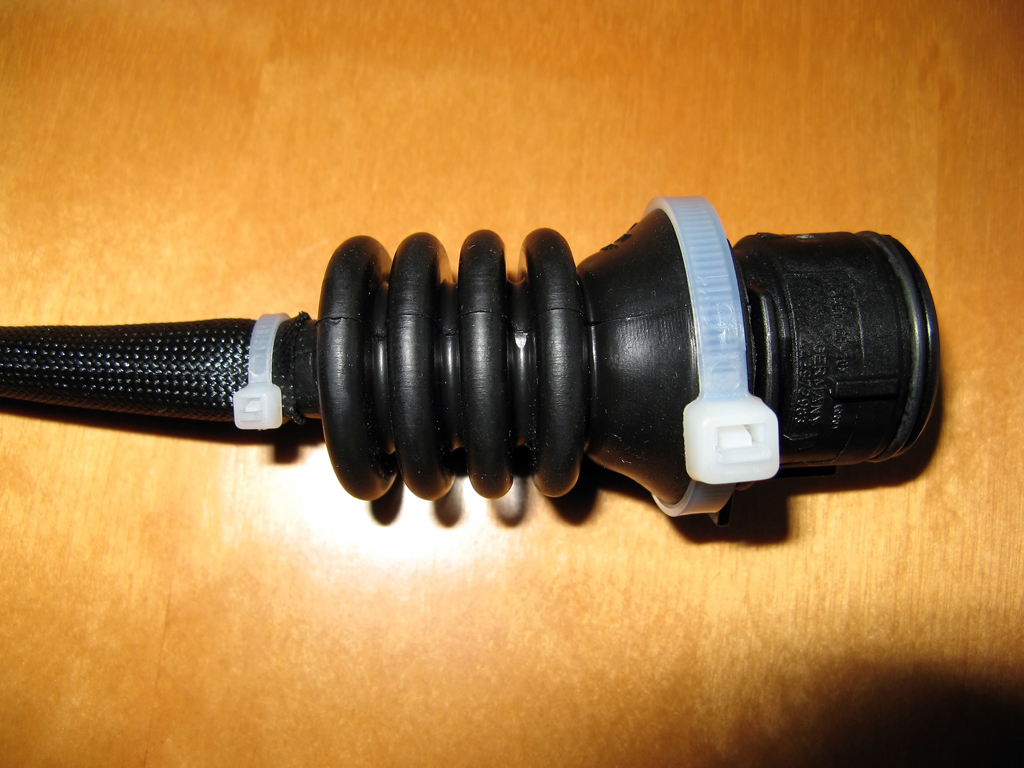
Before installation, zip tie the plug end of the new MFS on both sides of the rubber grommet. This should hopefully prevent contact corrosion from happening again. While not pictured, I also repeated this step on the harness end on the car's wiring.

Start your replacement by safely supporting your car with jack stands and properly supporting the transmission so you can remove the mount. Also disconnect the battery while you are working and do not reconnect until you are finished.
Removing the belly pan is required and the metal strip the rear attaches to is recommended. The metal strip is held on by two 10mm bolts. Removal of the front left wheel is also needed to access the bolts holding the mount and transmission bracket. Because of this, use of Rhino Ramps is not recommended.
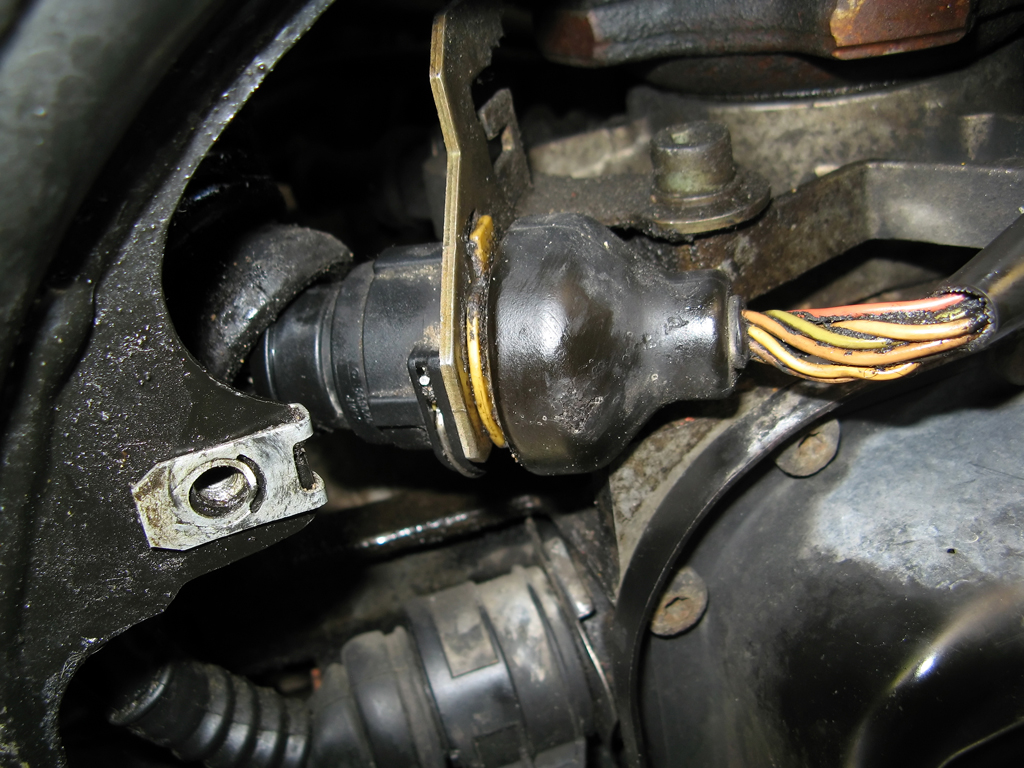
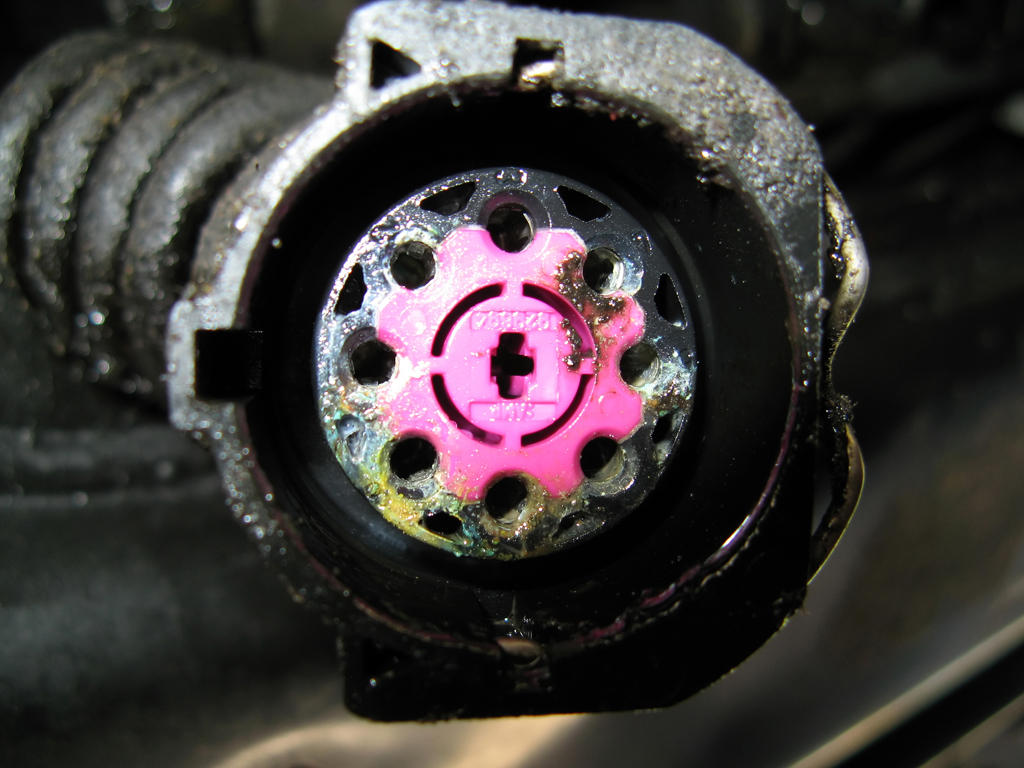
Locate the wiring harness connecting the MFS to the TCU. It is located front left of the transmission under the axle shaft:

Disconnect the wiring harness and inspect for damaged by coolant leaking from the oil cooler and/or coolant flange. Mine was salvaged using the CRC cleaner:

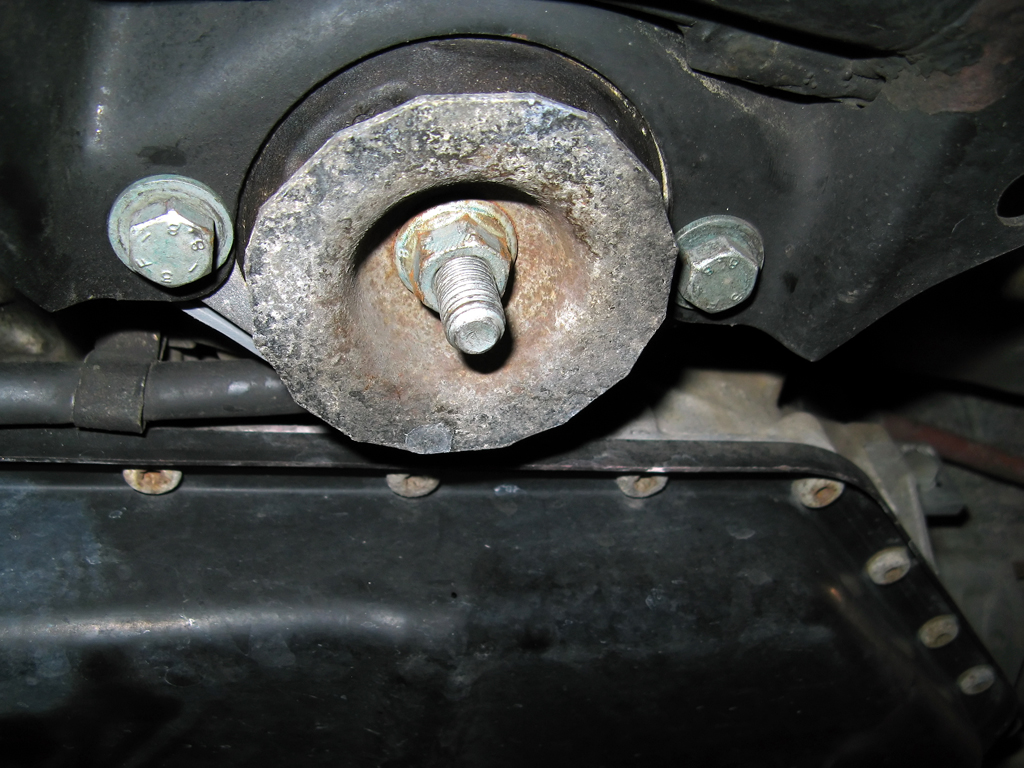
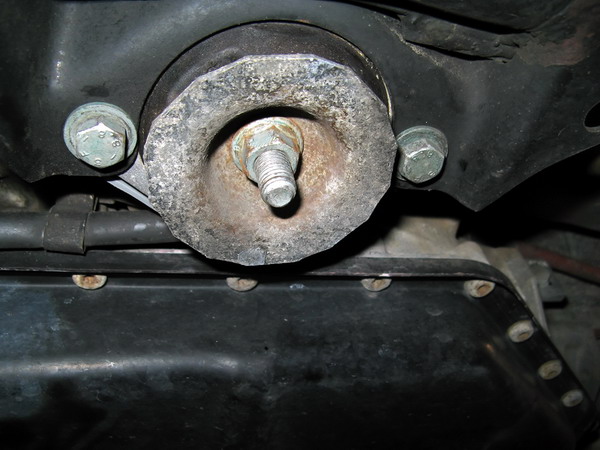
Remove the two bolts on the bottom of the transmission mount with the 13mm socket driver. Then use the 17mm crescent wrench on the bolt head and 15mm socket driver on the nut to counter the removal of the center bolt:
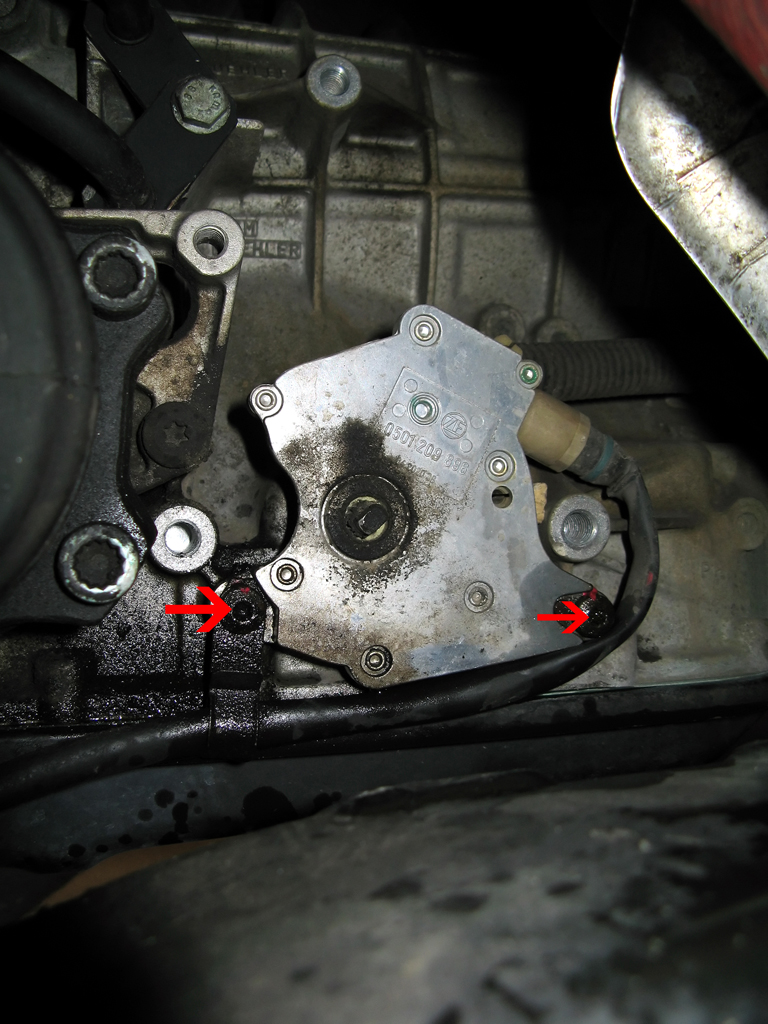
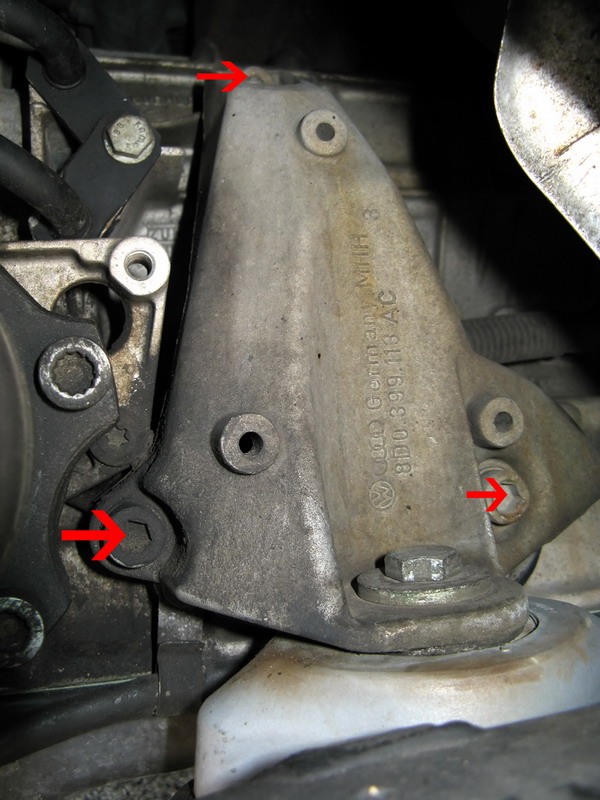
Use the ratchet wrench, 8mm hex drive, ¼" extension bar, and swivel socket to remove the three bolts that hold the transmission bracket on. These bolts are sealed with thread locker and make an audible "pop" when the seal breaks. Because of the amount of torque it takes to break the bolts, use of a new 8mm hex-head socket driver is strongly recommended. It will help reduce the chance of stripping the bolts and causing further delays.
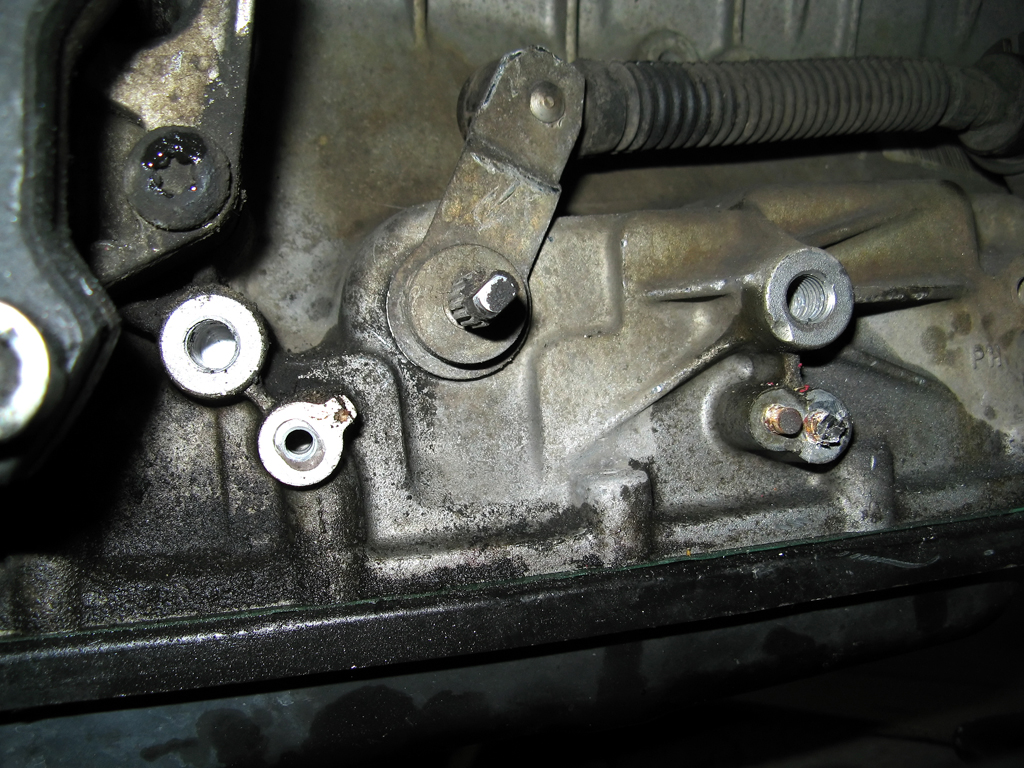
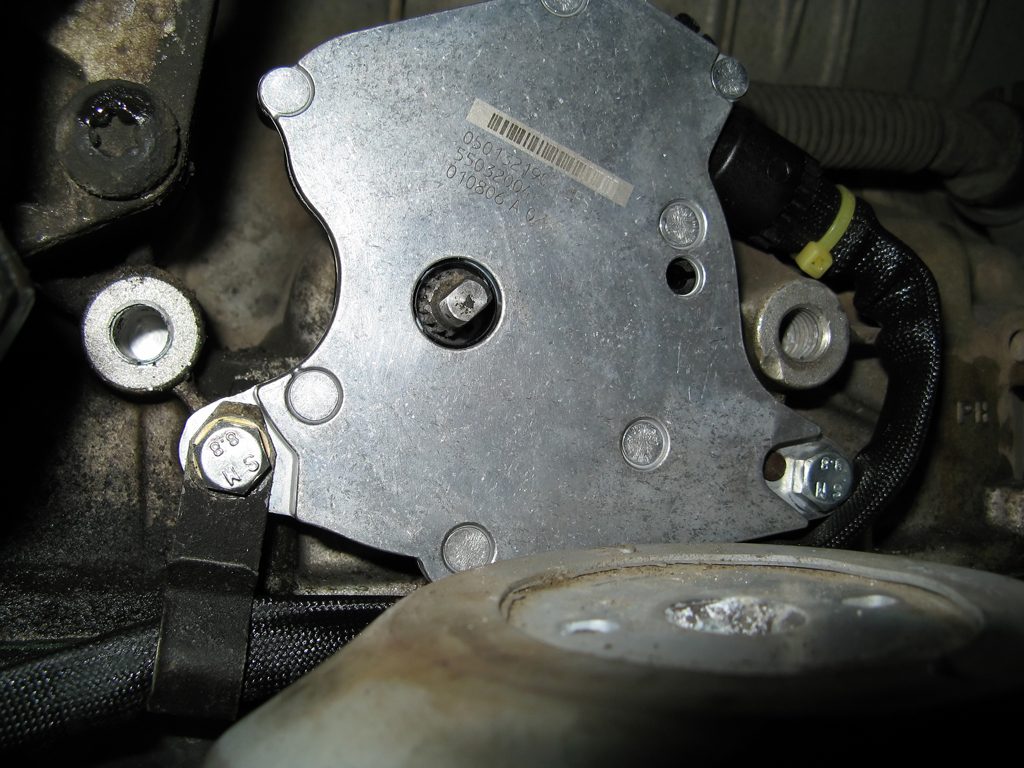
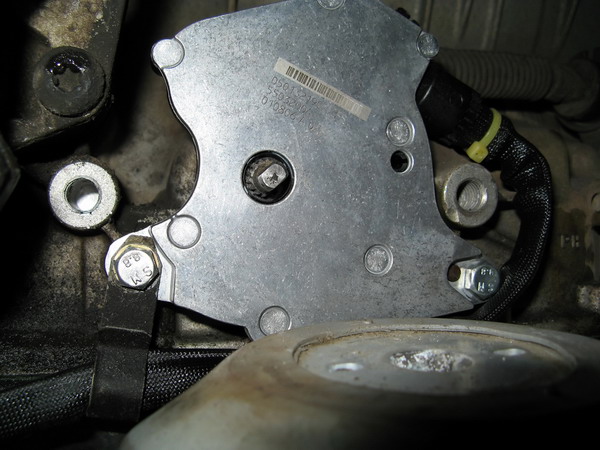
When the transmission bracket clears, you will have a clean shot of the MFS in all its glory. Removal of the two T-27 Torx bolts is all that is required. They are not, I repeat, NOT T-25 Torx bolts. If you use a T-25 driver, you will strip the bolt, spend an hour cutting it out, and then removing the threaded part with channel lock pliers. Make sure to soak the bolts with PB Blaster first:

Before removing the MFS, note the clock gear position on the MFS so you can align the new MFS's. Be gentle and pull it off evenly so as not to damage the clock gear drive. If you break or damage that part, it is not replaceable using spare parts from Audi!
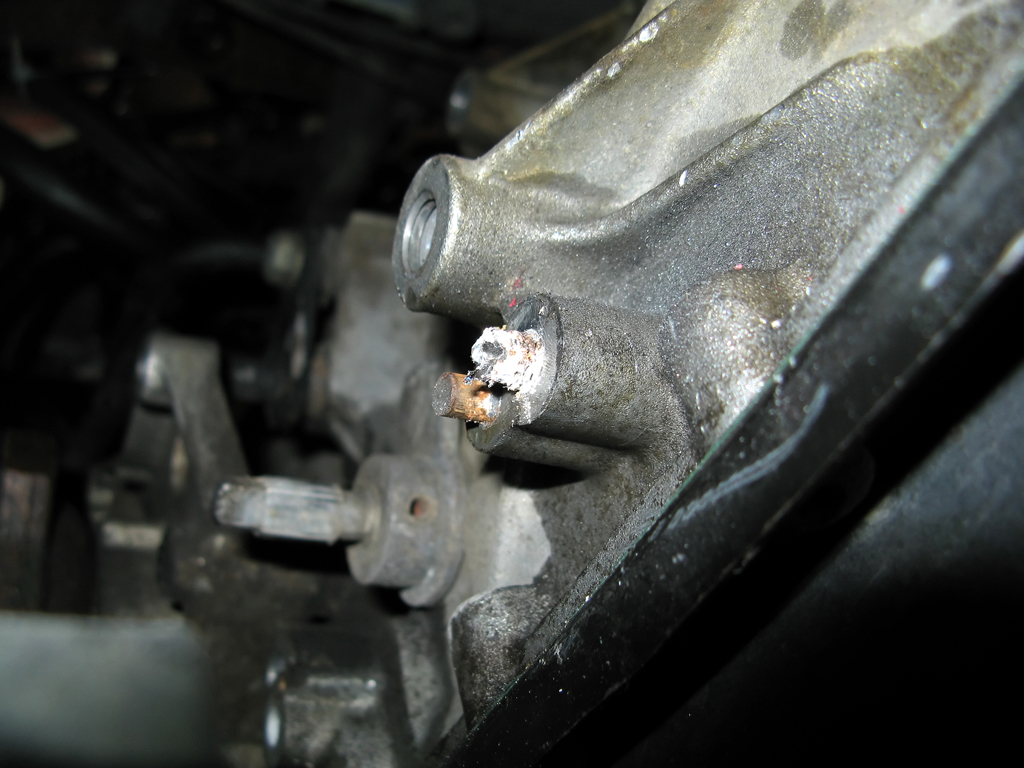
With the MFS removed, you can clean the clock gear drive up a little, but do not attempt to turn it by hand:

Using the T-27 driver, the right bolt still stripped because of corrosion even with a healthy soaking of PB Blaster. I had to use the Dremel and cutoff wheel to remove the bolt and then a pry bar to break the corrosion bond with the MFS. I ended up with this:

I soaked the threads with PB Blaster then used the channel pliers to spin it out of the hole without any damage to the transmission-side threads.
Install the new MFS by first aligning the clock gear to match the original then up with the gear drive. Gently press, but DO NOT FORCE the new MFS on. Instead of reusing the terrible Torx bolts, I used two M6x10mm bolts from Home Depot. They're not as long as the original Torx, but they're long enough to support the MFS. Thread locker can also be used, but is not required.
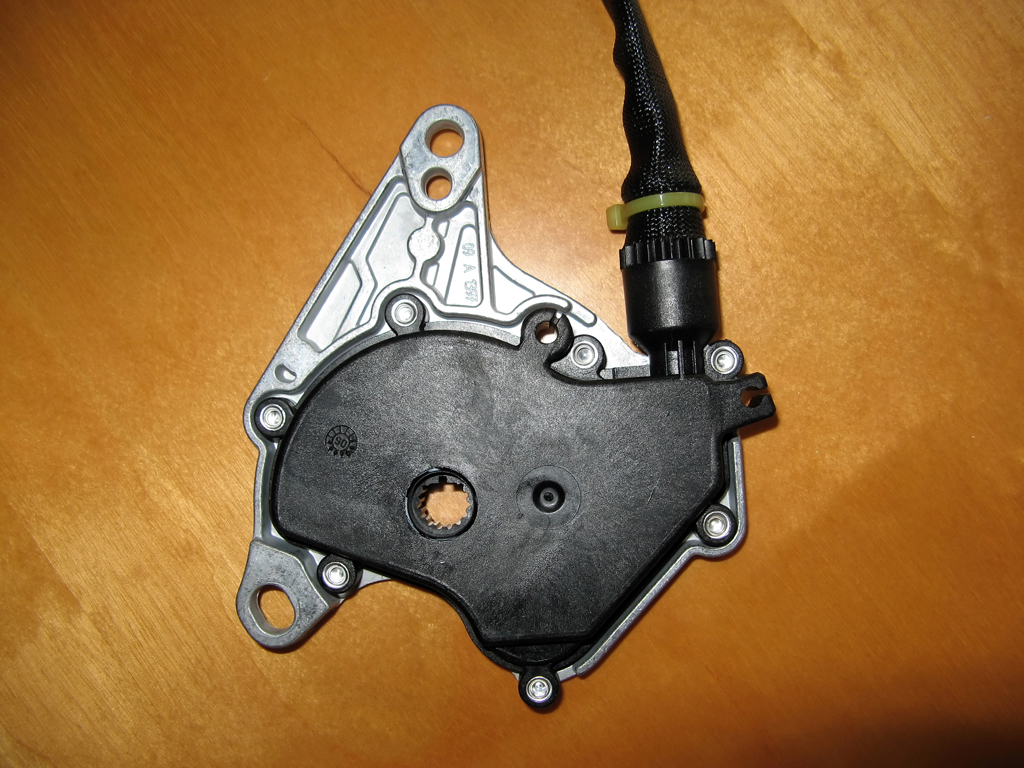
New MFS and bolts installed:
Reinstallation from here is reverse of removal. I used the good `n tight torque spec because I did not have factory specs handy at that time. Another disclaimer: factory torque specs are there for a reason.
Good luck!
|