| Tech Article Title
|
Author
|
Date
|
|
2.7T Timing Belt Replacement |
RMcQ
|
2005 |
B18. Remove 7x T-45 torx through impact absorbers and
lock carrier. You can see three of them in this picture:

B19.
Lift on whole lock carrier and slide it outward a few inches. Have
something to support it with as it is fairly heavy. Now hinge it left a
little bit like it is a gate. Be careful not to stress the hoses or
connections. Just make enough room that you can work behind it. Figure out
a good way to support it there for a while.


C
- Remove serpentine belt and accessories
C1. Remove fan. It has reverse threads. If you have the special
chopsticks tool this is easy. I figured out a way to improvise that was
not too difficult either.
C2. Detension the serpentine belt
tensioner using a 17mm socket. As you turn the ratchet to relieve tension
pin the tensioner open with a small screwdriver or other suitable tool.
Leave the tensioner and pin in place for now.

C3.
Remove the serpentine belt.
C4. Remove both hard plastic intake
pressure lines. Each has 3x hose clamps (2x ends plus 1x BPV) and 1x 10mm
bolt.
C5. Remove the serpentine belt tensioner with 10mm allen
socket but be sure to keep it pinned as you remove it and sit it aside. If
you lose the tension it will fall apart and be impossible to put back
together from what I understand.
D - Remove Timing Belt and
accessories
D1. Remove driver side Timing Belt (TB) cover with
3x 5mm allen
D2. Remove passenger side TB cover with 2x 5mm
allen.
D3. Remove center TB cover with 2x clip (pry
off.)
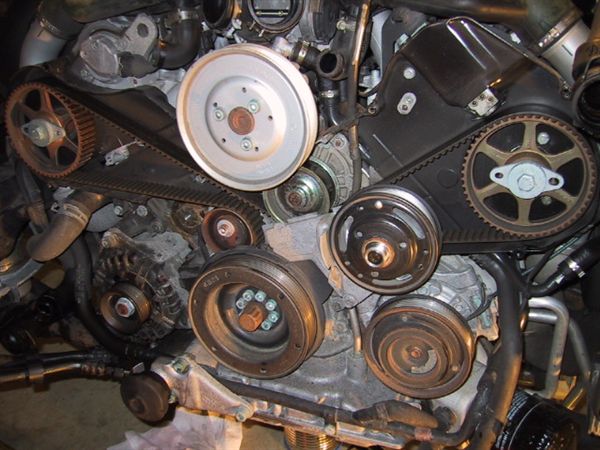
D4. Using a big socket turn the crank to top dead center
(TDC) using the reference mark provided.

When
you get the mark lined up on the crank pulley take a look at the wing like
brackets on the outside of the cam sprockets. If the larger holes are
OUTBOARD as in this picture you are not at TDC and the cam lock bar
will not fit on this way.
If
your cam "wings" look like above rotate the crank another entire rotation
and line the mark up again. You will now be at TDC.
D5. Install cam
lock bar. [you could get away without this special tool if you are
especially careful and make numerous reference marks on the cams to be
sure that you get them exactly where they are supposed to be. There is no
1 tooth margin of error. It needs to be right.]

D6.
Mark the harmonic balancer so you know which way it goes (probably not
100% necessary as it has its own mark, but what the heck) and remove it
from the end of the crank shaft.
[1] [2] [3] [4]
|