| Tech Article Title
|
Author
|
Date
|
|
2.7T Timing Belt Replacement |
RMcQ
|
2005 |
D7. Remove lower (round) TB cover
with 2x 10mm bolt.
D8. Remove serpentine belt idler pulley with 3x
6mm allen bolts (one is accessed through the pulley) and 1x 5mm bolt
through pulley.
D9. Detension the timing belt by putting a allen
driver through the hole in the tensioner and slowly applying pressure to
compress the piston. When you get the piston in far enough pin it back
with a piece of coat hanger or other strong wire.

D10.
Remove timing belt.
D11. Remove timing belt tensioner
pulley.
D12. Remove timing belt idler pulley.
D13. Loosen
dipstick tube with 1x 10mm bolt.
D14. Remove pulley on power
steering pump. This is the top center silver pulley with 3x 6mm allen
bolts.
D15. Loosen mounting bracket for power steering pump. There
are 3x 6mm allen bolts - 2x on front and 1x vertically on top as shown.
This is necessary to remove the water pump in the next steps.

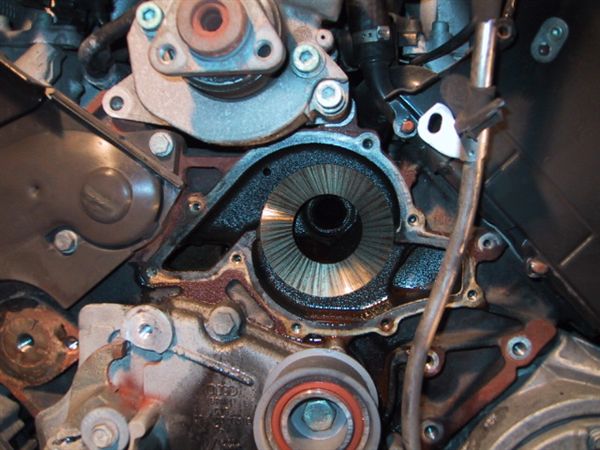
D16.
Remove water pump. 2x 10mm nut including dipstick nut already removed and
9x 10mm bolts.
D17.
Clean gasket surface.
D18. Remove thermostat housing (just to left
of water pump mounting. Remove thermostat and O-ring.
E -
Replace timing belt and accessories
E1. Replace thermostat and
O-ring.
E2. With gasket goop re-install new water pump with new
gasket.
E3. Reinstall 3 screws on power steering pump
mounting.
E4. Reinstall power steering pulley.
E5. Reinstall
new TB tensioner pulley.
E6. Install new timing belt. This is what
we came in here for! Hard to even remember after all the work so far! The
Bentley calls for a procedure that involves partially removing the cam
sprockets. This seemed risky and unnecessary to me so I took the extra
time and hassle to fit the new timing belt without loosening the pulleys.
First, I started the belt around the bottom of the crank and
around the idler pulley. Then I pulled it as tight as possible to driver
side to get the correct tooth on the sprocket. I could see what tooth
needed to be on but didn't have the strength to actually pull it on so I
took the cam lock bar off and very, very carefully rotated the cam about
1/2 tooth to get the belt on then 1/2 tooth back to the original TDC
position.
Then I kept the belt off the tensioner and pulled it
tight across the top to get the proper tooth started on the passenger side
cam. I could almost get the belt over the tensioner with the correct
timing, but I needed just a little more help so I put my allen tool back
in the tensioner to get a little more compression of the hydraulic piston.
This, combined with the fact that the tensioner pulley has no lip allowed
the belt to slip on.
Once the belt is on you can release the
tension from the TB tensioner. The belt should be nice and tight all the
way around with the cam lock bar still in place. Your timing should be
fine.
[IMPORTANT NOTE: This is not the correct way to do this, it's important to release the pulleys from the cams to install the belt 100% correctly. It's not difficult, or dangerous to do this. All you need is a 2 arm puller, or the special Audi puller. Loosen the cam pulley bolts with the cam bar in place. Back the bolts out 2 turns, and then pop the pulleys off. It will pop quite dramatically, but no harm will occur. The pulley will now be free to turn on the end of the cam, and this will allow you to install the belt 100% correctly. At this point, you release the tensioner, and then you tighten the cam pulley bolts to 40 lb/ft. ]
E7. Reinstall serpentine belt idler pulley.
E8.
Reinstall lower round TB cover.
E9. Reinstall harmonic balancer on
crank. It only fits one way. Check to make sure that your timing mark
still lines up and the cam lock bar is still in place and that the TB is
nice an tight. Timing is good.
E10. To double check timing rotate
the crank 2 full revolutions with a socket to ensure that everything runs
smoothly and that there is no internal interference.
E11. Reinstall
center TB cover, then passenger TB cover, then driver TB
cover.
F - Reinstall Serpentine belt and
accessories
F1. Reinstall serpentine belt tensioner with pin
still in place.
F2. Reinstall intake pressure lines and connect all
intake plumbing.
F3. Install new serpentine belt. Look at the
pictures above if you forget the routing.
F4. Release tension from
tensioner.
F5. Reinstall fan. Remember the reverse
threads.
G - Reinstall lock carrier
G1.
Position lock carrier back onto front of car but keep it out a couple
inches.
G2. Reroute the cables and plug in the 3 connectors by
power steering reservoir.
G3. Plug in headlights.
G4.
Connect upper and lower radiator hoses.
G5. Install and plug in
coolant temperature sensor in lower radiator hose.
G6. Push lock
carrier into place and reinstall 7x torx into impact absorbers.
G7.
Swing condenser back into place and fasten with 2 top bolts
only.
G8. Put fan back in place and attach with 2 other bolts on
top and torx on bottom.
G9. Reinstall power steering cooler line
and air temperature sensor.
G10. Reconnect horns and condenser
electrical connector.
G11. Reinstall 6x T-30 torx on top and sides
of lock carrier.
G12. Reinstall intercooler ducts.
G13.
Replace 3x radiator shrouds.
G14. Replace duct to air
box.
G15. Reconnect hood release cable.
H - Reinstall
bumper cover
H1. Slide bumper back onto car but leave
loose.
H2. Reconnect washer line and fog lights.
H3. Guide
bumper into place on the bumper guides on both sides. It should snap or
lock into place.
H4. Reinstall the 6x 10mm nuts behind fender
liner.
H5. Replace all fender liner hardware.
H6. Replace
vertical bolts in fog light housing area.
H7. Reinstall fog light
surrounds/intercooler grills.
I - Final steps
I1.
Reinstall belly pan.
I2. Reinstall engine covers.
I3. Fix a
50/50 coolant solution and fill coolant. You will have to run the car and
refill to get it to the correct level. You may also have to burp or bleed
the system by sliding back one of the heater core hoses to release
air.
So that's it. Piece of cake. Start it up and make sure it
sounds normal. Drive it and make sure it drives normal. You're done for
another 3-5 years.
[1] [2] [3] [4]