| Tech Article Title |
Author |
Date
|
| DIY N75 Replacement |
Robert Gedeon |
2006 |
Changing the N75 valve on the 2.7T engine is very straightforward. In fact, it's so straightforward that this writeup could be considered quite unnecessary! I figured I'd post it (since I had it anyway) in case anyone was ever on the fence about doing it themselves, to reassure them beforehand that it is very do-able. The hardest part about the job is removing the hose clamps connecting the hoses to the existing valve. Having said that, it's nothing anyone with a small bit of tenacity couldn't do on their own.
First thing to do is get the requisite parts and tools together. I used the following bits and pieces:
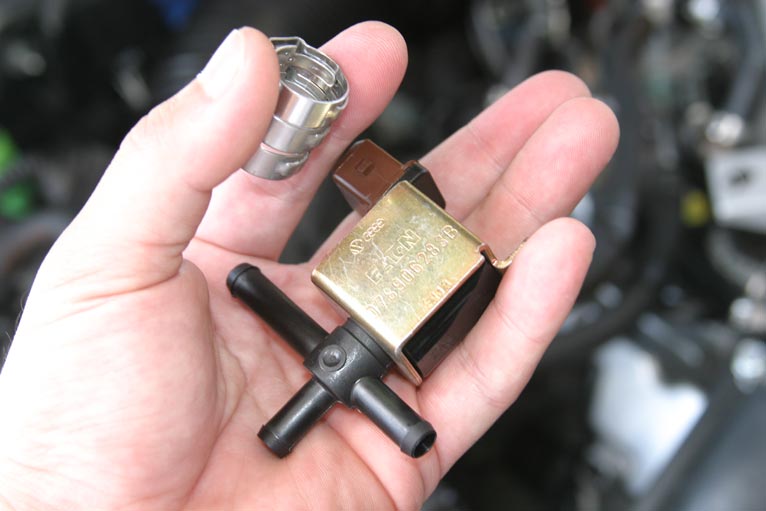
Solenoid change-over valve (N75): 078 906 283B
Spring clip / clamps (x3): N 102 334 01
Oetiker clamp / clip crimping tool
Big mouth pliers
Flat head screwdriver

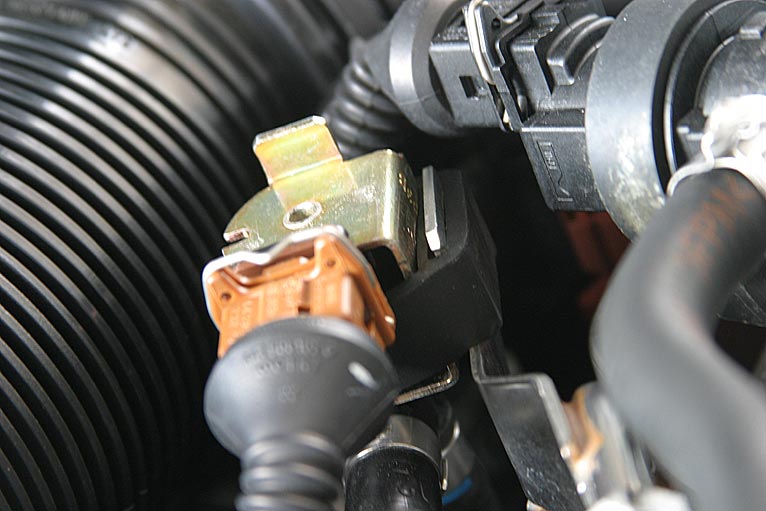
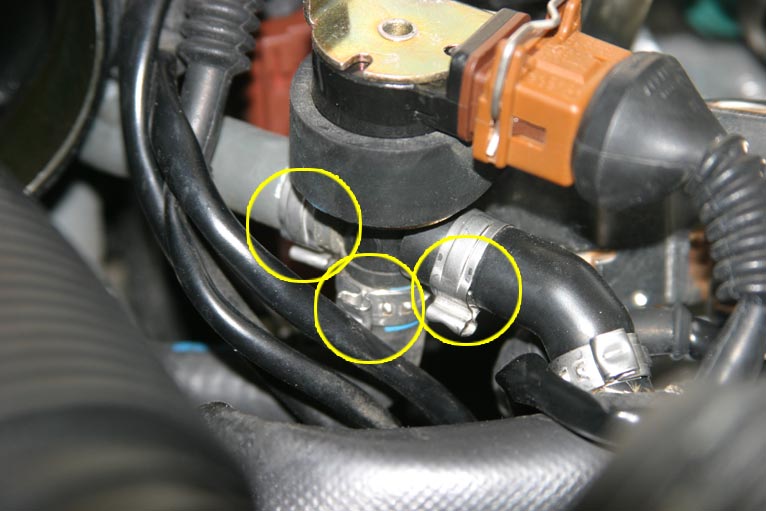
After all the tools & parts were together, the first task is to locate the N75 valve in the engine bay. The location is circled in yellow in the picture below, followed by a close-up of the valve itself. The valve body is secured in place by a rubber strap / band (which wraps around the valve body and secures it to a metal bracket), and is secured to three lines on the bottom of the valve via standard clamps.

The hardest part about the job is removing the valve after locating it. This requires the removal of the rubber strap and existing clamps. Space is at something of a premium, however, and therefore things can be made easier by removing the accordion hose connecting the MAF sensor housing to the y-pipe.
The accordion hose is held in place by two tension-loaded clamps - one at each end. Using a pair of big mouth pliers, open the clamps by closing the "handles" of the clamps together, and pull the accordion hose from the MAF housing, on the one hand, and the y-pipe, on the other. After getting the accordion hose out of the way, I secured the clamps onto the MAF housing and y-pipe to keep them out of the way.


With the accordion hose out of the way, the N75 valve is more accessible, and the clamps connecting the lines to the three nipples on the bottom of the valve are clearly visible.
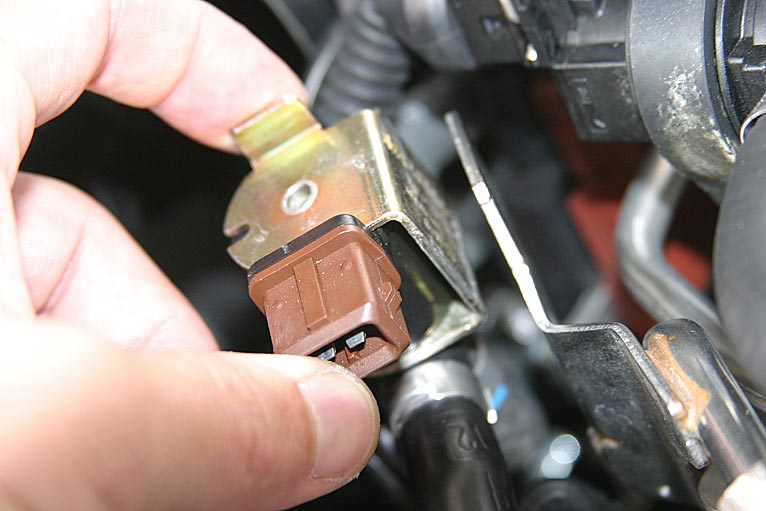
To make the clamps as accessible as possible, it's useful to first remove the plug from the valve, and then to remove the rubber strap to allow manipulation on the valve while removing the clamps. To remove the plug, simply depress the metal clip on the top of the plug with your thumb and pull. If you're a jackball like me, you might think you need to pry the clip off with a screwdriver. Don't go that route!!

Once unplugged, the rubber band securing the valve in place can be removed by "pulling" the strap up and over the valve body as indicated by the arrow in the image below. The band will need to be stretched a bit to clear the extension on the top of the valve, but once it clears, it can be pulled over the top and over the plug. With the band removed, the valve can be further manipulated allowing greater access to the clamps for removal.

At this point, the three clamps securing lines to the valve's nipples need to be removed. I used the Oetiker crimping tool to remove both of the horizontal lines first, then the vertical line. Removing these clamps will certainly be the hardest part of the project. Needle-nose pliers, extra small flat-head screwdrivers and the like might be employed here to pry the clamps apart. The task is complicated because the lack of space makes it difficult to get the right angles on the various clamps. With some patience and ingenuity, the clamps can be removed.
Once the clamps are removed, the existing N75 valve can be removed from the engine compartment.
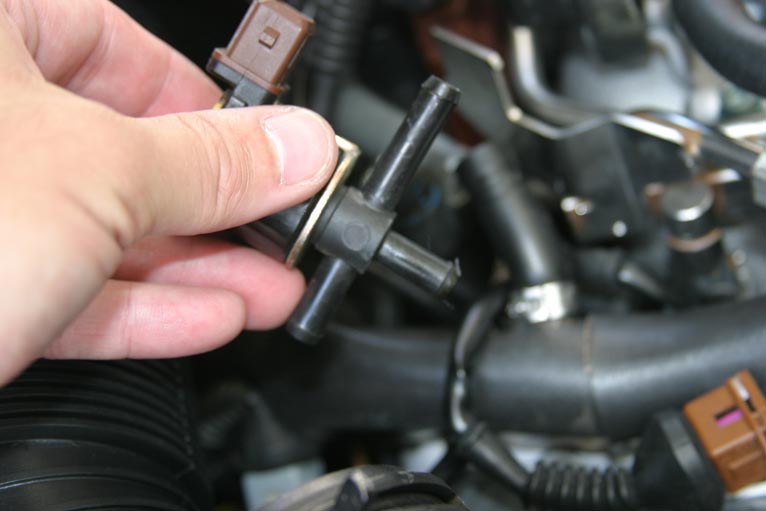
Once the old valve is removed, the new valve can be installed. Installation proceeds in reverse of removal. First, the three clamps should be slid over each of the three lines, the valve's nipples should be inserted into each, then the clamps should be slid into place and crimped closed with the crimping tool (the lines will have indentations where the old clamps were, which can be helpful with placement of the new clamps). Be sure to keep the nipples aligned as best as possible to avoid any unnecessary bends in the hoses, and be careful to install the new valve in the same orientation as the old - that is, long nipple and plug should be pointed toward passenger side headlight, and short nipple should point back toward the y-pipe / firewall.

Once the clamps have been crimped, the valve body can once again be secured by replacing the rubber band / strap in reverse of removal - first over the plug, then over the extension on the top of the valve and onto the securing bracket.

The final step is to re-insert the plug onto the valve, and to reattach the accordion hose to the MAF housing and y-pipe. After that, it's done!

|