| Tech Article Title
|
Author
|
Date
|
| Do-it-Yourself Sports Grille
|
Robert Jordan
|
1999
|
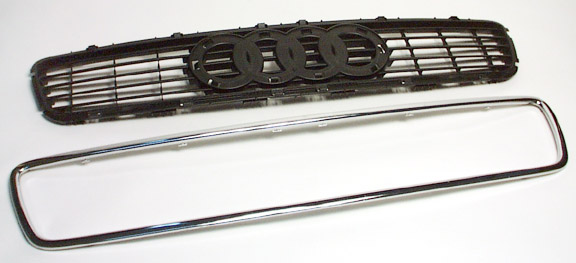
Removing the entire grill assembly from the hood. Raise the hood and starting at either end of the grill, squeeze the plastic clips (six in all) on the top of the grill (engine side) toward the grill while pushing the grill assembly forward. The top should tip out and lift the grill upward to release the bottom.
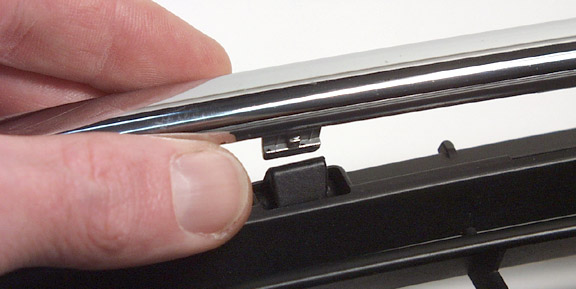
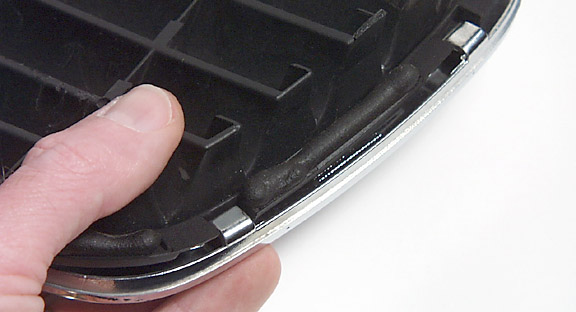
Removing the grill trim from the grill. Once the grill is out, the next step is to remove the chrome trim. On the back of the grill there are 12 tabs along the top and bottom, which hold the trim ring to the body of the grill. In addition, there are two `ears' on either end, which hold the trim.
Start at one end of the grill and unhook the two ears by pushing the trim downward and away from the grill (this is the hardest part). Once one end of the trim is free, start working your way across the grill to the other end, releasing the tabs on the top and bottom of the trim. Use a small flat-blade screwdriver to carefully pull the grill clips away from the trim tabs. This is the hardest part to explain, but it is obvious what needs to be done once you have a good look at the back of the grill.
Prep the trim for Sanding. Once the trim is removed, wash it thoroughly with warm water and a good strong detergent (I found a toothbrush to be very helpful). You might want to wash the grill as well, just for the hell of it.
Sanding. Some folks think this step is unnecessary and you may wish to skip this step. I don't think any primer or paint is going to stick to chrome plating, so I recommend you sand the trim. I would not use any paper coarser than #400; for fear that the sanding marks will show up under the paint. Finer than #600 may not provide enough `tooth' for the primer to stick to. The plating is very tough and will take a while to roughen up.
Final paint prep. Inspect the trim to ensure all surfaces to be painted are thoroughly sanded. Wipe the entire trim with a clean cloth soaked in rubbing alcohol to remove all sanding residue and fingerprints/oils.
Primer. Apply a suitable automotive primer, `filling' primer is not recommended. Filling primer is designed to fill small door dings and is too thick for this application. Make sure your primer and paint are compatible! I recommend buying the same brand of primer and paint and reading all the instructions on both cans. Apply at 70degrees or higher for best results, low humidity is also recommended for best results. I used three Very light coats.
Painting. Allow the primer to dry as per the manufacturer's instructions. Follow manufacturer's instructions for applying the paint. I used four Very light coats. Once the paint had dried for about an hour, I moved the trim to a photographic film drying cabinet, where I was able to cure the paint at 150-degrees and very low humidity for a couple of hours. You may wish to replicate this step using whatever you have at hand.
Reinstallation. Hook one end of the trim over the `ears' on the grill and work your way down the grill to the other end. Once the `ears' are hooked up on the other end, the grill is ready to replace. Hook the lower edge of the grill over the grill opening (from the outside of the hood) and push it into place. Ensure that all the clips are fully engaged. Close hood and admire.
|

