| Tech Article Title |
Author |
Date
|
| Snub Mount Install |
Eddie Man |
2006 |
Improvement in shift feel, speed and drivability.
Eventhough the "S" is already that and more, I wanted to improve it that much more...
Well in a nut shell, it has.
The shifting coupled w/my StratSS is damn DIRECT and Super Clean and Lighting Fast. No more laging, though small in OEM mode, it is still a dramatic improvment while shifting and engaging.
Shifting goes like this.
BAM-BAM-BAM-BAM-BAM-BAM all the way to 6th...
Yes, it's that quick.
Another value added side benefit is that the braking feel and turning appears to have tightened up too. Almost a feeling of no engine movement going forward while braking and restricted side-to-side movement on strong turns.
To the nay-sayers regarding vibration:
None whatsoever. It's all in the installation and proper adjustment. Period.
Get that right and then it's pure bliss.
Well here's a quick naration of my install:
1. Removal of the bumper.
Thanks to "4RingS4"s thread for his bumper removal link >>> Bumper Removal


2. Remove Bumper Bracket Frame Bolts & loosen bumper bracket guide nut, but do not remove. (2 locations)
Refer to my "APRSnub" link above for a more detailed process...
Basically, it's the same but only tighter (4.2 vs. 3.0)

3. Locate OEM Snub beneath engine bay (adjacent radiater wall).
Don't laugh at my chicken legs / 8yr old took pic :)


4. Create Working Space for Snub Removal...
Insert object (I used a rubber mallet) to hinge radiator wall open at the bottom.

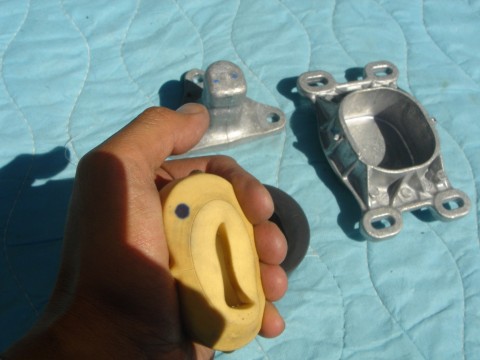
5. Organize the Snub Swap.
I used the ECStuning "Black" Snub, recommended for the S4.
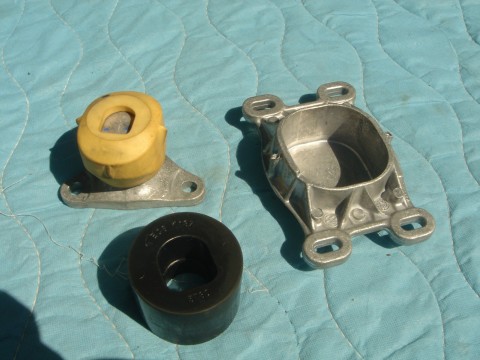
6. Observation of the "Soft" OEM Snub.
BTW, this is the exact snub used in the B6/3.0L.
7. Install ECS Snub onto Snub male bracket.
Use rubber mallet.

8. Thread Lock for all engine bolts removed.

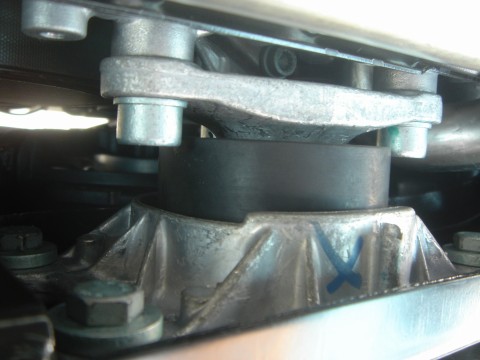
9. New Snub Installed (before & after)
|