|
|
I bought this antenna last year, and had it painted Silver immediately. Then I got the "how to" directions from Boston Driver on dropping the headliner and running the cables, and found I had no time to do this project...so I put the antenna in storage.
With the stereo system install that I'm in the middle of, I decided to add Sirius SAT radio to the goodies going in. So that meant another antenna on the car. I spoke with Teddy B Game regarding the connectors from the antenna, as they would not match up with my SAT tuner, or my GPS input to the new Eclipse headunit.  There were to many "unknowns" to using the OEM connectors, plus I would need to extend the cables as well. So with the help of my friend Peter who builds marine GPS bouys, we decided to explore the insides of the antenna. This is what is inside:  After some delicate dis-assembly to preserve the parts, all the OEM hardware was removed. With a dremel, some modifications were made to the base and the plastic cap to allow for the next step. The GPS antenna from the Eclipse head, and the Sirius antenna were then mounted and hot-glued to the antenna base.  The end result was no cable or connector splices or extensions, and the exact antennas necessary for my needs. I sent the plastic cap off for it's second paint job to a local body shop, and when I got it back, re-assembled it. 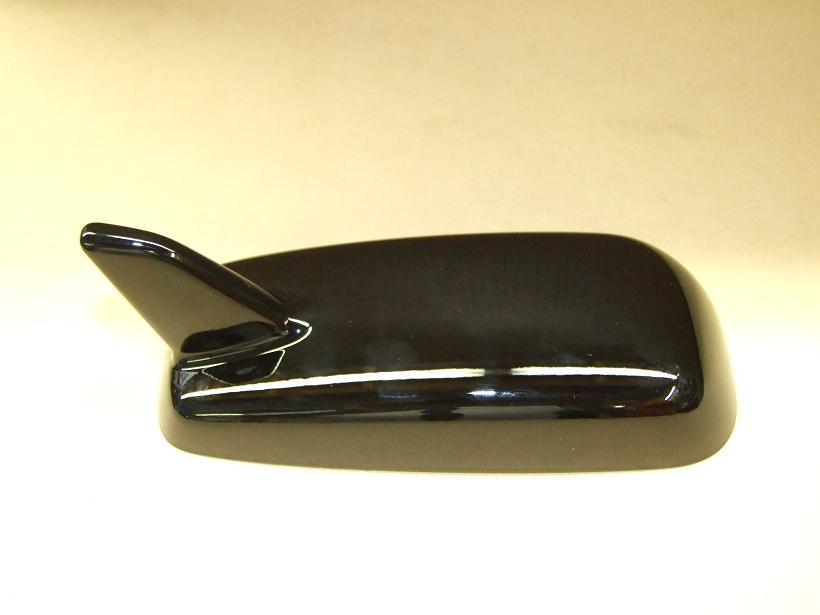 The mounting to the car was a very time consuming project. Here is the base of the OEM stubby antenna that was on the car:  And here is the base of the C6 version:  So, using the square hole mounting hole that was already in the roof as a guide, the wires were routed though the hole, and removed about twenty times to get the perfect position for drilling a hole for the fastening bolt at the back of the antenna. Once done, I test fit the antenna one last time, secured the bolt in, and found that the antenna lifted up at the front from the roof. I removed the antenna again, and drilled a hole in the antenna base, and installed a threaded ferrule. Then, more placement and removal of the antenna in order to drill another hole for a bolt in the front. The antenna base has a very good rubber sel around it, and secondary seals around the rear bolt hole, and where the wires pass through. I added some weatherstrip foam to the underside where I added the additional bolt. Passed the wires through one last time, mounted the antenna, secured the two bolts, and a perfect flush fit. I finished it off with some RTV silicone on the underside of the roof at both bolt holes, and where the wires pass through just for good measure. Here is the old OEM stubby antenna on the roof before (you can also see where I had to drill one of the holes):  And here is the new antenna installed: 
|
|
Advertising |
Contact Us |
Cookie Policy |
Privacy Statement |
Terms of Service |
Do Not Sell My Personal Information
© 2020 MH Sub I, LLC dba Internet Brands |