|
|
This description should be useful for anyone wanting to replace that lower trim or take their bumper skin off for repair/replacement/whatever. Tools needed: 10mm socket (I used both a regular and a deep socket). T-25 TORX Between AESIS and the fine members of Audiworld, I was able to determine the locations of the nuts to remove. There are 5ea 10mm nuts accessed through each trunk side compartment. A column of 3 to the outside, and a column of 2 just inside the trunk trim. Even AESIS's diagrams are pretty vague, so I decided to take a series of pictures to better show the important locations. Open the trunk and remove the two side comparment doors. Find the three outer nuts on the left side behind the CD changer mounting. The top one: 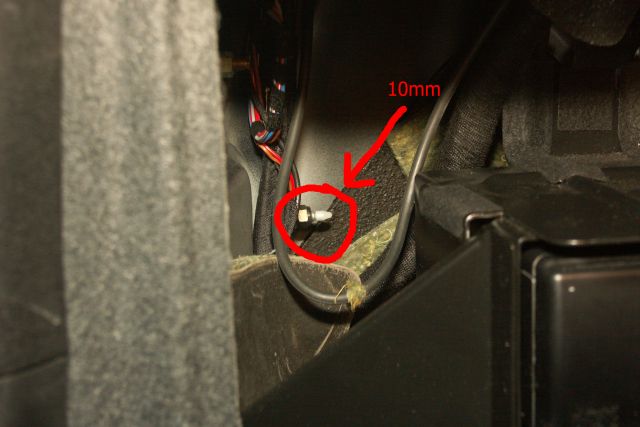 The bottom one:  The middle & bottom ones: 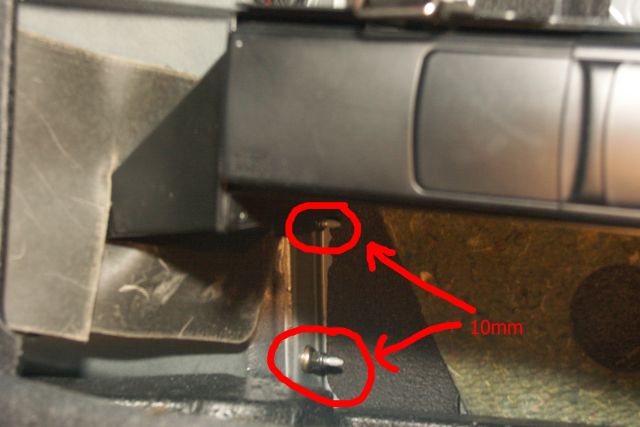 The right side outer nuts are even easier:  The inner nuts are more difficult, they're jammed in between the trunk trim and the headlight assembly. I peeled back some of the sound insulation to better reach the bolts, but I still couldn't get a good picture. The best I could do was to show where the wrench sits when it's on each nut. Once you find the first one, these really aren't too hard - just be *CAREFUL* not to drop a nut down into the bodywork!!! I used a 10mm deep socket here to make things a little easier. Top left:  Bottom left: 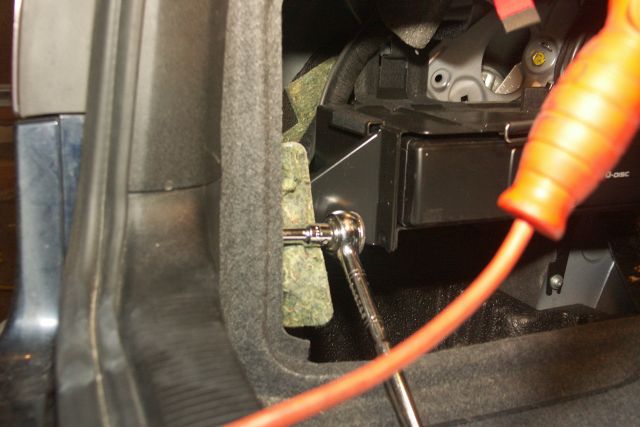 Top right:  Bottom right: 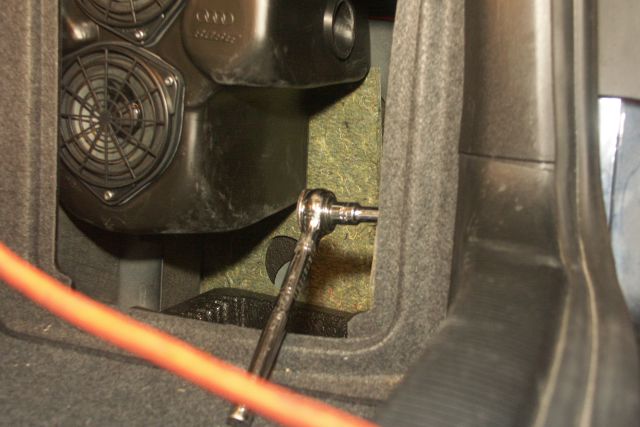 Here's a picture of the right side after everything is off which shows the bolt holes a little better perhaps: 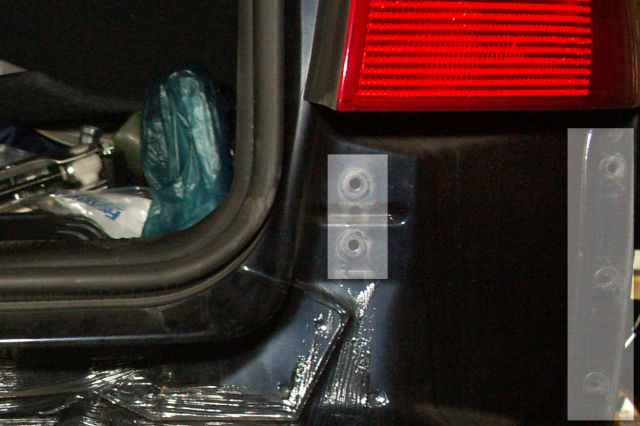 Now you should have 6 nuts from the outer bolts, and 4 from the inner bolts. It's time for the wheel well bolts. There are 2ea self-tapping 10mm bolts and 1ea self-tapping T-25 TORX bolt in the back of each wheel well. I had to use a box-end wrench at times here as my 17" wheels and tires made even a standard socket a tight fit. Here's the right side, the left is simply mirrored:  Now you should have added 4ea 10mm bolts and 2ea T-25 TORX bolts to your collection. All that's left is to unsnap the bumper skin from the guide and remove. Ok, so it took me a while to figure out the unsnapping bit. Basically you have to work the skin down and out from the wheel well, as there are a bunch of barbed plastic tabs holding the bottom of the skin in position/shape. There's probably a special Audi tool to make this easy, perhaps popsicle sticks or a plastic spatula or something would have worked - I just carefully pushed up and pulled out to work the skin off the barbs. Here's the skin popped off on the left side: 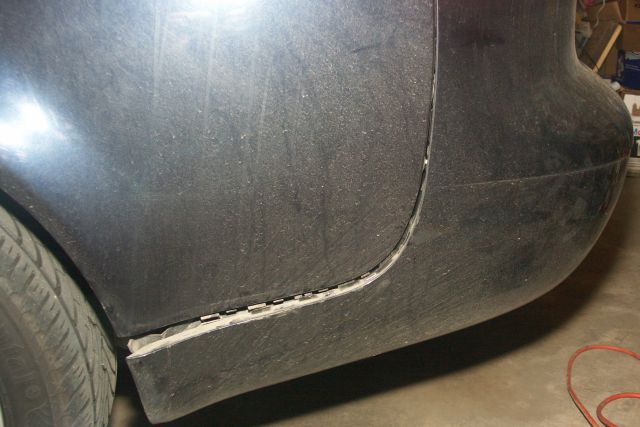 Sorry, I tried for a closeup of the junction - it didn't come out very well: 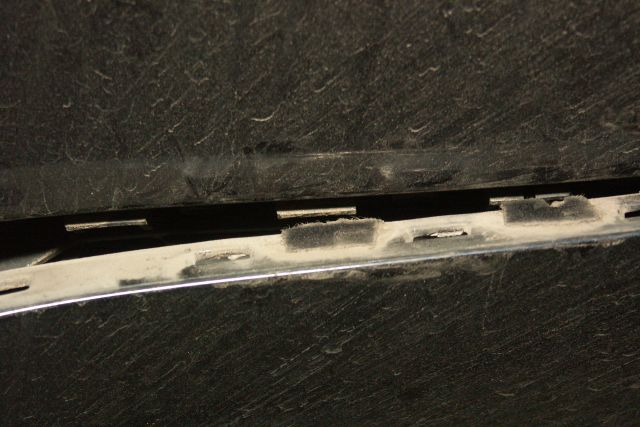 The "magic" - this plastic guide makes everything fit beautifully even when assembled by people as clumsy as me: 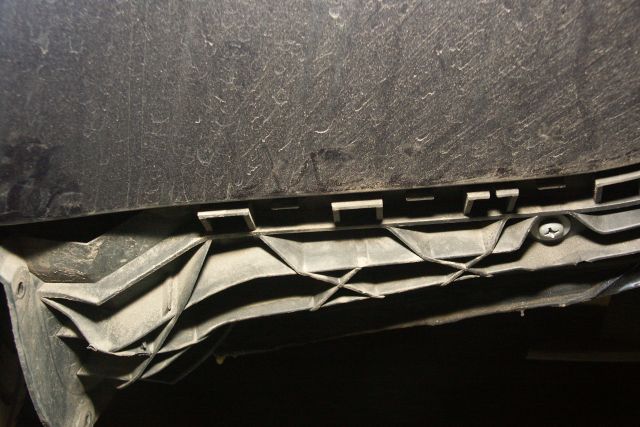 Once the skin is popped off both side guides it *should* just slide straight back. My left top bolt got hung up on the little plastic grommet, so I spent 10-15 minutes fiddling and cursing to get it free. Once the skin is off, you're left with naked Audi butt. Note the highlighted bolt holes:  Nice to see there's a real metal bumper and energy absorbers behind all that plastic:  I didn't bother taking pictures of the lower trim. Once the bumper skin is off, the 6ea T-25 bolts are obvious and simple. Re-attaching the skin is likewise straightforward. HINT: use the tape trick when putting those inner nuts back on! (Put nut in socket, wrap a layer of electrical tape around both with most tape on the socket. Once the nut is solidly threaded on, you can pull the socket and tape free.) I did get one good laugh out of the whole deal. I've long said this is the best Italian car I've ever owned... lo and behold, what do I spy on the inside of the new lower trim piece? 
|
|
Advertising |
Contact Us |
Cookie Policy |
Privacy Statement |
Terms of Service |
Do Not Sell My Personal Information
© 2020 MH Sub I, LLC dba Internet Brands |