| Tech Article Title |
Author |
Date
|
| Instrument Cluster Removal & Cleaning |
a_CQ |
2007 |
Ok, did this today as well. I had ton of dust/dirt in the IC and while it was bothering me a bit my GF was on my case about it ever since we bought the car so....
Pull your wheel all the way out and tilt down.
Remove this trim piece. Grab both sides and pull straight back:

You will expose 2 torx bolts in each channel. Remove them.

After that you are ready to remove the cluster. To do so, I used needle nose pliers and grabbed the tabs located at 6 o'clock beneath rpm and speedo unit:

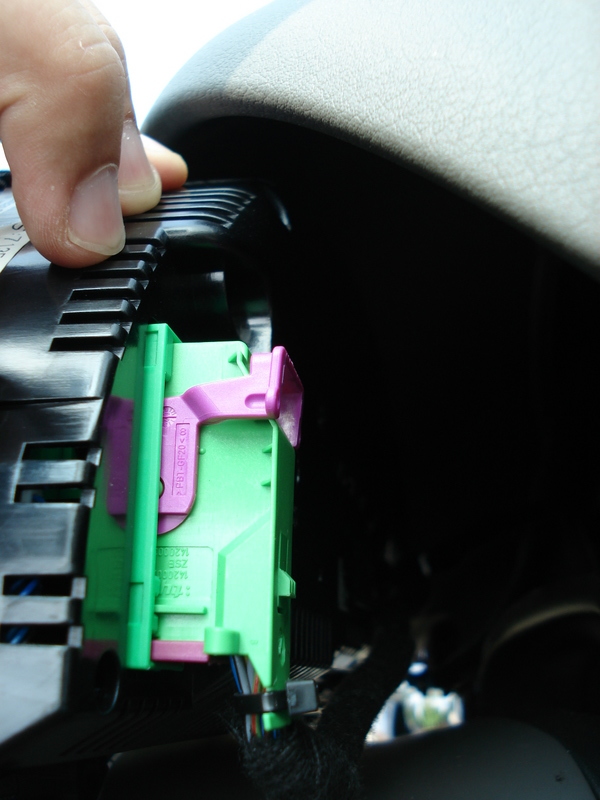
Once the cluster slides out there are 2 plugs on the back that you will have to disconnect. Blue and green on opposite sides of the clister. To do so, press on the little tab where my flat head points to and the purple tab will flip up, releasing the plug lose:

Ready to pull it out. Do it on both sides and your cluster can come out.
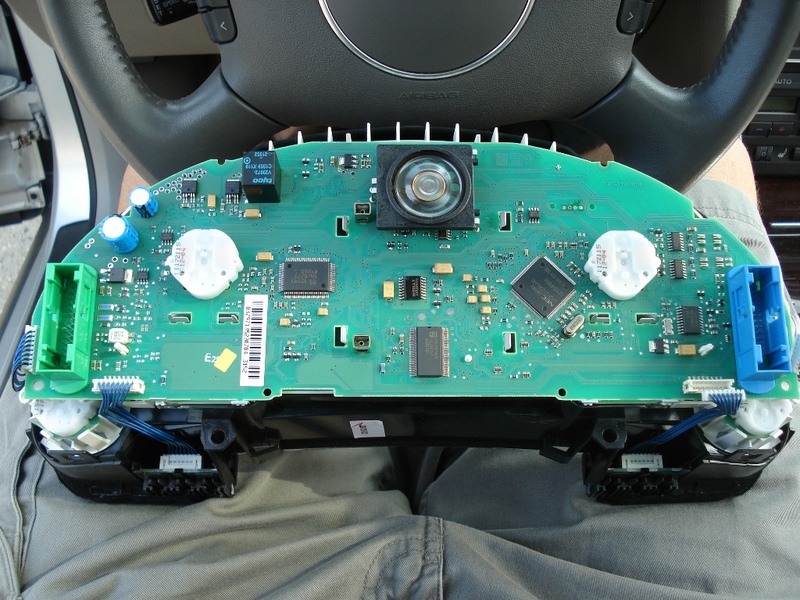
Once the cluster is out, turn it around and you will see 4 torx bolts on the back. Only 2 are pictured here, but remove all 4:

Next, you will likely have to take off some of the identification stickers so the back of the cluster assembly can come off. What I did is follow the "line" where two pieces meet and unglued only part of thsoe stickers, not removing them completely. There also 6-8 tabs around like this - release them all and back plastic cover will come off:

When you remove the back plastic cover you will see this:
Notice the tabs with bunch of blue wires - you will have to release all 4 of those, 2 on each lower corner of the unit. I only had a pick like this handy so I used that. I can imagine other little sharp objects will work too. Be carefull here not to damage any of the wires.


Once you ae done with this, you are ready to pull the main piece of the cluster out of the clear cover that you see on the front. Just grab the whole unit and pull straight up.

Your fuel and water temp gauges will stay in the clear plastic cover. I can imagine thsoe can be removed too if need be but I didn't bother with them. I then blew the dust out and used some q-tips to clean out the larger pieces that wouldn't blow out.
Put everything back together in reverse oder. Don't forget to hide those wires behind the 2 clips on each side. I'm not sure the purpose but I imagine its so they don't get damaged during IC removal/install:

Nice and clean. Enjoy your IC again.

|