| Tech Article Title |
Author |
Date |
| Garmin
StreetPilot III Installation |
Don
Pavlik |
2001 |

When I purchased my S4 I did not to get the
pricey factory navigation system... maybe if it had a LCD display with
maps I would have but the way Audi decided to provide navigation on US
cars did not impress me. I'm too lazy to read paper maps and have a short
term memory that lasts about 5 seconds when it comes to remembering street
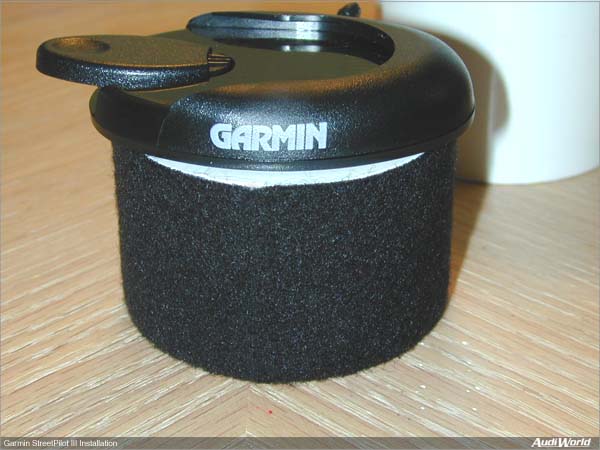
names so when Garmin released the StreetPilot III I couldn't resist.So
far, I'm very impressed. The auto-routing has worked flawlessly, the
display is crisp and easy to read even in bright light and the voice
prompts are easy to understand.
The GPS comes with mounting hardware which
you can affix to the dash via double sided sticky tape but after test
placement I decided putting it on top of the dash wasn't for me. I'd
been using the in-dash cup holder for my eMap so it seemed like a good
location for the SPIII.Satellite reception is not a problem in this
location.
I decided to hardwire it for power and use
the navigation speaker in the drivers door for the voice prompts provided
by the SPIII. Power and speaker leads exit the edge of the glove box and
route up behind the GPS unit. When not
in use, I simply remove the SPIII, the mount and stow the power and
speaker connection in the glove box--very clean, no clutter and not
visible to tempt thieves.
 |
- The hole in the cup
holder is a near-perfect fit for a 2" SCH40 PVC collar. Some sticky
backed black felt (from a craft store) carefully applied and
trimmed dressed it up nicely.
- A flush PVC plug inserted into the
collar provides a mounting surface for the GPS mount. I
had to trim the length of the plug for it fit flush.
|
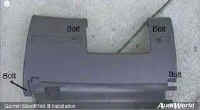 |
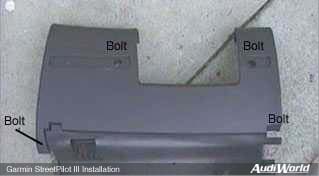
- Drop the lower panel for access to
hook up power and the speaker leads.
- To drop the lower panel remove 4
bolts (2 behind the trim covers, pry them out) and pull the
panel back and down.
- Release the light and
diagnostic connector wiring from the panel to prevent damage. Be
careful!
- For power, I chose an unswitched
source and secured my fused power lead under one of the 10mm
bolts on the power bus located under the relays. Sorry, no
picture... it's obvious where when you have the panel down.
|
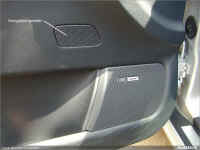 |
- The navigation speaker. Please, no
grief about the dust and scuff marks... it's all gone now. :
)
|
 |
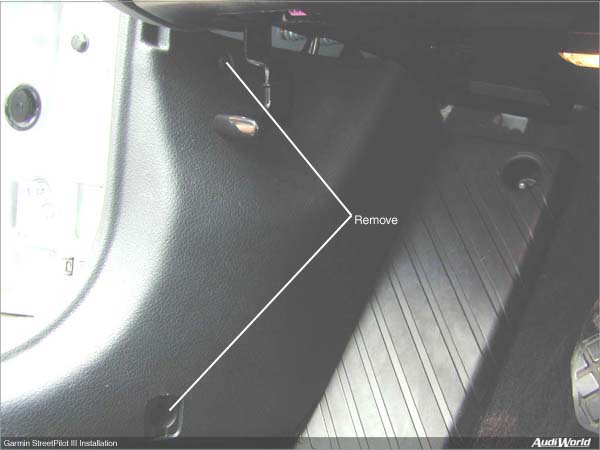
- The connector for the navigation
speaker is behind the kick panel in the drivers footwell.
- Remove the screw cover for access
to the bottom screw.
|
 |
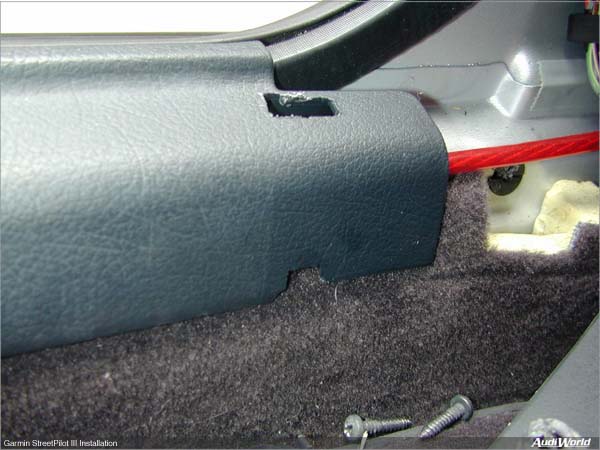
- Remove both screws and then gently
pry the bottom edge of the cover outward where it meets the door
sill and the carpet.
|
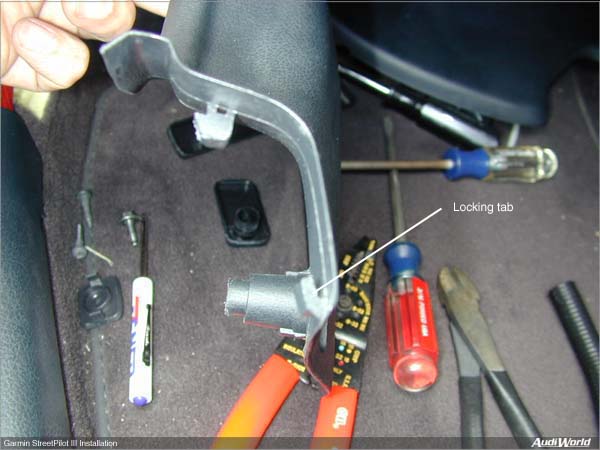
 |
- Once you release the lock tab the
panel slides back and lifts out.
|
 |
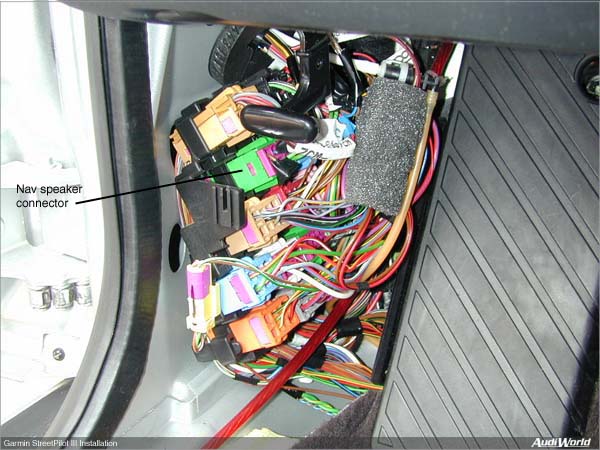
- With the cover removed the
connector gang from hell is revealed.
- We're interested in the bright
green connector.
|
 |
- The brown and blue wires run to the
speaker in the door.
- I cut both wires and ran wire that
connects to the speaker out plug on the back of the GPS.
- The output plug is a sub-mini
plug--one size smaller than a normal 1/8" mono plug.
Radio Shack had the plug in stock (and in gold for
distortion-free connections! Yea, right).
- I routed the speaker and power
wiring along the firewall and over to the glove box.
|
It does slightly obstruct the A/C vents but
this picture makes it look worse than it really is. If angled up,
the center vent still blows air to the rear of the car. Very nice
navigation unit IMO.

|