|
|
Back in early 1999 I mentioned on the Digest(s) that my own personal brake pressure bleeder was made from a pump-up garden sprayer and some hose, a few fittings and a master cylinder cap drilled to accept another air fitting. I lent mine out to a fellow employee who liked it so much that he asked to buy it. After making a tidy $25 profit, its now time to make another one. So here we go fellow cheapskates, if you can't afford Steve D's most excellent Bleeder Cap or have learned from experience not to accidentally apply 125 PSI to your master cylinder, here's my $25 or less do-it-yourself pressure bleeder. Have an Ace Hardware in your neighborhood? You can do this. Update I: At the Laguna Seca Driving School held 11/20-21/99 I lent my bleeder to Jay Sala. Jay was just bleeding his brakes and therefore didn't have a turkey baster with him. Why is that important? Well, most of these bleeders leave the master cylinder topped off with fluid and you need to suck out the extra fluid to get it down to the fill level line. Jay and I didn't have a baster handy. So, I made an improvement to the bleeder today to cure this little problem. Look at the last picture and instructions. I also splurged an extra $2.99 at Ace Hardware for a pressure gauge. The proper operating pressure is 15-20 psi. Update II: A few people over the last year have asked me what to use to catch the brake fluid in when bleeding brakes. I've always told them to use a one or two liter Coke bottle with some kind of hanger to hold the bottle while you open the bleeder screws. Since I broke my bottle today, I had to make a new one. Look for the update at the bottom of the page for pics. Update III: Michael Kim wrote to say he had made a copy of the bleeder
for himself, adding a quick release coupling to the unit. While this would
put the cost of making a unit slightly above the $25 goal I set for the device,
it's a worthwhile upgrade. See the bottom of this article for the letter
Michael sent me with the parts list and a picture of his version.

Ok, here's where we start. 1/2 gallon size pump up sprayer from Ace Hardware (Model# 74497).
Next step, loosen ring connecting spray head hosing. Save in case your wife finds out what you've done and makes you put her rose sprayer back in original condition.
Now that you've loosened that pesky ring, cut the hose off if you can't get it to slip off. Then slit it down the side and peel it off. Set the original hose aside in case you ever want to reuse this thing as a sprayer. If so, remember to clean it real well first.
Yes its true. You can use a late model GM master cylinder cap (Help! p/n 42035). You have to take 5 seconds to modify it but it works fine after that. What you will find when you open the package is that the GM piece has a little groove cut in the underside of it to relieve pressure!?! I don't know what the hell that's about, but take some black (or whatever) RTV and using a scrap of the original packaging, smear the groove full of RTV and let it cure for a bit.
I didn't take pictures of every last little detail. Sue me. While at Pep Boys buying the cap, get a 1/4" hose fitting with a threaded base and associated brass nut. I also used a fender washer from my spare hardware bin on top. Drill a whole and enlarge to the size of the hose fitting. Screw that baby in there and secure from the back (see next pic) with the brass nut.
Yep just like that. Too bad it was sunny out and the flash didn't light up the inside where I put black RTV on black plastic. You would have been real impressed with the overwhelming difficulty of the job.
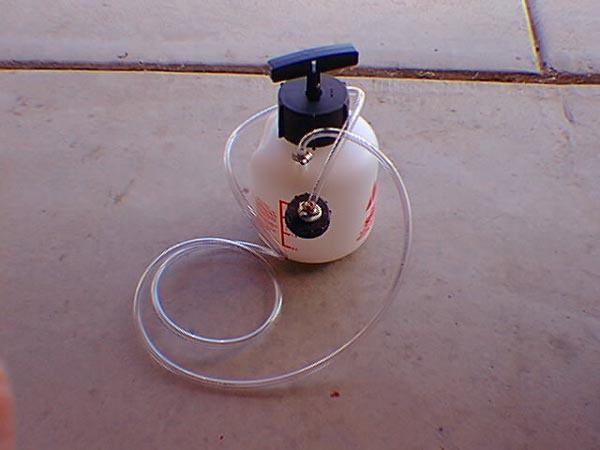
I left this pic full size. I imagine you can double click on the others and see them this size if you want. Connect 6 feet (or whatever you feel like) of 1/4" I.D. (for this sprayer) poly hose to the sprayer and cap. Secure with hose clamps. That is all there is. Under $25 and you are good for years, or until you sell it at a profit to a friend. Here's how you use it. Pour in 1 to 2 liters of Super Blue or Type 200 ATE brake fluid and after sucking old brake fluid out of master cylinder with your wife's best turkey baster, refill and screw the cap on. Pump it up to pressurize and start bleeding brakes. After you're done, loosen main sprayer cap slowly to relieve pressure. Suck out or fill up master cylinder to full level line and reinstall factory cap and sensor. Update I
Here's the improvements to the bleeder. Take a small length of 1/4" OD (for the hardware I used) copper tubing and attach to the inside of the cap using either a ferrule and cap or JB Weld epoxy. I did both, just to be sure. Trim to the proper length so that when the cap is installed onto your master cylinder it will just reach the fill level line. Then when you are done flushing or bleeding your brakes, loosen the cap of the pressure bottle. You must have the bottle below the level of the master cylinder. When you do this, you will syphon the fluid back into the reservoir from the master cylinder. The fluid will syphon down to the end of the copper tubing where the syphon's vacuum will be broken and your fluid level will automatically be correct. I also drilled the tank to accept a small air/fluid pressure gauge. This will help first time users set the proper pressure of 15-20 psi when pumping the reservoir up. RTV (Silicone) the gauge in place also to make sure its air tight. Update II
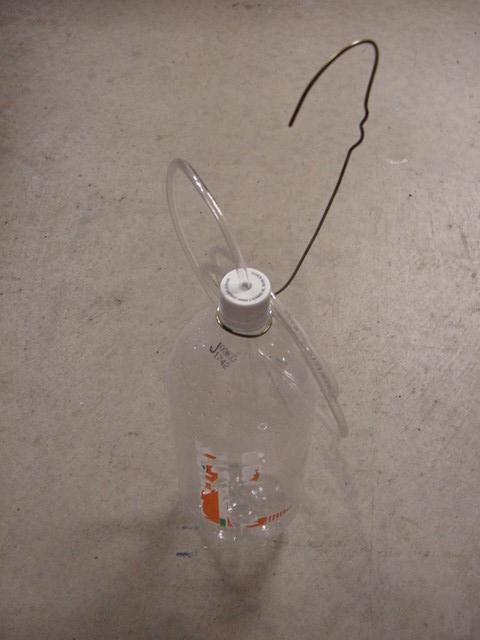
Here's the finished product. Use about a 1/3 of a coat hanger or anything else you like to make a hanger. Twist a loop into it around the neck of the bottle and squeeze it closed with a pair of large pliers.
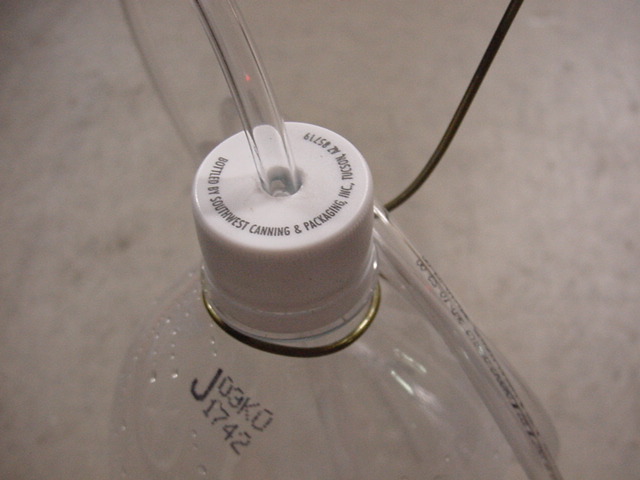
Get yourself about 4-5 feet of 1/4" OD (outside diameter) tubing at a hardware store. Drill a hole in the bottle cap to accept it and push it about halfway into the bottle. You want the tubing to hang above the fluid draining in so you can see when it runs clean and without bubbles. When drilling the cap, it will work best to start with a small bit and work up. Using a large bit first will probably result in the bit catching in the hole and spinning the cap. And since I know all of you will drill the thing holding it in your bare hand, we wouldn't want THAT! Update III I purchased my union joint at ACE for $3.99 called a "3/8x1/8 INSTA" "PUSH MALE CONN", but Mcmaster sells it for $2.62 "51055K16". Perhaps a nice upgrade for those that plan on using the bleeder frequently. Here's a photo, notice I put my gauge on top of the cap, instead of on the bottle. The 3/8OD tubing simply slides into the grey connector on top, and swivels, or can easily be pulled out. It's sealed with an O-ring, and rated to over 100psi.
Used with permission. Original article by Jim Powell |
|
Advertising |
Contact Us |
Cookie Policy |
Privacy Statement |
Terms of Service |
Do Not Sell My Personal Information
© 2020 MH Sub I, LLC dba Internet Brands |