Like I said before it took about 2.5 hrs to do the complete job. My
friend who works for a small independent garage that specializes in
mainly VWs and some Audis had never done this before and I assisted
him. The work is strait forward and anyone competent with tools and
these cars can do it. The oil refill takes just under 2 liters (~1.8l)
and I chose to go with Motul's 300 gear lube (synthetic 75W90) as I had
done when we changed the TorSen/tranny oil when we did the STaSIS mod
to the TorSen.
Again, here is one view of the STaSIS LSD. Four plate/clutch with a 60% lock up. Notice how the center portion (between the two bearings) is bulky.
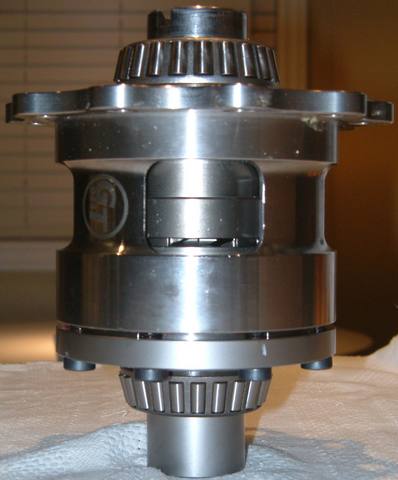
Different view.

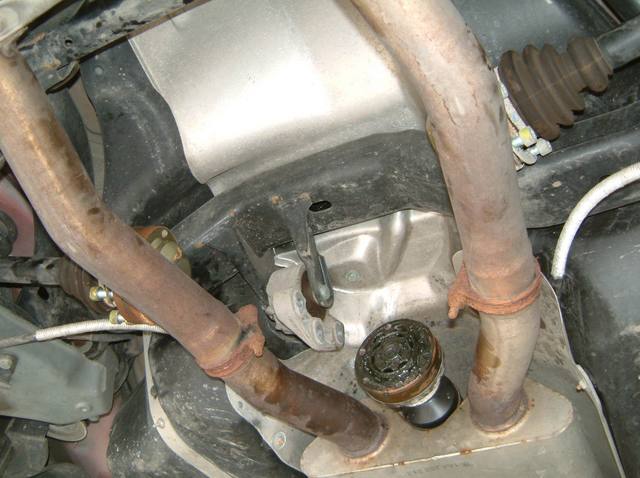
First, we removed the bolts that secure the output shaft (main drive line shaft) to the rear diff. We then gently tapped the shaft to loosen it for it to slip out of its position.

We then loosened both rear axle bolts. The heat shields have already been removed in this picture.

Now the drive shafts are disconnected from the rear diff.

There are several attachment points with bolts that have to be removed in order to remove the rear diff from its position. Here is one of them with three bolts in one location.
With the rear diff supported by a tranny jack and with the bolts out, the diff can be man handled very easily and move back slightly as to pop it out from the main drive line shaft that runs from the front to the rear. Now I guess my car is a FWD only!
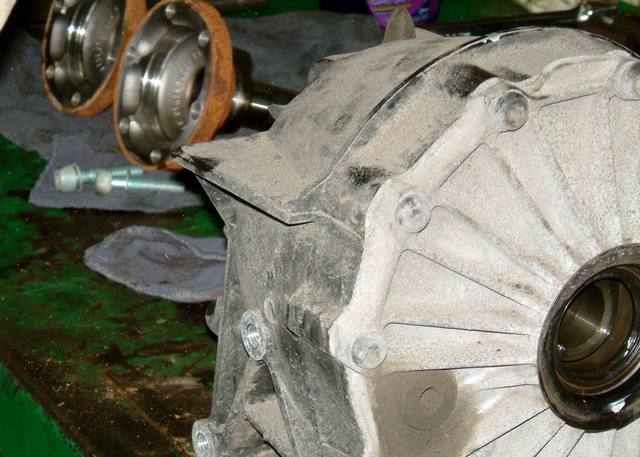
Front view of the diff sitting on the work bench. You can clearly see the front connection point to the output shaft and the two rear axle drive shafts. You can also see at the far top, above the drive shaft connecting point a black rubber cap. That is the oil breather. Not seen here and underneath is the oil plug for draining the diff which as not been done yet. Also not seen and located between the near front drive shaft connecting point and that rear aluminum bracket is the oil filler point for the diff.

Rear view of the diff and the aluminum bracket.

Next we removed the drive shaft coupling adapters from the diff housing. This is done by removing a bolt at the center of the coupling adapter. Be careful not to damage the rubber oil seals when you pull it out.
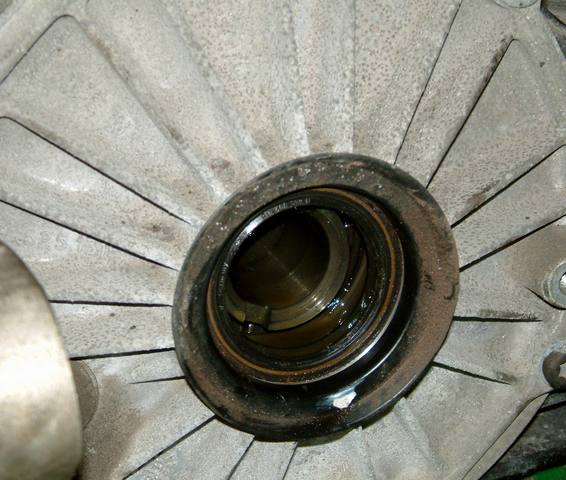
Here we have the diff housing in the foreground, notice the oil filler plug. The two adapters and their bolts in the background.
Next, we removed the cover to the diff housing to have access to the diff itself. Notice the oil filler plug located at one o'clock on the cover. The housing and the cover use an O ring to seal themselves.
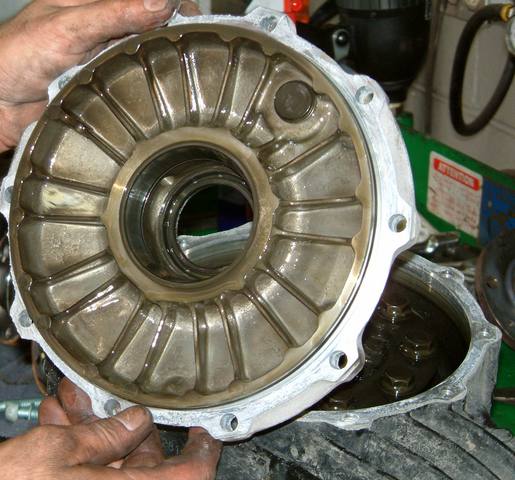
Finally, here is you regular/normal Audi rear diff. For those that don't know, it is of the open kind. Please take a note of those bolts.

With the inner guts of the diff removed that is all that is left, another gear that is hooked up to the drive line shaft.

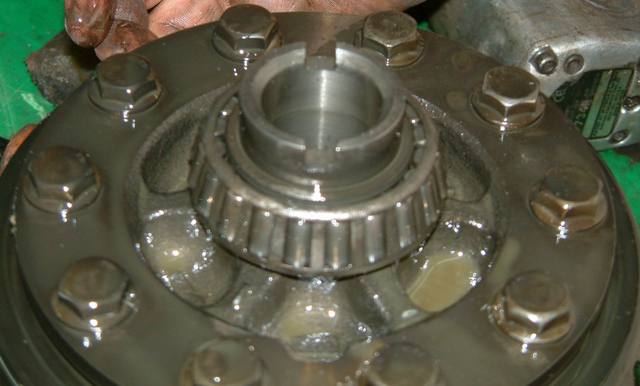
Here is your OEM rear diff. Notice how the center portion is void of almost anything and as nothing in common like the STaSIS unit in pictures 1 and 2. The crown ring/gear that is secured in place by the previously mentioned bolts will now have to be removed from this diff and reinstalled on the new one.

Here again are the bolts that have to be removed. Once this done, the use of a rubber hammer will be needed to pry the crown ring/gear from its location. It is a very tight almost press fit.
The ring can be slipped over the STaSIS LSD into its position.
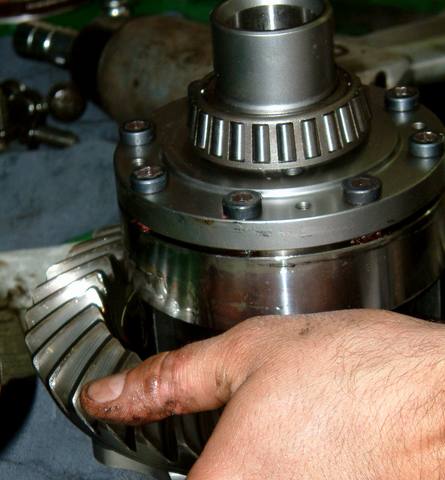
As you can see in this picture the ring is not sitting all the way down in its proper position. There is about a one inch gap. Now as in the removal, it will have to be forced in by using a rubber hammer until the bolts can catch the threads and be pulled into position. If this was not going to work because of the tightness, the diff would have to be put in a freezer and the ring in an oven. In our case we managed by simply tapping the ring with the rubber hammer and using the bolts to finish off the job. Next we inserted the new unit back into the housing, filled it with the appropriate amount of oil. The install on the car was exactly the reverse of the removal.

FIRST DRIVING IMPRESSIONS
I have not had the chance to drive the car that much to test it after the install today, so this will be a brief report.
However, from what little testing I have done today, there is no doubt that the car's behavior as changed. From a standstill, making a 180 degree turn (U turn) at a light or a stop sign, the car will rotate and oversteer more than before. In a 90 degree turn taken at a fair pace, the rear will step out more under power on situation, requiring counter steer action. The car is definitely getting more push from the rear wheels under all conditions.
Anyway we will soon see under autocross conditions how this all turns out.
Later guys.