|
|
Materials needed: Simple Green Index Cards Bondo Tack Cloth 320 Grit Sandpaper Masking/Painters tape Dupli-Color Prep Wipe Dupli-Color Filler Primer (FP102) x 2 Dupli-Color Wheel Coating (I used Graphite WP102) x 2 Total cost of materials is about $30. I already had simple green and the index cards so that was not factored into the cost. Step 1: Use simple green or your favorite wheel cleaner to thoroughly clean your wheels. I used simple green and a sponge. Wipe dry with clean cloth. Step 2: Use the 320 grit sandpaper to scuff the surface. There will be a lot of white sanding dust as you scuff off the finish. No need to go overly aggressive with sanding, just enough to remove the finish and something for the primer and paint to bite into. This step will remove light scratches, chips, etc. Should look like this: 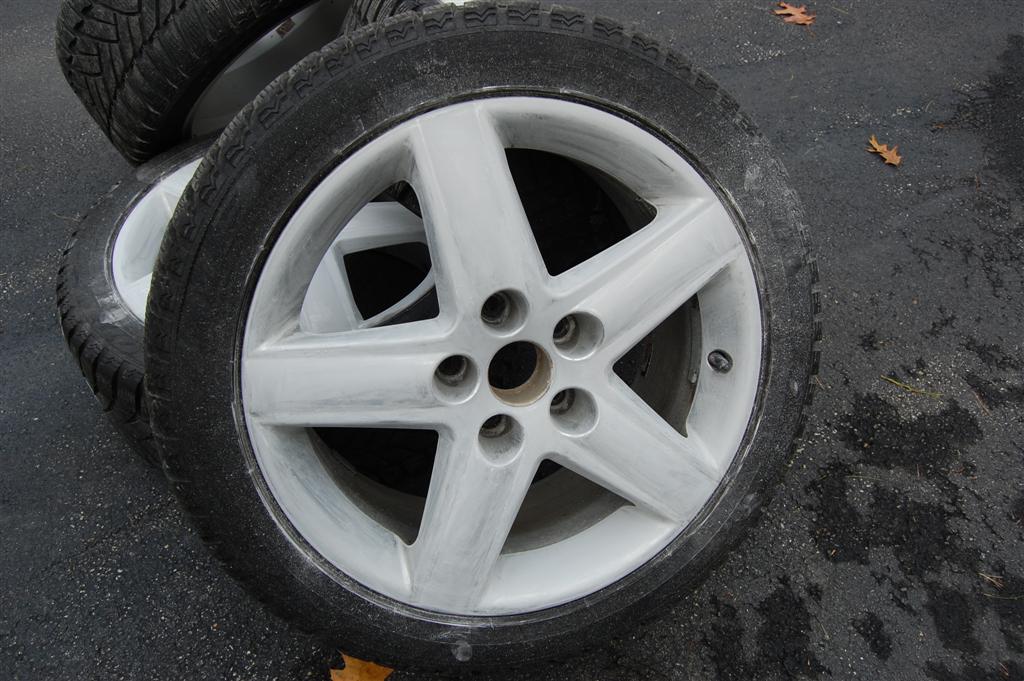 Step 3: Rinse wheels off to get rid of the sanding dust and wipe dry. Step 4: Use the Bondo Tack Cloth to wipe down the wheel. This will remove any remaining sanding dust and other contaminants from the surface. Step 5: Use the Dupli-Color Prep Wipe to clean the surface of any grease, etc. This preps the surface for primer/painting. Step 6: Stick the index cards into the bead around the wheel. Overlap each index card slightly. Also use the masking/painters tape to tape off the valve stem. Step 7: Get the Dupli-Color Filler Primer and shake it up according to the directions on the can. Use LIGHT coats. Too heavy will cause running of the primer. This stuff comes out thick so easy on the trigger finger! This will fill in any imperfections like scratches, chips, etc. I used only one coat of primer for the whole wheel. I hit deeper scratches, gouges twice to fill it in, spot treatments. Again, LIGHT coats. Give it about 10 minutes between coats (if you're doing multiple primer layers). Should look like this after a coat of primer: 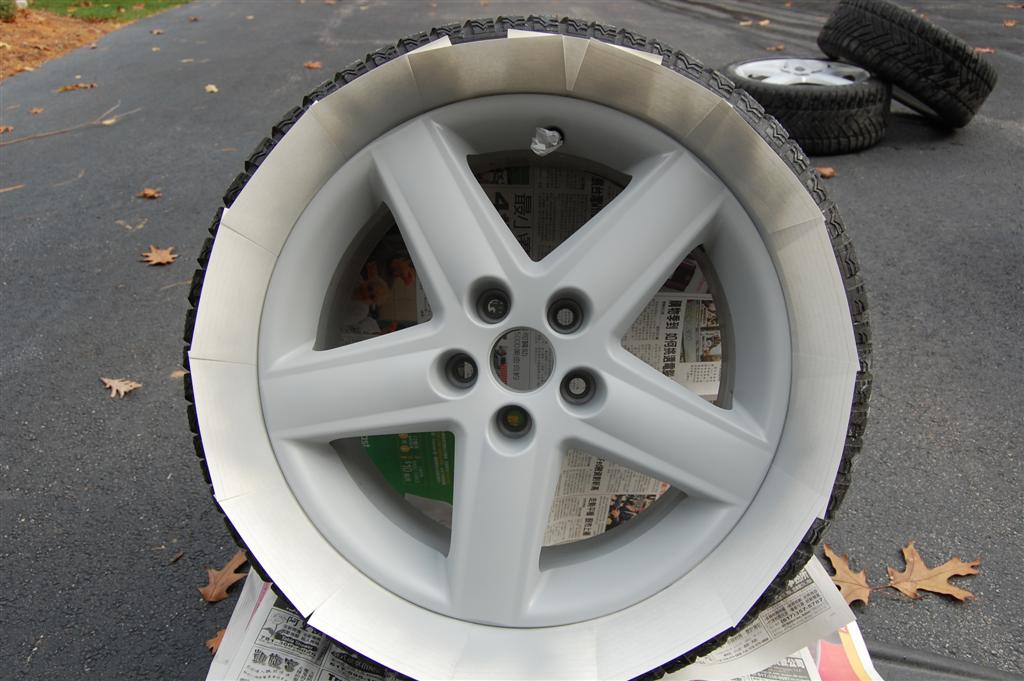 Step 8: Get the Dupli-Color Wheel Coating and shake it up according to the directions on the can. Again, I can't stress enough of using LIGHT coats. I put two coats on. The first coat may not coat the wheel like you want, that's OK. The second coat will take care of the rest and complete it. 10 minutes between coats. Make sure to use a sweeping motion to get nice even coats! After 2 coats, give it about 10 minutes and take care of spots that need attention. Again, LIGHT sprays. Don't hold it over that spot and spray at it. You run the risk of spraying too much and causing it to run. Should look like this: 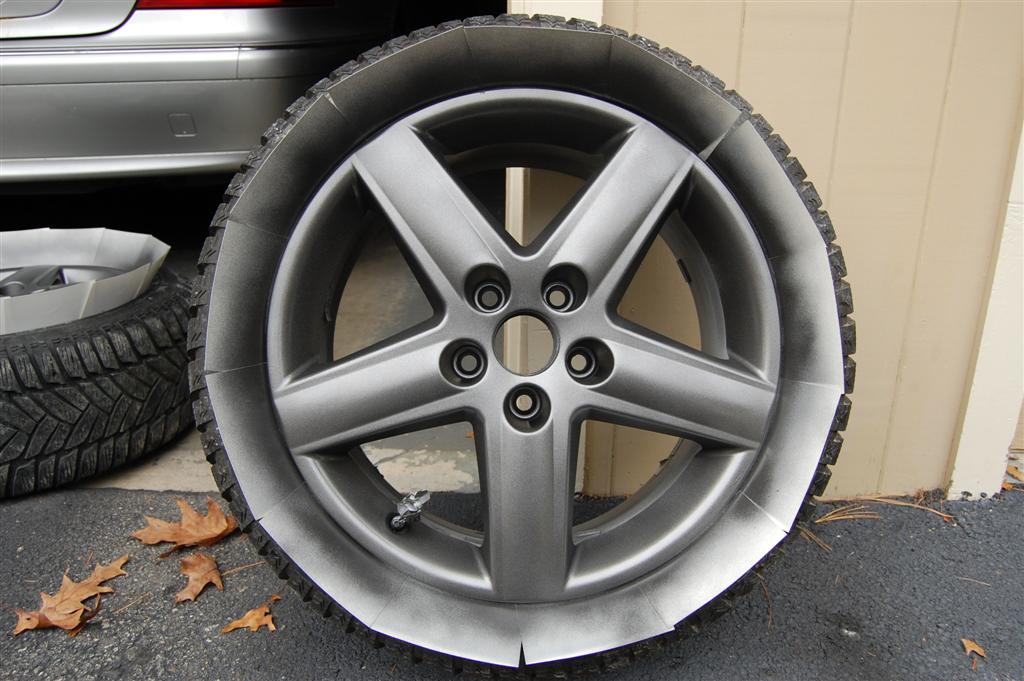  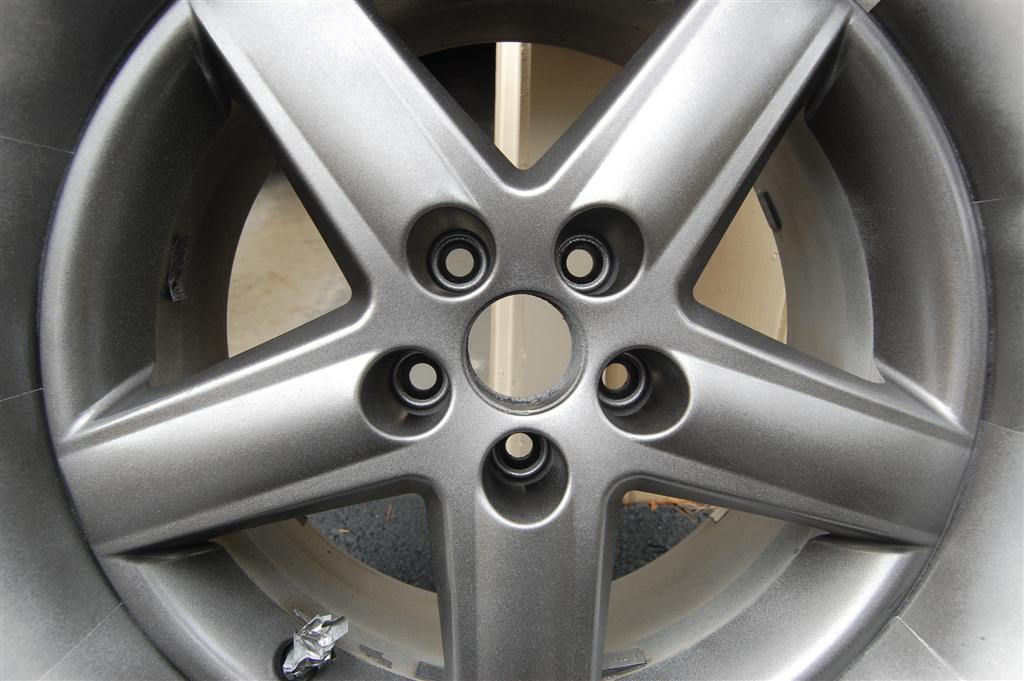 Step 9: Give it a couple of hours after your last coat to dry. Feel the surface, it'll be a gritty feeling. Use the tack cloth and wipe down the surface again. This will remove the grittiness. Step 10: Let it sit overnight. The next morning, the surface should feel like a OE finish, no more grittiness. Step 11: Stand back and take a look at your refinished wheels! Post on how they look on my car. Tips: You'll probably only use one can of primer. When I finished all 4, I had a little bit left. I did however use 1.5 cans of the wheel coating. You can decide on how much primer you want. If you have some car ramps, set one wheel up on the ramp and lean it back against something so it's at an angle. Or if you have a lazy susan, you can use that too to spin the wheel slowly while painting it. Take your time! Rushing may lead to a bad painting job. Set aside a half a day for this project. It took me about 5 hours from start to finish. If you want to put a clear coat on, use WP103, within one hour of the last wheel coating. It may not be needed as the wheel coating is pretty durable stuff. I also have read that the clear is slightly milky so it may not come out the way you want. I hope this helps some of you who want to refinish your wheels! Let me know if anything needs clarification. |
|
Advertising |
Contact Us |
Cookie Policy |
Privacy Statement |
Terms of Service |
Do Not Sell My Personal Information
© 2020 MH Sub I, LLC dba Internet Brands |