DIY: Fog lamp replacement
 12-28-2009, 12:59 PM
#1
AudiWorld Super User
Thread Starter
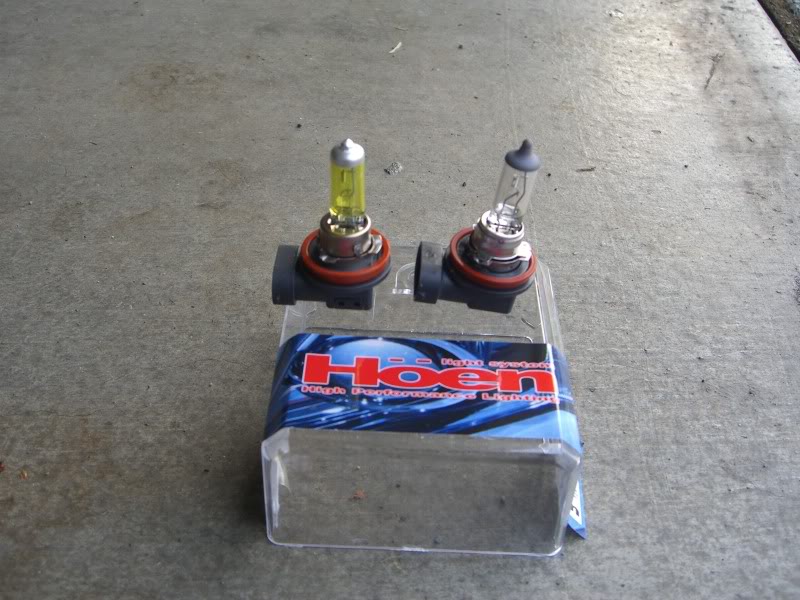
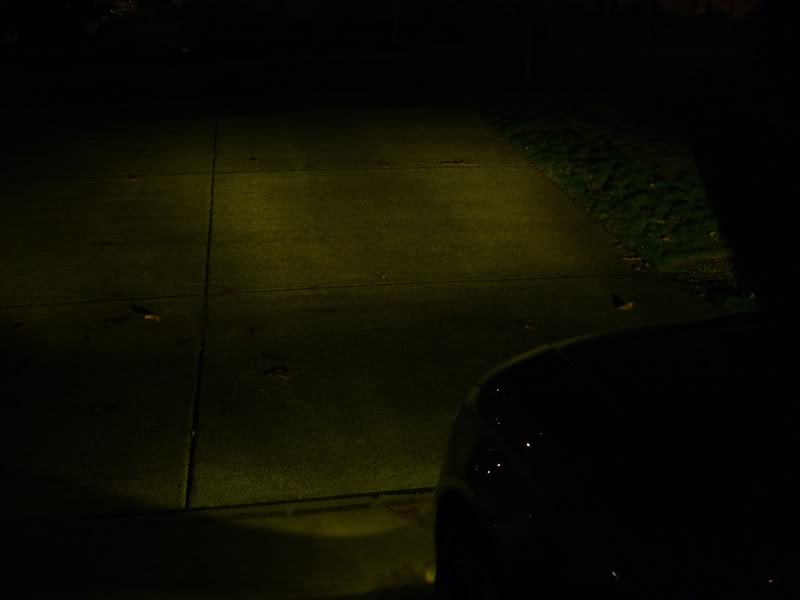
OK gang, I had the time to bang out another mod, and document this. I ordered the Hoen H11 Endurance (very yellow) fog bulbs to replace the near white stock ones. Why? To aid in sight distance at night. Yellow cuts fog much better and farther, it is also easier to see for oncoming traffic, which might hit you!
You can find them at the bottom of this link:
http://www.hoen-usa.com/fog.htm
They look like this compared to our stock bulbs:
Tools needed:
#25 Torx bit - all screws for this use this size
Universal bit driver for torx bit
Clean dry soft cloth
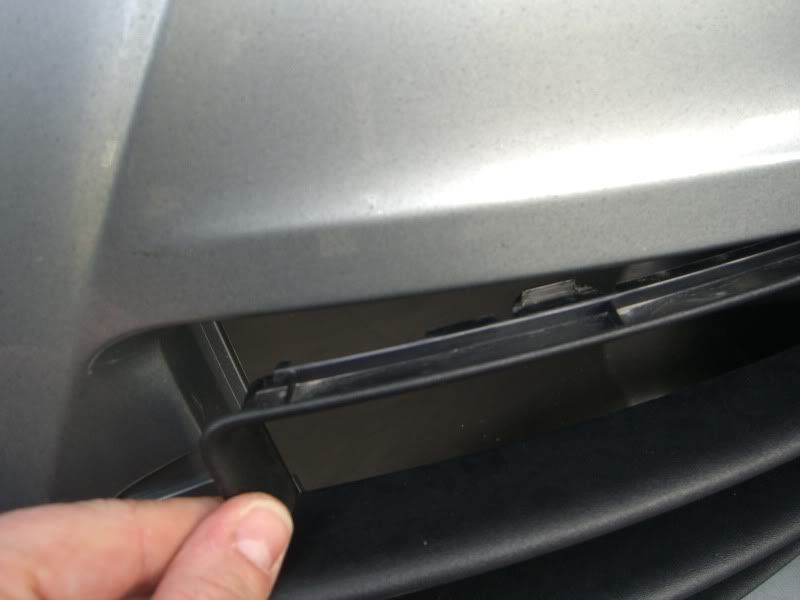
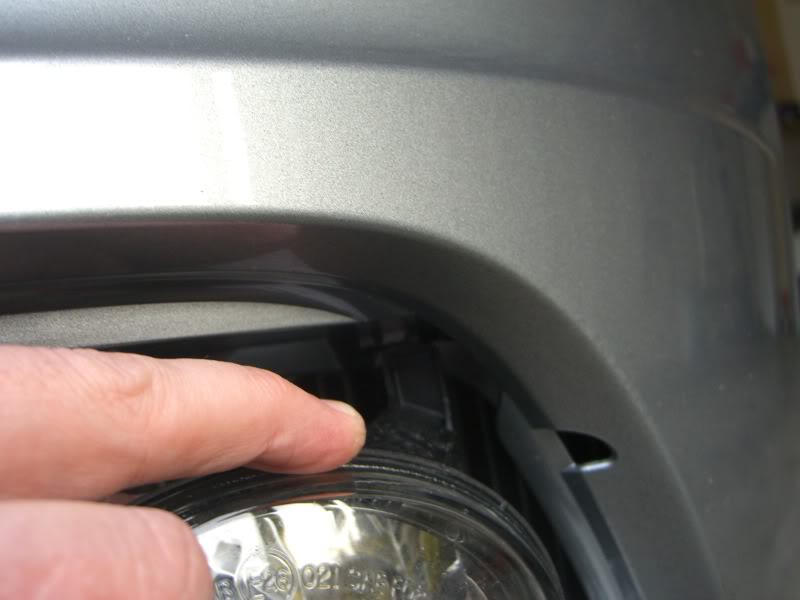
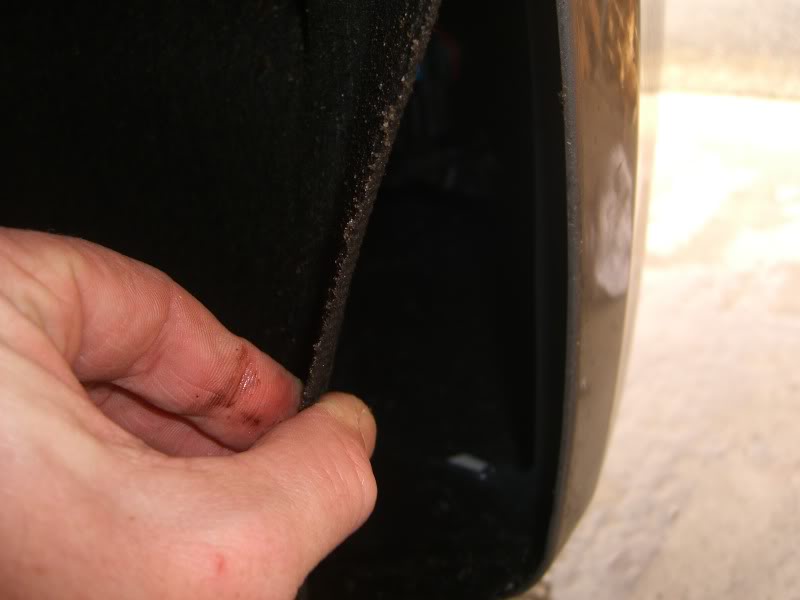
Each side for our car is a little different, so I will go over both, starting with driver side. The drivers side black grille around the fog, is open due to the smaller cooler for the transmission placed here. Reaching inside the top and bottom where the black meets the painted portion of the valance, you can feel the little tabs shown here are the top tabs:
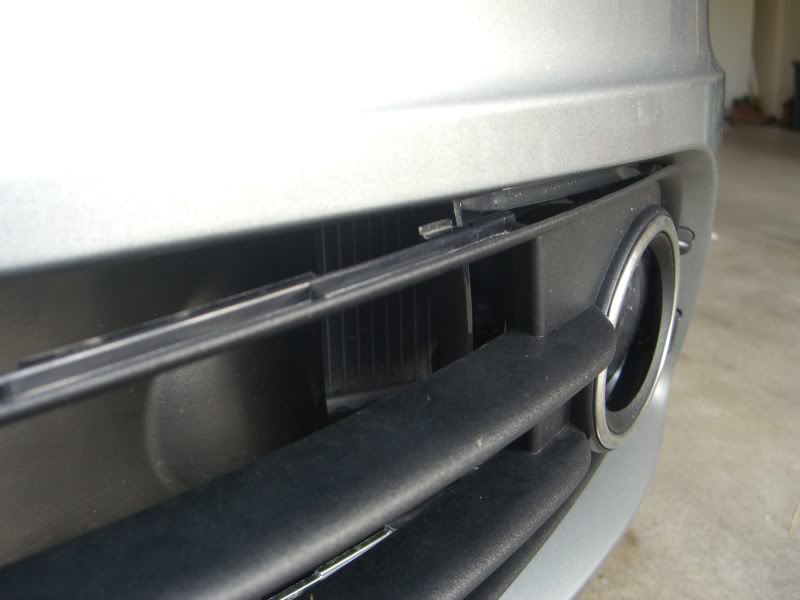
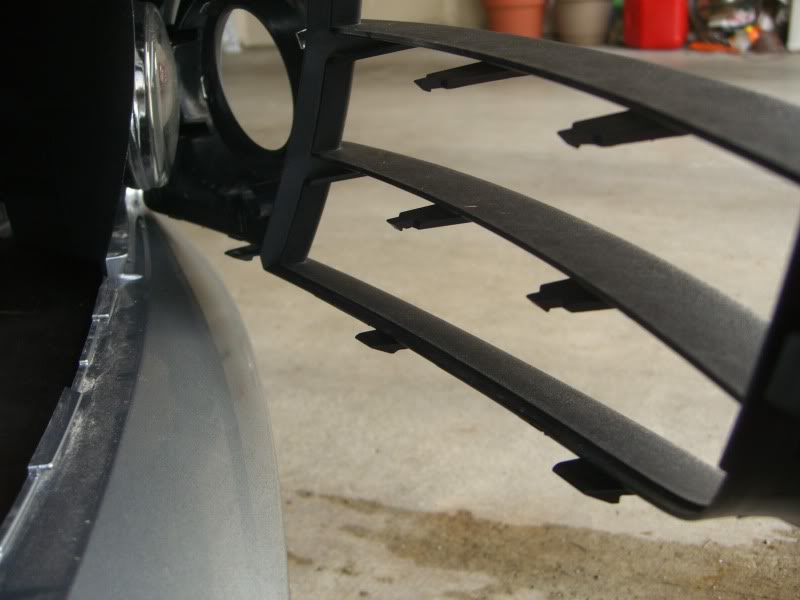
Here I have peeled it away to show the locations of the lower tabs, you will want to pull it away from the center of the car to the outside, as the fins of the grill actually penetrate the valance on the outer edge. Then you just pull it free.
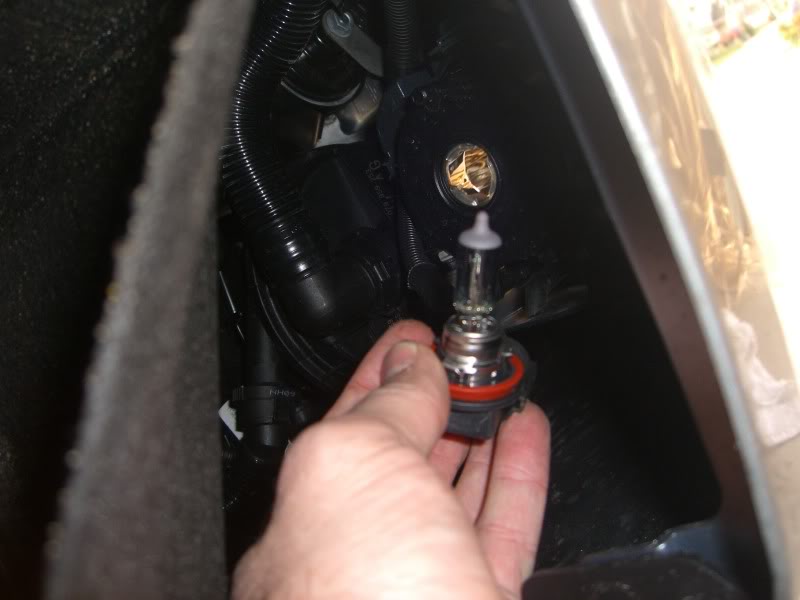
You can see the bulb housing and lens clearly now on the drivers side, there are 2 silver screws to undo here, upper left (already removed here) and lower right (still in place).
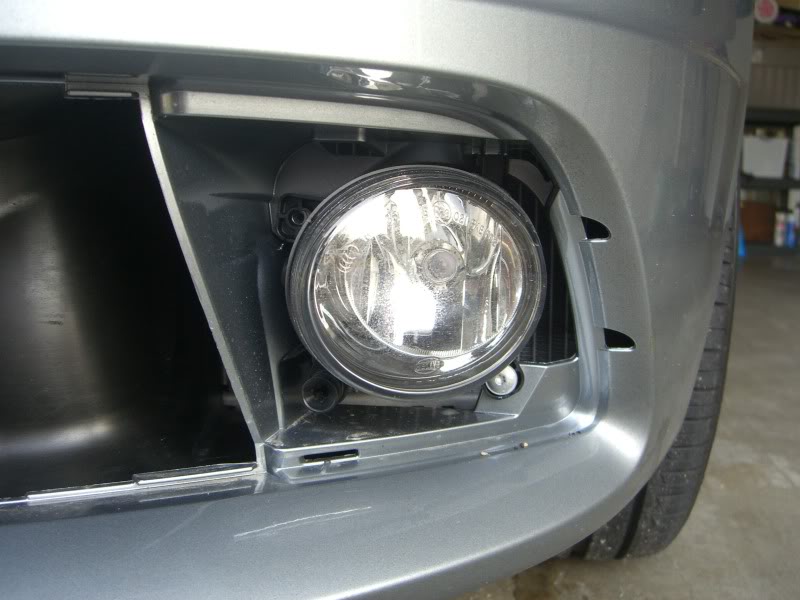
Removing these allows the housing to come out (there is a small tab at the top of the housing which adds a 3rd point in addition to the removed screws, so slide it out of this)
Once out, you will twist the bulb counter clockwise (looking at the rear of the housing) and pull it out, wiring connector and all. Once loose of the housing, you will remove the bulb from the wiring harness by depressing tab at the rear of the bulb area, and pulling the bulb free once the clip is depressed enough (my thumb is on the clip portion you need to depress)
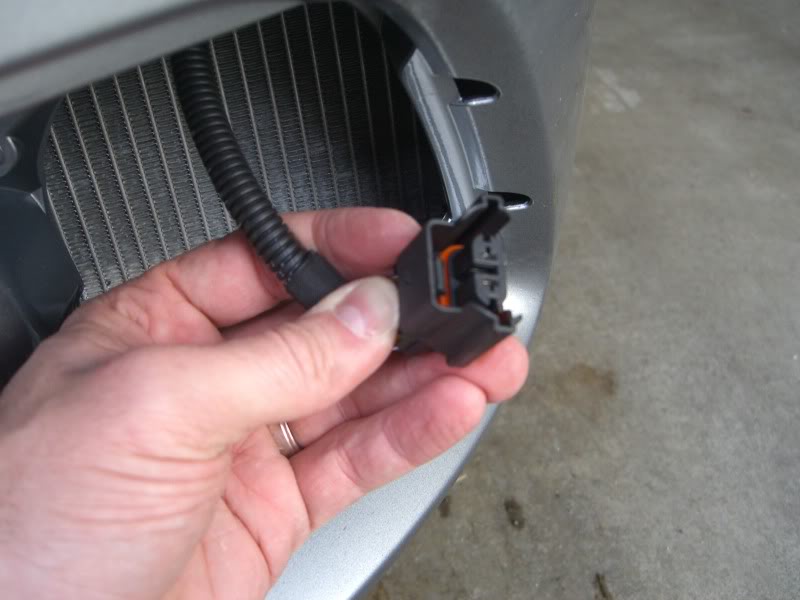
The bulbs have a tab which only allows them to be plugged in the correct way, so line up the tab, insert the bulb, and snap it to the wiring harness. Put the harness back into the light housing, and twist to tighten (the red gasket will seat on the back of the housing to form a water tight seal). Be sure the wiring harness is pointed DOWN when you have it done, to allow water to drip away from the wiring. Now just interst the tab at the top of the housing into the slot in the valance, and resecure the 2 silver screws. Replace the grille and snap this into place - Driver's side is done!
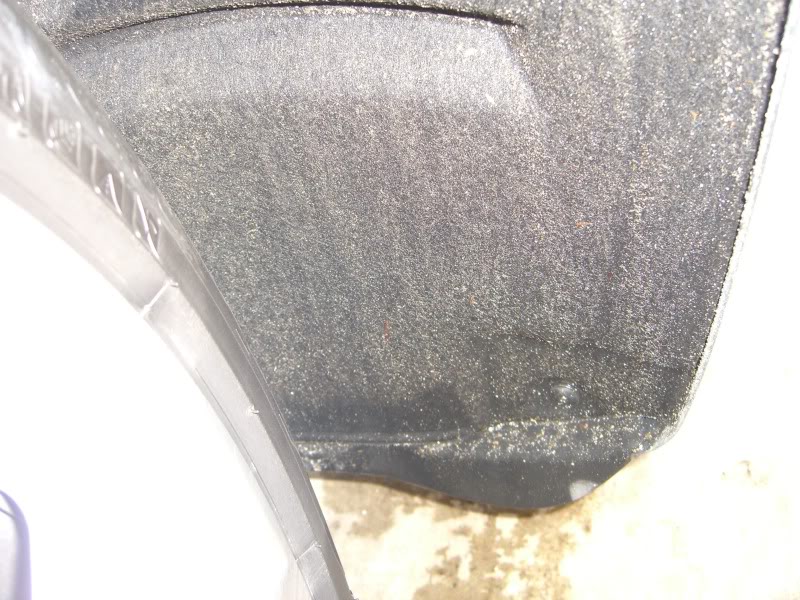
Since the passenger side is solid (no radiator here), ease of entry is to pull back the wheel well liner seen here:
This lower most screw (pictured) on the front of the well is all we need to remove.
Once out, just pull the liner back, it's soft and malleable:
Once pulled back, you can see inside with good lighting or a flashlight, and reach the back of the fog lamp easily - a quick counter clock turn and pull the bulb and wiring harness out:
Replace the bulb the same as the other side, re-insert into the housing back, twist clock wise to secure snugly, and be sure the wiring is pointing DOWN again. Replace the screw into the wheel well liner, and you are done!
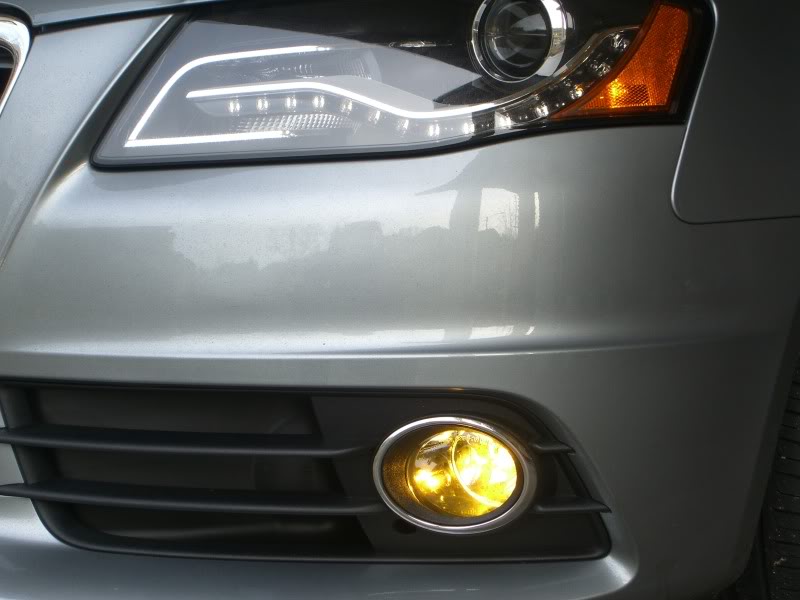
Completed pics:
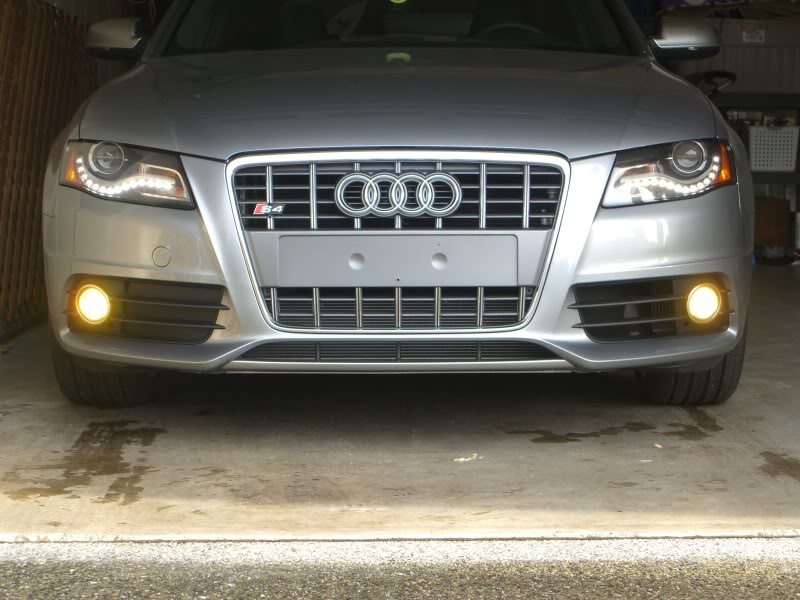
Close up:
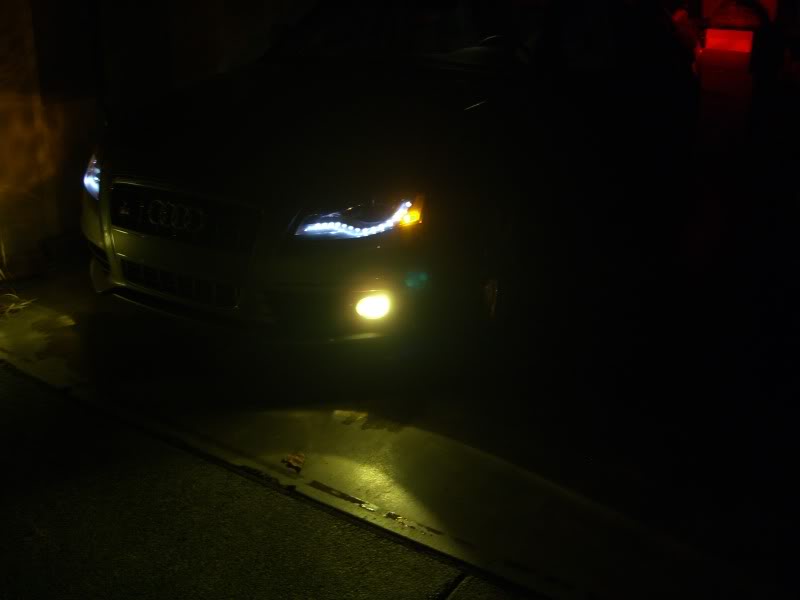
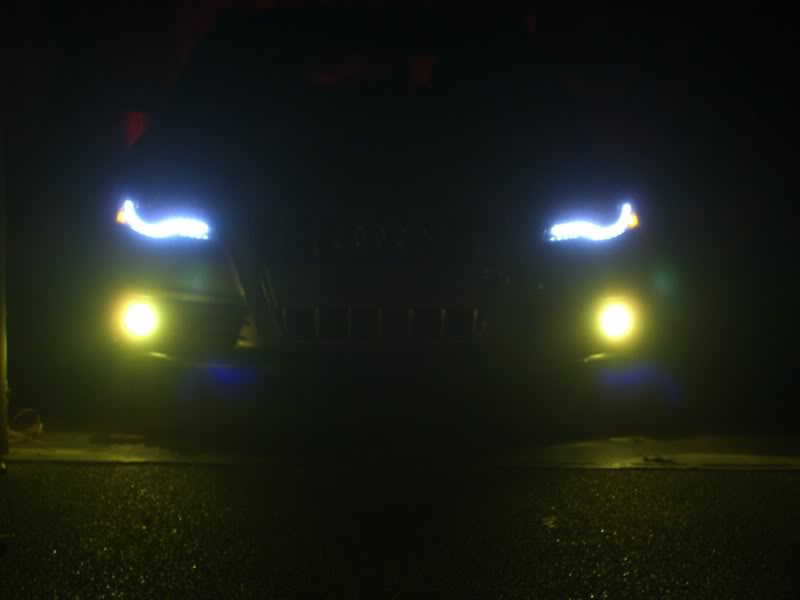
I'll try to get some night shots of both the 6K HID's and these and update both threads.
You can find them at the bottom of this link:
http://www.hoen-usa.com/fog.htm
They look like this compared to our stock bulbs:
Tools needed:
#25 Torx bit - all screws for this use this size
Universal bit driver for torx bit
Clean dry soft cloth
Each side for our car is a little different, so I will go over both, starting with driver side. The drivers side black grille around the fog, is open due to the smaller cooler for the transmission placed here. Reaching inside the top and bottom where the black meets the painted portion of the valance, you can feel the little tabs shown here are the top tabs:
Here I have peeled it away to show the locations of the lower tabs, you will want to pull it away from the center of the car to the outside, as the fins of the grill actually penetrate the valance on the outer edge. Then you just pull it free.
You can see the bulb housing and lens clearly now on the drivers side, there are 2 silver screws to undo here, upper left (already removed here) and lower right (still in place).
Removing these allows the housing to come out (there is a small tab at the top of the housing which adds a 3rd point in addition to the removed screws, so slide it out of this)
Once out, you will twist the bulb counter clockwise (looking at the rear of the housing) and pull it out, wiring connector and all. Once loose of the housing, you will remove the bulb from the wiring harness by depressing tab at the rear of the bulb area, and pulling the bulb free once the clip is depressed enough (my thumb is on the clip portion you need to depress)
The bulbs have a tab which only allows them to be plugged in the correct way, so line up the tab, insert the bulb, and snap it to the wiring harness. Put the harness back into the light housing, and twist to tighten (the red gasket will seat on the back of the housing to form a water tight seal). Be sure the wiring harness is pointed DOWN when you have it done, to allow water to drip away from the wiring. Now just interst the tab at the top of the housing into the slot in the valance, and resecure the 2 silver screws. Replace the grille and snap this into place - Driver's side is done!
Since the passenger side is solid (no radiator here), ease of entry is to pull back the wheel well liner seen here:
This lower most screw (pictured) on the front of the well is all we need to remove.
Once out, just pull the liner back, it's soft and malleable:
Once pulled back, you can see inside with good lighting or a flashlight, and reach the back of the fog lamp easily - a quick counter clock turn and pull the bulb and wiring harness out:
Replace the bulb the same as the other side, re-insert into the housing back, twist clock wise to secure snugly, and be sure the wiring is pointing DOWN again. Replace the screw into the wheel well liner, and you are done!
Completed pics:
Close up:
I'll try to get some night shots of both the 6K HID's and these and update both threads.


 01-20-2010, 10:50 AM
#7
AudiWorld Member
Join Date: Aug 2009
Location: Los Gatos, CA
Posts: 365
Likes: 0
Received 0 Likes
on
0 Posts
Looks great, I'm going to do this mod as well most likely! Especially if this storm on the west coast is sticking around for the next 2 months like people are predicting.
Trending Topics
01-20-2010, 02:34 PM
#8
AudiWorld Senior Member
Join Date: Jul 2004
Location: Pacific NW
Posts: 752
Likes: 0
Received 0 Likes
on
0 Posts
I almost never use fog lights, but just for aesthetic purposes, they look great! Your write up makes the process seem very easy too. I'd imagine those lamps aren't particularly expensive ... are they?
Thanks!
Thanks!
01-30-2010, 07:58 AM
#10
I've just changed my Euro S-line fog lights bulbs and the body work is identicle to the S4 apart from we have a blanking plate clipped into the back of the left hand side (I won't say drivers/passengers as it's different for us!).
You do not need screen drivers nor do you need to remove the wheel or wheel liner. The only tool needed is the Torx 25 driver.
You simply do what it says in the manual : Grap hold and pull off!
I started in the middle of the car and pulled firmly out whilst pulling up and down and both sides came out easily. I did this at -2C (about 29F) and there was no issue with the clips so don't worry about them breaking.
Here's some pics. The last one shows the "S4" grill with the "S-line" clip in blanking plate.
p.s. There doesn't appear to be any slots for screw drivers on the top edge with mine. Perhaps this is a MY2010 change?