Audi A6 C5: How to Replace Intake Air Temperature (IAT) Sensor
The intake air temperature sensor is critical to the performance of your Audi A6 C5. Read on to learn how to replace it.
This article applies to the Audi A6 C5 (1998-2004).
The intake air temperature sensor is a little device, in your Audi A6 C5, that monitors the temperature of the air going into your engine. Since cold air has different density than warm or hot air, the car needs to send the proper amount of fuel to maintain engine performance. For instance, The colder air requires more fuel to maintain the proper ratio. If the intake temperature sensor fails, you will have improper air/fuel ratio, which will cause your Audi to run sluggish. The best way to diagnose a faulty air temperature sensor is by using a scan tool. The code will lead you right to it. Read on to learn how you can replace the engine air temperature sensor yourself in the Audi A6 C5.

Material Needed
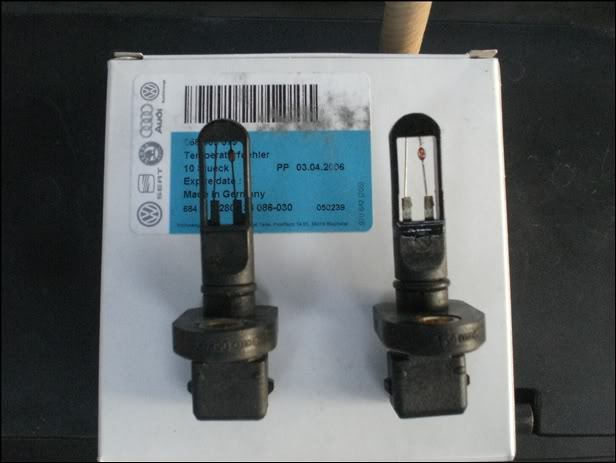
- Engine air temperature sensor
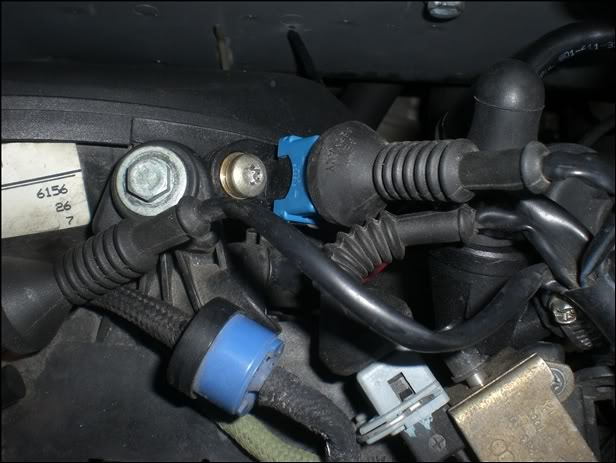
Step 1 – Remove air temperature sensor
The air temperature sensor is located on the intake manifold, behind the throttle body. It is connected to the housing with an electrical connection connected to it. Remove the sensor with the electrical connection still connected in it.

Step 2 – Disconnect electrical connection
Disconnect the electrical connection from the sensor. Be careful because it could be old and worn, but to remove it, you will have to pull them apart gently.
Step 3 – Install new sensor
Connect the electrical connection onto the new sensor, then plug the new sensor in place. Make sure it is properly plugged in place.
Related Discussions
- IAT Replacement - AudiWorld
- IAT Unplugged - AudiWorld