Audi A6 C5: How to Install a Subwoofer
Although the stock sound system on your Audi is well-balanced, it still doesn't provide enough bass. Fortunately, your stock head unit makes it pretty easy to install a subwoofer.
This article applies to the Audi A6 C5 (1998-2004).
Whether you listen to talk radio, rock n' roll, or the classics, adding a subwoofer always increases the sound quality in your car. The subwoofer is basically a larger speaker that is designed to produce deep bass frequencies. They are usually installed with an external amplifier, in order to be able to fully customize the sound quality. When installing a sub, it is best to do an inconspicuous installation in order to prevent theft and offer an overall "cleaner" look. So instead of paying professionals thousands, use these instructions to install a subwoofer into your car.

Materials Needed
- Screwdriver
- Raw fiberglass
- Adhesive
- Carpet
- Wire crimps
- Wire connectors
- Silicone
- Line out converter
- Ratchet set
There are many different possibilities for choosing the subwoofer installation location on your car. This DIY will focus on the inside the trunk.
Step 1 – Remove the right side panels in the trunk
Remove the trunk screws holding the right panel in place, then loosen the bolts holding the stock Bose subwoofer (if applicable). If you do have the stock Bose system, disconnect the subwoofer and then remove it.
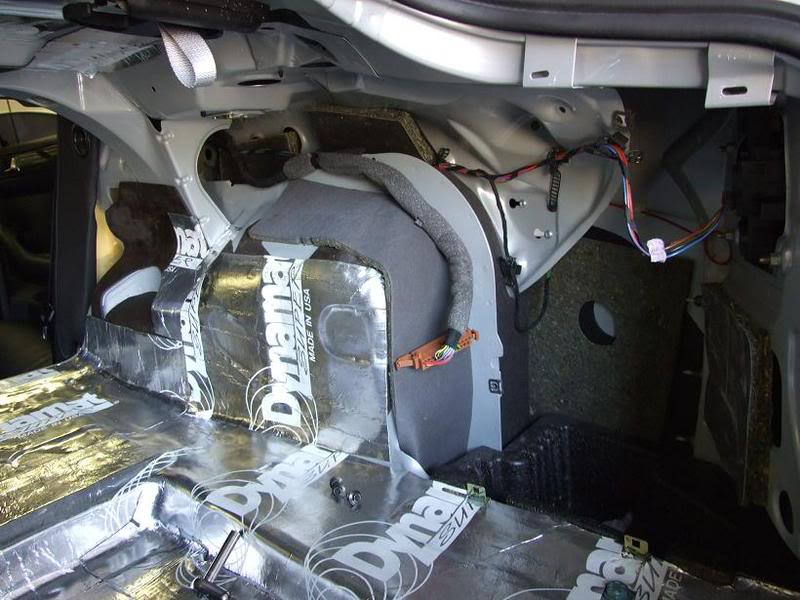
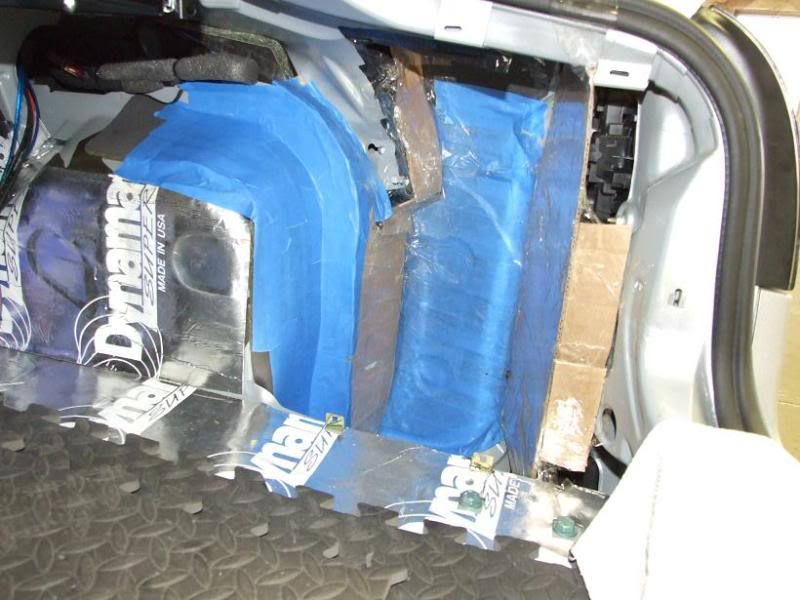
Step 2 – Apply some deadening material
Apply sheets of sound deadening material to each area of bare metal. This material will help keep out environmental noise.
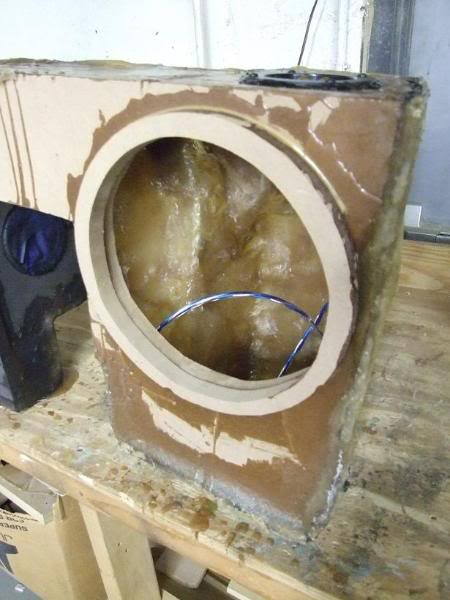
Step 3 – Create the fiberglass mold
Although most people opt to use wood to create a speaker box, making a fiberglass mold allows you to create a cleaner look, that is especially useful for stealth installations. Note: Using fiberglass is very time consuming and can extend the overall project up to two weeks.
- Mix the fiberglass compound.
- Prep the area with blue paint tape.
- Apply six to eight layers to the area.
- Release the mold.
- Apply another 10+ layers to the mold.
Measure the mold and then cut out an appropriate sized wooden cover for both the face and top end of the box. Seal the box together and wait for it to dry.

Figure 3. Begin creating the fiberglass mold. 
Figure 4. Remove the fiberglass mold. 
Figure 5. Cover the fiberglass speaker box.
Step 4 – Install the subwoofer
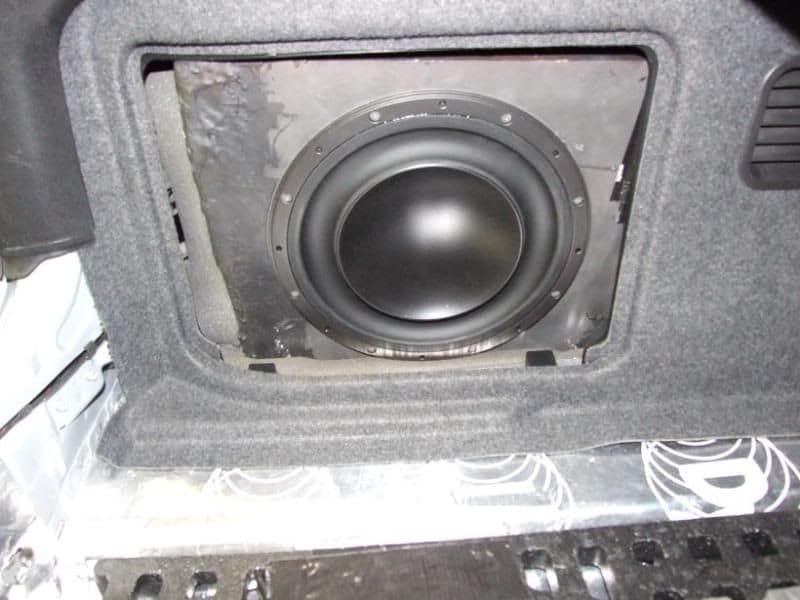
Cut out openings in the box to fit the speakers along with room allowed for the wiring. Mount each box inside the vehicle and test fit. If it is good, remove the boxes and apply some strong adhesive to the front of each box. Apply some carpet to match the interior of the trunk and mount the sub into its location.
Step 5 – Wire the subwoofer
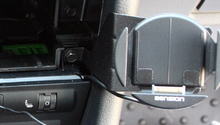
This next part can be pretty confusing and, as with most aspects of this DIY, there is more than one way to do this. However, the easiest way is to use the stock amplifier found in your car. The first thing you want to do is to wire in the power from the battery. Locate the rubber nipple found on the firewall and slide the wiring positive cable in. Attach a fuse, then run the cable down through hood latch cover and floor trim all the way to the trunk. Mount the new amplifier and find a place to install the ground wire. Install a line-out converter in between your stock and new amplifier, then connect the sub to the new amp (refer to Figure 9 to correctly wire the line-out converter).
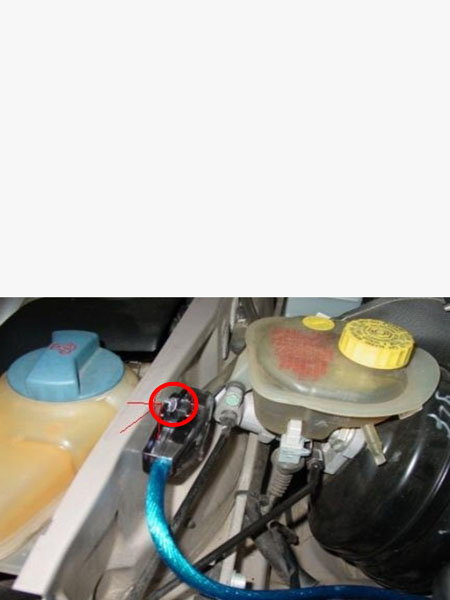
Figure 7. Wire the 12v with a fuse. 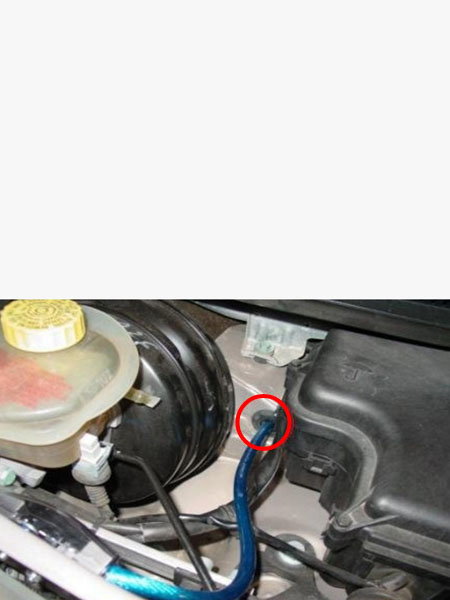
Figure 8. Snake the fuse through the firewall. 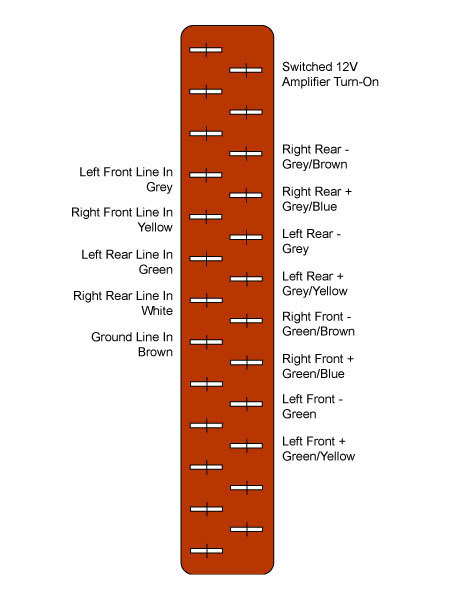
Figure 9. Wire diagram for stock amplifier.
Step 6 – Install the trim
With the wiring complete, add some silicone to the hole where you routed the 12v, then test the system out and install the trim.
Related Discussion
- Part IX - Custom Stealth Subwoofer Install - AudiWorld