Audi A6 C6: How to Replace Brake Pads/Calipers/Rotors
Replacing your brake pads, rotors, and even calipers can solve most of your brake issues. Read on to learn how to do it in the Audi A6 C6.
This article applies to the Audi A6 C6 (2011-2016).
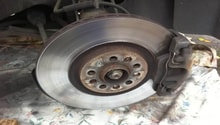
The brake system is considered one of the most important systems in your Audi A6, especially when it comes to safety. Every and each time you step on the brake pedal, the brake calipers push the brake pads against the brake rotors, and the friction that occurs is what causes your car to stop. Over time, the brake pads get worn and need replacement, and if you fail to do so, you start wearing out your brake rotors, which usually don't need replacement until the second round of brake pad replacement. The brake calipers, however, aren't known to need replacement, but every now and then they can go bad, which can cause the pistons to stick, which forces the pads to rub on the rotors. Read on to learn how to replace your brake pads, rotors, and even your calipers.

Materials Needed
- Jack
- Jack stands
- Tire iron
- Socket
- Wrench
- Flat head screwdriver
- Hex head
- Hose
- Bottle
- C-clamp
- Brake pads
- Brake rotor
- Brake caliper
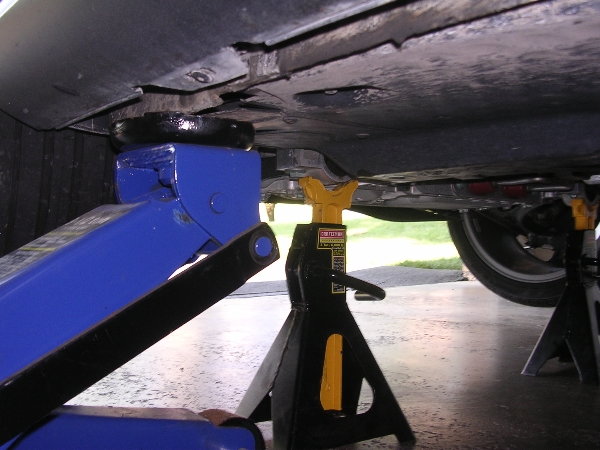
Step 1 – Jack up your car
Raise the car from the side you will be performing the brake change on. If you are raising the front, the jack points are behind the front wheels, and the jack stand points are right on the inside of them. If you are raising the rear, however, the jack points are in front of the rear wheels, and the jack stand points are also on the inside of them.
Step 2 – Replace brake pads
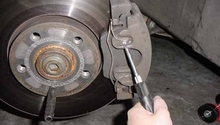
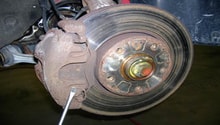
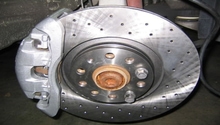
Use your flat head screwdriver to remove the metal clip on the outside of the brake caliper, then remove the two bolts on the rear using your socket. Pull the brake caliper up and off the rotor, then place it somewhere safely; don't let it hang from the brake line or sensor wire. Finally, remove the worn pads and install the new ones in their place. If brake pads is all you're doing, then you will need to decompress the caliper's piston using your C-clamp; this will allow it to fit on top of the thicker pads.
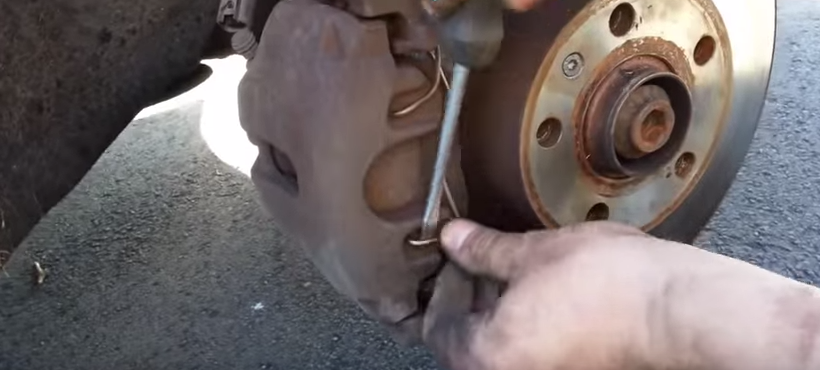
Figure 2. Remove metal clip. 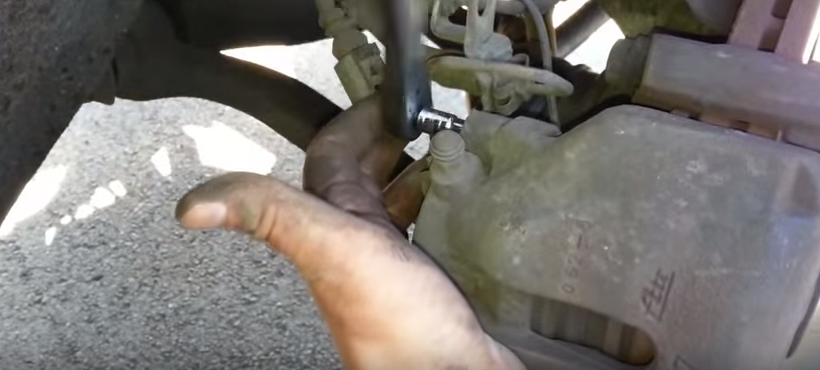
Figure 3. Remove caliper. 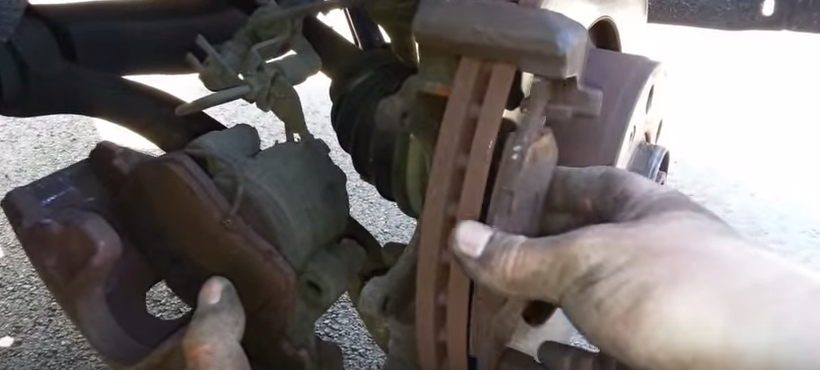
Figure 4. Replace pads.
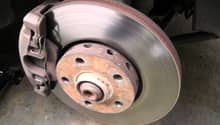
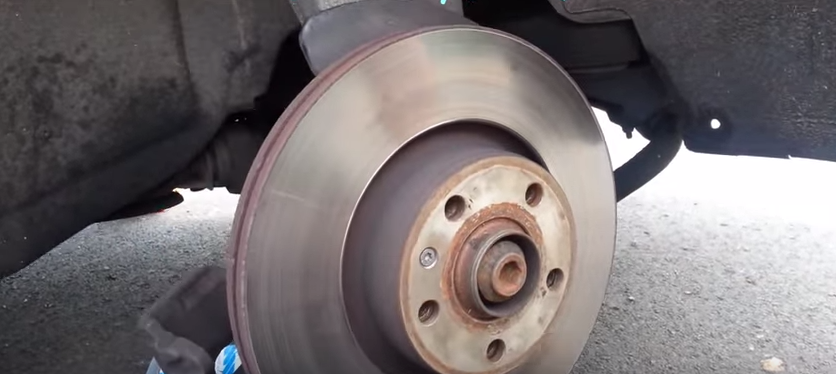
Step 3 – Replace brake rotor
The brake rotor is held in place by one hex screw, so remove the hex screw then pull the brake rotor straight out. You may have difficulty removing it, so try wiggling it out; if all fails, use a rubber mallet to tap the center of it until it comes loose.
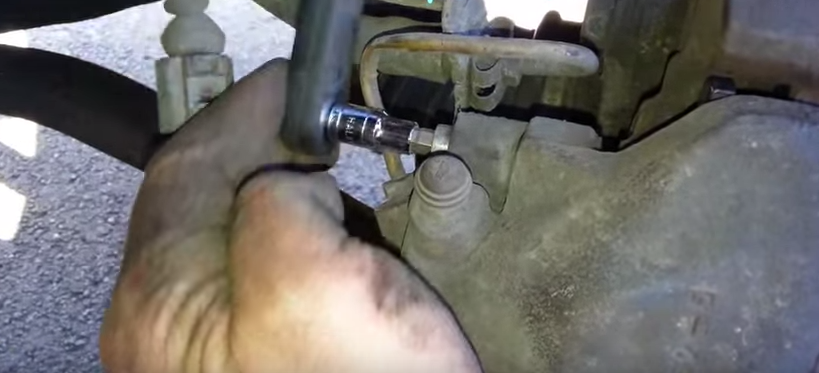
Step 4 – Replace brake caliper
At this point, the brake caliper is held in place by the brake line and the sensor; the sensor can be removed by twisting it counterclockwise. The brake line can be removed by using a wrench to remove its nut, so remove it and then install it onto the new caliper as fast as you can, as this will reduce the amount of fluid that will leak. Tighten the brake line nut and clean the area. Install the caliper over the pads and rotors, then tighten the two bolts on the back.
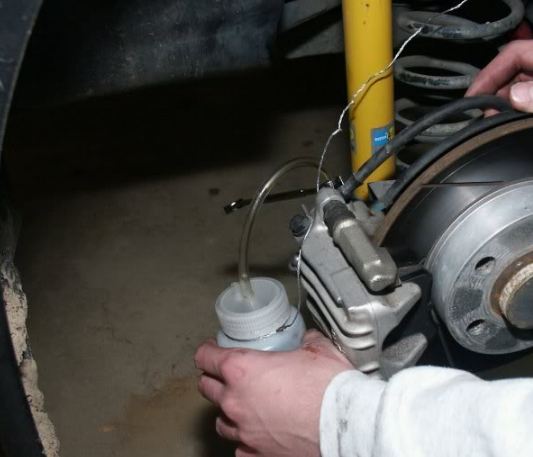
Step 5 – Bleed the brakes
You don't have to bleed the brakes unless you're replacing the brake caliper. Anytime you remove the brake line from the caliper, you introduce air into the brake system. The correct bleeding sequence starts from the passenger's side rear caliper, passenger's caliper, driver's side rear caliper, and then end with the driver's caliper. Locate the bleeder screw on the back of each caliper, then connect the hose to it. Connect the other end of the hose into the bottle, then ask a friend to pump the brake pedal a few times. With the brake pedal pressed down, loosen the bleeder screw with your wrench, then watch the fluid coming out, and as soon as you stop seeing bubbles in the fluid, tighten the bleeder screw first, then let go of the brake pedal. Repeat the same process for each brake caliper, but be sure to top of the brake fluid reservoir between each caliper.
Related Discussions
- Brake Pad Replacement - AudiWorld
- Rear Brake Pads - AudiWorld