When you click on links to various merchants on this site and make a purchase, this can result in this site earning a commission. Affiliate programs and affiliations include, but are not limited to, the eBay Partner Network.
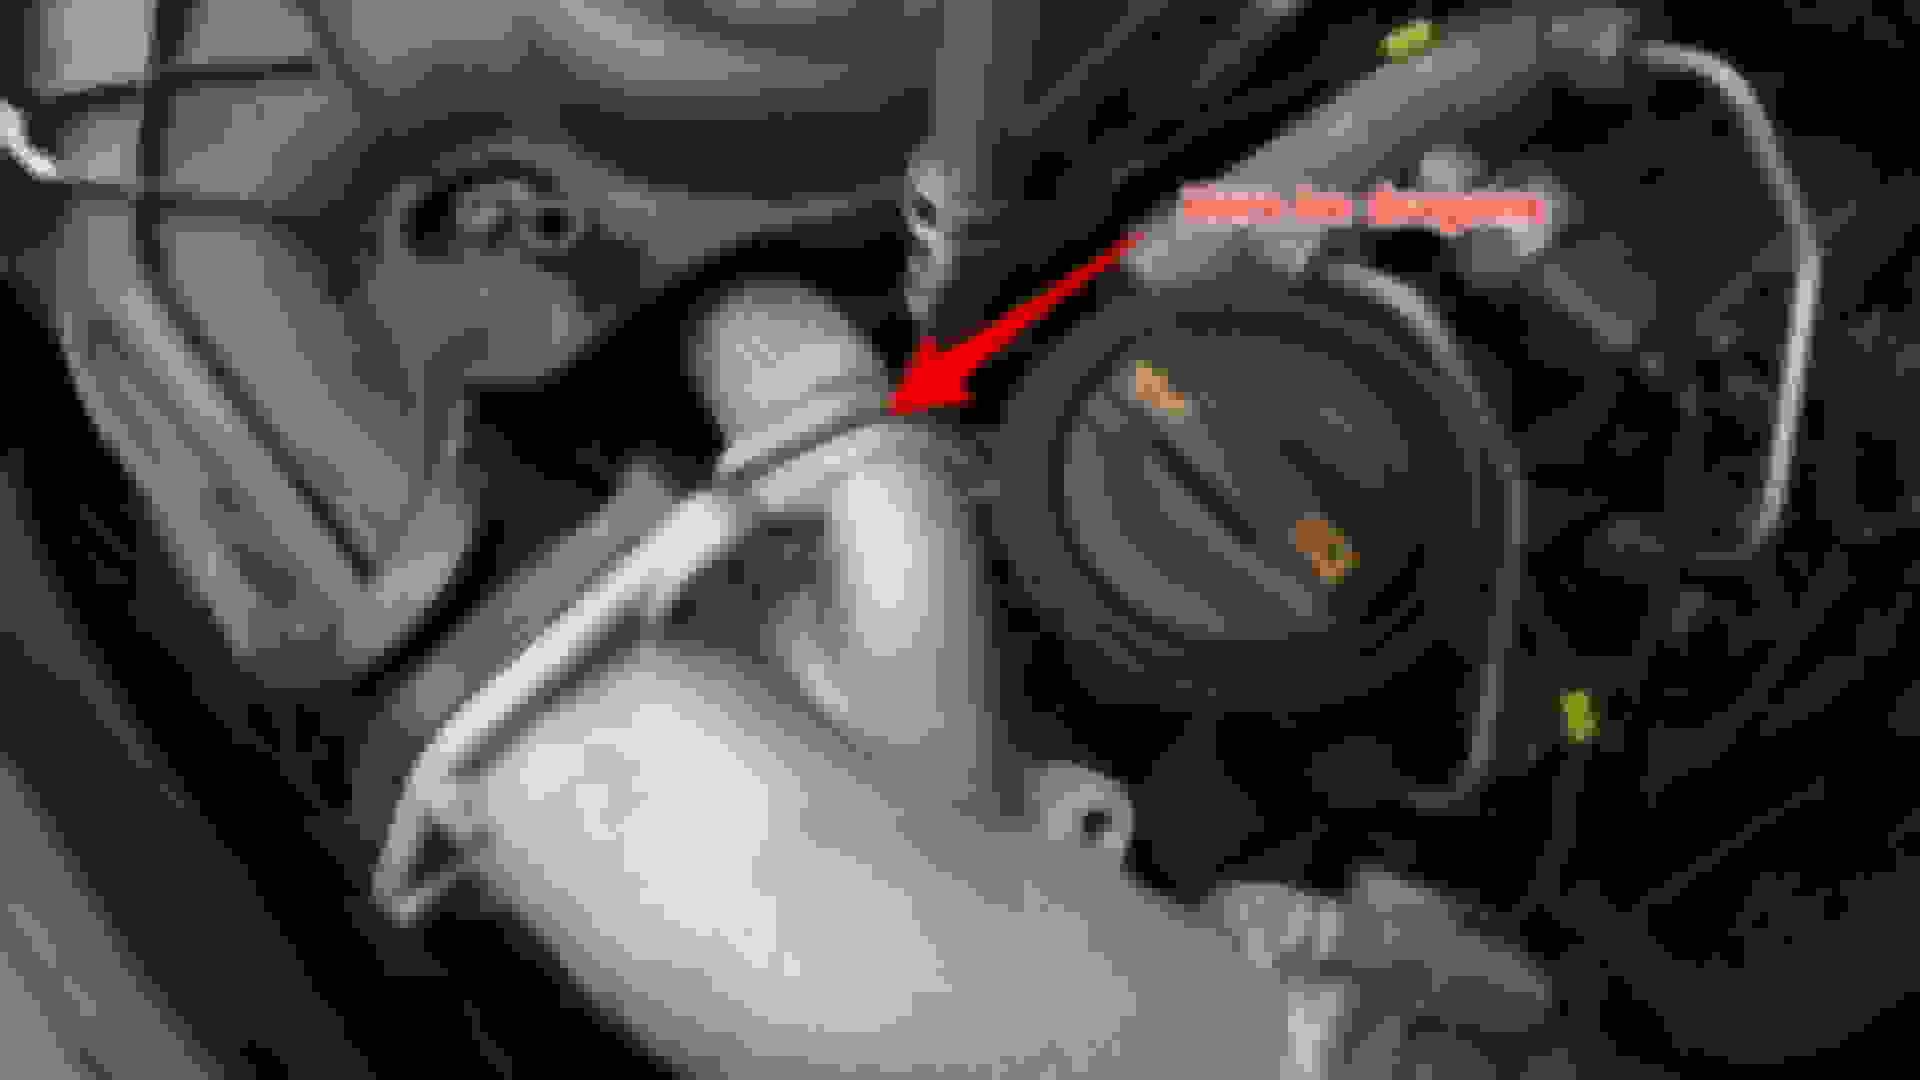
A quick google told me that this was due to failure of the linkage for the intake manifold "swirl" flaps,
as explained so well by the company "airshox" who sell replacement intake manifolds:
Normally the assembly fails at the ball joint highlighted by the red arrows, but the swirl flab bearings may also wear out.
At 130000km some wear like this is to be expected.
The purpose of the swirl flaps is to ensure a correct mixture of fuel and air by limiting the amount of
air that can pass though the engine, starting at 1250RPM the flaps start to open,
and reach fully open at about 2750RPM.
These flaps are moved by two electrical motors controlled by the ECU
and sensors monitor the current position of the flaps.
Unfortunately (for anyone owning an Audi 3.0TDI in a country where vehicle roadworthiness and emissions testing is performed yearly) the ECU will turn on the CEL light if the actual position of the flaps differ by more than two percent, and if the CEL light is on, you fail the roadworthiness test.
While this was all a somewhat interesting piece of automotive engineering
I had my hands busy and decided to contact my local Audi dealership.
Let make one thing clear...I live in Sweden, driving an Audi a8 to a mechanic and asking for a quote is about as stupid as informing a great white that you are made out of meat...
The quote read: �1200 ($1500) for parts PLUS about 6-8hours of work, for a total of about �1800...
I contacted ?????? ? ??????????? ?? ?????????? ( I am not affiliated in any way, they are based in bulgaria, speak english and seemed very service minded).
I got a quote for �280 including new gaskets and shipping within the EU provided I would return my old faulty manifolds to them for repair, and it may be just me, but a price difference of about �1000 got me thinking, how hard could it possibly be to buy the parts and do the repair myself?
I searched the internet, and found bits and pieces on the procedure, but still did not feel confident dissasembling the engine of my precious A8, that�s when I decided on documenting this, how hard could it be? it turns out, not that hard at all...
Now as far as pictures go, I know they are blurry, conditions could have been better, but due to a pending roadworthiness test I had to do this in my driveway, it was 3 degrees centigrade, with 10m/s winds and using my cellphone as a camera. atleast the show on the ground meant I had plenty of reflected daylight...
Enough with the foreplay, here goes...
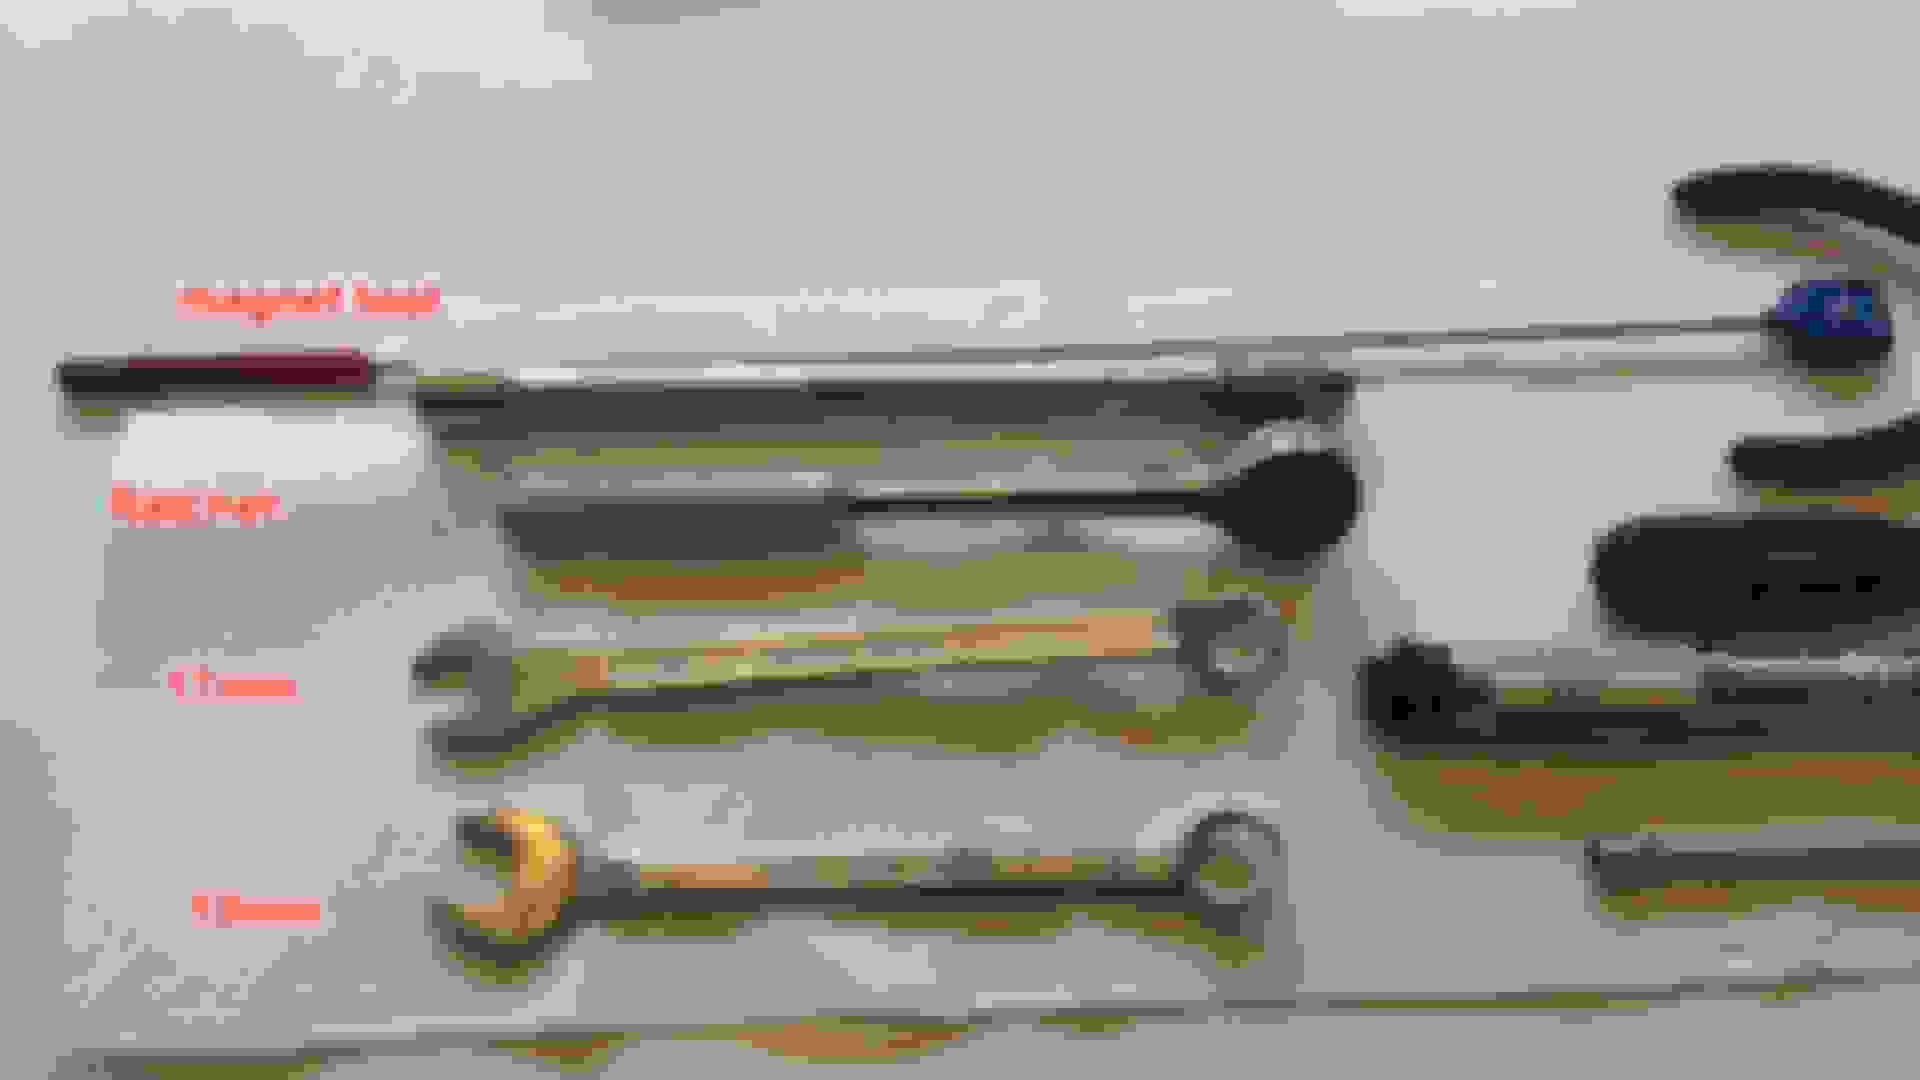
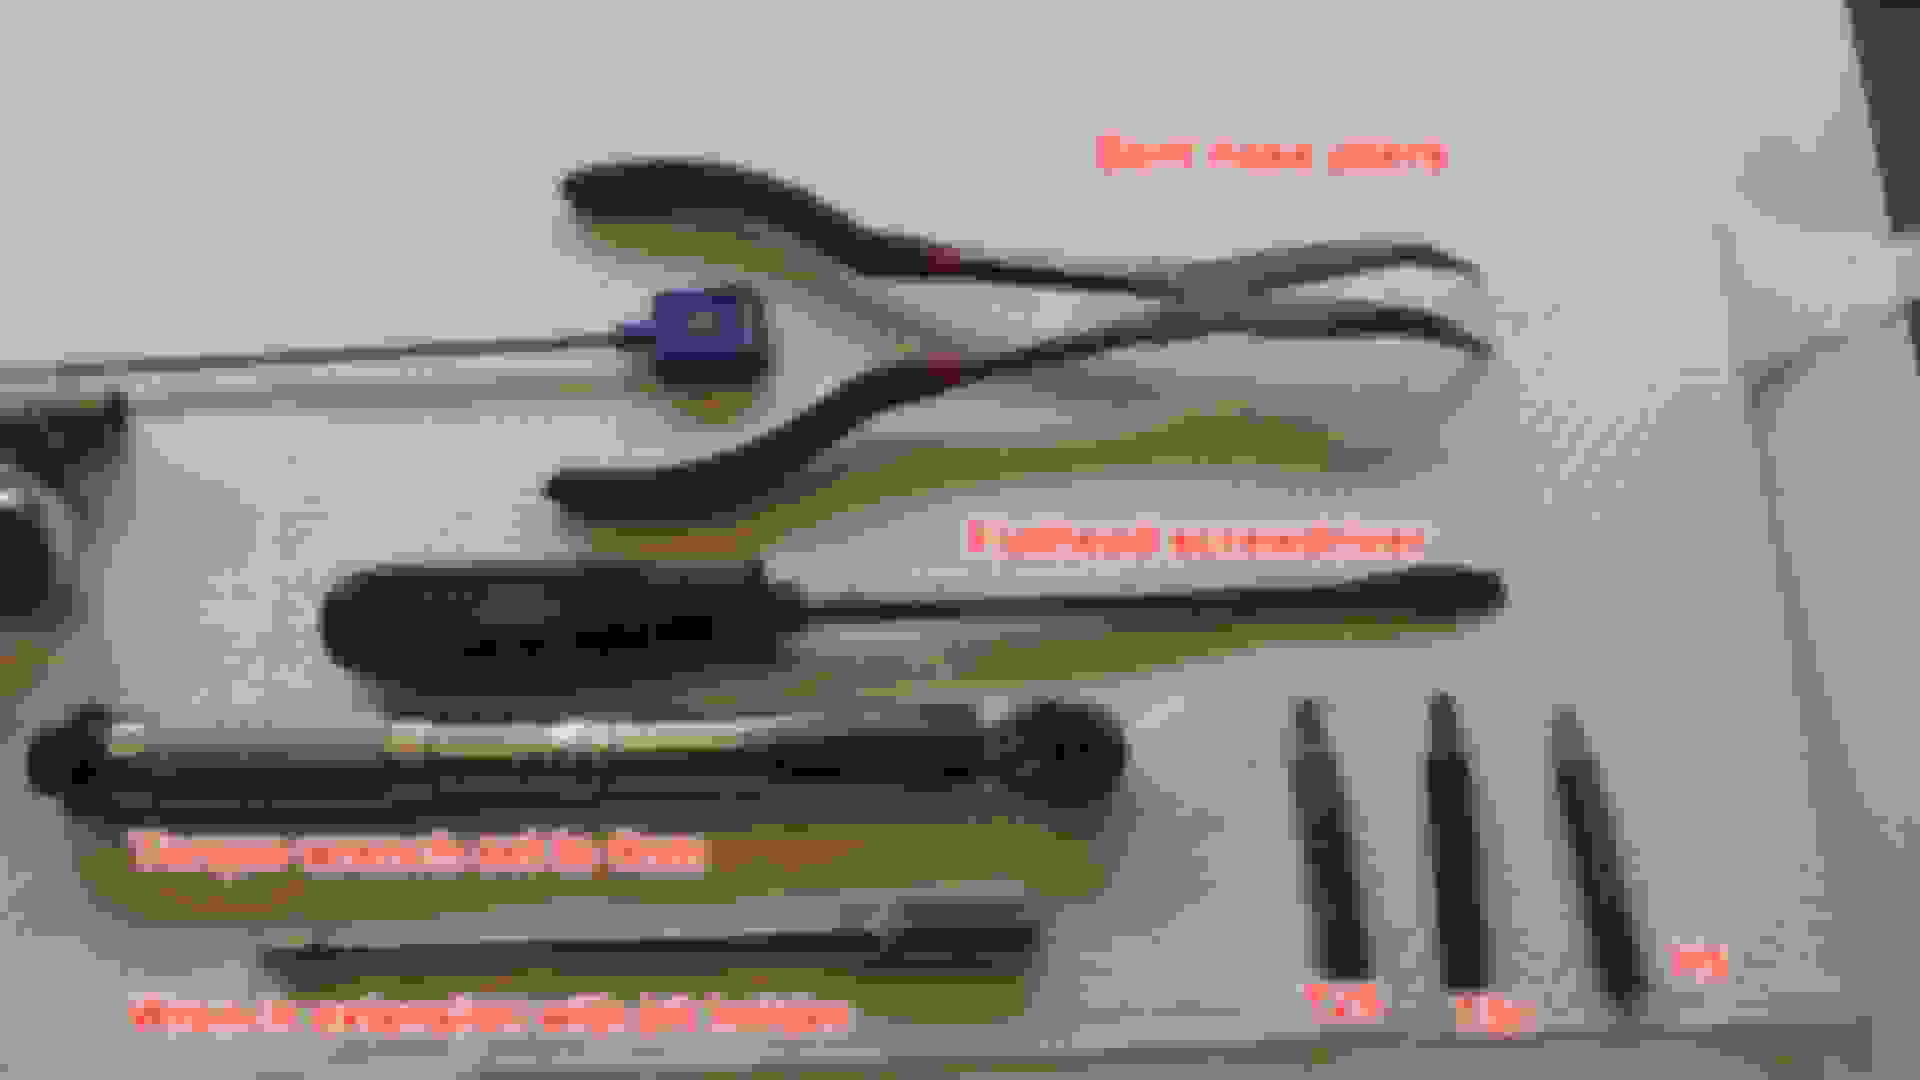
Tools needed:
Magnet tool - comes in handy, if you drop a bolt on the A8, it will probably end up in the belly pan, and you will not be able to retrieve it.
Ratchet wrench and extension - with holder for the torx and hex bits
17mm and 19mm wrench - for disconnecting the fuel lines
Bent nose pliers - needed for disconnecting and connecting the glow plug cables
Flathead screwdriver - to pry the manifold flap linkage off
Torque wrench - set to 9nm to avoid overtightening the manifold bolts, since it is made out of plastic.
T25, T30 and hex 5mm bits - these need to by narrow to get to where the bolts are, had they been any shorter the bitholder of the extension would have gotten in the way.
Not pictured:
A T40 bit used to tighten the engine cover mounting lugs (could have used hand force and pliers)
Items used to clean the intake duct - rags, old electrical cord and a broom handle.
When you order a replacement manifold from airshox, this is what you get:
But fear not, it comes assembled..
I ordered mine with a new gasket, and that was also in place when the manifold arrived, and the look and feel of the assemly is as new, if they remanufacure they are doing a good job at it:
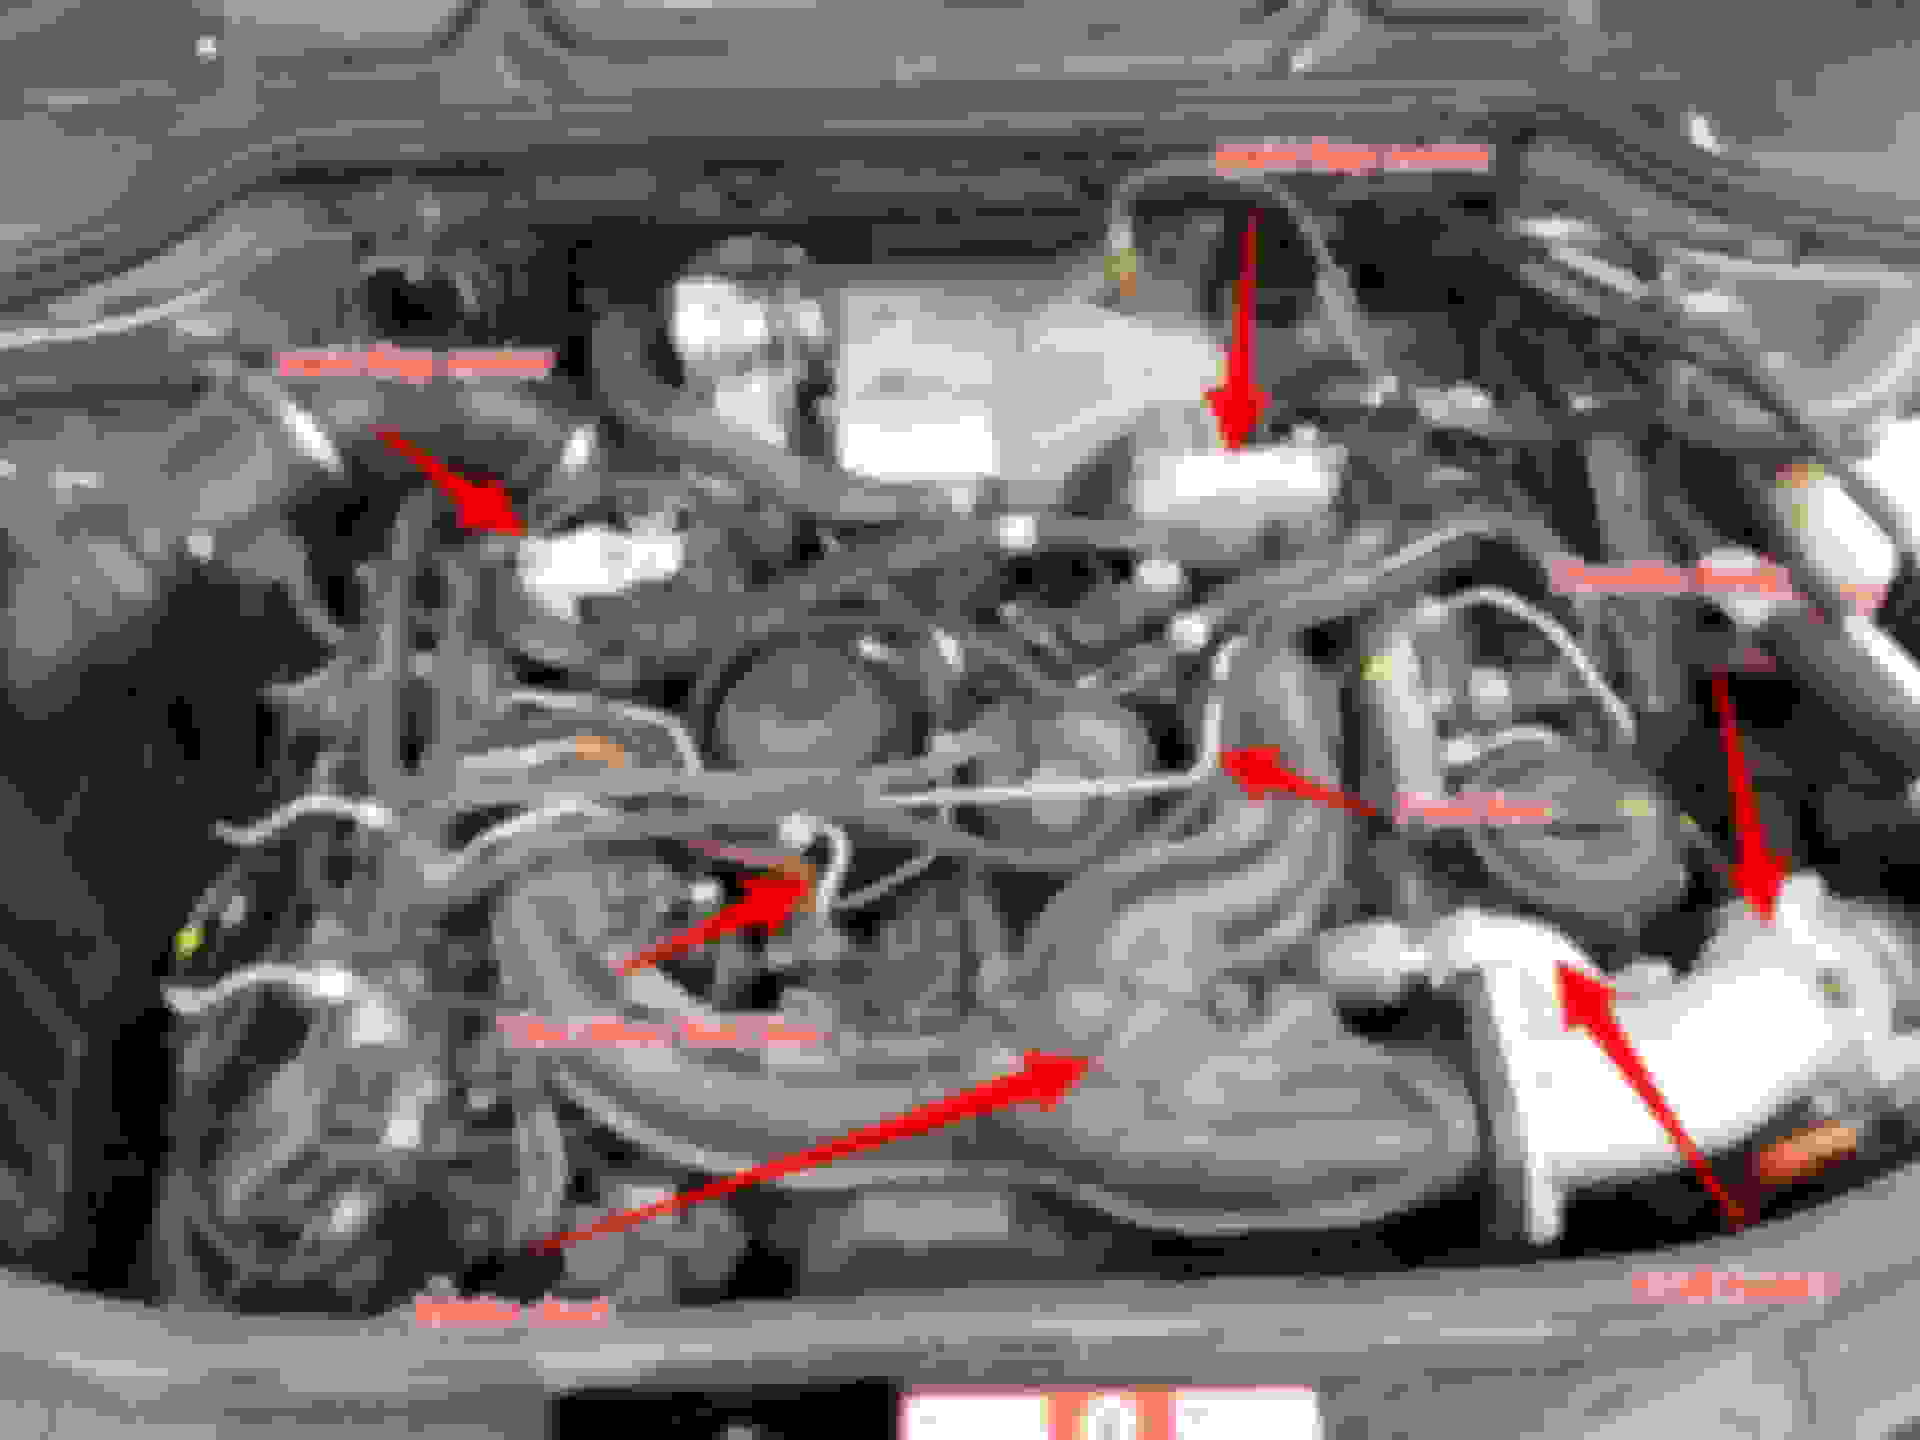
Lets pop the hood:
Some of the components highlighted, there are actually two manifolds down there too, and according to the manual, even an engine under all those wires and hoses...
The fuel line highlighed will need to be removed shortly
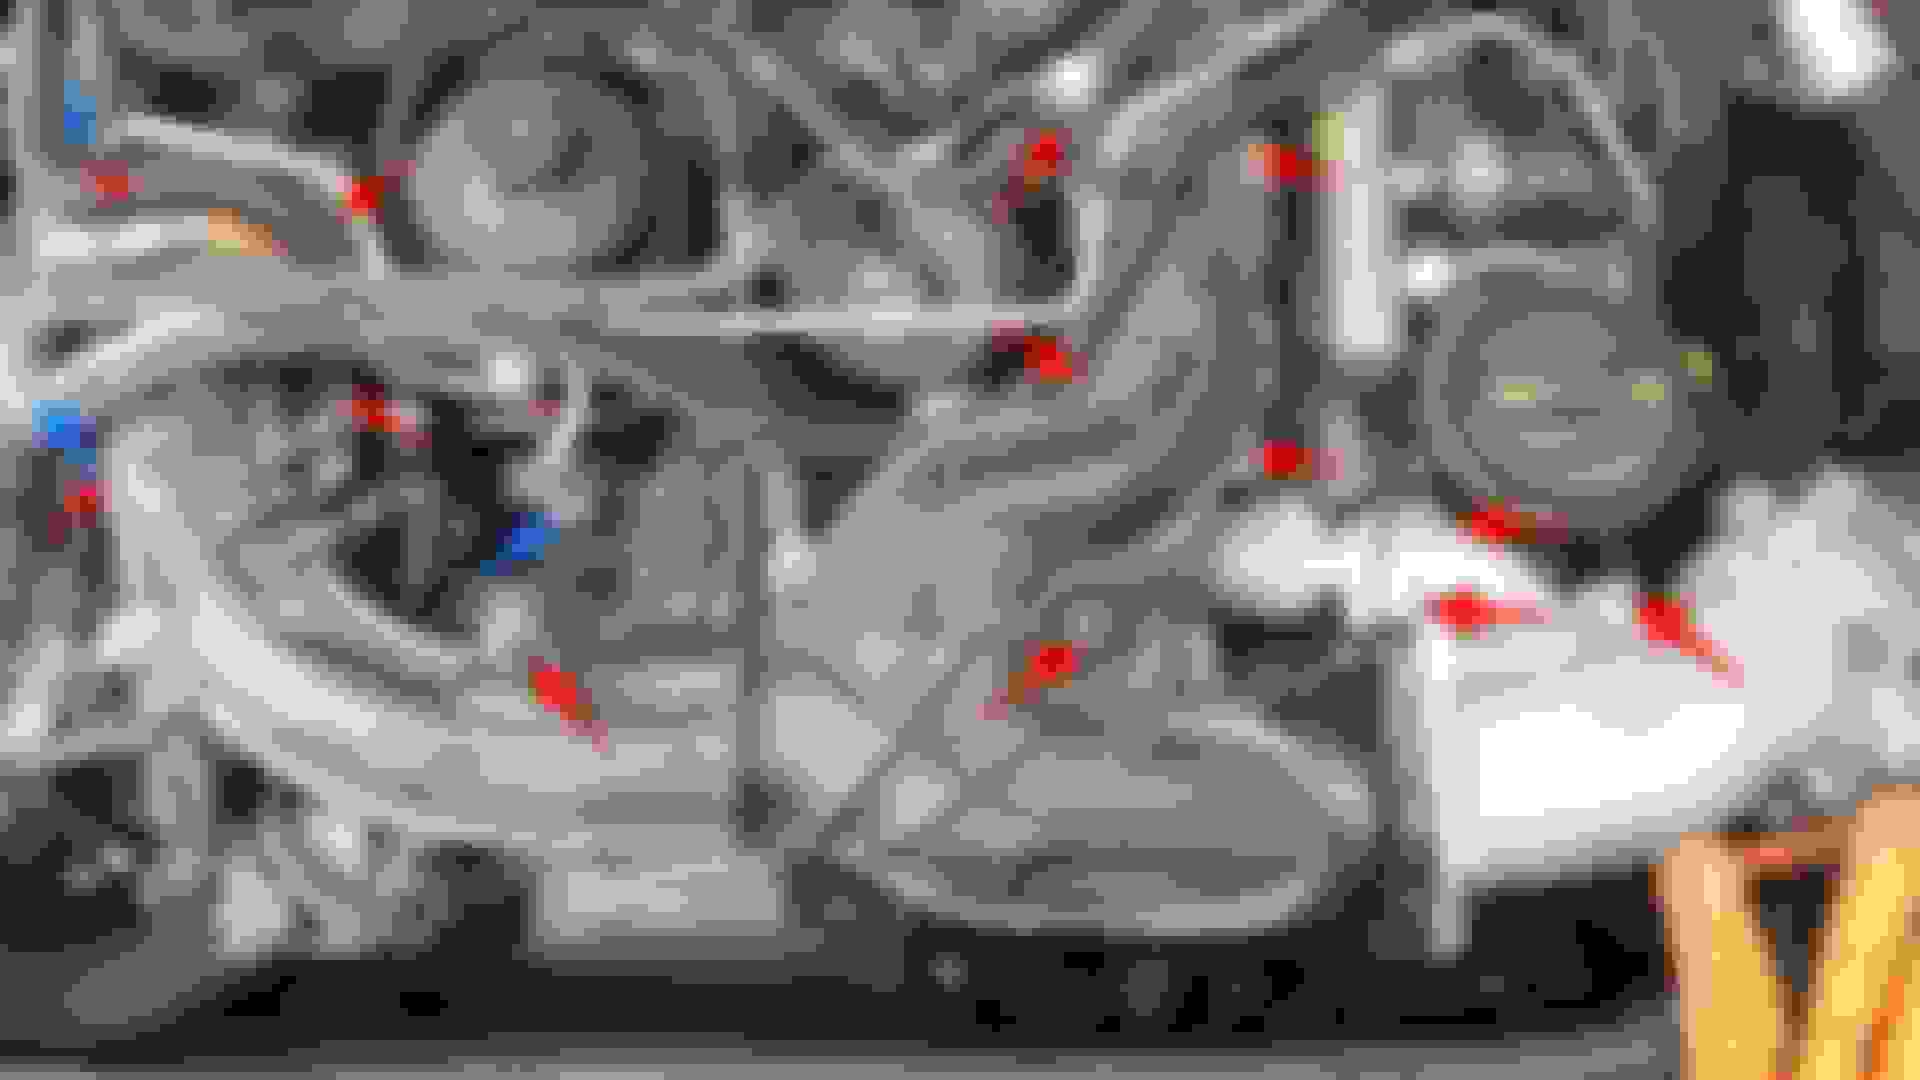
First remove fuel lines and move intake duct out of the way
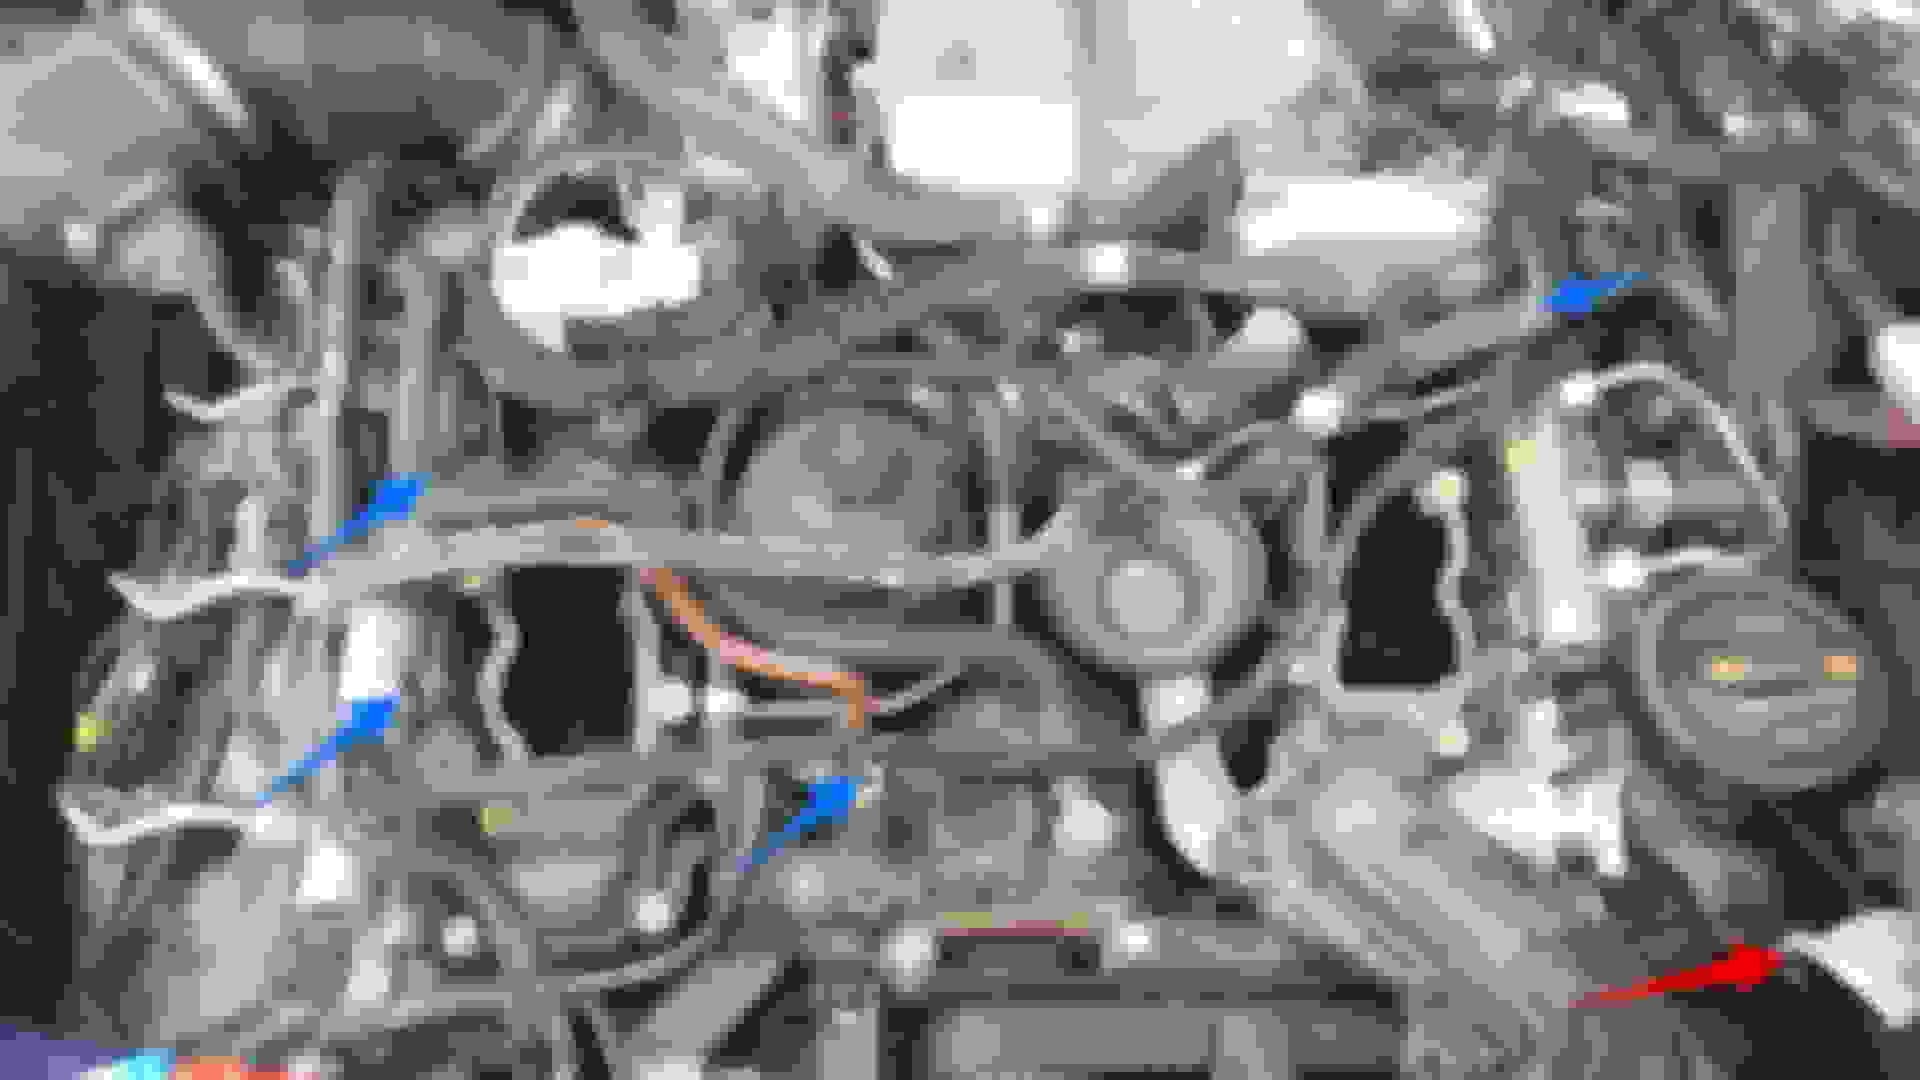
The blue arrows point to the fuel pipes that need to be removed using 17 and 19mm wrenches, the end of one of the pipes is out of the picture to the top right, I am sure you can find it.
Unclip all the cables, but make note of where they go.
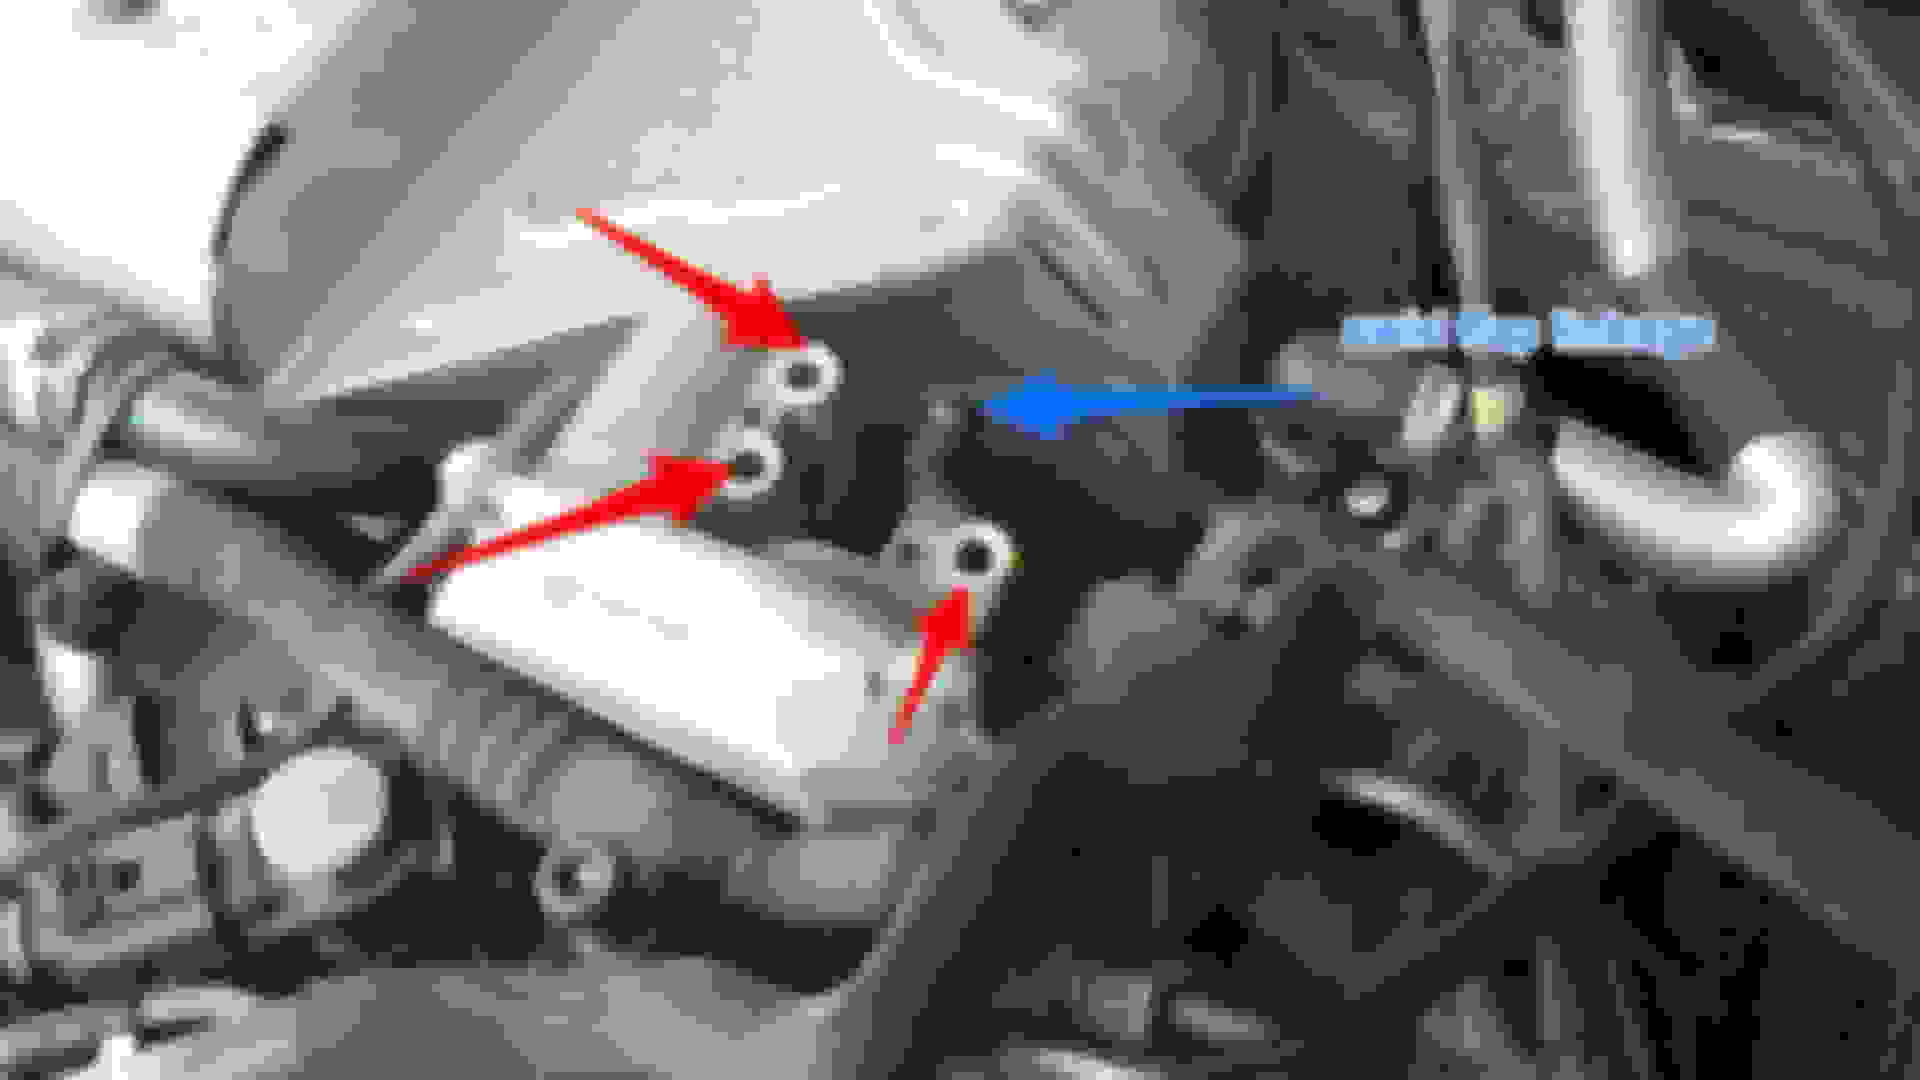
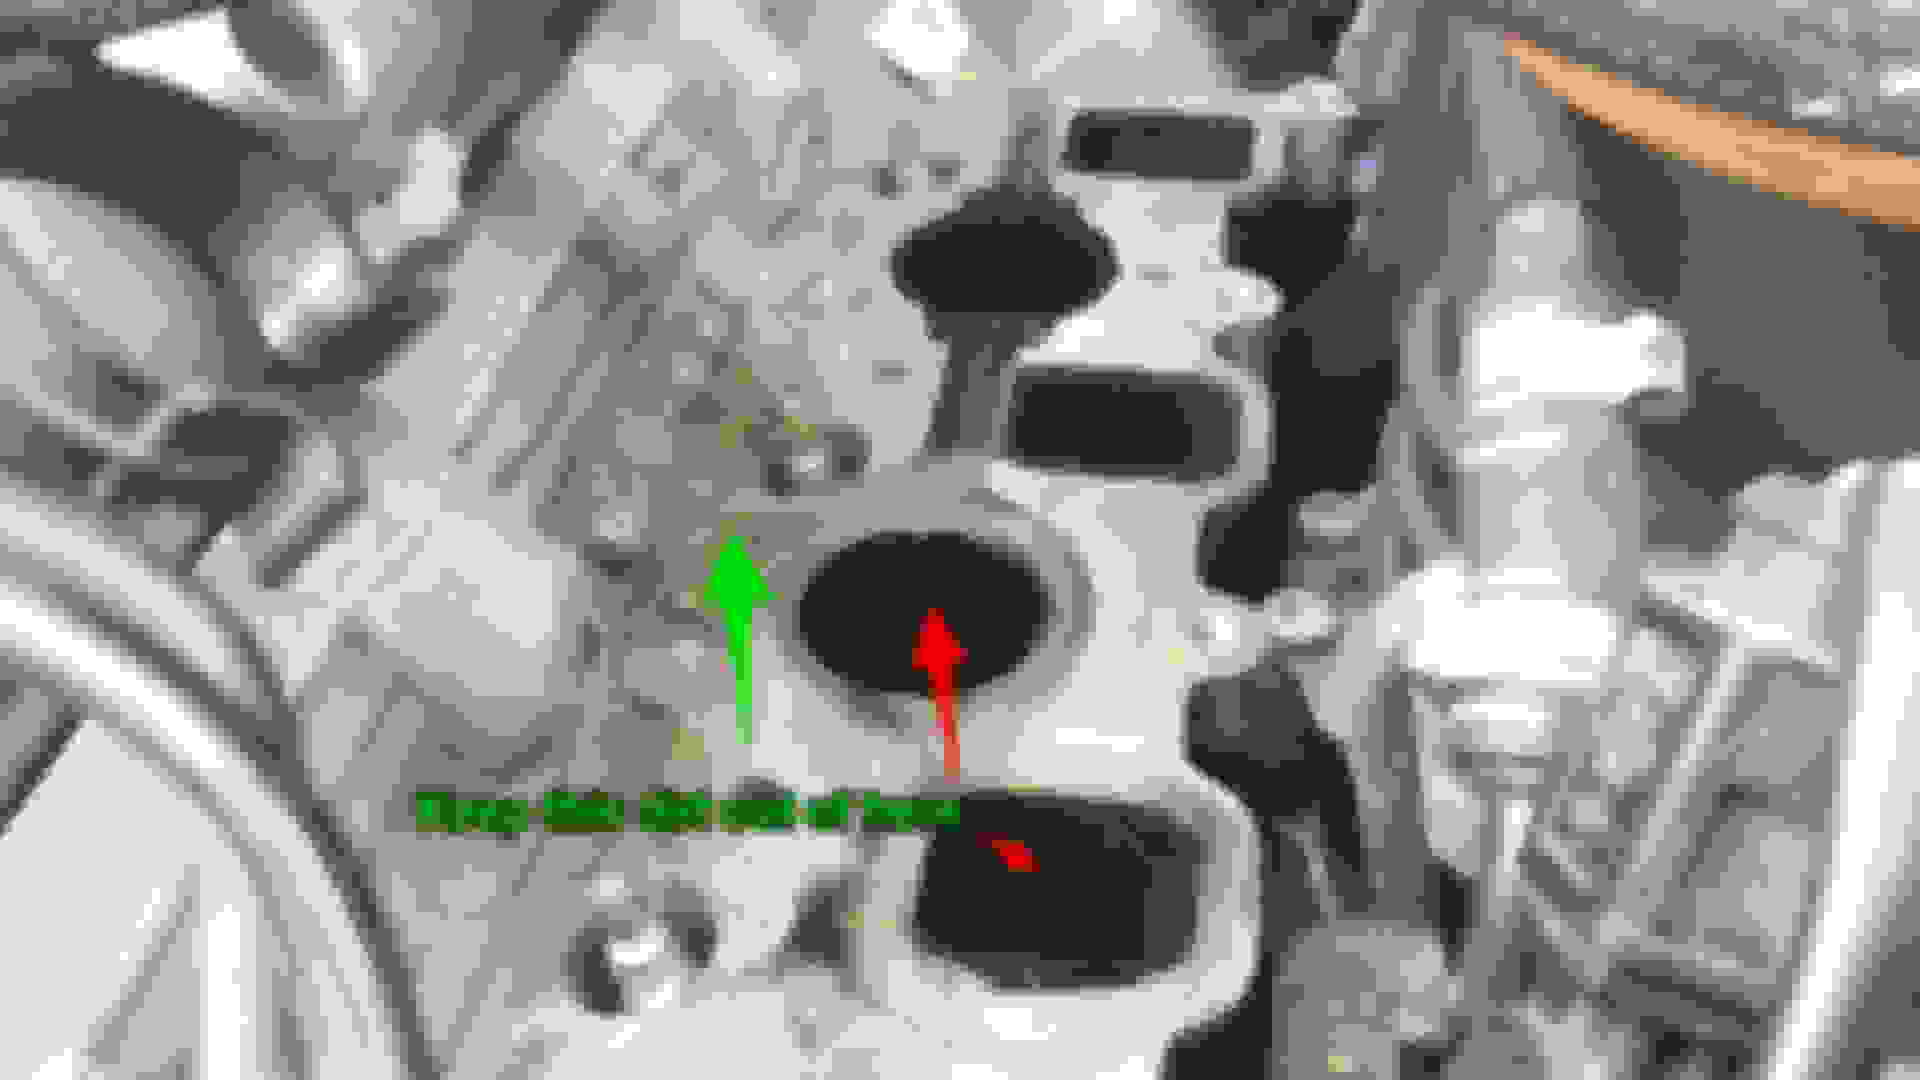
Next, loosen the intake by removing all bolts maked by red arrows, this should allow the intake to swing out of the way.
Note that two of the 10 black bolts are slightly longer, they are used to hold the intake in place (bottom two red arrows on the intake duct)
Use the magnet tool, if you drop the bolts in the engine bay you may never find them...
First oops:
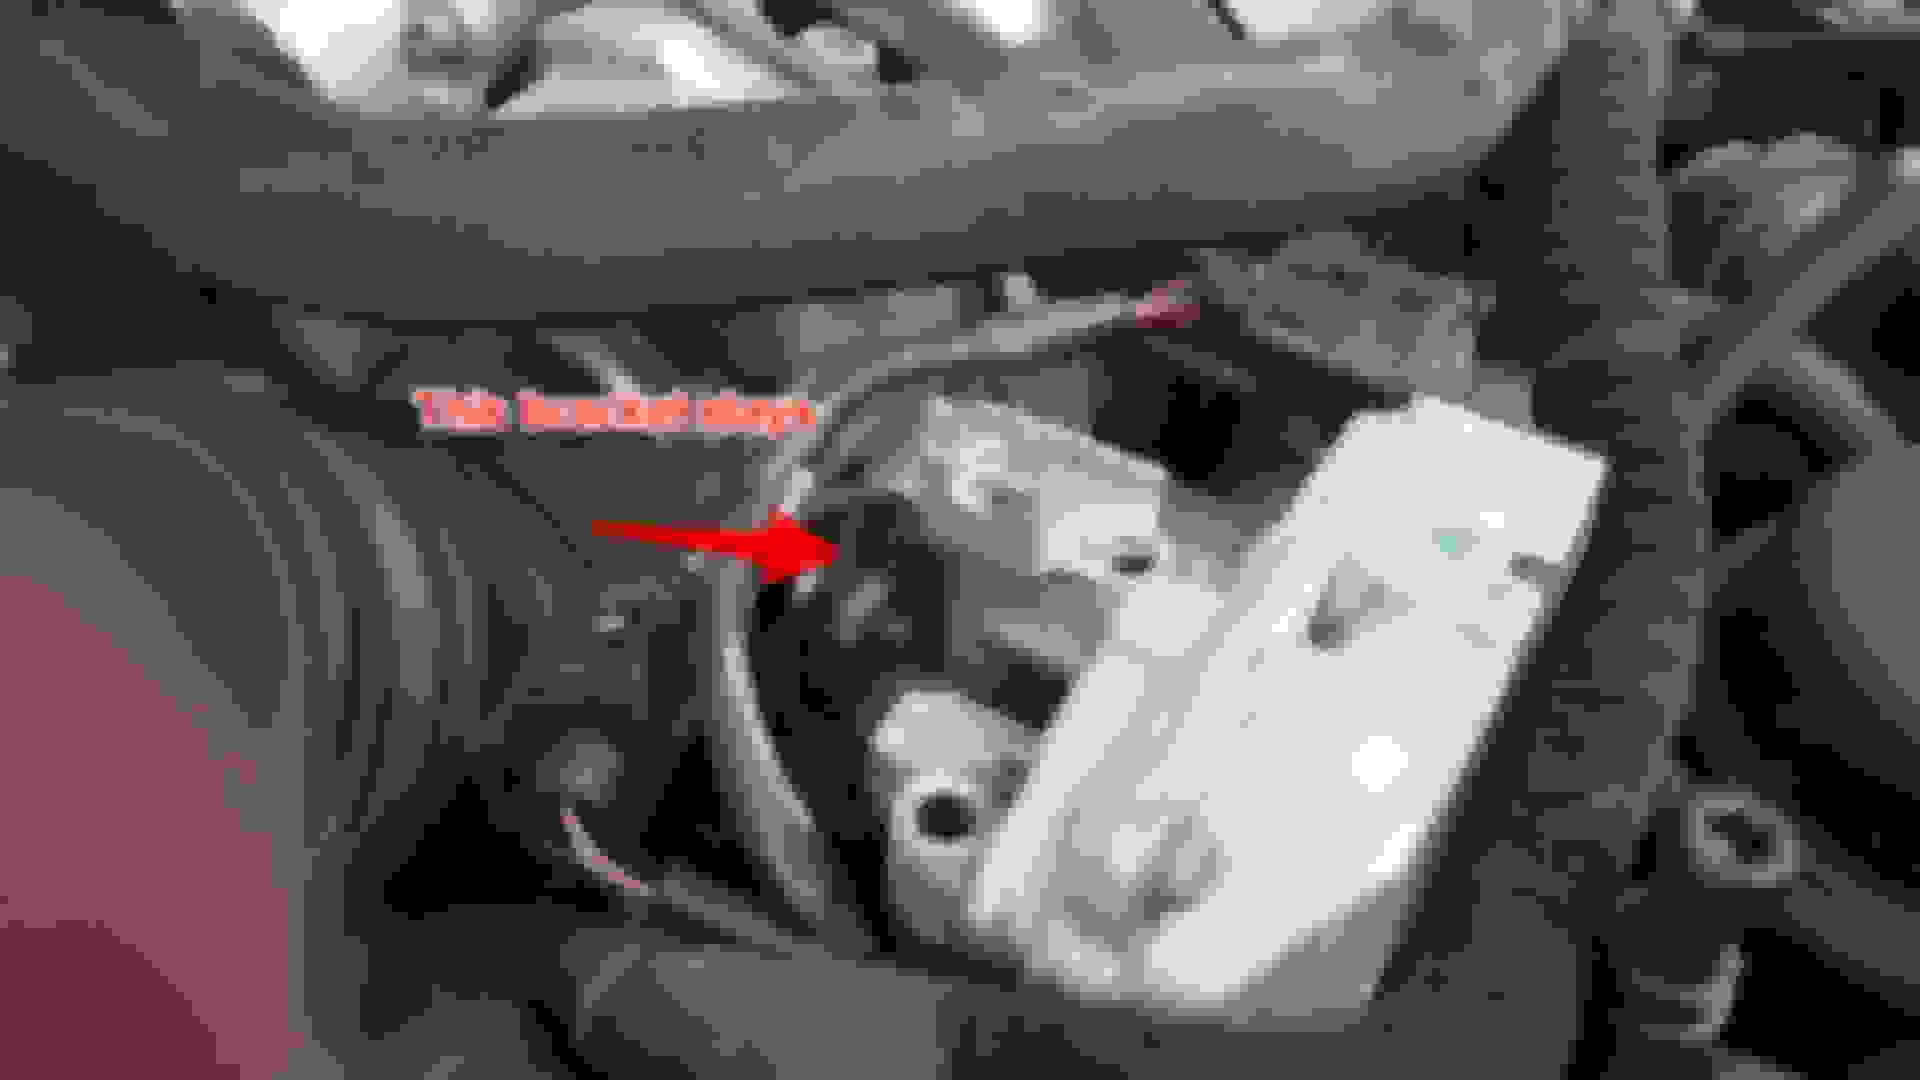
The EGR Hose (webbed) has a metal shim/gasket...if you remove the bolts you will hear it making its way down the engine bay never to be seen again....take note ( I didn't)
Next remove the swirl flap motors:
Remove the swirl flap motors by unclipping the linkage and removing the 3 screws, on one side there is a metal bracket over the motor, it does not need to be removed as you can move the motor out of the way without issue:
After moving the motors out of the way, use the bent nose pliers to disconnect all 6 glow plugs, just remember when reassembling to connect them back before you mount the swirl flap motors again
Lets see what we have:
Fuel lines marked in blue, removed
Intake duct removed from the throttle body ( marked in red ) this was not part of the plan, but on disassembly I found loads of tar looking gunk in the intake and decided to remove it for cleaning.
Photo skills FTW:
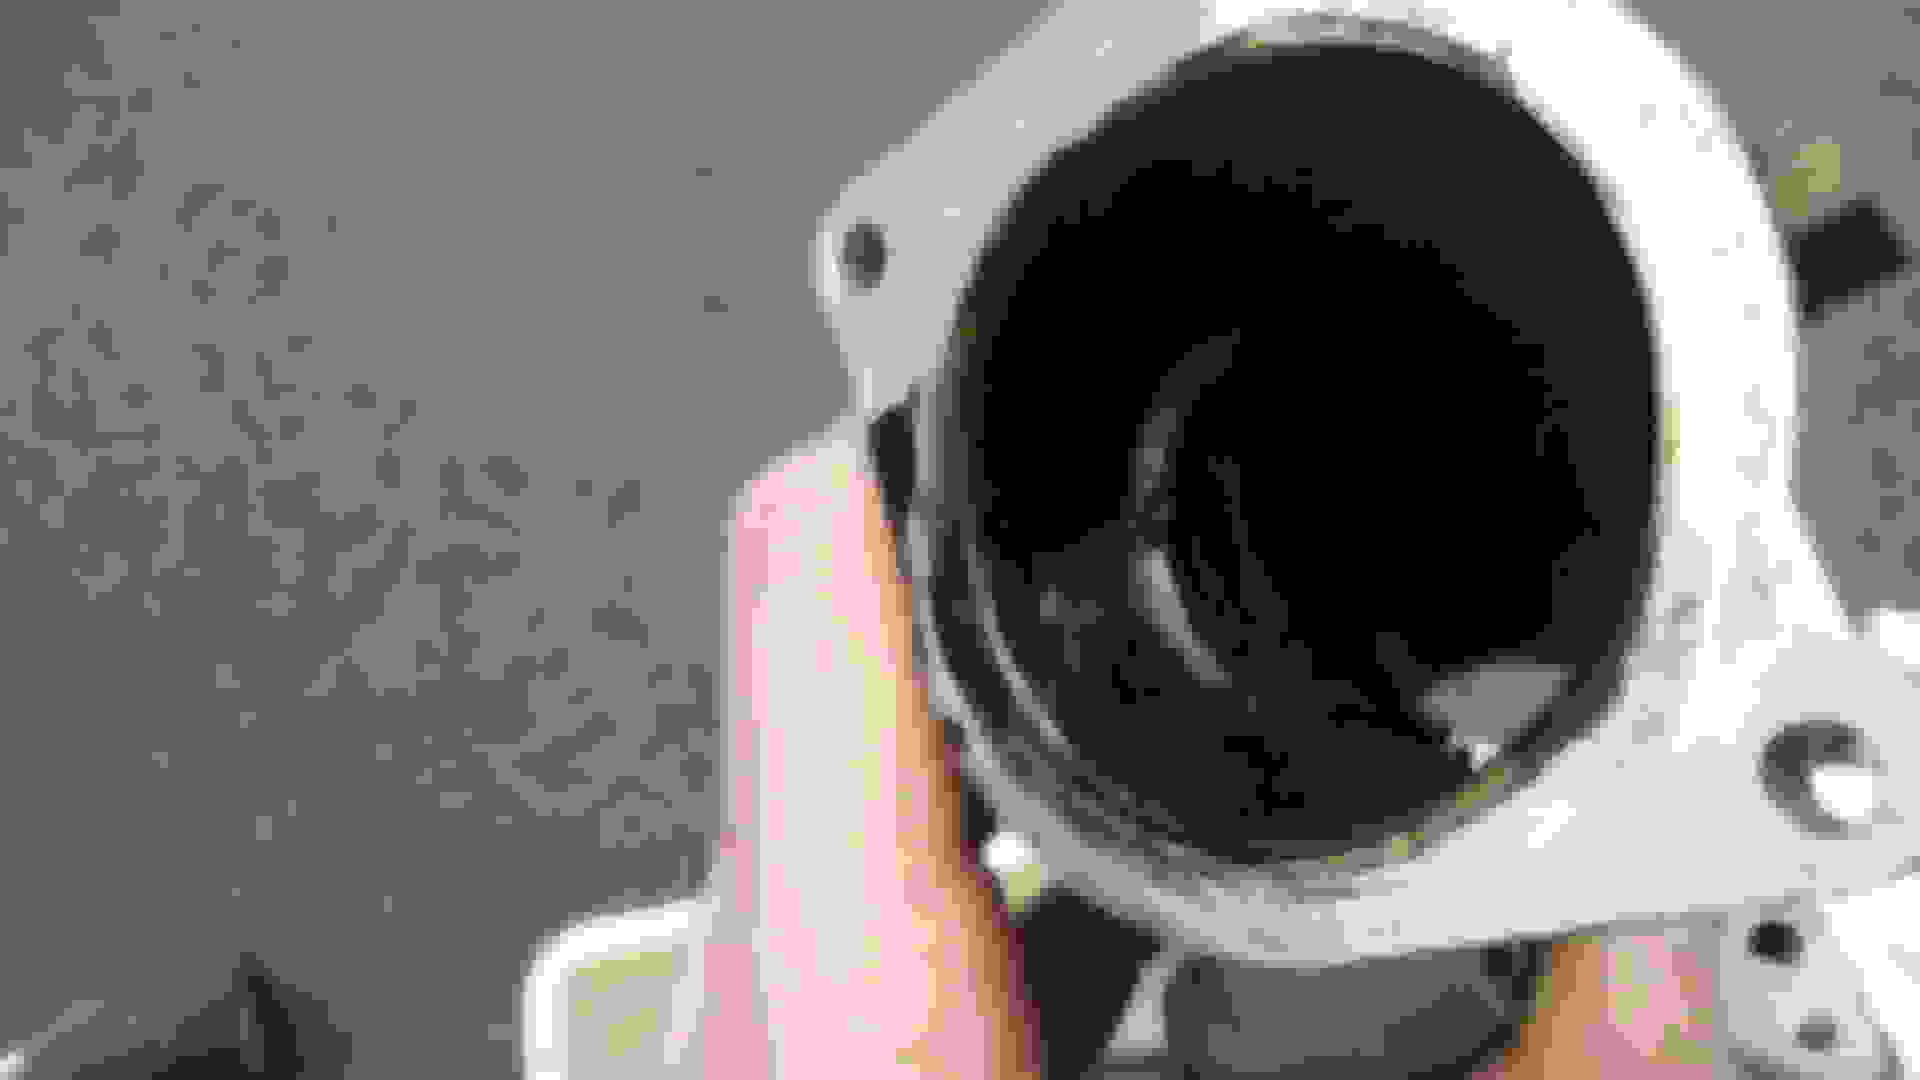
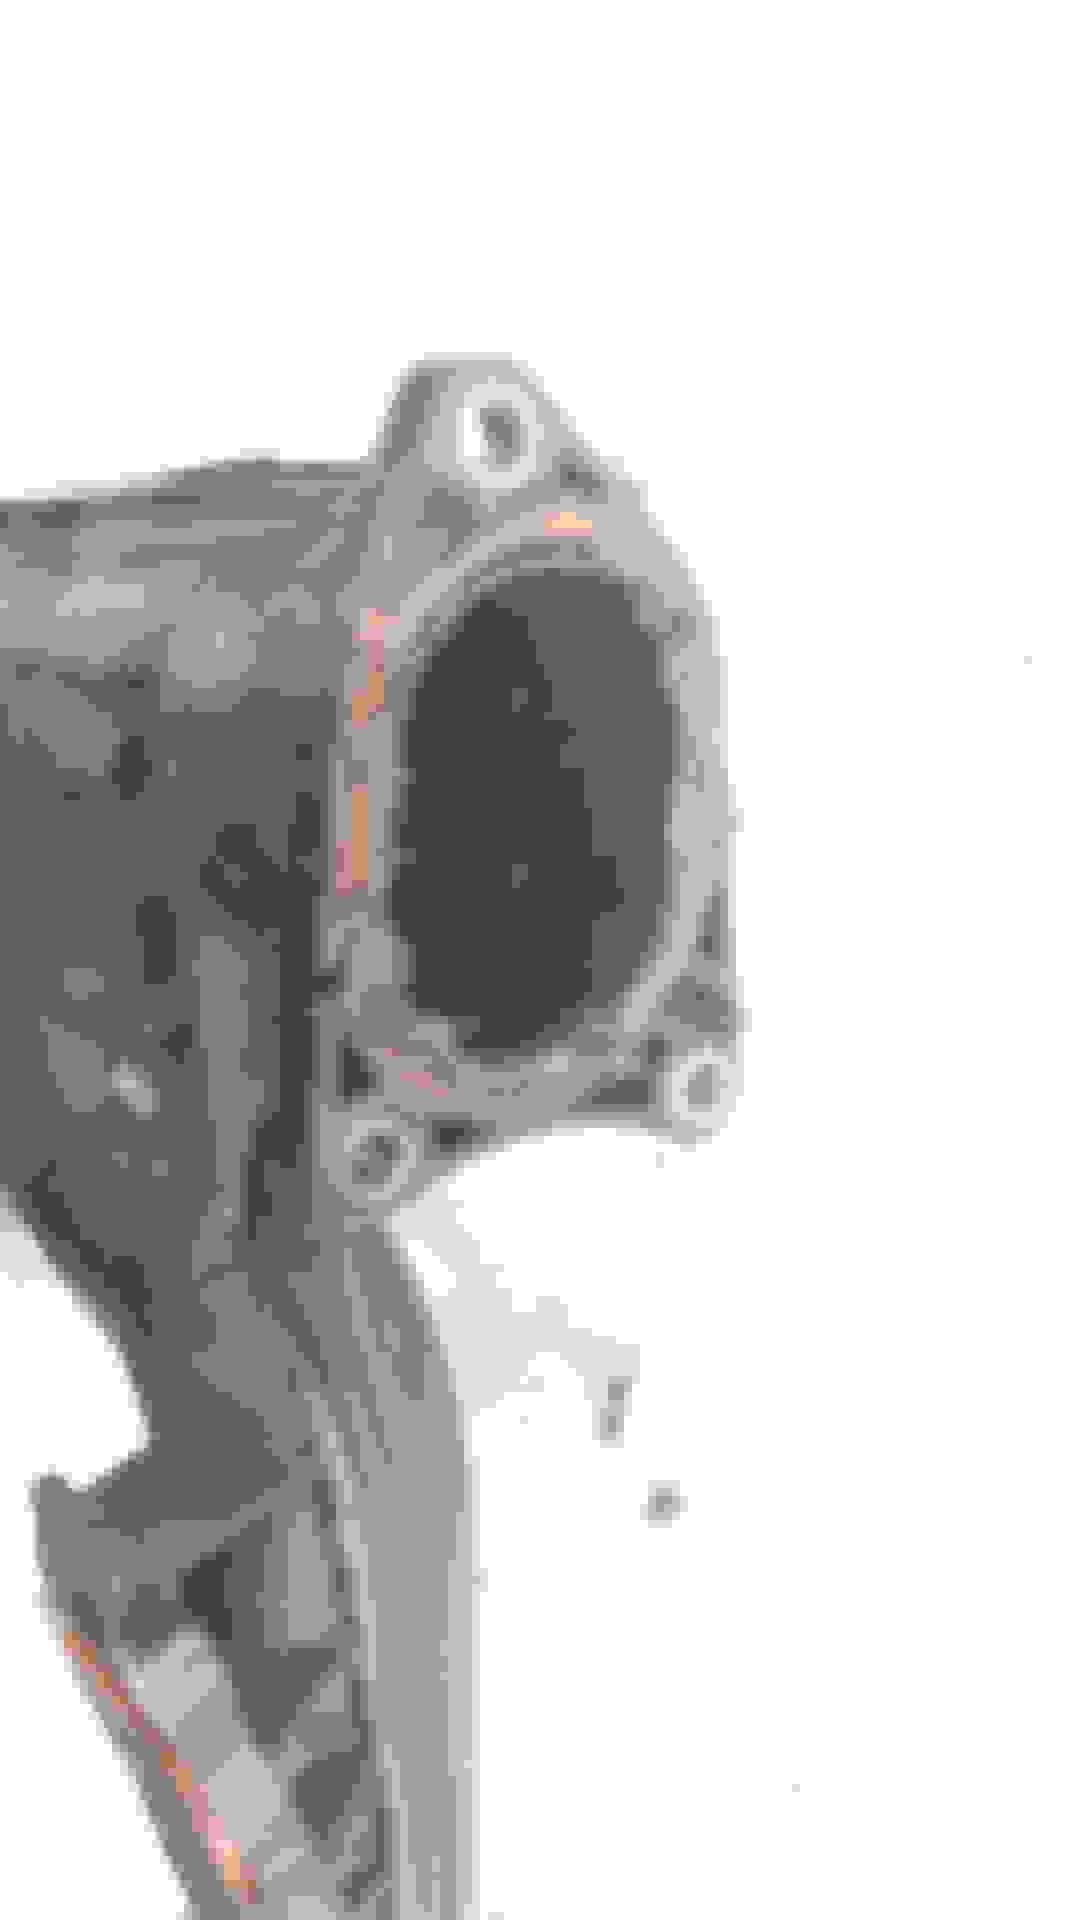
I apologize again for the quality of the pictures, but I hope that even these pictures tell a story of how much oil ends up in the engine via the EGR.
All in all I cleaned about 200g or tar-looking gunk from the intake duct using the flathead screwdriver, rags pushed through by a piece of old electrical cord and a broom handle before I used diesel to clean the last remnants
In order to remove the manifolds a few more steps are needed:
On the right side there is a ??? somethingsomething, any way it is clearly made in the USA and is currently in our way, unclip it and remove it from its bracket.
After removing the bracket, unscrew all 8 bolts for each manifold using a T30 bit or other T30 tool narrow and long enough to reach down to all bolts (if in doubt check this first)
On each side there are coolant pipes attached to one of the bolts, these pipes make it alot harder to remove the manifold, but if care is taken they can be moved to the side enough to let the manifold come out (I was busy cursing, so I forgot to take pictures).
I used the flathead screwdriver to pry/wiggle the manifold loose and then removing them by turning/tilting them towards the cars midline, this make it easier to pull them from under all hoses without snagging on the coolent pipe attachments just mentioned.
After removing the manifold, wipe away all dirt and oil taking care not to let it drop into the engine.
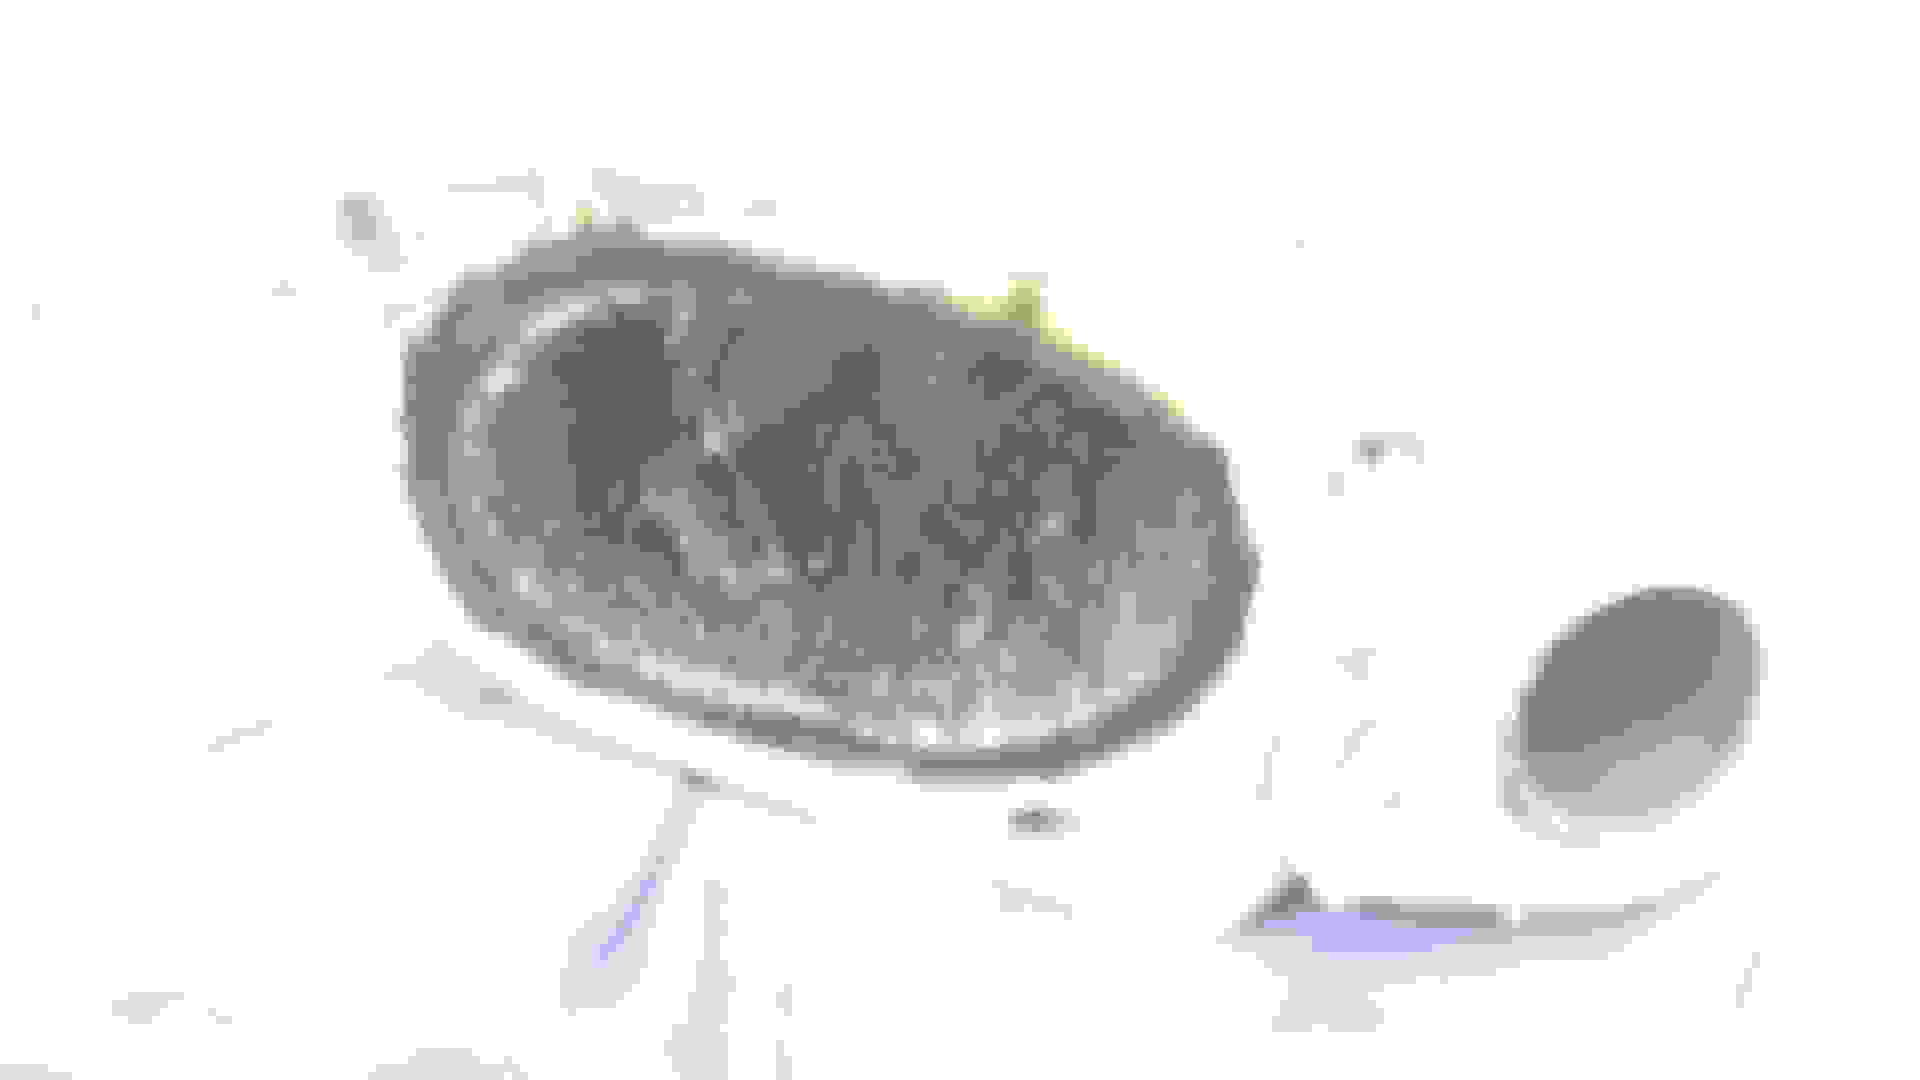
This is what the removed manifold looked like, again I blame EGR, the manifold flaps themselves did not have as much play as I feared and moved reasonably well, It may have been enough to just replace the links, but I would have had to remove the manifold to check either way...
Putting it back together:
When mounting the new mainfolds, use a torque wrench set to 9nm, apply som loctite blue (or similiar threadlock) to the threads and tighten in a cross wise fashion starting with the middle two bolts and moving outwards.
The swirl flap motors do not need threadlock on the bolts, they screw in to the plastic manifold, but do not forget to connect the glow plugs before mounting the motors.
Make sure you get the fuel piping back in its original place, not just put it on top of the other lines.
The two mounts for the engine cover are made out of plastic, use a T40 bit and very gentle force or they will crack when you mount them.
Once the repair is finished the car will take some time to start as air is being purged from the system, I had to crank for about 30seconds before the car would start.
All in all this repair cost me about �300 and took 3.5hrs. If you skip the intake duct cleaning and lunch, it will probably take about 2.5hrs.
I did the repair standing outside in my driveway using tools I already had in my toolbox, for creature comfort I would recommend a garage or warmer climate, but apart from that the process was quite easy and knowing I saved more about �1500 for less than 4 hours of work definitely made it worth it.
Very helpful thank you. Even though I have a 4.0 tdi, I have very similar issue and am currently in the process of having my great mechanic Jamie in Dublin replace the second manifold. the first one left bank was clearly broken linkage. this one is not as clear. I am hoping the 2% variation is the problem. What I mean is that the manifold is gummed up with carbon and replacing with a clean one will do it. Both actuators seem to operate correctly. but really with used parts you never know. It was the only option as Audi quoted �2100 for each manifold plus fitting...
[QUOTE=kanaudi;24681290]Very helpful thank you. Even though I have a 4.0 tdi, I have very similar issue and am currently in the process of having my great mechanic Jamie in Dublin replace the second manifold. the first one left bank was clearly broken linkage. this one is not as clear. I am hoping the 2% variation is the problem. What I mean is that the manifold is gummed up with carbon and replacing with a clean one will do it. Both actuators seem to operate correctly. but really with used parts you never know. It was the only option as Audi quoted �2100 for each manifold plus fitting...[/QUOTE
Hi,I have the same problem with my Q7,I am from Dublin,would you mind pass your mechanic contact details,many thanks! Regards, Alex
A quick google told me that this was due to failure of the linkage for the intake manifold "swirl" flaps,
as explained so well by the company "airshox" who sell replacement intake manifolds:
Normally the assembly fails at the ball joint highlighted by the red arrows, but the swirl flab bearings may also wear out.
At 130000km some wear like this is to be expected.
The purpose of the swirl flaps is to ensure a correct mixture of fuel and air by limiting the amount of
air that can pass though the engine, starting at 1250RPM the flaps start to open,
and reach fully open at about 2750RPM.
These flaps are moved by two electrical motors controlled by the ECU
and sensors monitor the current position of the flaps.
Unfortunately (for anyone owning an Audi 3.0TDI in a country where vehicle roadworthiness and emissions testing is performed yearly) the ECU will turn on the CEL light if the actual position of the flaps differ by more than two percent, and if the CEL light is on, you fail the roadworthiness test.
While this was all a somewhat interesting piece of automotive engineering
I had my hands busy and decided to contact my local Audi dealership.
Let make one thing clear...I live in Sweden, driving an Audi a8 to a mechanic and asking for a quote is about as stupid as informing a great white that you are made out of meat...
The quote read: �1200 ($1500) for parts PLUS about 6-8hours of work, for a total of about �1800...
I contacted ?????? ? ??????????? ?? ?????????? ( I am not affiliated in any way, they are based in bulgaria, speak english and seemed very service minded).
I got a quote for �280 including new gaskets and shipping within the EU provided I would return my old faulty manifolds to them for repair, and it may be just me, but a price difference of about �1000 got me thinking, how hard could it possibly be to buy the parts and do the repair myself?
I searched the internet, and found bits and pieces on the procedure, but still did not feel confident dissasembling the engine of my precious A8, that�s when I decided on documenting this, how hard could it be? it turns out, not that hard at all...
Now as far as pictures go, I know they are blurry, conditions could have been better, but due to a pending roadworthiness test I had to do this in my driveway, it was 3 degrees centigrade, with 10m/s winds and using my cellphone as a camera. atleast the show on the ground meant I had plenty of reflected daylight...
Enough with the foreplay, here goes...
Tools needed:
Magnet tool - comes in handy, if you drop a bolt on the A8, it will probably end up in the belly pan, and you will not be able to retrieve it.
Ratchet wrench and extension - with holder for the torx and hex bits
17mm and 19mm wrench - for disconnecting the fuel lines
Bent nose pliers - needed for disconnecting and connecting the glow plug cables
Flathead screwdriver - to pry the manifold flap linkage off
Torque wrench - set to 9nm to avoid overtightening the manifold bolts, since it is made out of plastic.
T25, T30 and hex 5mm bits - these need to by narrow to get to where the bolts are, had they been any shorter the bitholder of the extension would have gotten in the way.
Not pictured:
A T40 bit used to tighten the engine cover mounting lugs (could have used hand force and pliers)
Items used to clean the intake duct - rags, old electrical cord and a broom handle.
When you order a replacement manifold from airshox, this is what you get:
But fear not, it comes assembled..
I ordered mine with a new gasket, and that was also in place when the manifold arrived, and the look and feel of the assemly is as new, if they remanufacure they are doing a good job at it:
Lets pop the hood:
Some of the components highlighted, there are actually two manifolds down there too, and according to the manual, even an engine under all those wires and hoses...
The fuel line highlighed will need to be removed shortly
First remove fuel lines and move intake duct out of the way
The blue arrows point to the fuel pipes that need to be removed using 17 and 19mm wrenches, the end of one of the pipes is out of the picture to the top right, I am sure you can find it.
Unclip all the cables, but make note of where they go.
Next, loosen the intake by removing all bolts maked by red arrows, this should allow the intake to swing out of the way.
Note that two of the 10 black bolts are slightly longer, they are used to hold the intake in place (bottom two red arrows on the intake duct)
Use the magnet tool, if you drop the bolts in the engine bay you may never find them...
First oops:
The EGR Hose (webbed) has a metal shim/gasket...if you remove the bolts you will hear it making its way down the engine bay never to be seen again....take note ( I didn't)
Next remove the swirl flap motors:
Remove the swirl flap motors by unclipping the linkage and removing the 3 screws, on one side there is a metal bracket over the motor, it does not need to be removed as you can move the motor out of the way without issue:
After moving the motors out of the way, use the bent nose pliers to disconnect all 6 glow plugs, just remember when reassembling to connect them back before you mount the swirl flap motors again
Lets see what we have:
Fuel lines marked in blue, removed
Intake duct removed from the throttle body ( marked in red ) this was not part of the plan, but on disassembly I found loads of tar looking gunk in the intake and decided to remove it for cleaning.
Photo skills FTW:
I apologize again for the quality of the pictures, but I hope that even these pictures tell a story of how much oil ends up in the engine via the EGR.
All in all I cleaned about 200g or tar-looking gunk from the intake duct using the flathead screwdriver, rags pushed through by a piece of old electrical cord and a broom handle before I used diesel to clean the last remnants
In order to remove the manifolds a few more steps are needed:
On the right side there is a ??? somethingsomething, any way it is clearly made in the USA and is currently in our way, unclip it and remove it from its bracket.
After removing the bracket, unscrew all 8 bolts for each manifold using a T30 bit or other T30 tool narrow and long enough to reach down to all bolts (if in doubt check this first)
On each side there are coolant pipes attached to one of the bolts, these pipes make it alot harder to remove the manifold, but if care is taken they can be moved to the side enough to let the manifold come out (I was busy cursing, so I forgot to take pictures).
I used the flathead screwdriver to pry/wiggle the manifold loose and then removing them by turning/tilting them towards the cars midline, this make it easier to pull them from under all hoses without snagging on the coolent pipe attachments just mentioned.
After removing the manifold, wipe away all dirt and oil taking care not to let it drop into the engine.
This is what the removed manifold looked like, again I blame EGR, the manifold flaps themselves did not have as much play as I feared and moved reasonably well, It may have been enough to just replace the links, but I would have had to remove the manifold to check either way...
Putting it back together:
When mounting the new mainfolds, use a torque wrench set to 9nm, apply som loctite blue (or similiar threadlock) to the threads and tighten in a cross wise fashion starting with the middle two bolts and moving outwards.
The swirl flap motors do not need threadlock on the bolts, they screw in to the plastic manifold, but do not forget to connect the glow plugs before mounting the motors.
Make sure you get the fuel piping back in its original place, not just put it on top of the other lines.
The two mounts for the engine cover are made out of plastic, use a T40 bit and very gentle force or they will crack when you mount them.
Once the repair is finished the car will take some time to start as air is being purged from the system, I had to crank for about 30seconds before the car would start.
All in all this repair cost me about �300 and took 3.5hrs. If you skip the intake duct cleaning and lunch, it will probably take about 2.5hrs.
I did the repair standing outside in my driveway using tools I already had in my toolbox, for creature comfort I would recommend a garage or warmer climate, but apart from that the process was quite easy and knowing I saved more about �1500 for less than 4 hours of work definitely made it worth it.
i have the same issue with my a6 does the swirl flap motor affects performance and economy
A quick google told me that this was due to failure of the linkage for the intake manifold "swirl" flaps,
as explained so well by the company "airshox" who sell replacement intake manifolds:
Normally the assembly fails at the ball joint highlighted by the red arrows, but the swirl flab bearings may also wear out.
At 130000km some wear like this is to be expected.
The purpose of the swirl flaps is to ensure a correct mixture of fuel and air by limiting the amount of
air that can pass though the engine, starting at 1250RPM the flaps start to open,
and reach fully open at about 2750RPM.
These flaps are moved by two electrical motors controlled by the ECU
and sensors monitor the current position of the flaps.
Unfortunately (for anyone owning an Audi 3.0TDI in a country where vehicle roadworthiness and emissions testing is performed yearly) the ECU will turn on the CEL light if the actual position of the flaps differ by more than two percent, and if the CEL light is on, you fail the roadworthiness test.
While this was all a somewhat interesting piece of automotive engineering
I had my hands busy and decided to contact my local Audi dealership.
Let make one thing clear...I live in Sweden, driving an Audi a8 to a mechanic and asking for a quote is about as stupid as informing a great white that you are made out of meat...
The quote read: �1200 ($1500) for parts PLUS about 6-8hours of work, for a total of about �1800...
I contacted ?????? ? ??????????? ?? ?????????? ( I am not affiliated in any way, they are based in bulgaria, speak english and seemed very service minded).
I got a quote for �280 including new gaskets and shipping within the EU provided I would return my old faulty manifolds to them for repair, and it may be just me, but a price difference of about �1000 got me thinking, how hard could it possibly be to buy the parts and do the repair myself?
I searched the internet, and found bits and pieces on the procedure, but still did not feel confident dissasembling the engine of my precious A8, that�s when I decided on documenting this, how hard could it be? it turns out, not that hard at all...
Now as far as pictures go, I know they are blurry, conditions could have been better, but due to a pending roadworthiness test I had to do this in my driveway, it was 3 degrees centigrade, with 10m/s winds and using my cellphone as a camera. atleast the show on the ground meant I had plenty of reflected daylight...
Enough with the foreplay, here goes...
Tools needed:
Magnet tool - comes in handy, if you drop a bolt on the A8, it will probably end up in the belly pan, and you will not be able to retrieve it.
Ratchet wrench and extension - with holder for the torx and hex bits
17mm and 19mm wrench - for disconnecting the fuel lines
Bent nose pliers - needed for disconnecting and connecting the glow plug cables
Flathead screwdriver - to pry the manifold flap linkage off
Torque wrench - set to 9nm to avoid overtightening the manifold bolts, since it is made out of plastic.
T25, T30 and hex 5mm bits - these need to by narrow to get to where the bolts are, had they been any shorter the bitholder of the extension would have gotten in the way.
Not pictured:
A T40 bit used to tighten the engine cover mounting lugs (could have used hand force and pliers)
Items used to clean the intake duct - rags, old electrical cord and a broom handle.
When you order a replacement manifold from airshox, this is what you get:
But fear not, it comes assembled..
I ordered mine with a new gasket, and that was also in place when the manifold arrived, and the look and feel of the assemly is as new, if they remanufacure they are doing a good job at it:
Lets pop the hood:
Some of the components highlighted, there are actually two manifolds down there too, and according to the manual, even an engine under all those wires and hoses...
The fuel line highlighed will need to be removed shortly
First remove fuel lines and move intake duct out of the way
The blue arrows point to the fuel pipes that need to be removed using 17 and 19mm wrenches, the end of one of the pipes is out of the picture to the top right, I am sure you can find it.
Unclip all the cables, but make note of where they go.
Next, loosen the intake by removing all bolts maked by red arrows, this should allow the intake to swing out of the way.
Note that two of the 10 black bolts are slightly longer, they are used to hold the intake in place (bottom two red arrows on the intake duct)
Use the magnet tool, if you drop the bolts in the engine bay you may never find them...
First oops:
The EGR Hose (webbed) has a metal shim/gasket...if you remove the bolts you will hear it making its way down the engine bay never to be seen again....take note ( I didn't)
Next remove the swirl flap motors:
Remove the swirl flap motors by unclipping the linkage and removing the 3 screws, on one side there is a metal bracket over the motor, it does not need to be removed as you can move the motor out of the way without issue:
After moving the motors out of the way, use the bent nose pliers to disconnect all 6 glow plugs, just remember when reassembling to connect them back before you mount the swirl flap motors again
Lets see what we have:
Fuel lines marked in blue, removed
Intake duct removed from the throttle body ( marked in red ) this was not part of the plan, but on disassembly I found loads of tar looking gunk in the intake and decided to remove it for cleaning.
Photo skills FTW:
I apologize again for the quality of the pictures, but I hope that even these pictures tell a story of how much oil ends up in the engine via the EGR.
All in all I cleaned about 200g or tar-looking gunk from the intake duct using the flathead screwdriver, rags pushed through by a piece of old electrical cord and a broom handle before I used diesel to clean the last remnants
In order to remove the manifolds a few more steps are needed:
On the right side there is a ??? somethingsomething, any way it is clearly made in the USA and is currently in our way, unclip it and remove it from its bracket.
After removing the bracket, unscrew all 8 bolts for each manifold using a T30 bit or other T30 tool narrow and long enough to reach down to all bolts (if in doubt check this first)
On each side there are coolant pipes attached to one of the bolts, these pipes make it alot harder to remove the manifold, but if care is taken they can be moved to the side enough to let the manifold come out (I was busy cursing, so I forgot to take pictures).
I used the flathead screwdriver to pry/wiggle the manifold loose and then removing them by turning/tilting them towards the cars midline, this make it easier to pull them from under all hoses without snagging on the coolent pipe attachments just mentioned.
After removing the manifold, wipe away all dirt and oil taking care not to let it drop into the engine.
This is what the removed manifold looked like, again I blame EGR, the manifold flaps themselves did not have as much play as I feared and moved reasonably well, It may have been enough to just replace the links, but I would have had to remove the manifold to check either way...
Putting it back together:
When mounting the new mainfolds, use a torque wrench set to 9nm, apply som loctite blue (or similiar threadlock) to the threads and tighten in a cross wise fashion starting with the middle two bolts and moving outwards.
The swirl flap motors do not need threadlock on the bolts, they screw in to the plastic manifold, but do not forget to connect the glow plugs before mounting the motors.
Make sure you get the fuel piping back in its original place, not just put it on top of the other lines.
The two mounts for the engine cover are made out of plastic, use a T40 bit and very gentle force or they will crack when you mount them.
Once the repair is finished the car will take some time to start as air is being purged from the system, I had to crank for about 30seconds before the car would start.
All in all this repair cost me about �300 and took 3.5hrs. If you skip the intake duct cleaning and lunch, it will probably take about 2.5hrs.
I did the repair standing outside in my driveway using tools I already had in my toolbox, for creature comfort I would recommend a garage or warmer climate, but apart from that the process was quite easy and knowing I saved more about �1500 for less than 4 hours of work definitely made it worth it.
i have the same issue with my a6 does the swirl flap motor affects performance and economy ?
A quick google told me that this was due to failure of the linkage for the intake manifold "swirl" flaps,
as explained so well by the company "airshox" who sell replacement intake manifolds:
Normally the assembly fails at the ball joint highlighted by the red arrows, but the swirl flab bearings may also wear out.
At 130000km some wear like this is to be expected.
The purpose of the swirl flaps is to ensure a correct mixture of fuel and air by limiting the amount of
air that can pass though the engine, starting at 1250RPM the flaps start to open,
and reach fully open at about 2750RPM.
These flaps are moved by two electrical motors controlled by the ECU
and sensors monitor the current position of the flaps.
Unfortunately (for anyone owning an Audi 3.0TDI in a country where vehicle roadworthiness and emissions testing is performed yearly) the ECU will turn on the CEL light if the actual position of the flaps differ by more than two percent, and if the CEL light is on, you fail the roadworthiness test.
While this was all a somewhat interesting piece of automotive engineering
I had my hands busy and decided to contact my local Audi dealership.
Let make one thing clear...I live in Sweden, driving an Audi a8 to a mechanic and asking for a quote is about as stupid as informing a great white that you are made out of meat...
The quote read: �1200 ($1500) for parts PLUS about 6-8hours of work, for a total of about �1800...
I contacted ?????? ? ??????????? ?? ?????????? ( I am not affiliated in any way, they are based in bulgaria, speak english and seemed very service minded).
I got a quote for �280 including new gaskets and shipping within the EU provided I would return my old faulty manifolds to them for repair, and it may be just me, but a price difference of about �1000 got me thinking, how hard could it possibly be to buy the parts and do the repair myself?
I searched the internet, and found bits and pieces on the procedure, but still did not feel confident dissasembling the engine of my precious A8, that�s when I decided on documenting this, how hard could it be? it turns out, not that hard at all...
Now as far as pictures go, I know they are blurry, conditions could have been better, but due to a pending roadworthiness test I had to do this in my driveway, it was 3 degrees centigrade, with 10m/s winds and using my cellphone as a camera. atleast the show on the ground meant I had plenty of reflected daylight...
Enough with the foreplay, here goes...
Tools needed:
Magnet tool - comes in handy, if you drop a bolt on the A8, it will probably end up in the belly pan, and you will not be able to retrieve it.
Ratchet wrench and extension - with holder for the torx and hex bits
17mm and 19mm wrench - for disconnecting the fuel lines
Bent nose pliers - needed for disconnecting and connecting the glow plug cables
Flathead screwdriver - to pry the manifold flap linkage off
Torque wrench - set to 9nm to avoid overtightening the manifold bolts, since it is made out of plastic.
T25, T30 and hex 5mm bits - these need to by narrow to get to where the bolts are, had they been any shorter the bitholder of the extension would have gotten in the way.
Not pictured:
A T40 bit used to tighten the engine cover mounting lugs (could have used hand force and pliers)
Items used to clean the intake duct - rags, old electrical cord and a broom handle.
When you order a replacement manifold from airshox, this is what you get:
But fear not, it comes assembled..
I ordered mine with a new gasket, and that was also in place when the manifold arrived, and the look and feel of the assemly is as new, if they remanufacure they are doing a good job at it:
Lets pop the hood:
Some of the components highlighted, there are actually two manifolds down there too, and according to the manual, even an engine under all those wires and hoses...
The fuel line highlighed will need to be removed shortly
First remove fuel lines and move intake duct out of the way
The blue arrows point to the fuel pipes that need to be removed using 17 and 19mm wrenches, the end of one of the pipes is out of the picture to the top right, I am sure you can find it.
Unclip all the cables, but make note of where they go.
Next, loosen the intake by removing all bolts maked by red arrows, this should allow the intake to swing out of the way.
Note that two of the 10 black bolts are slightly longer, they are used to hold the intake in place (bottom two red arrows on the intake duct)
Use the magnet tool, if you drop the bolts in the engine bay you may never find them...
First oops:
The EGR Hose (webbed) has a metal shim/gasket...if you remove the bolts you will hear it making its way down the engine bay never to be seen again....take note ( I didn't)
Next remove the swirl flap motors:
Remove the swirl flap motors by unclipping the linkage and removing the 3 screws, on one side there is a metal bracket over the motor, it does not need to be removed as you can move the motor out of the way without issue:
After moving the motors out of the way, use the bent nose pliers to disconnect all 6 glow plugs, just remember when reassembling to connect them back before you mount the swirl flap motors again
Lets see what we have:
Fuel lines marked in blue, removed
Intake duct removed from the throttle body ( marked in red ) this was not part of the plan, but on disassembly I found loads of tar looking gunk in the intake and decided to remove it for cleaning.
Photo skills FTW:
I apologize again for the quality of the pictures, but I hope that even these pictures tell a story of how much oil ends up in the engine via the EGR.
All in all I cleaned about 200g or tar-looking gunk from the intake duct using the flathead screwdriver, rags pushed through by a piece of old electrical cord and a broom handle before I used diesel to clean the last remnants
In order to remove the manifolds a few more steps are needed:
On the right side there is a ??? somethingsomething, any way it is clearly made in the USA and is currently in our way, unclip it and remove it from its bracket.
After removing the bracket, unscrew all 8 bolts for each manifold using a T30 bit or other T30 tool narrow and long enough to reach down to all bolts (if in doubt check this first)
On each side there are coolant pipes attached to one of the bolts, these pipes make it alot harder to remove the manifold, but if care is taken they can be moved to the side enough to let the manifold come out (I was busy cursing, so I forgot to take pictures).
I used the flathead screwdriver to pry/wiggle the manifold loose and then removing them by turning/tilting them towards the cars midline, this make it easier to pull them from under all hoses without snagging on the coolent pipe attachments just mentioned.
After removing the manifold, wipe away all dirt and oil taking care not to let it drop into the engine.
This is what the removed manifold looked like, again I blame EGR, the manifold flaps themselves did not have as much play as I feared and moved reasonably well, It may have been enough to just replace the links, but I would have had to remove the manifold to check either way...
Putting it back together:
When mounting the new mainfolds, use a torque wrench set to 9nm, apply som loctite blue (or similiar threadlock) to the threads and tighten in a cross wise fashion starting with the middle two bolts and moving outwards.
The swirl flap motors do not need threadlock on the bolts, they screw in to the plastic manifold, but do not forget to connect the glow plugs before mounting the motors.
Make sure you get the fuel piping back in its original place, not just put it on top of the other lines.
The two mounts for the engine cover are made out of plastic, use a T40 bit and very gentle force or they will crack when you mount them.
Once the repair is finished the car will take some time to start as air is being purged from the system, I had to crank for about 30seconds before the car would start.
All in all this repair cost me about �300 and took 3.5hrs. If you skip the intake duct cleaning and lunch, it will probably take about 2.5hrs.
I did the repair standing outside in my driveway using tools I already had in my toolbox, for creature comfort I would recommend a garage or warmer climate, but apart from that the process was quite easy and knowing I saved more about �1500 for less than 4 hours of work definitely made it worth it.
wow you have to be very intelligent to do what you did and the detailed explanation.
Just bought a 2008 A5 and had this error code after a few days. Quoted �1600 by Audi for a repair. Just had a quick look myself following this guide and found one of the rods had disconnected from a swirl flap. Reconnected it and the code has gone! Thanks for this helpful post
I've had to do this already, and will be doing it again tomorrow - and this is THE BEST write-up I've ever seen.
I cleaned all my intakes out, but didn't have the replacement parts - so tomorrow I'll be replacing the swirl flaps and all moving parts and hopefully, that will be it for another 100,000 miles or so.
 02-22-2015, 03:29 AM