Audi Q5: How to Replace Brake Master Cylinder
Has your brake master cylinder failed, leaving you in a scary situation with failing brakes? This article will walk you through the process of replacing it.
This article applies to the Audi Q5 (2009-2016).
Even the modern master cylinder in a complicated vehicle like the Q5 is simple: a piston, a reservoir and a few seals. They rarely fail, but they can become less effective over time, with worn pistons and bores, and leaking seals. Master cylinders play an important role in your braking system, converting the force of your leg on the brake pedal to hydraulic pressure, which in turn pushes the pistons in the calipers. When it starts to go bad, you might notice some sponginess, or additional travel at the pedal. Before things get too bad, follow the steps below and replace that leaky master cylinder with a new one.

Materials Needed
- Turkey baster
- Assorted Torx bits and driver
- Ratchet
- Assorted common size sockets
- (2) adjustable wrenches
- New master cylinder
- Brake fluid
Step 1 – Locate the master cylinder
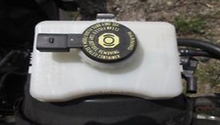
Of course, before you can replace the bad master cylinder you need to find it. Audi hides it below a plastic cover at the cowl, right up by the windshield. Look for the yellow screw-on cap. The cover just drops into place, so you just pull it up and slide it out, exposing the master cylinder, washer fluid bottle, and battery.

Figure 1. This yellow plastic cap is the master cylinder reservoir. 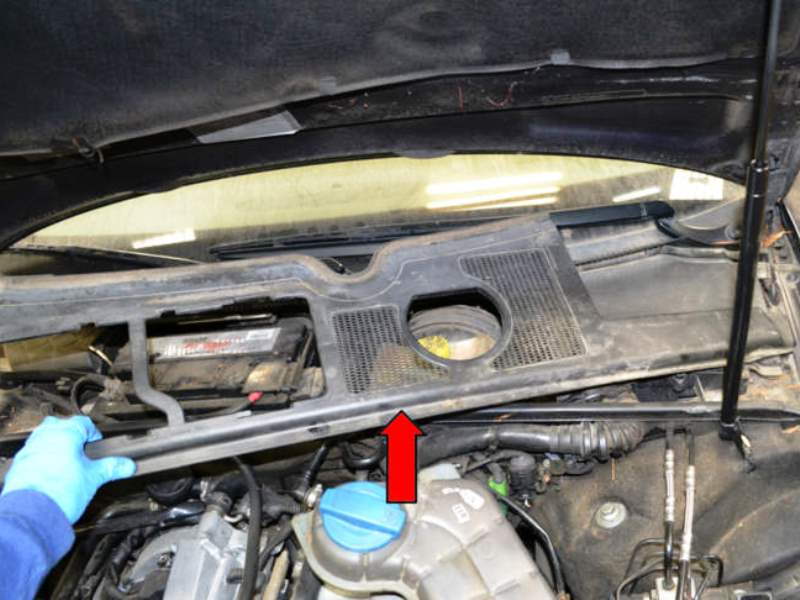
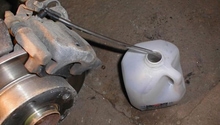
Figure 2. This is actually an A4, but the cowl cover and master cylinder are very similar.
Step 2 – Remove brake fluid reservoir
Remove the cap on the brake fluid reservoir and use a turkey baster to remove as much brake fluid as possible. This will minimize the mess you make when you remove it. Remove the cap, brake fluid sensor and hose from the reservoir, then pull the pin that connects it to the master cylinder. Pull the reservoir straight up till the barbed ends pull free from the grommets, then toward the front of the car to remove it.
Step 3 – Remove the master cylinder
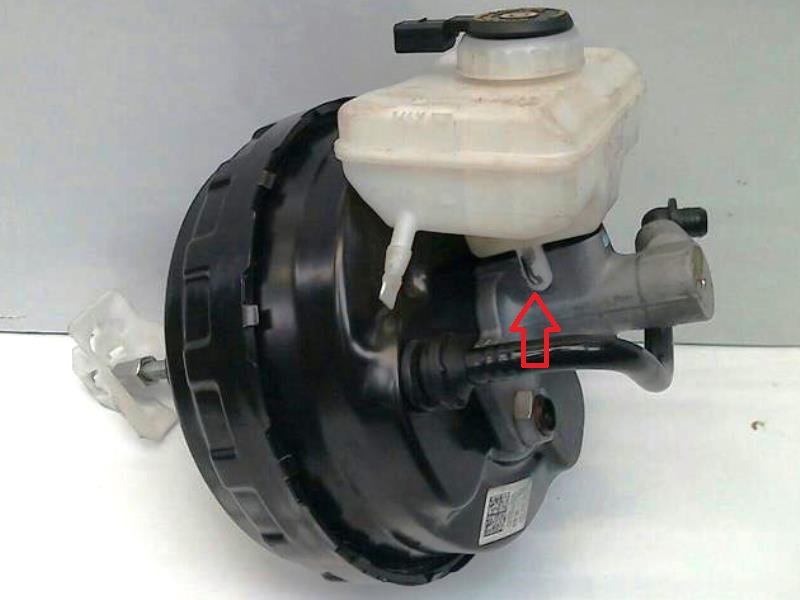
If your car has the sports suspension, you will need to remove the strut tower brace at this point to gain the clearance necessary to remove the master cylinder. The strut tower brace is held in place by two Allen head bolts on each side and a 10mm bolt on the firewall. Remove the two hard lines on the master cylinder, then unscrew the two hard lines on the other end that connect to the ABS block. Remove the two large nuts that hold the master cylinder to the booster, and you should be able to pull it free.
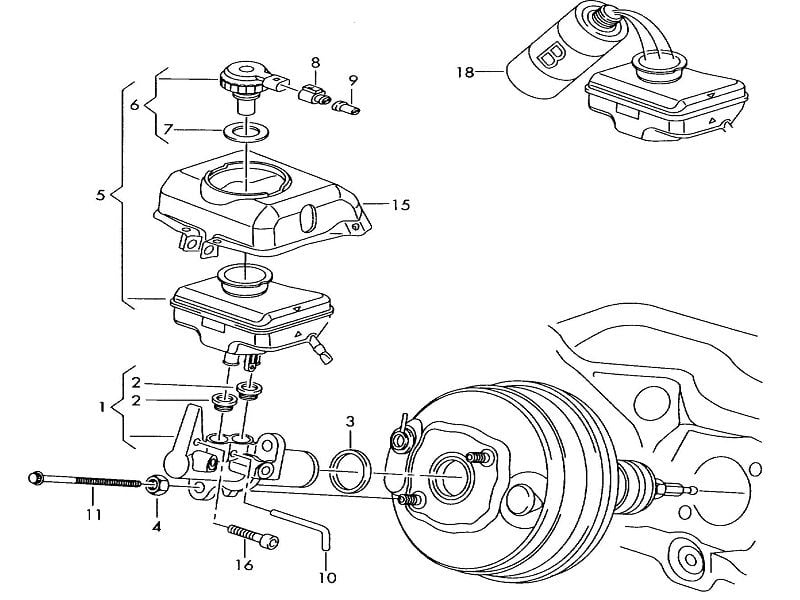
Figure 4. The large nuts (#4) hold the master cylinder to the vacuum booster. 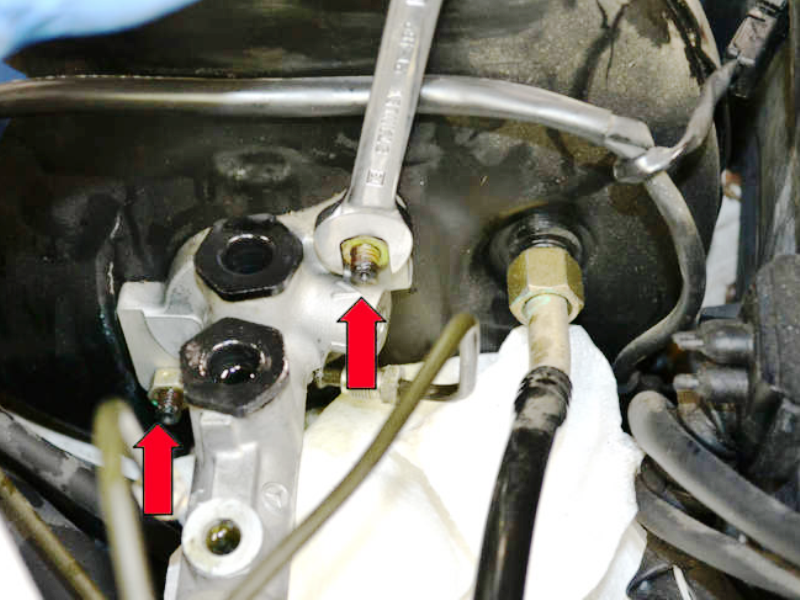
Figure 5. Typical Audi master cylinder nuts.
If you do have to replace the booster as well, then loosen and remove the small bolts inside the large nuts that hold the assembly to the firewall. Remove the knee bolster from underneath the steering wheel by removing the bolt in the fuse box and two bolts on the bottom of the bolster. Place one adjustable wrench on the inch long metal collar coming off the top of the brake pedal, and place the other wrench on the nut that keeps it tight. Remove the nut and spin the collar all the way off the rod. Remove the hose that attaches to the vacuum booster and pull the entire assembly out of the car.
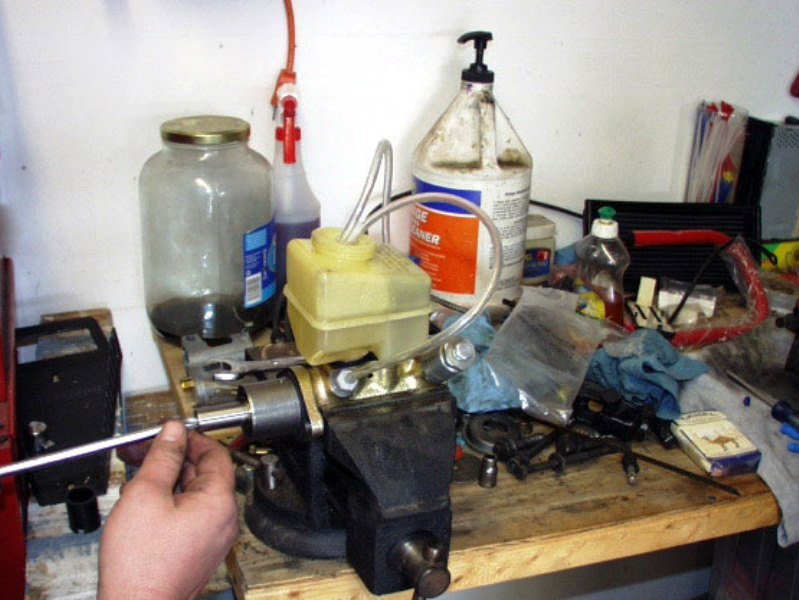
Step 4 – Bleed and install new master cylinder
Pop the old reservoir onto the new master cylinder and add some fluid. In order to make things easier, it is recommended you bench bleed the unit before installing it to the car. Do this by clamping it in a vice, and pressing in the piston with a large screwdriver. Typically, master cylinders come with plastic barb ends in the brake line outlets, so you can loop a clear hose up into the reservoir. For more detailed instructions, see this video: How to Bench Bleed a Master Cylinder.
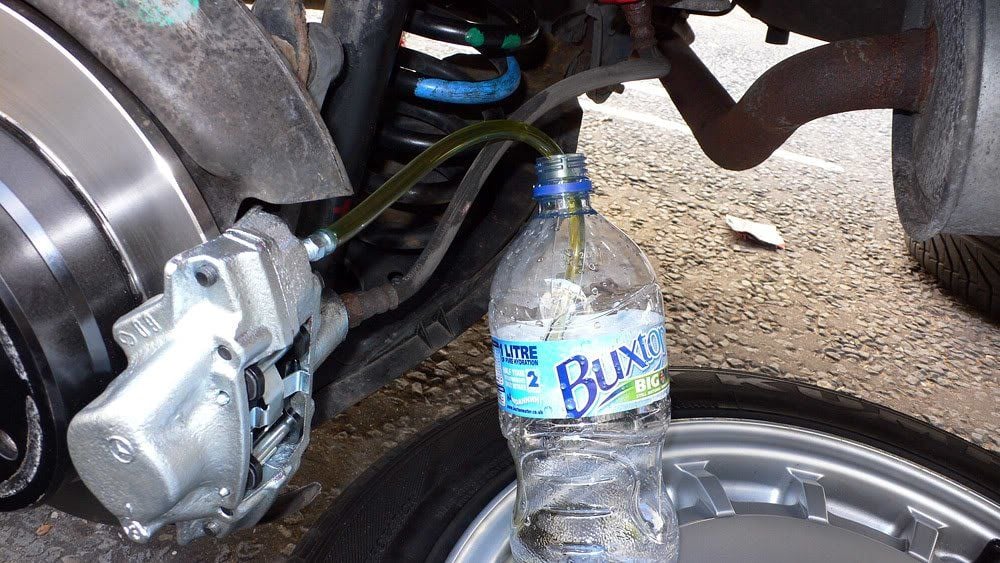
Put the new master cylinder in the place the old one was, and finger-tighten the nuts. Make sure the push rod is proper aligned, and tighten the bolts with the proper wrench. Fill the reservior, then work around the car and bleed all the lines, as outlined in this article: How to Replace Brake Fluid Brake.
If you also are replacing the booster, you need to make sure everything is properly adjusted before it is tight. Reinstall the brake pedal to the rod under the dash, but don't tighten it just yet. Reinstall the lines to the master cylinder and hand-tighten. At this point, once everything is lined up properly, go back and tighten all the nuts and bolts. Reinstall the hard lines to the ABS block, then reinstall the screws for the entire assembly back into the firewall. Reinstall the vacuum hose and the reservoir, then replace the reservoir nut, hose, and sensor. Bleed the brakes and ensure the brake fluid is filled to the fill line. If necessary, you can adjust the brakes using the collar attached to the brake pedal by spinning it up or down.
Related Discussions
- Replace Master Cylinder - AudiWorld
- Replacing Master Cylinder - AudiWorld