
 08-22-2016, 02:53 PM
Last edit by: IB Advertising
See related guides and technical advice from our community experts:
- Audi A4 B8 How to Remove Fixed Rear Seat<br>Step by step instructions for do-it-yourself repairs.

[Tutorial] Removing the fixed rear seat in an Audi A4 B8
09-08-2013, 10:29 PM
#1
Audiworld Junior Member
Thread Starter

Join Date: Apr 2011
Posts: 11
Likes: 0
Received 0 Likes
on
0 Posts
Hello all! Was recently working on the car, and figured I'd write this up to help anyone. Taking out the seat is actually pretty easy.
Tools needed:Time: 20-40 minutes if you have the tools.
People needed: 1, 2 would make it easier.
So you have the tools and are ready to dig in?! Lets do this!
1. Remove the rear seat bottom
So there you have it! It's not too much trouble, and you just turned your people carrier into a coupe. Congrats.
To put the seat back in, it's the exact same process just reversed. Though, while it is a one person job to take the seat out, I would recommend having some help putting the seat back in. Also, putting the rear seat bottom back in is a major PITA because you have to line up the seat belt locks with the holes in the seat. Took me about 5 minutes to work the rear seat bottom into place.
Tools needed:
- Socket Wrench -- 9/16 socket
- (same size as a T40 Torx)*
- (same size as a T50 Torx)**
*Sadly you will need a triple square. The screw fits a T40 Torx, but it won't grip it...Was lucky to enough to find a Triple Square set at a local CarQuest. It's the second size in the Lisle pack.
**I believe that is the right size. I have a big Torx set all the way up to 60, and these screws worked with a regular torx! The size was either T47 or T50.
**I believe that is the right size. I have a big Torx set all the way up to 60, and these screws worked with a regular torx! The size was either T47 or T50.
People needed: 1, 2 would make it easier.
So you have the tools and are ready to dig in?! Lets do this!
1. Remove the rear seat bottom
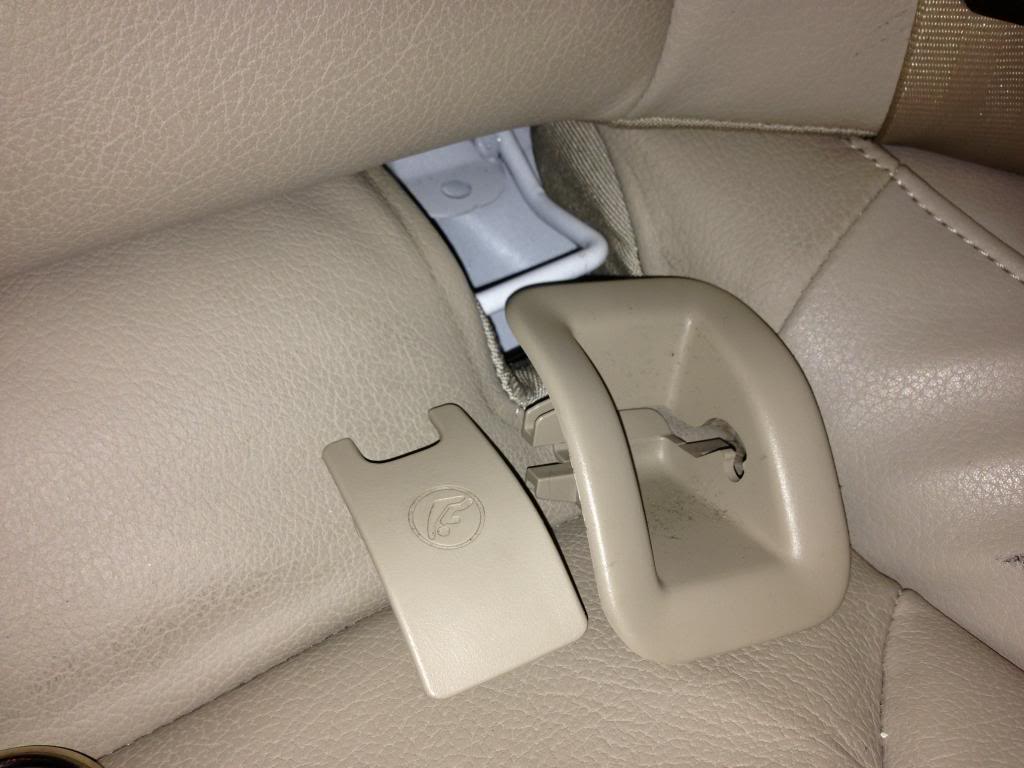
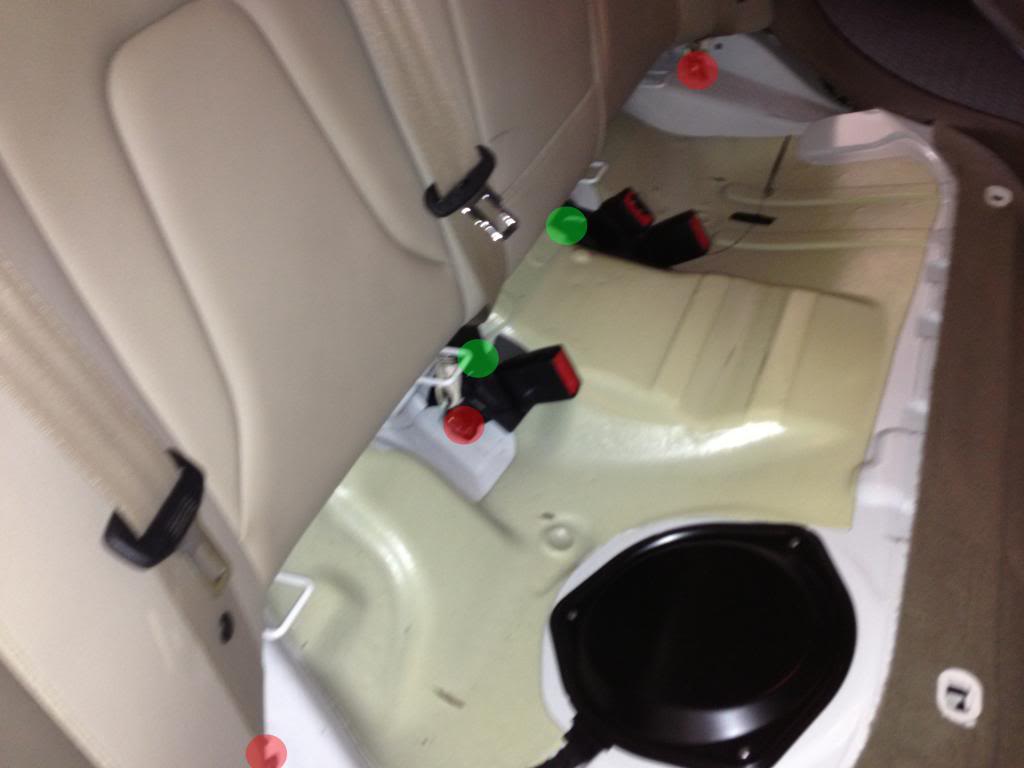
To remove the rear seat bottom, you need to take off the child seat anchor covers. The lids pop off real easy, and with a bit of work you can get the whole plastic anchor piece off. I had to put my hand between the seat bottom and back, and kind of put the piece at an angle. With a bit of work, you'll have it out in no time! Do this for the 4 anchors.
Removing the anchor cover.
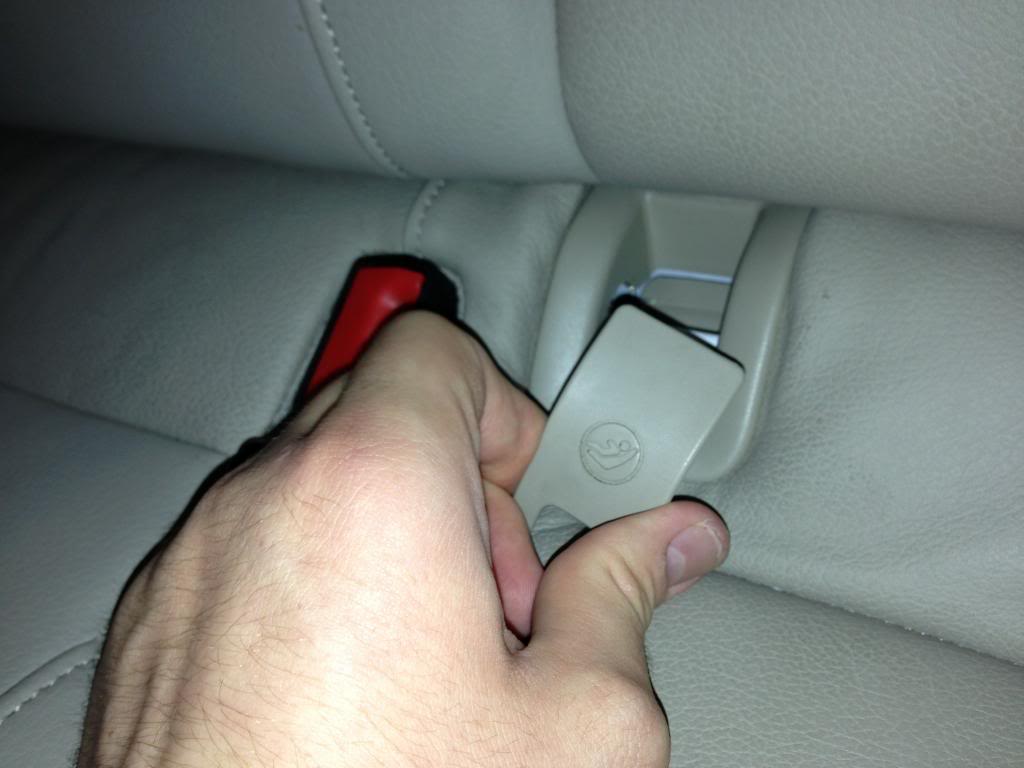
Removing the anchor.
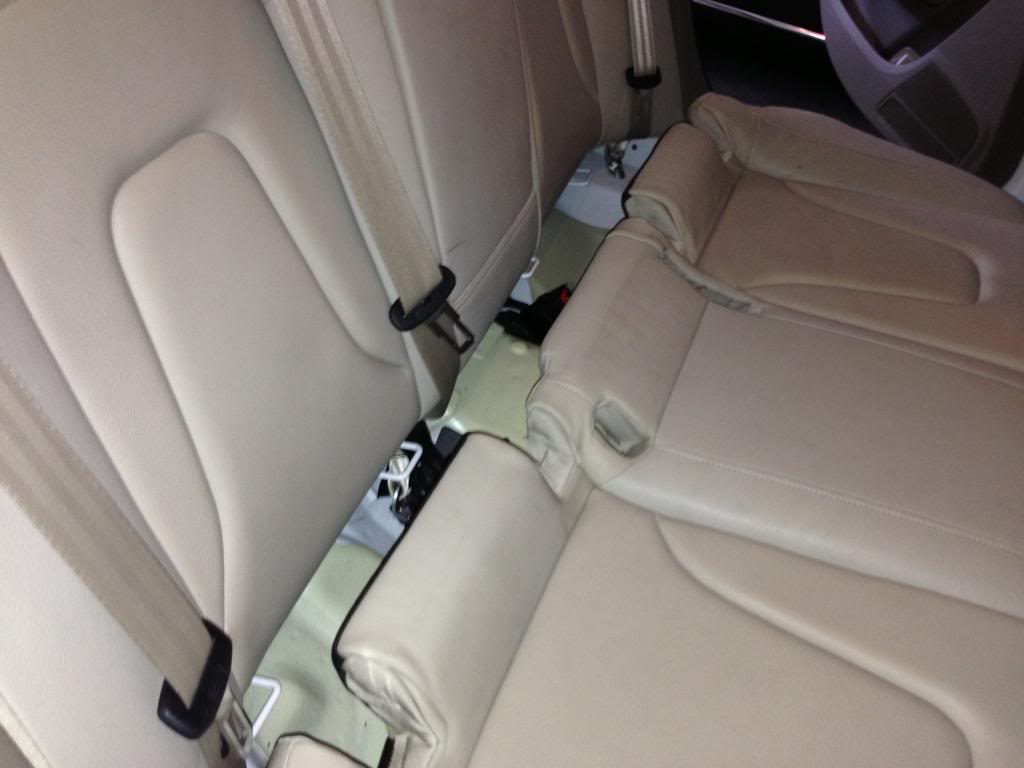
Once you have those removed, You will need to give a good pull up to the front of the rear seat bottom. There are clips that hold the seat in place, and you want to remove the seat from the clips. You may feel like you might break something, but just pull and you'll be fine. Do try to apply even pressure on both sides though. I did the left side a little bit, and then moved to the right side and pulled it all the way out, and then moved back to the left. Once you have that done, go ahead and pull the rear seat bottom out.
Rear seat detached and ready to be removed from the car.
2. Remove the rear seat back.Removing the anchor cover.
Removing the anchor.
Once you have those removed, You will need to give a good pull up to the front of the rear seat bottom. There are clips that hold the seat in place, and you want to remove the seat from the clips. You may feel like you might break something, but just pull and you'll be fine. Do try to apply even pressure on both sides though. I did the left side a little bit, and then moved to the right side and pulled it all the way out, and then moved back to the left. Once you have that done, go ahead and pull the rear seat bottom out.
Rear seat detached and ready to be removed from the car.
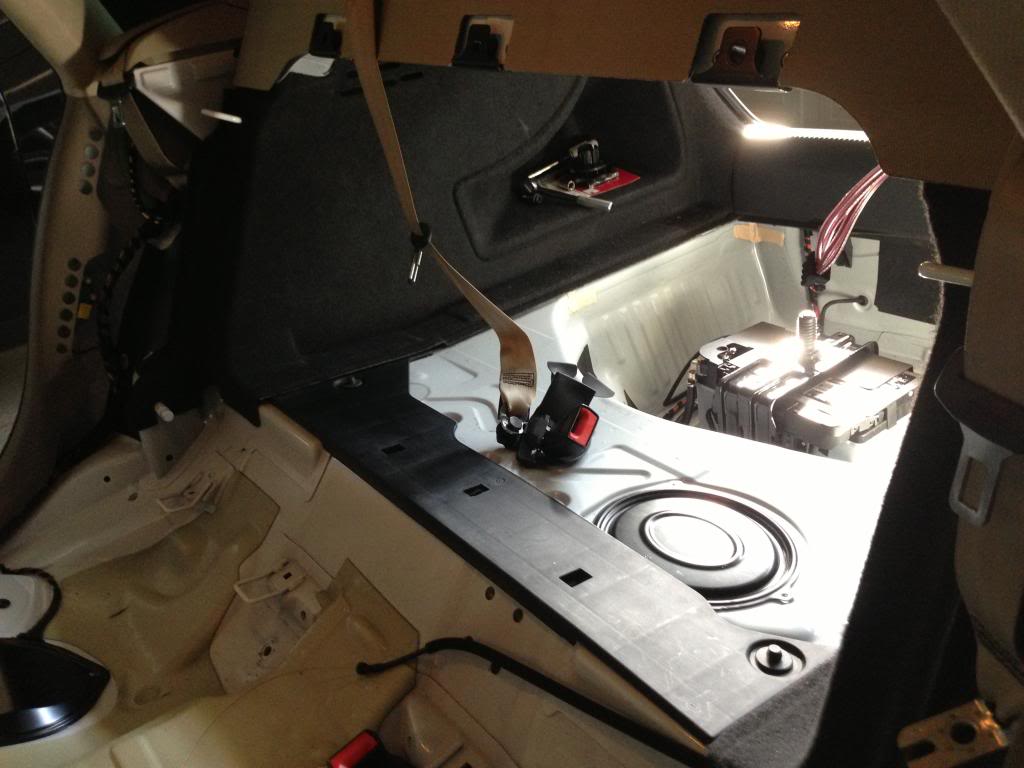
This is actually pretty easy, but it's a PITA due to needed specialized tools. If you have anything mounted to your rear seat, such as an aftermarket sound system amp or anything, be sure to disconnect the wires or unmount it. You will be physically removing the wall between the cabin and the trunk.
Here is the location of all the bolts/screws you will need to work with.
In the cab:
In the trunk:
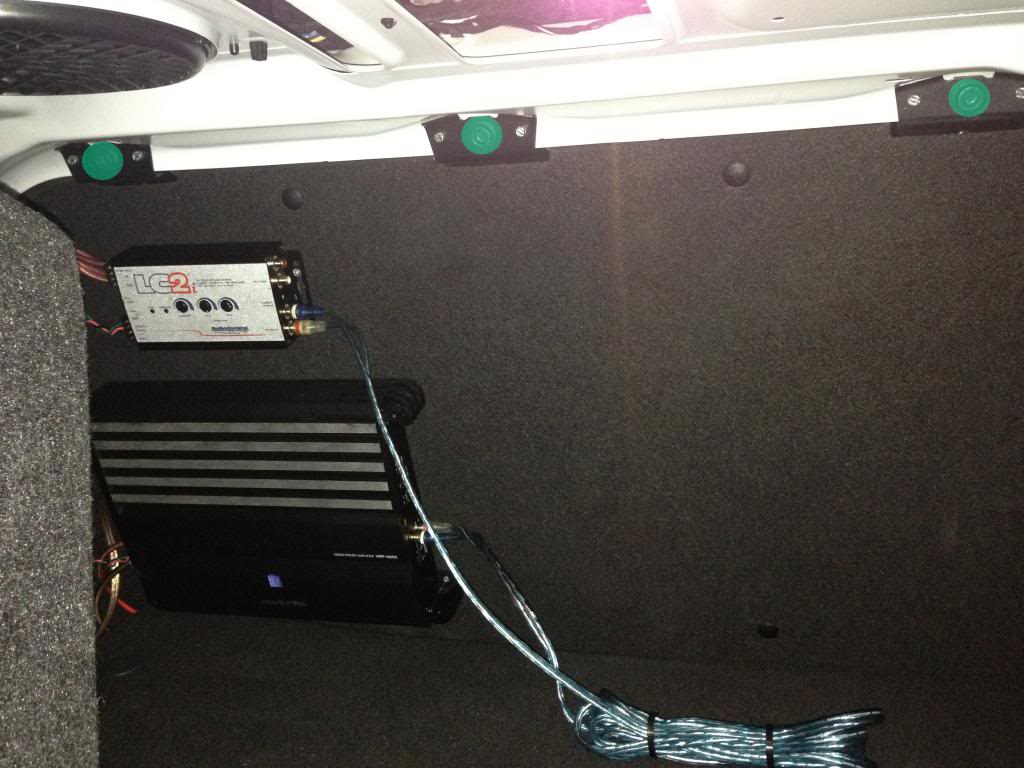
Start by taking the 3 screws off in the trunk. These should be super easy to take off. Once you are done with that, you are officially done with entering the car through the trunk. Congrats!
Next, you want to remove the seat belts from being bolted to the car. As I'm sure you can imagine, they take quite a bit of force to get moving. I used a, around 9 inch, extension for my socket wrench. Once you are done, move the seat belts out of the way. I put the middle seat belt on the rear deck while the others I let hang in the doorway.
Now you get to unscrew the T40 sized Triple Square screws. This is where it gets fun. They don't take much effort to turn, but the seat is officially free once you take them off. It will stay in its position so don't worry about catching it, but don't move it just quite yet.
Come at the seat from the driver's side and lift carefully about 3-5 inches away from it's position in the car. On the bottom of the seat is where the emergency trunk release is fixed. Unlatch that from the seat. You are officially free, take that seat out!
This is what your beautiful Audi will now look like:Here is the location of all the bolts/screws you will need to work with.
9/16th's Bolt (Seat Belts)
Triple Square (T40 Torx size)
Triple Square (T47 or T50 size) *Can get away with using Torx
Triple Square (T40 Torx size)
Triple Square (T47 or T50 size) *Can get away with using Torx
In the cab:
In the trunk:
Start by taking the 3 screws off in the trunk. These should be super easy to take off. Once you are done with that, you are officially done with entering the car through the trunk. Congrats!
Next, you want to remove the seat belts from being bolted to the car. As I'm sure you can imagine, they take quite a bit of force to get moving. I used a, around 9 inch, extension for my socket wrench. Once you are done, move the seat belts out of the way. I put the middle seat belt on the rear deck while the others I let hang in the doorway.
Now you get to unscrew the T40 sized Triple Square screws. This is where it gets fun. They don't take much effort to turn, but the seat is officially free once you take them off. It will stay in its position so don't worry about catching it, but don't move it just quite yet.
Come at the seat from the driver's side and lift carefully about 3-5 inches away from it's position in the car. On the bottom of the seat is where the emergency trunk release is fixed. Unlatch that from the seat. You are officially free, take that seat out!
So there you have it! It's not too much trouble, and you just turned your people carrier into a coupe. Congrats.
To put the seat back in, it's the exact same process just reversed. Though, while it is a one person job to take the seat out, I would recommend having some help putting the seat back in. Also, putting the rear seat bottom back in is a major PITA because you have to line up the seat belt locks with the holes in the seat. Took me about 5 minutes to work the rear seat bottom into place.
 11-22-2014, 07:41 AM
#2
AudiWorld Newcomer

Join Date: Nov 2014
Posts: 1
Likes: 0
Received 0 Likes
on
0 Posts
experienced difficulty popping the seat cushion.
So caution to the wind I gave it a yank, only to find that i had broken the two retaining clips under the seat.
So now I need to know where I can purchase replacements.
So caution to the wind I gave it a yank, only to find that i had broken the two retaining clips under the seat.
So now I need to know where I can purchase replacements.
02-20-2015, 11:03 AM
#3
Club AutoUnion

Join Date: Feb 2015
Location: Akron, OH
Posts: 2
Likes: 0
Received 0 Likes
on
0 Posts
How about the front seats? I bought a set of sport seats from a 2013 A4. I need to swap into my 2014 A4. I may need to change the seat cushions (foam) and heating element. Not sure how you remove the leather. Also, what are the procedures for switching the seats? You may contact me directly via text at 330-256-8860 or email: malenhandyman@yahoo.com
Thank you!
Thank you!
03-08-2015, 01:55 PM
#4
AudiWorld Junior Member

Join Date: Feb 2015
Posts: 17
Likes: 0
Received 0 Likes
on
0 Posts
Awesome write up!
to add to this...
I had to replace my Seat belts due to air bag deployment, you do NOT need to remove the rear seat back, only the bottom.
but removing the cover for where the tensioner is is HORRIBLE due to how little space there is
to add to this...
I had to replace my Seat belts due to air bag deployment, you do NOT need to remove the rear seat back, only the bottom.
but removing the cover for where the tensioner is is HORRIBLE due to how little space there is
05-17-2015, 04:28 PM
#5
AudiWorld Newcomer

Join Date: Nov 2006
Posts: 9
Likes: 0
Received 0 Likes
on
0 Posts
Related, but different - Any thoughts on why the drivers side back seat child anchor sticks up higher than the others and the cover doesn't fit? I'm sure it's been covered, but just bought a 2010 Avant and am clueless. Big hammer? It's a welded in piece.
05-18-2015, 12:55 PM
#6
AudiWorld Senior Member

This was pretty interesting as I didn't know the A4's came with a fixed rear seat. All of the ones we looked at before purchasing both A4's all had fold down rear seats. Learned something new .
09-06-2015, 08:29 AM
#7
AudiWorld Newcomer

Join Date: Sep 2015
Posts: 1
Likes: 0
Received 0 Likes
on
0 Posts
Where did u find seat belt replacements?
Trending Topics
 05-14-2018, 03:57 PM
#9
AudiWorld Super User

You mean the seat bench? No, the opening to the trunk is only behind the seat backs.

Thread
Thread Starter
Forum
Replies
Last Post
HoTTrod
TT (Mk3) Discussion
11
09-07-2015 10:47 AM
akitamike
Vehicles For Sale - Archive (NO NEW POSTS HERE)
3
09-05-2015 03:01 PM
Audi A6 2012 A6 3.0T Prestige (Atlanta)
QuickChange
Vehicles For Sale - Archive (NO NEW POSTS HERE)
1
09-04-2015 06:51 PM