Audi A4 B7: Downpipe/Test Pipe Reviews and How to Install
For that last little bit of power on the track, or where you don't have to pass smog checks, replace your factory catalyst equipped downpipe with a race only open version. Or, use an aftermarket catalytic converter version and still get a nice boost in power as well as sound.
This article applies to the Audi A4 B7 (2005-2009).
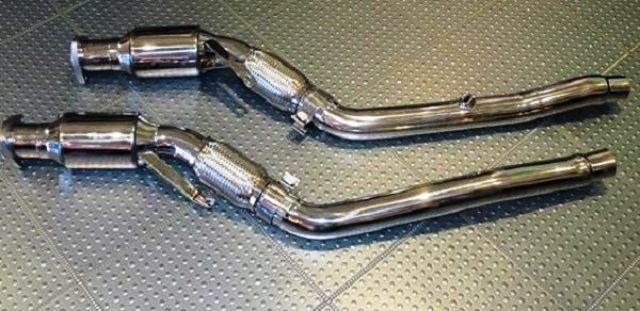
If you are looking for an inexpensive way to increase the horsepower under your hood, consider an aftermarket downpipe. This metal tube between the exhaust header and the rest of the system (usually containing the catalytic converters) can dramatically increase the performance of your A4. The factory piece is heavy, and restrictive, to last 100,000 miles and deliver a quiet interior at cruising speeds. The aftermarket models are less restrictive, so they are louder and flow more gasses. Many of them remove the catalytic converters as well, which makes them only legal for off-road, race track use, but makes them even lighter and better performing. If you are ready for a boost in power and a faster spooling turbo, read on and learn how to install a new downpipe.
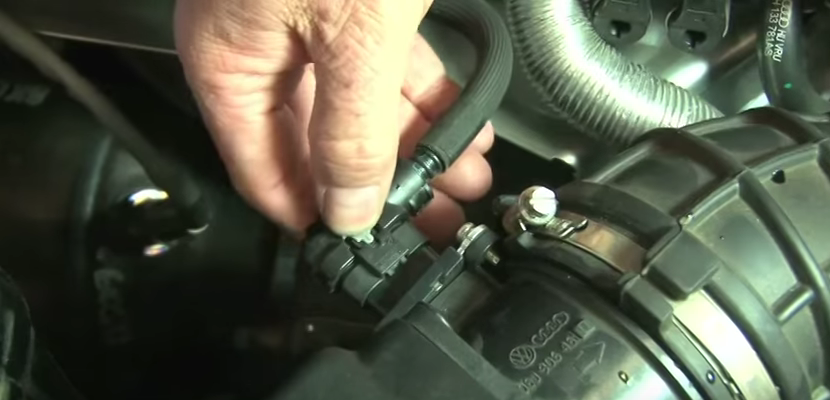
Disconnect the mass air flow sensor; it pulls right out.
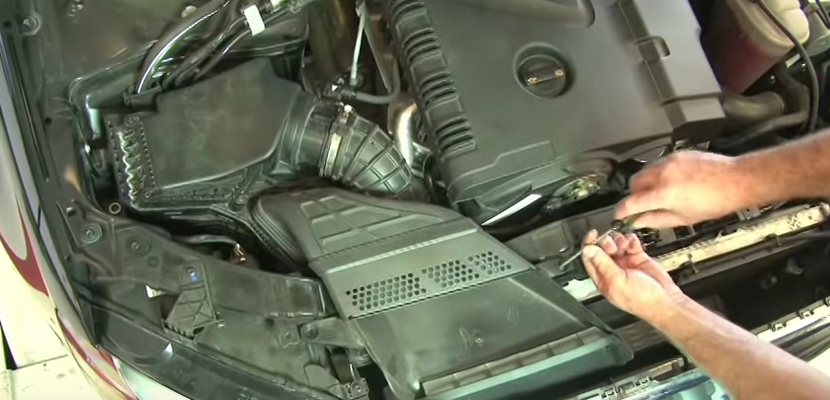
Take the top off of the airbox and remove the air filter.
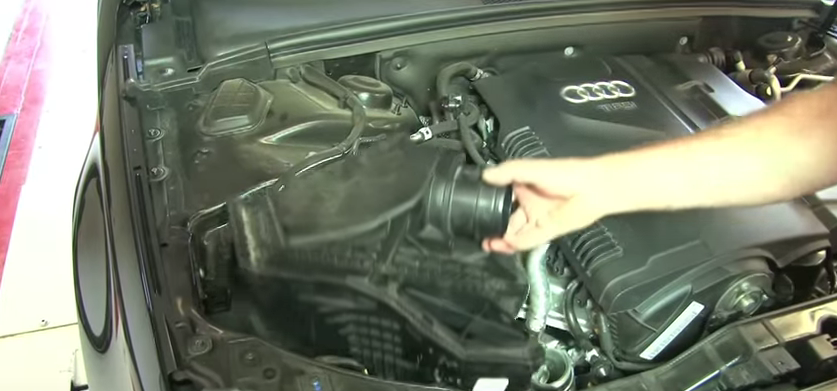
Remove the airbox assembly and set it aside.
Figure 1. Remove the air intake scoop.
Figure 2. Squeeze and pull out the MAF sensor.
Figure 3. Remove the top of the airbox, filter and lower airbox assembly.
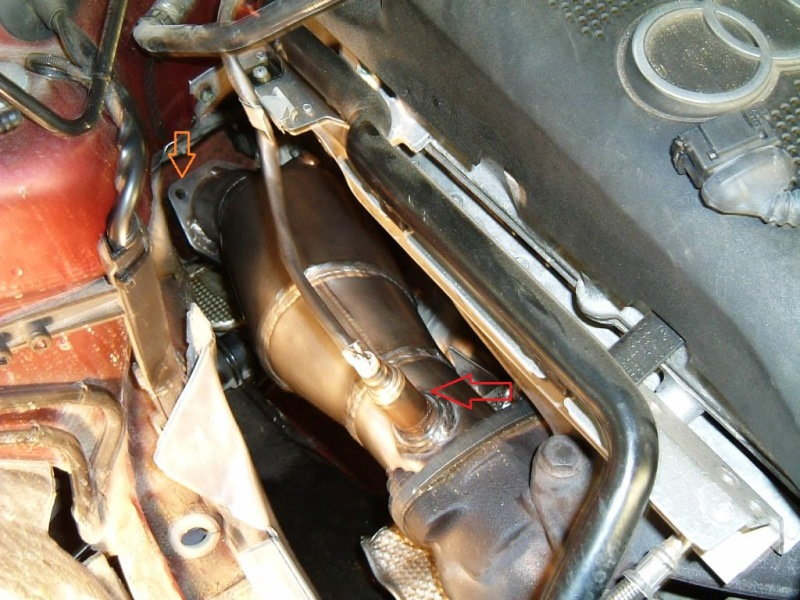
Step 2 – Disconnect the O2 sensor and downpipe from turbo
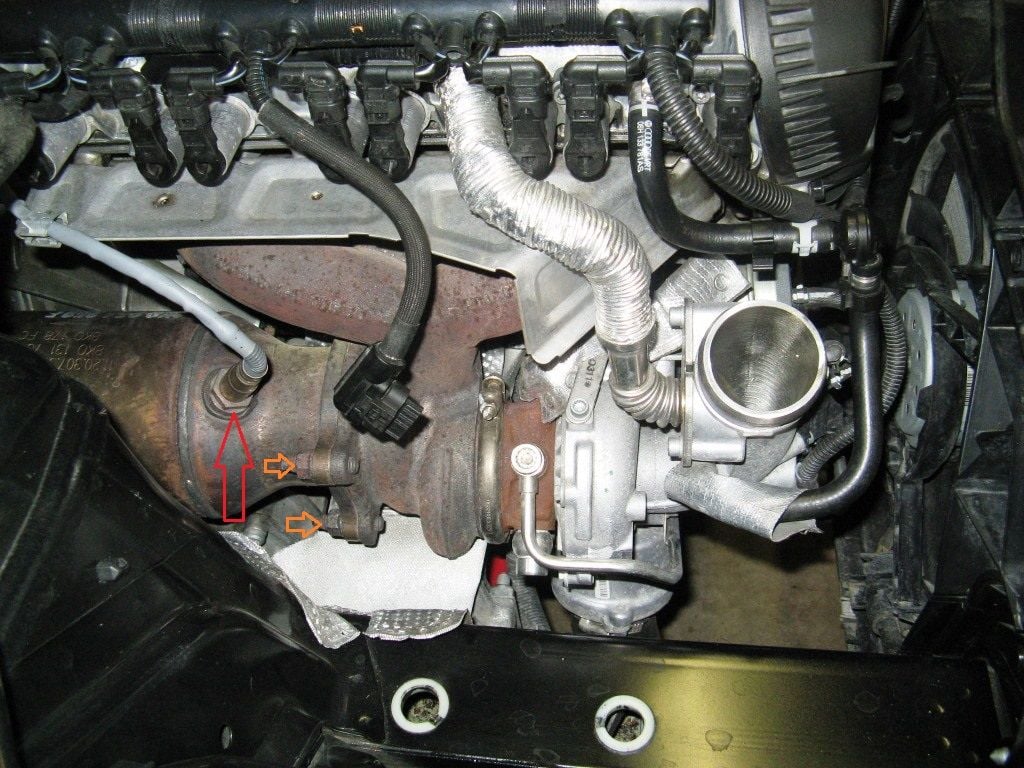
Disconnect the front O2 sensor at the wiring harness connection.
Pull the O2 wire out of the retaining clips up under the lip of the hood and tuck the entire wire down to the downpipe.
Remove the two bolts that mount the downpipe onto the turbo charger.
Figure 4. Red arrow is the top O2 sensor, and orange arrows are mounting bolts (one hidden).
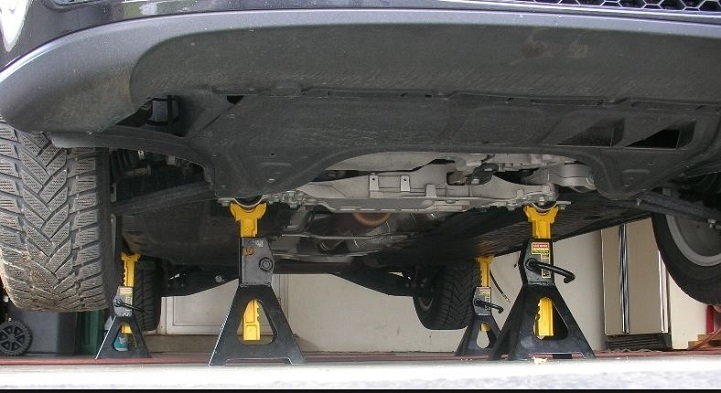
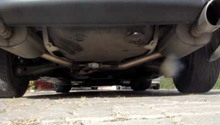
Step 3 – Jack up car and remove belly pan
With the top mounting nuts off, now you'll need to get under the car to finish the job. Use a hydraulic floor jack at the manufacturer's suggested location and place on jack stands. Never work under your car using only a floor jack. Always use jack stands. Most Audis have a plastic belly pan covering part of the engine and exhaust, remove the screws and set it aside for better access.
Figure 5. Get the front end up and on jack stands, then remove belly pan.
Step 4 – Remove heat shield and lower mounting bolts
The lower mounting bolts may be hidden behind the heat shield, so it needs to be removed.
The lower mounting bolts can be hard to get to from the top or the bottom.
You may need to use a ratchet with a long extension and socket, or you may need a box wrench.
Figure 6. You can see the bolt holes, but you might not be able to reach them from here.
Figure 7. The V6 motor has two downpipes, but the lower bolts are in the same place.
Step 5 – Remove exhaust brackets and clamp
Remove the front OEM exhaust hanger via the two bolts.
Remove the mid and rear exhaust hangers by taking off the four bolts that mount each brace in position.
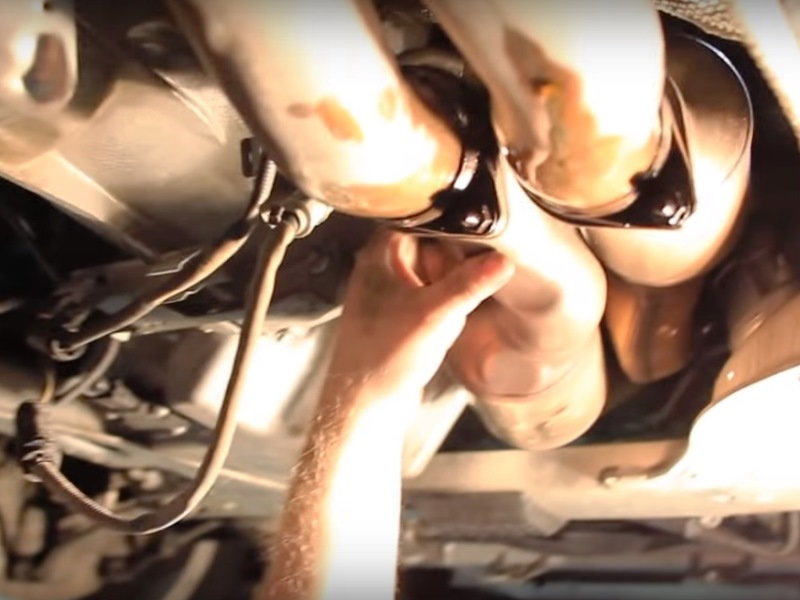
At the end of the mid pipe, just behind the rear brace, is the collar that holds the two pipes together; loosen the two nuts.
Figure 8. Just loosen these two nuts on the clamps so the pipe can slide.
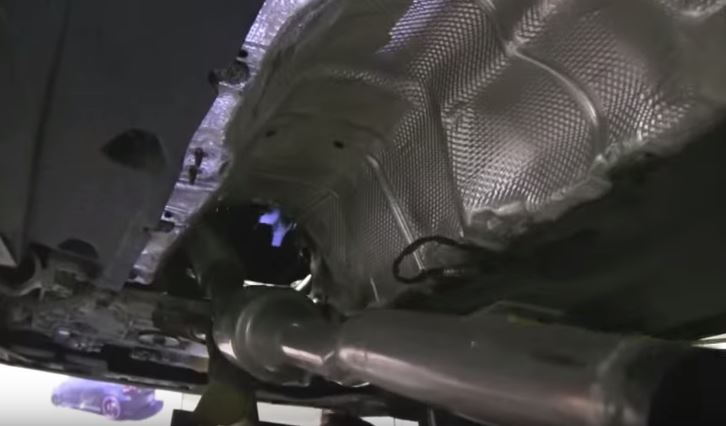
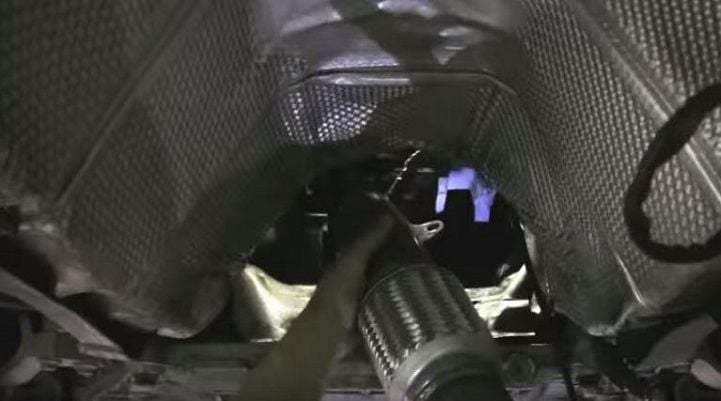
Step 6 – Remove O2 sensor and downpipe
Use a 22mm wrench to remove the O2 sensor from the existing downpipe and tuck it out of the way.
From the rear end of the downpipe, pull the sleeve away and slide the pipe out. Set the sleeve aside.
You should now be able to pull the downpipe away from the turbo flange and pull it out.
With the right motions, you can remove the pipe from above as well, if that is easier.
You will need to turn the downpipe as you pull it out.
Figure 9. Twist the downpipe as you pull it to get it out.
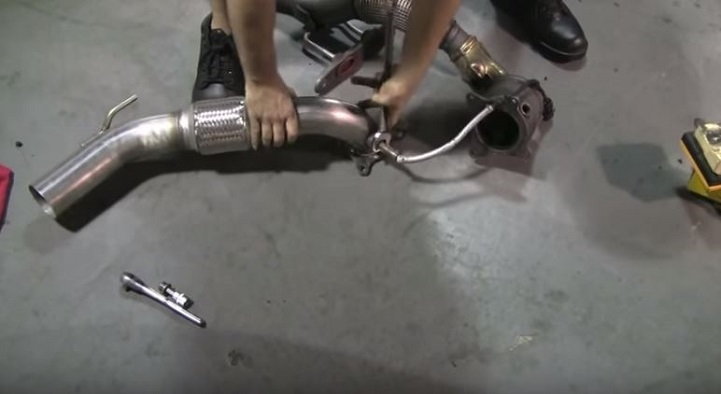
Step 7 – Remove primary O2 sensor and hanger from old downpipe to install on new
Use the 22mm wrench to remove the primary O2 sensor from the old downpipe.
Remove the exhaust hanger from the old downpipe.
Put some anti-seize on the threads of the O2 sensor and install it into the new downpipe.
Replace the exhaust hanger onto the new downpipe.
Figure 10. Install the O2 sensor onto the new downpipe. Use anti-seize on the threads.
Figure 11. Install the exhaust hanger onto the new downpipe.
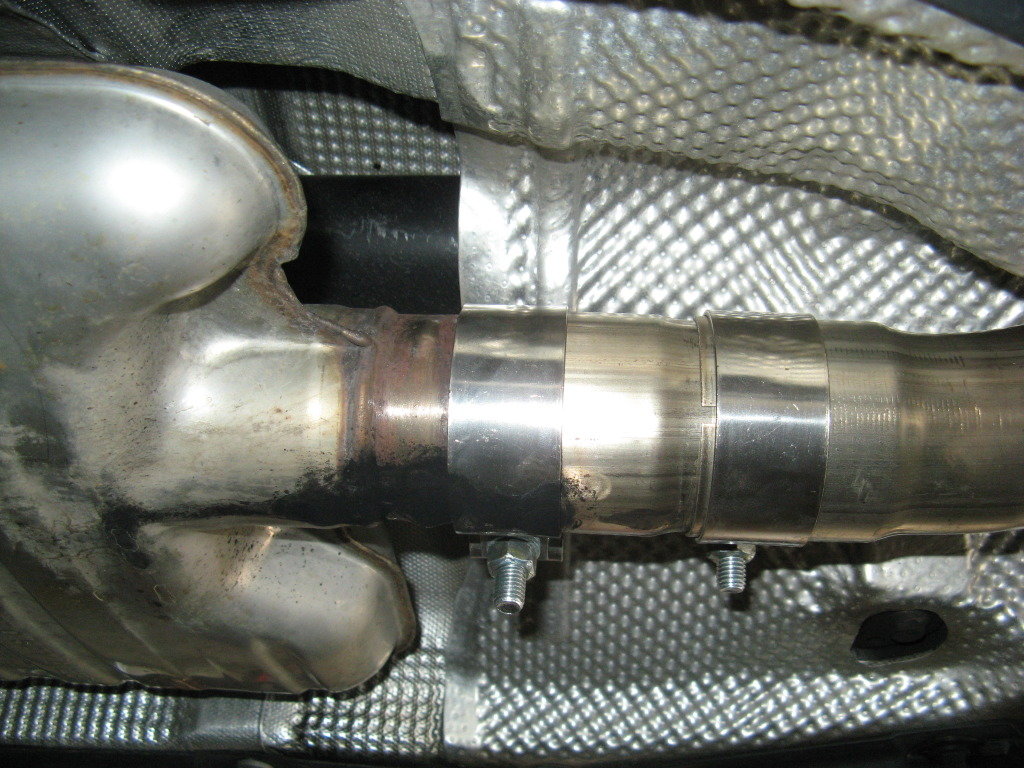
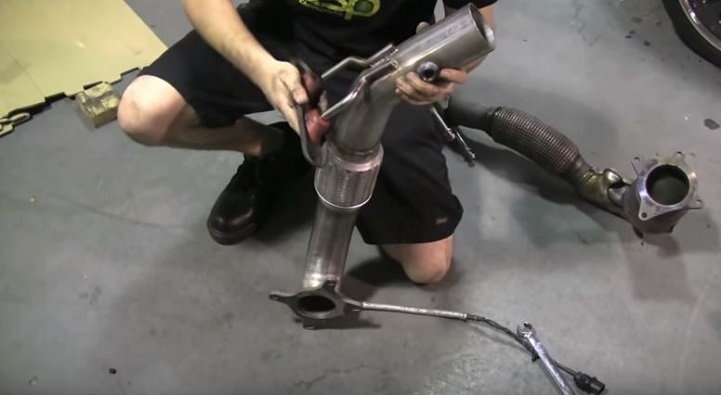
Step 8 – Install the new downpipe
Depending upon the brand or model of downpipe and the corresponding engine model, you may need to plug an O2 sensor bunghole on the new downpipe.
Be sure that the exhaust manifold steel gaskets are still in place on the turbo before you install the new downpipe.
Bolt on and torque the lower mounting bolts onto the turbo manifold.
Reinstall the rest of the exhaust, including all hangers and brackets.
Reconnect your secondary O2 sensors.
When the exhaust is complete from the underside, drop your car back onto its wheels so you can get to the upper bolts and primary O2 easier.
Bolt on and torque to spec the upper mounting bolts.
Reconnect the primary O2 wiring harness and put the loose wire back into the retaining clip on the firewall.
Figure 12. Installing the new downpipe is even easier than it was to remove the old.
Featured Videos
How to Install AR Design Downpipes
Flex Downpipe Replacement
Downpipe Reviews
An upgraded (aftermarket high performance) downpipe will add power to your A4, and if you have a track only car, a downpipe that eliminates the cats will make your car literally scream down the race track. Please note that this option is legal only for off-road, track use, and not on the streets. A downpipe with cats included will still give you a power gain, but not as much. With so many brands out there to choose from, you may need help deciding, so here is the review of some common brands to help make your purchase easier.
AWE
Stasis
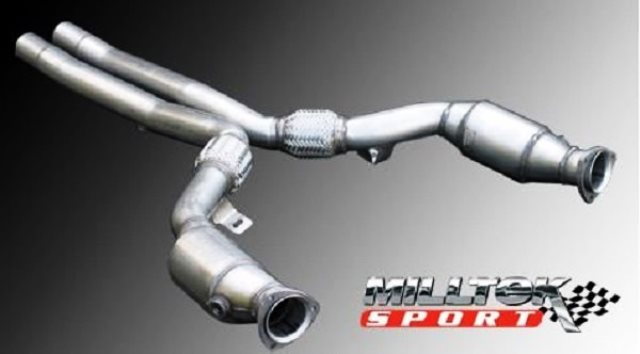
Milltek
APR
Price
$580
$800
$650
$275 - $500
Piping Diameter
2.5 "
3.0"
2.5"
2.5"
Power Gains
+12 hp
+ 10 hp
+ 15
+ 12-15
Cat-less?
No
No
Yes
Both Available
Fitment
OEM Compatible
Excellent
Excellent
Very Good
Best Quality: Stasis
Best Value: APR
AWE
Price – $580
Pipe Size –2.5"
Power Gains –12 hp
Cats or No Cats –With Cats
Fitment –OEM compatible
The AWE downpipes are moderately priced and offer an incredible 12 horsepower gain in performance. They come either catted or designed to work with your existing factory cats. This keeps them quiet and will let you get noticed for the speed you make, not the annoying noise. Recommended for anyone looking for an upgrade over OEM for impressive hp gains while staying relatively inconspicuous on the streets.
Stasis
Price –$800
Pipe Size – 3"
Power Gains –10 hp
Cats or No Cats –With cats
Fitment –Excellent
Stasis makes a complete system for your A4. The power gains are relatively impressive and the sound is really quiet with little to no drone. This is a nice, street legal setup, especially for an entire exhaust system with three inch pipes. This is one of the few brands on the market with larger diameter pipes for an impressive look. Recommended if you are looking for an entire exhaust upgrade with large diameter pipes, a nice quiet sound, and very little interior drone.
Milltek
Price –$650
Pipe Size –2.5"
Power Gains –15 hp
Cats or No Cats – No cats
Fitment –Excellent
The Millteks are one of the premier downpipes exclusively for the track, and with good reason. This is a cat-less system and is very loud, but the sound is deep and meaty. This gives your A4 that classic muscle car sound that is very difficult to duplicate. For the price point, these can't be beat for the track warrior. Recommended for the trackster who wants that loud and beefy muscle car sound with the hp gains to back it up.
APR
Price –$275-$500
Pipe Size –2.5"
Power Gains –12-15 hp
Cats or No Cats – Both versions are offered
Fitment –Very good
The APR downpipe is one of the most popular because of both its price point as well as the fact that they offer this in a cat and a cat-less system. With the cat-less system, you of course will get more power gains and a much louder ride at the expense of legality. You'll be relegated to the track only going this route. Don't despair however, as you can get the catted version for a little more money and only a few less horsepower gains as opposed to its cat-less brother. The sound is nice and the power gain is really nice, but some folks have had headaches getting the fitment just right. You may or may not have issues with the installation, but the price point should make up for any extra time you spend in getting this rig on. Recommended if you are on a budget but still want some really nice power increases.
Audi A4 B7 Cat-Back Exhaust Reviews and Installing Cat-Back Exhaust
Cat-Back Exhaust Reviews and How to Install
Are you looking for something to make your A4 sound and perform a little meaner?
This article ...
Audi A4 B8 Exhaust System Reviews
Exhaust System Reviews
Let free that glorious engine song and increase your performance at the same time.
This article applies to the Audi A4 B8 (2009-2015).
The Audi A4's ...
Audi A6 C5 Oxygen Sensor Replacement
How to Replace Oxygen Sensors
01A6Turbo, spoon2000
Get rid of that annoying fault code by replacing your oxygen sensors.
This article applies to the Audi A6 C5 V6 ...
AudiWorld forum members show off their TTs by documenting ownership experiences and planning future modifications. Check out some of our favorite threads inside.
Automotive forums provide a community for car ...
Audi A3 Installing Oil Catch Can
How to Install Oil Catch Can
Time to play catch!
This article applies to the Audi A3 (1996-2008).
Your Audi A3 is quipped with a system called the PCV system, which stands for ...
Think your R8 is fast? This RS 3 has something to say about that.
Slideshow: Initially set to begin their quarter-mile quest with a B5 Audi S4, Malaka MotorSports did an about-face straight into the sub-ten-second ...